Clean Temporary Files on Windows 11: Just like how we need to detoxify ourself physical and mental health on a regular basis, it is essential to keep our Windows 11 Clean. These Temporary Files are created by Applications like the Browsers, etc, System Temporary Files ,Windows Update Files, Crash Reports, and Logs, and more. These are short-lived files and are meant to be deleted automatically after use, however, they often accumulate over time, consuming disk space.
Different Types of Temporary Files on Windows 11 OS:
- Application Temporary Files.
- Windows Update Files.
- System Temporary Files.
- Recycle Bin Items.
- Windows prefetch files.
- Crash Logs and Reports.
- Delivery Optimization Files.
- DirectX Shader Cache and more.
Application Files generally includes temporary files created by applications such as Browsers, Microsoft Office, Adobe Apps, etc. Windows Update Files are downloaded and stored temporarily before their installation, however, even after an successful update, Windows keeps old update files. System Files are created by the OS itself for temporary Caching. Crash Reports include Log Errors, Debugging info, etc.
If you use your PC heavily for Gaming, Browsing, Work-Related, then it is suggested to clean the temporary files on a weekly basis. Before doing a major Windows update, you can delete these temporary files to prevent update errors.
Why Do We Need to Delete Temp Files on Windows 11?
In the above paragraph, we saw why these temporary files get accumulated on our Windows 11. Here, we will check out Why do we need to delete them and how they will improve the System Performance afterwards.
Temp files piles up overtime, and they may take Gigabytes of storage. Also, if the temporary files are too much, then the system resources will be wasted on processing those files unnnecessarily. Older Temporary Files may cause a app to malfunction. Temp Files are sensitive files as they contain sensitive data like Passwords, Browser History, etc. Deleting Temporary Files on Windows 11 will also prevent failures or slowdowns during the Windows Updates.
Various Methods to Delete these Temporary Files on Windows 11
There are some methods available on Windows 11 to delete these temp files.
- Recommended Way using the Windows Settings.
- Use Disk Clean up and delete Temp Files.
- Manually Deleting the
tempand%temp%Folders using the Run Command. - Automatic Cleanup using the Storage Sense.
The above methods are hand-picked and are most effective to cleanup temp files on Windows 11. Let’s check out each method in detail.
1. How to Cleanup Temporary Files using the Windows Settings?
This is a simple method. Go to Windows Settings using the shortcut WinKey + I.
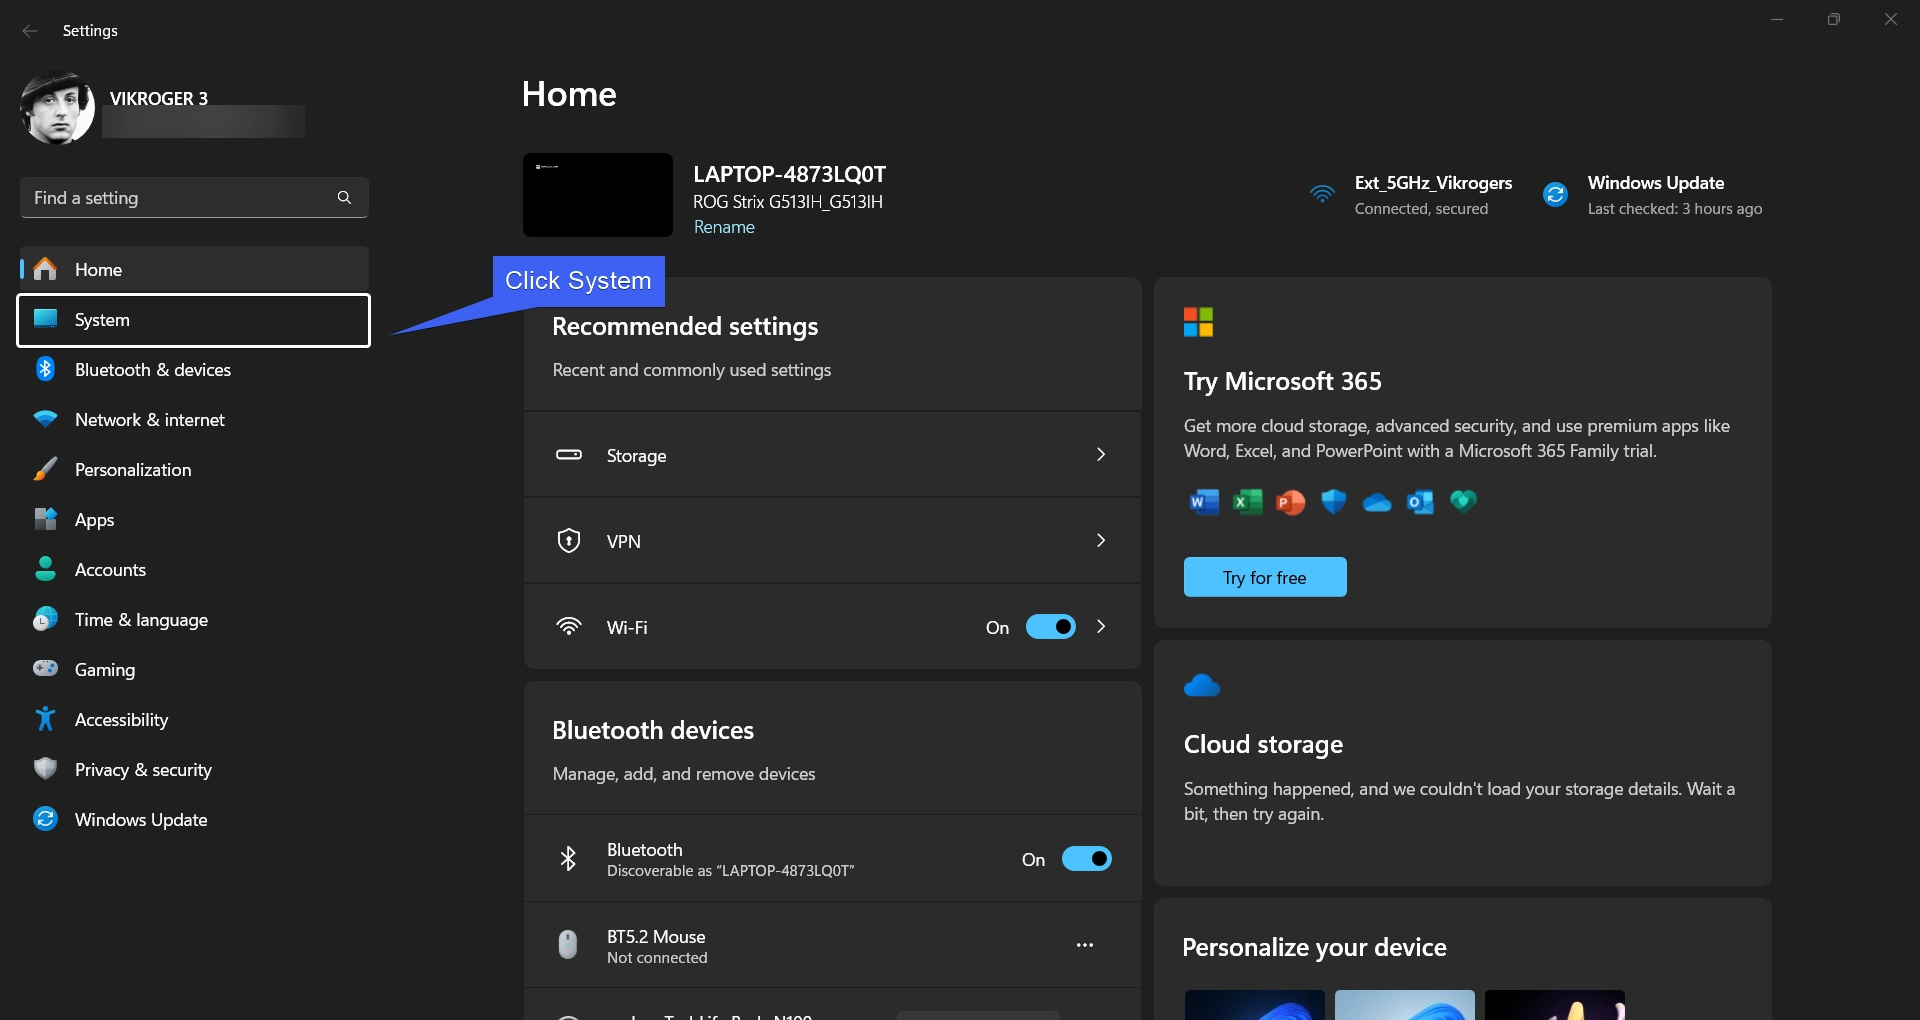
- In the Windows Settings, click on System from the left pane.
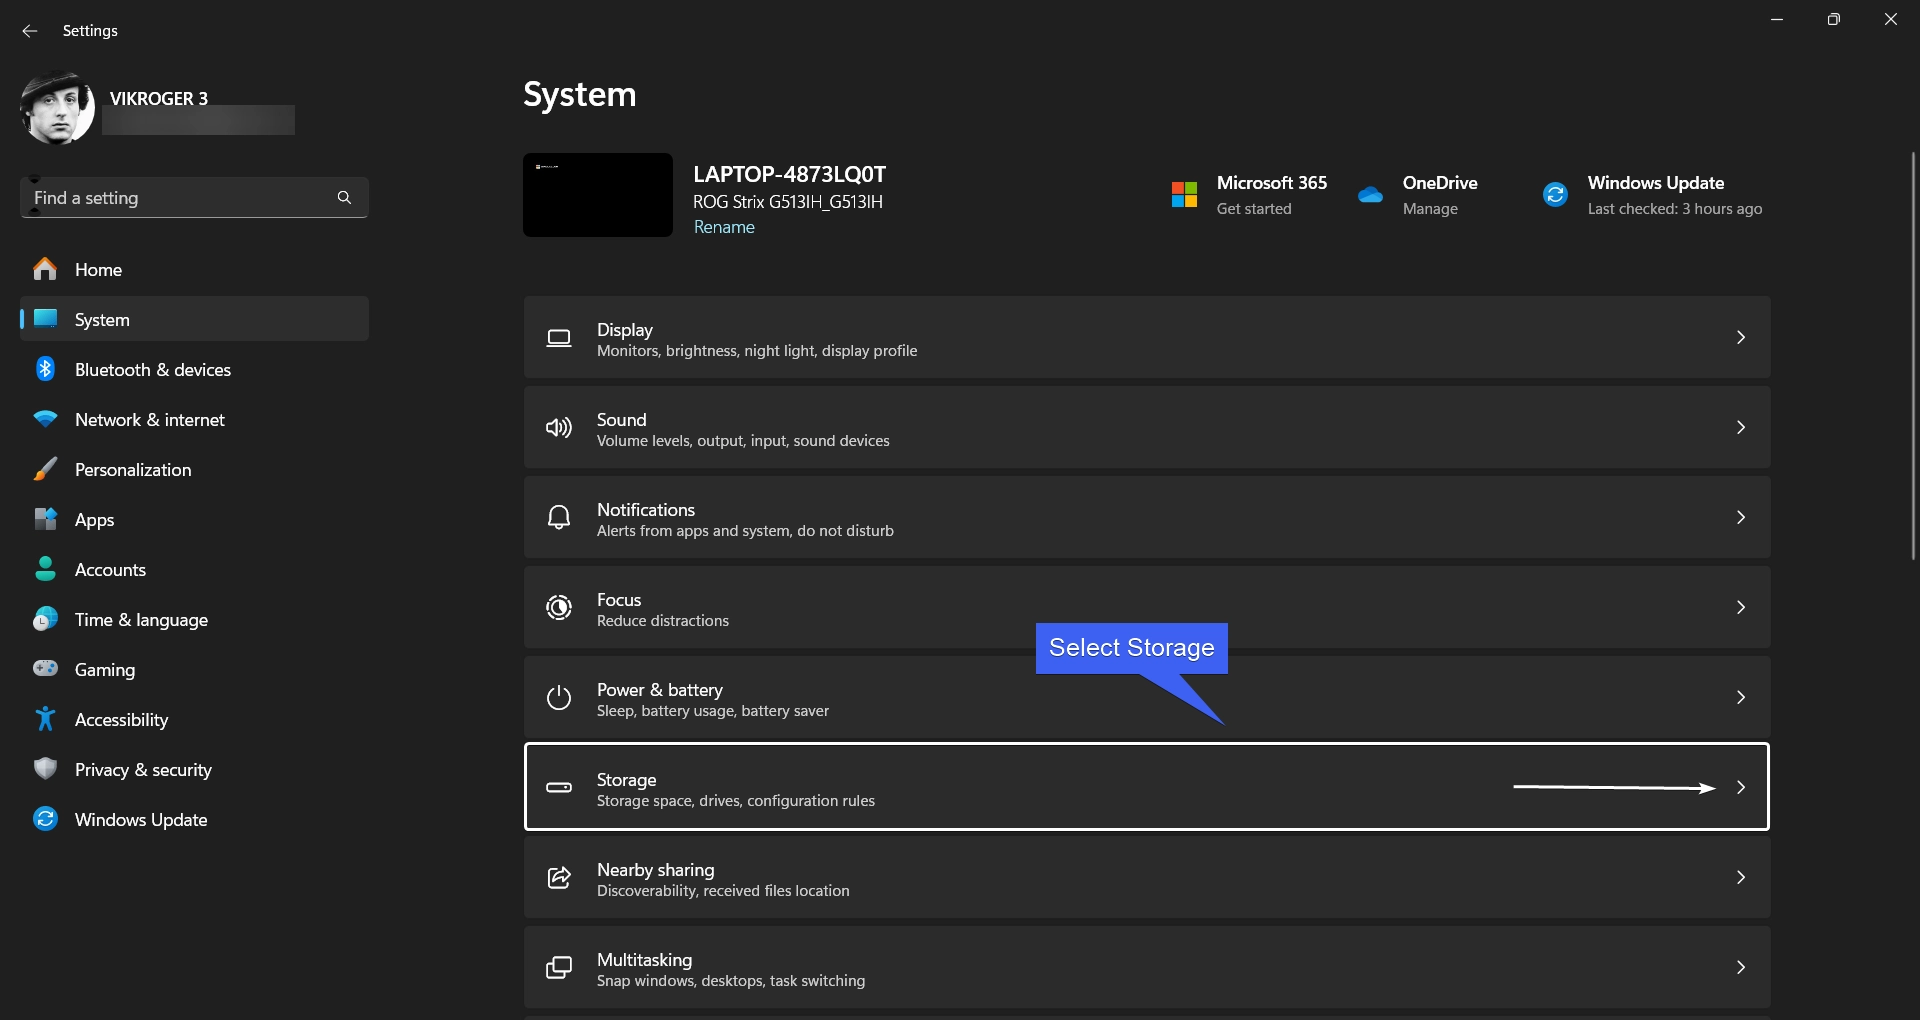
- Locate Storage and click on that to open it. The System will display the storage information.
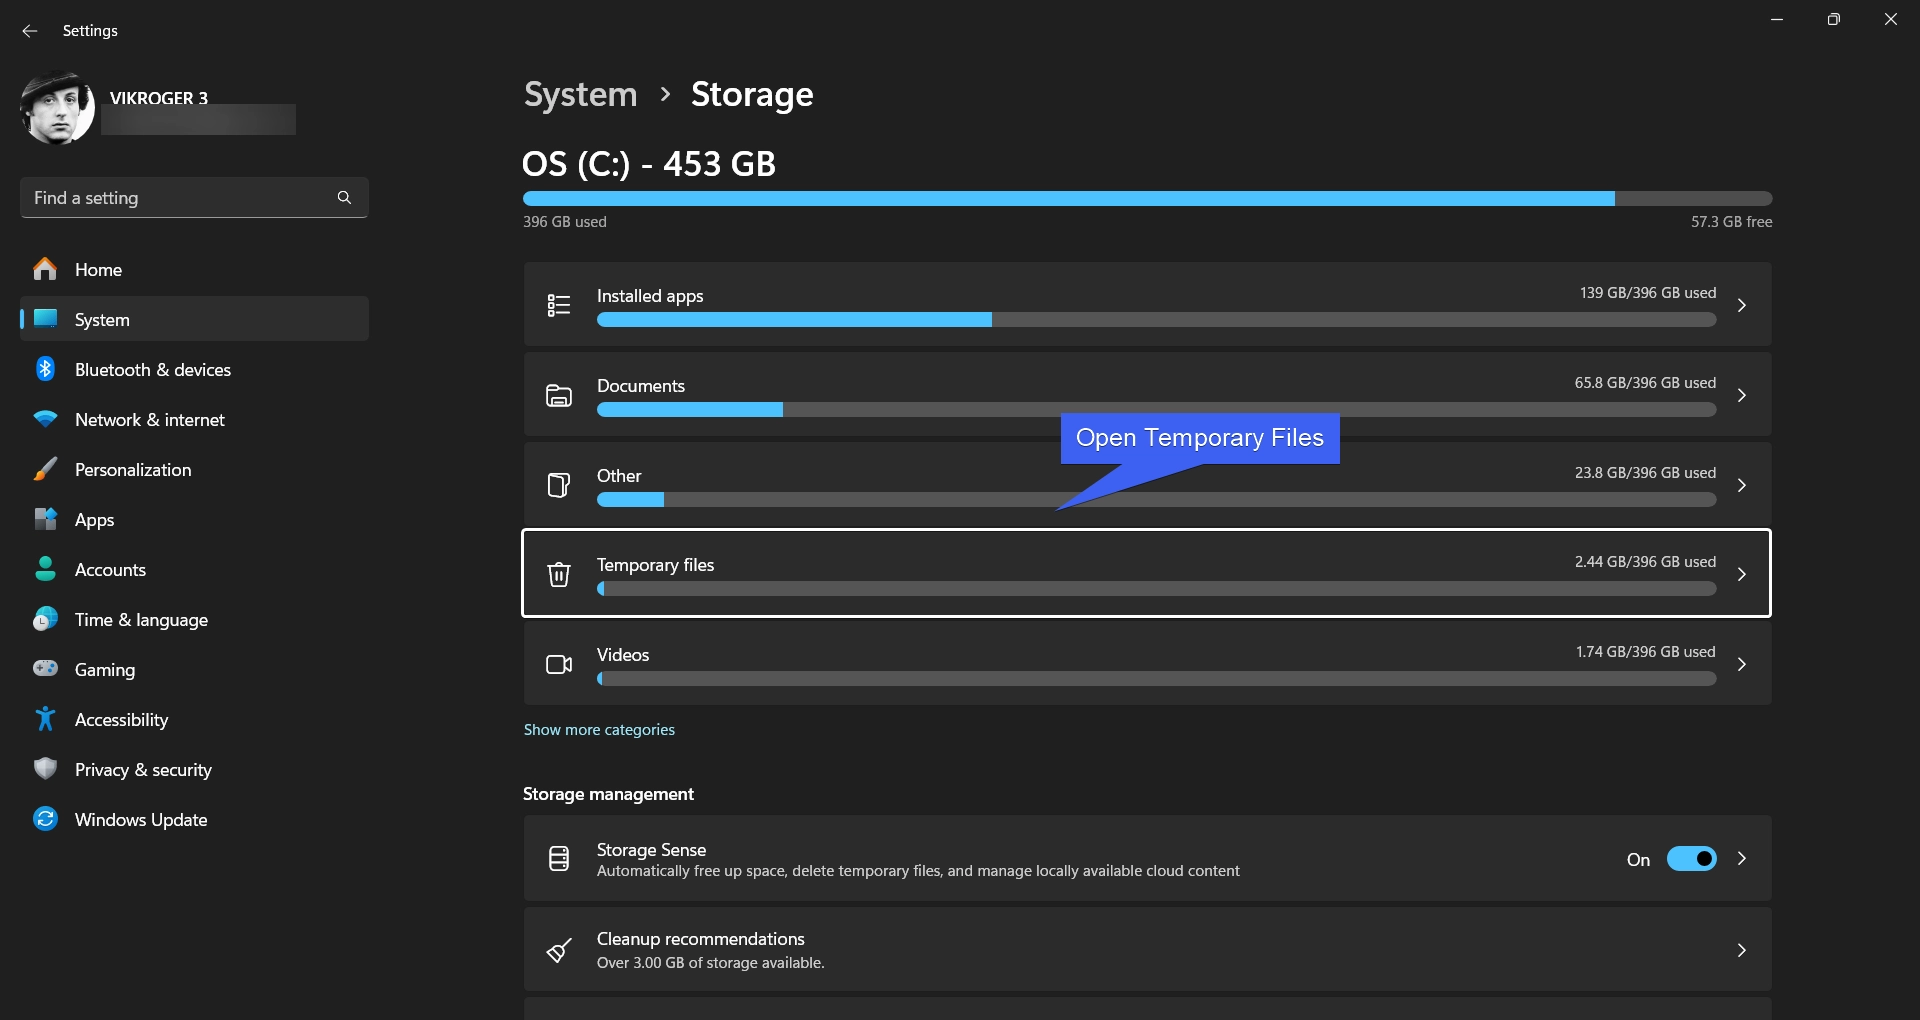
- You can find Temporary Files. Open it.
- Now, the system will display all the temporary files stored. The files include Windows Upgrade Log Files, Windows Update Cleanup, Delivery Optimization Files, Recycle bin, Thumbnails, Microsoft Defender Antivirus, Device Driver Packages, Windows Error Reports and Diagnostics, Temporary Files ,DirectX Shader Cache, Temporary Internet Files, Temporary Windows Installation Files, etc.
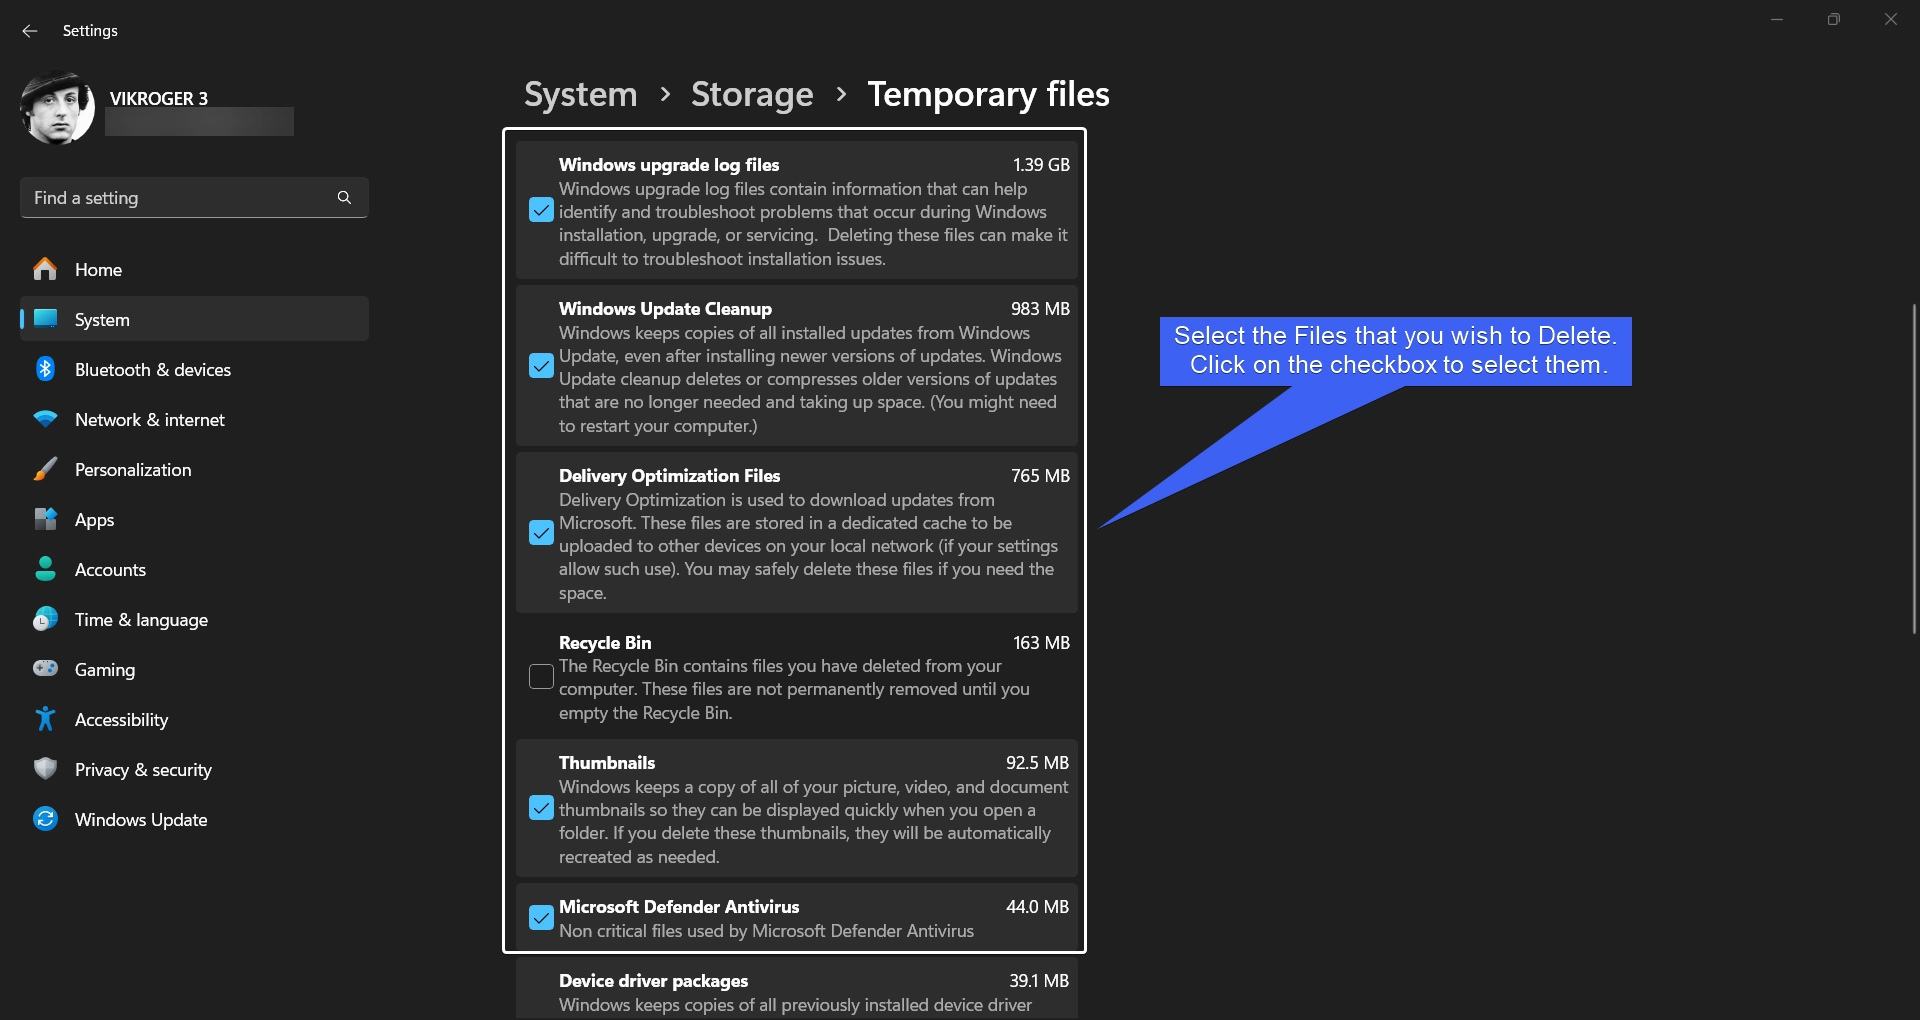
- Select the checkbox of the files that you wish to delete and then click Remove files.
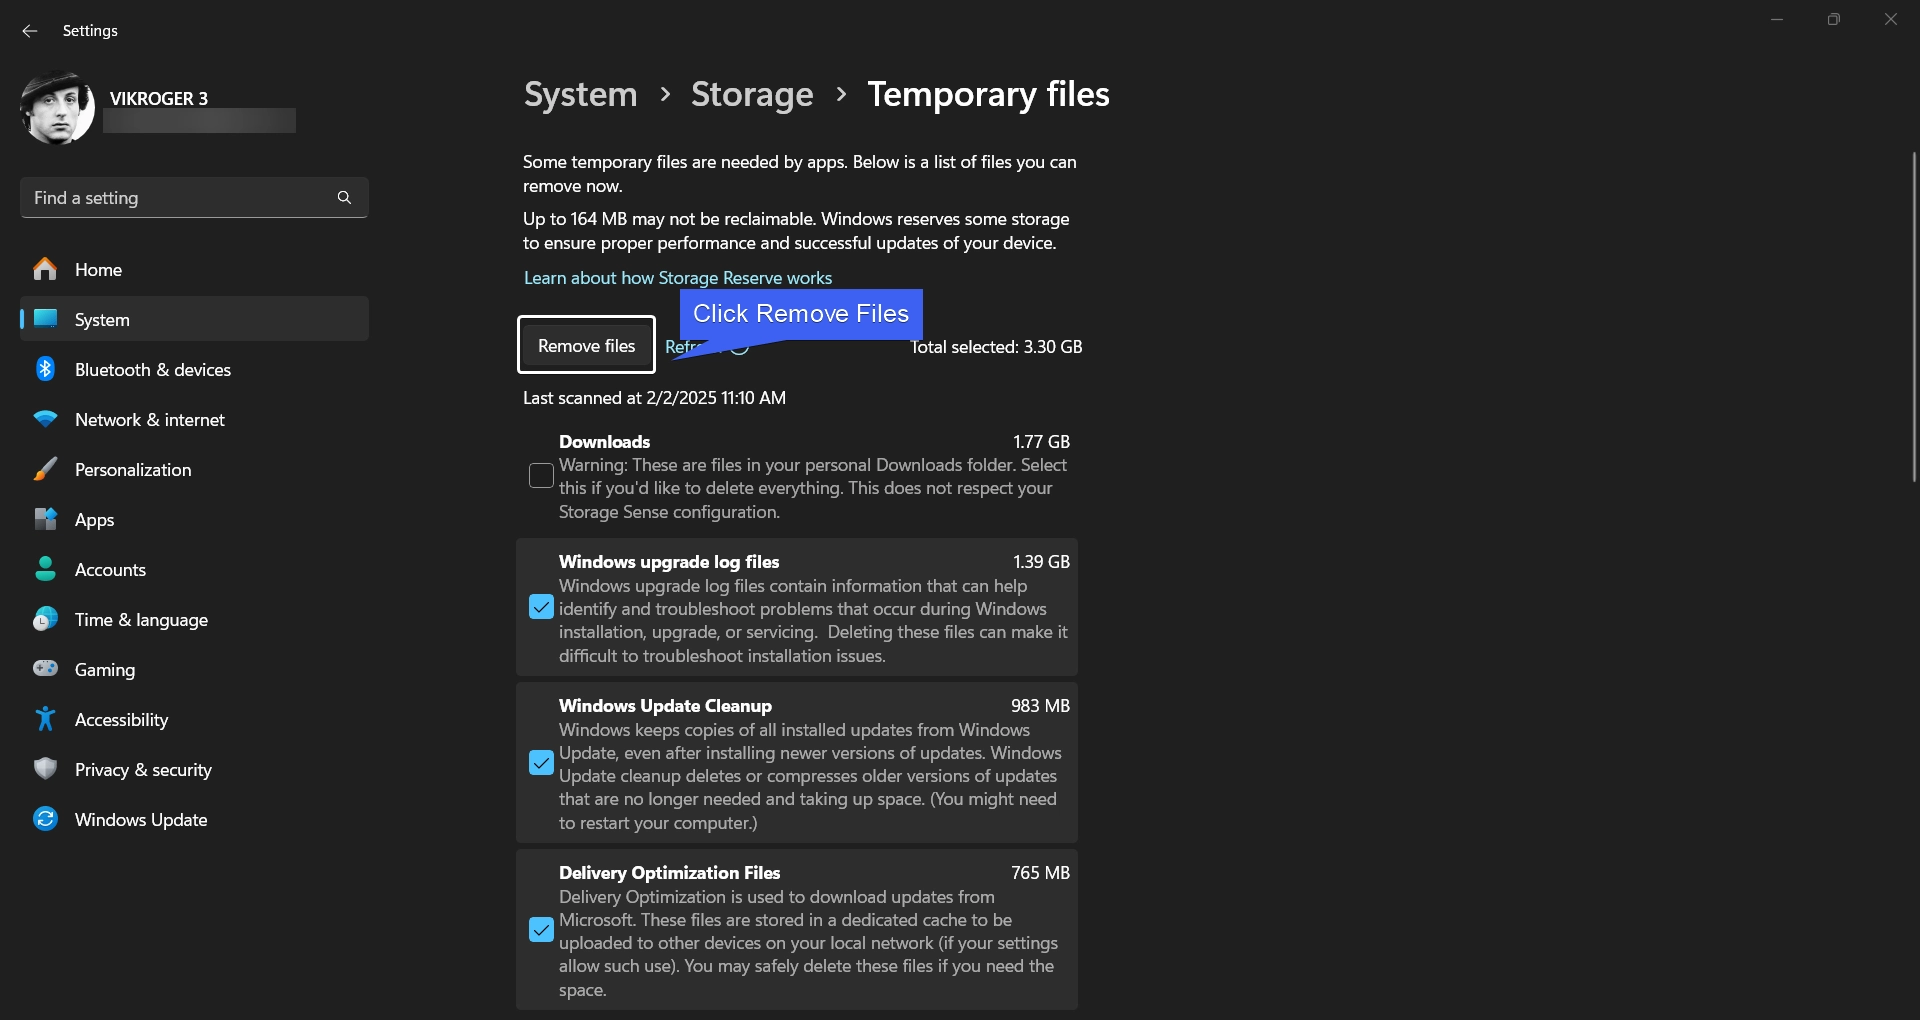
- This method gives more control over the temporary files allowing you to choose the files using the GUI Interface.
Important: The system will also display the Personal Downloads Folder where the user downloads are kept. Kindly be careful while choosing this folder. Select this Downloads Folder only if you are sure about the contents of the folder.
2. Use Disk Cleanup and clear Temp Files on Windows 11
- Go to the Start menu and search for Disk Cleanup.
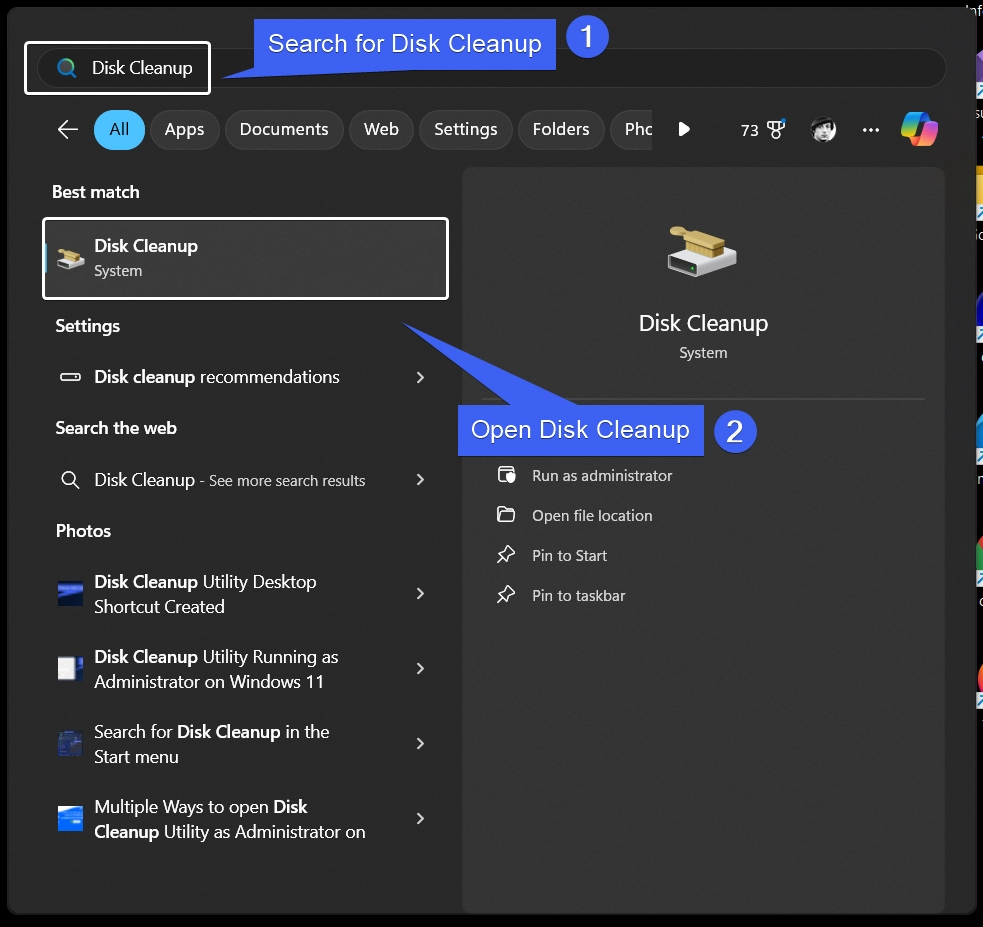
- Once you find the Disk Cleanup Application, click on that.
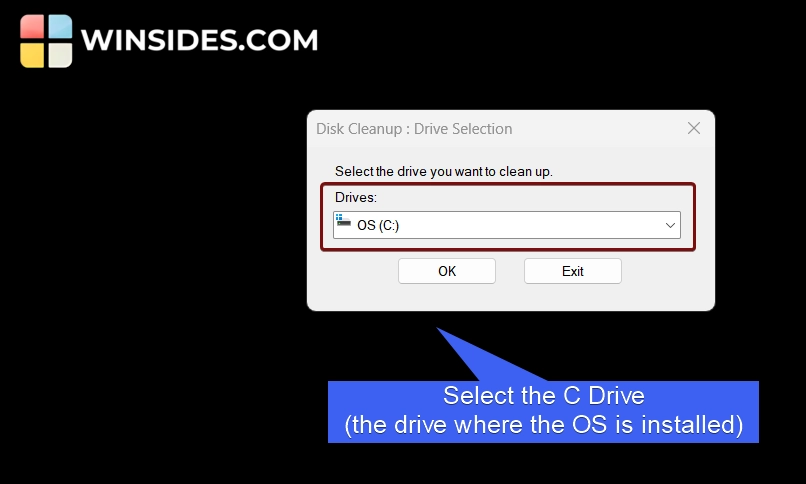
- Disk Cleanup : Drive Selection will open now. By default, Local Disk C will be chosen(The drive where the OS is installed). Click OK.
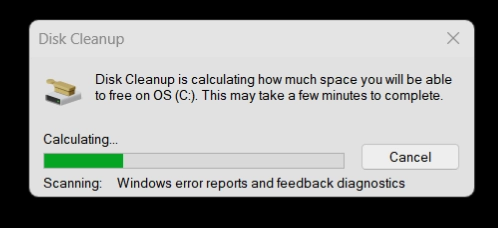
- Disk Cleanup will scan the C Drive.
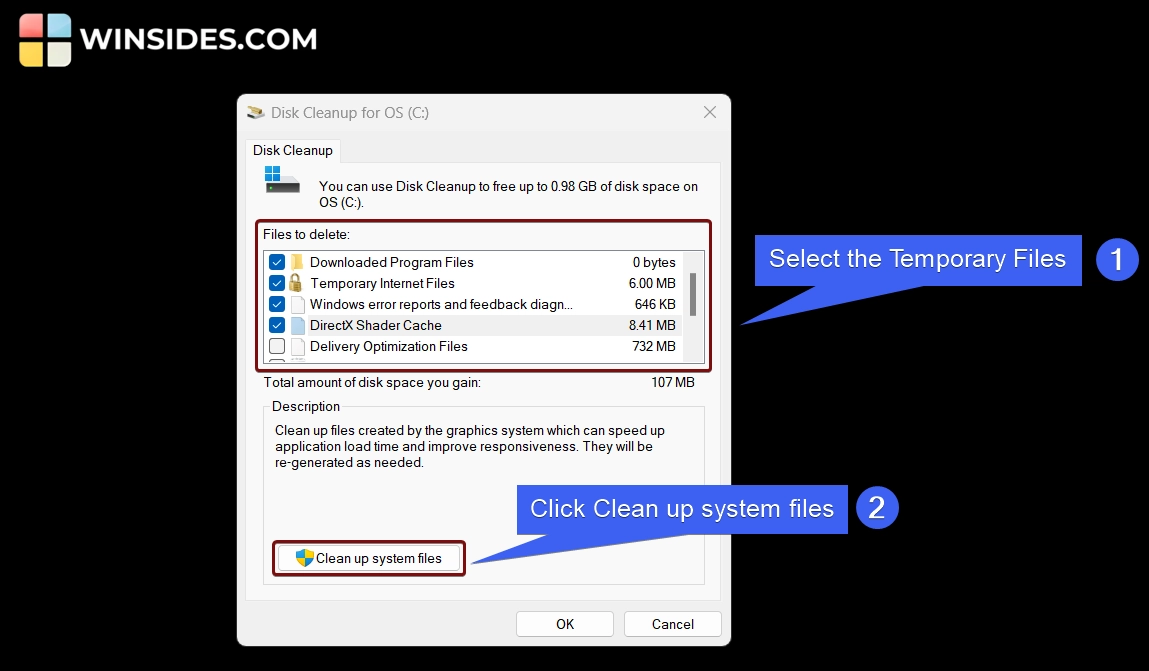
- Now, it will show the Files to Delete. You can find Downloaded Program Files, Temporary Internet Files, DirectX Shader Cache, Delivery Optimization Files, Temporary Files, and more. Select the files that you wish to delete and then click Clean up System Files.
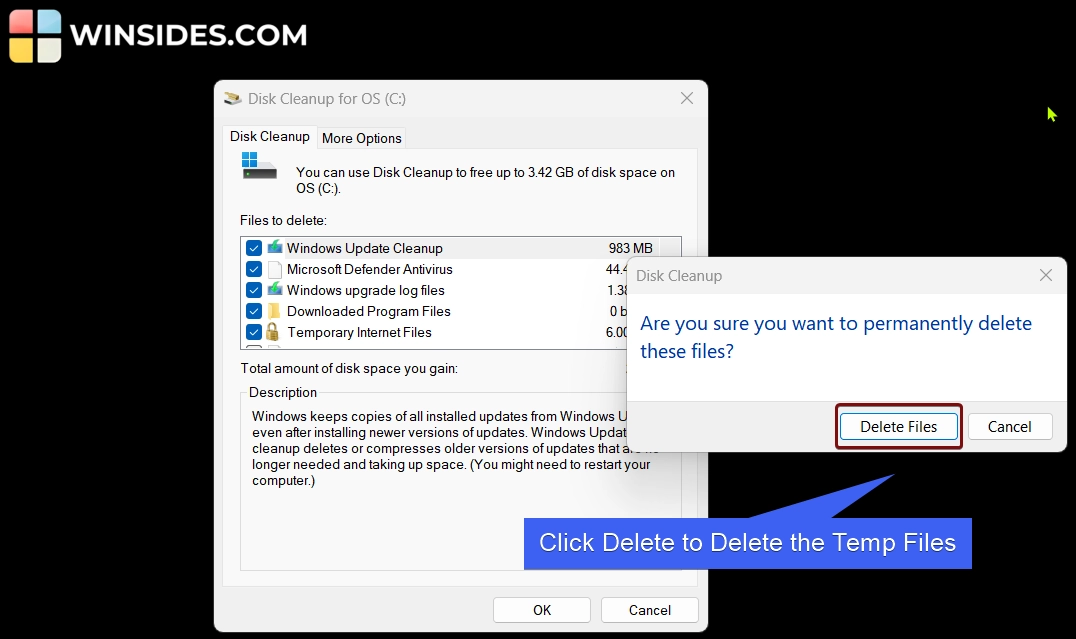
- The system will ask for your confirmation. Kindly make sure you are not deleting any other data, and then choose your confirmation.
- Finally, the Disk Cleanup Utility will clean up the unnecessary temporary files.
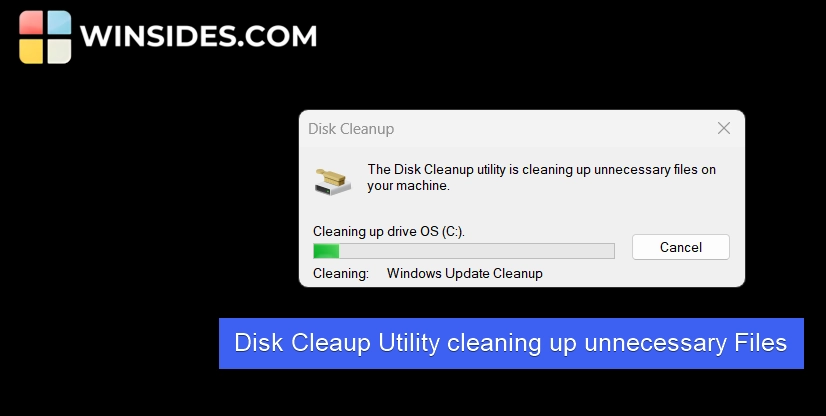
- This process will clean Temporary Files on Windows 11.
3. Manually Delete the Temp and %Temp% Folders on Windows 11 using the Run Command
This is a popular method and a handy one to delete temporary files on Windows 11.
If you are wondering what is the difference between the Temp Folder and %Temp% Folder, %temp% folder refers to the temporary folder for the current logged-in user, whereas, temp folder refers to the System-wide temporary folder.
| Feature | Temp Folder | %Temp% Folder |
| Scope | User-Specific | System-wide |
| Location | C:\Users\YourUsername\AppData\Local\Temp | C:\Windows\Temp |
| Access Via | Via the Run & File Explorer | Via the Run & File Explorer |
| Permissions | No Admin Rights Needed to Modify the files. | Requires admin rights to delete files |
| Used By | Installed Applications, Browsers, User Processes, etc | Windows System & Services |
Deleting Temp Folder using the Run Command
- Open the Run Command using the Shortcut WinKey + R.
- In the Run, execute the following command.
temp

- The Temp Folder will open now. You can manually select the Files and Delete them using Shift + Delete.
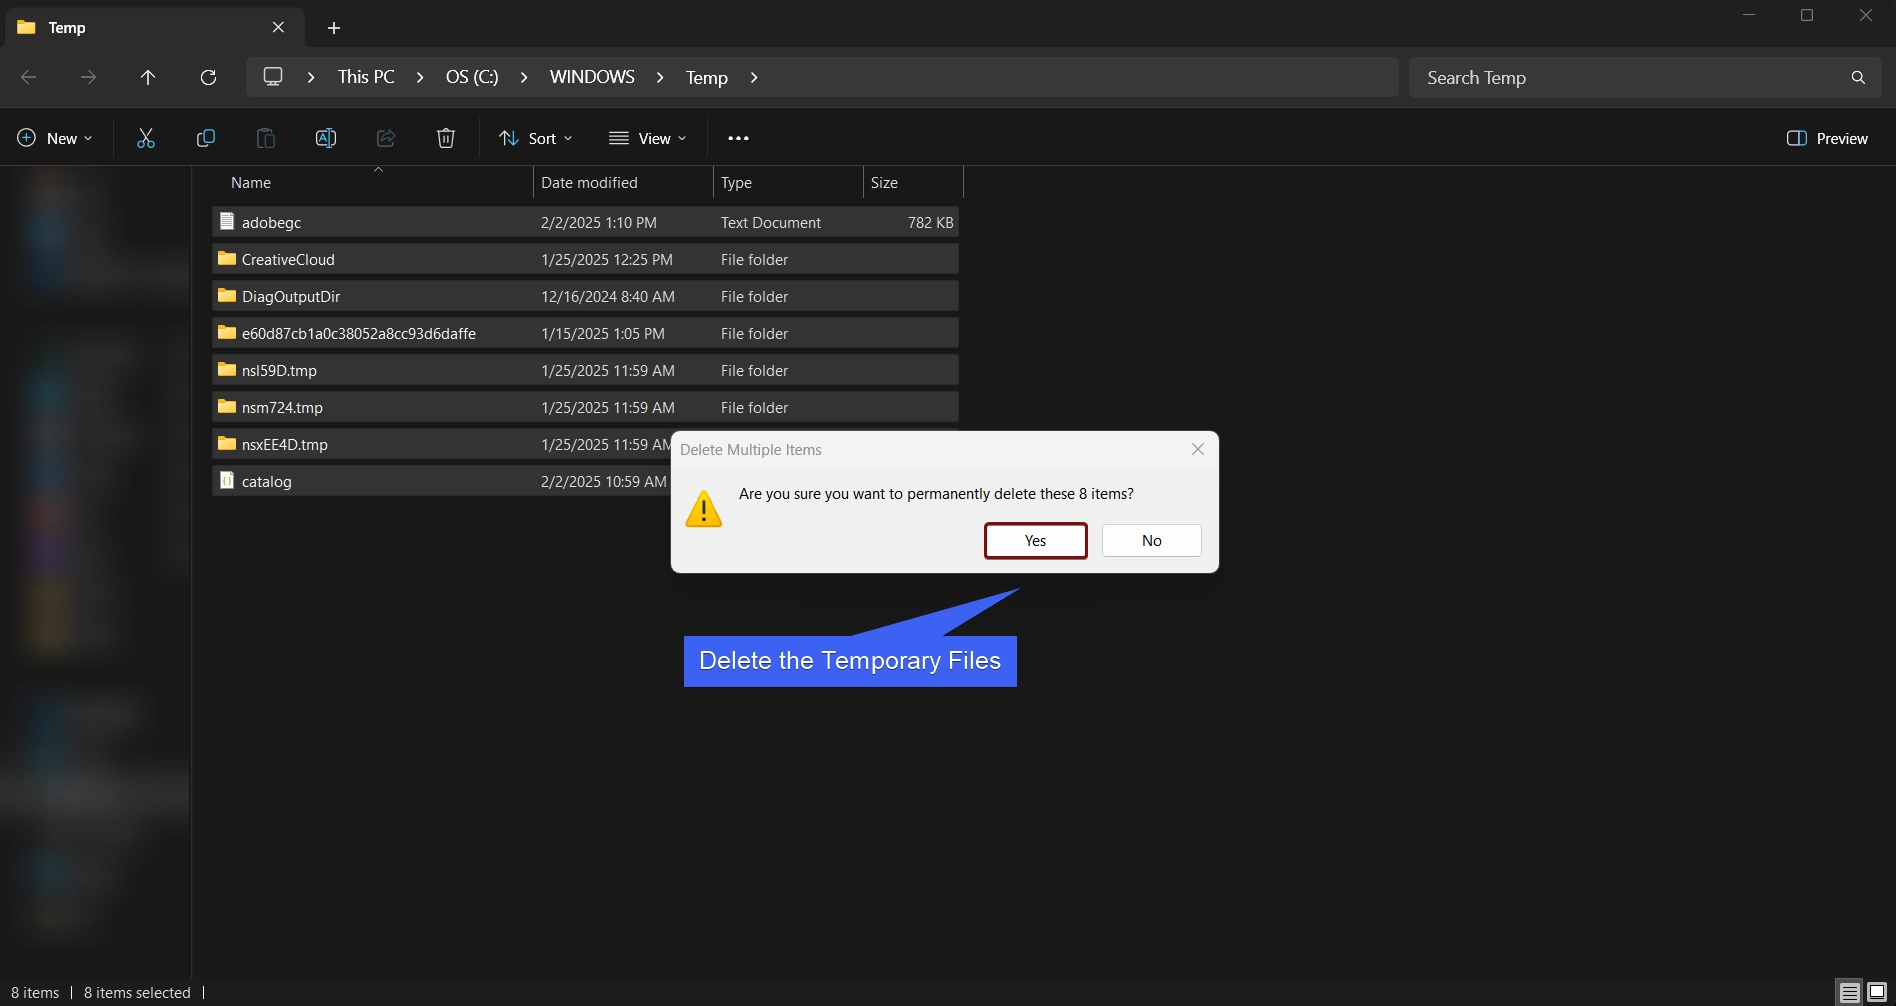
- It is generally safe to delete the files in this folder, however, if you are not able to delete some files, then they may be either used by the system actively or may need Administrative Permissions.
Delete the %Temp% Folder using the Run Command
In this section, we will see how to delete the system-wide temp files.
- Go to the Run Command.
- In the Run, Execute the command
%temp%
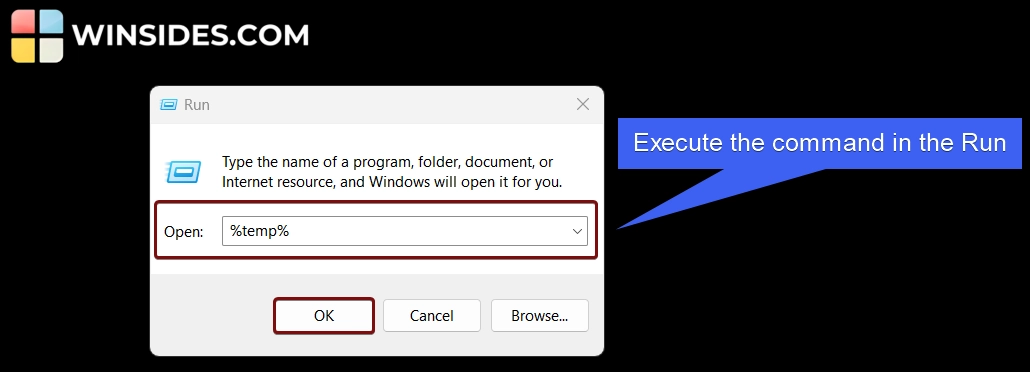
- This will open %Temp% Folder.
- You can now manually select the temporary files and delete them.
del /s /q /f %temp%\*

del /s /q /f C:\Windows\Temp\*
Turn on Storage Sense for Automatic Cleanup on Windows 11
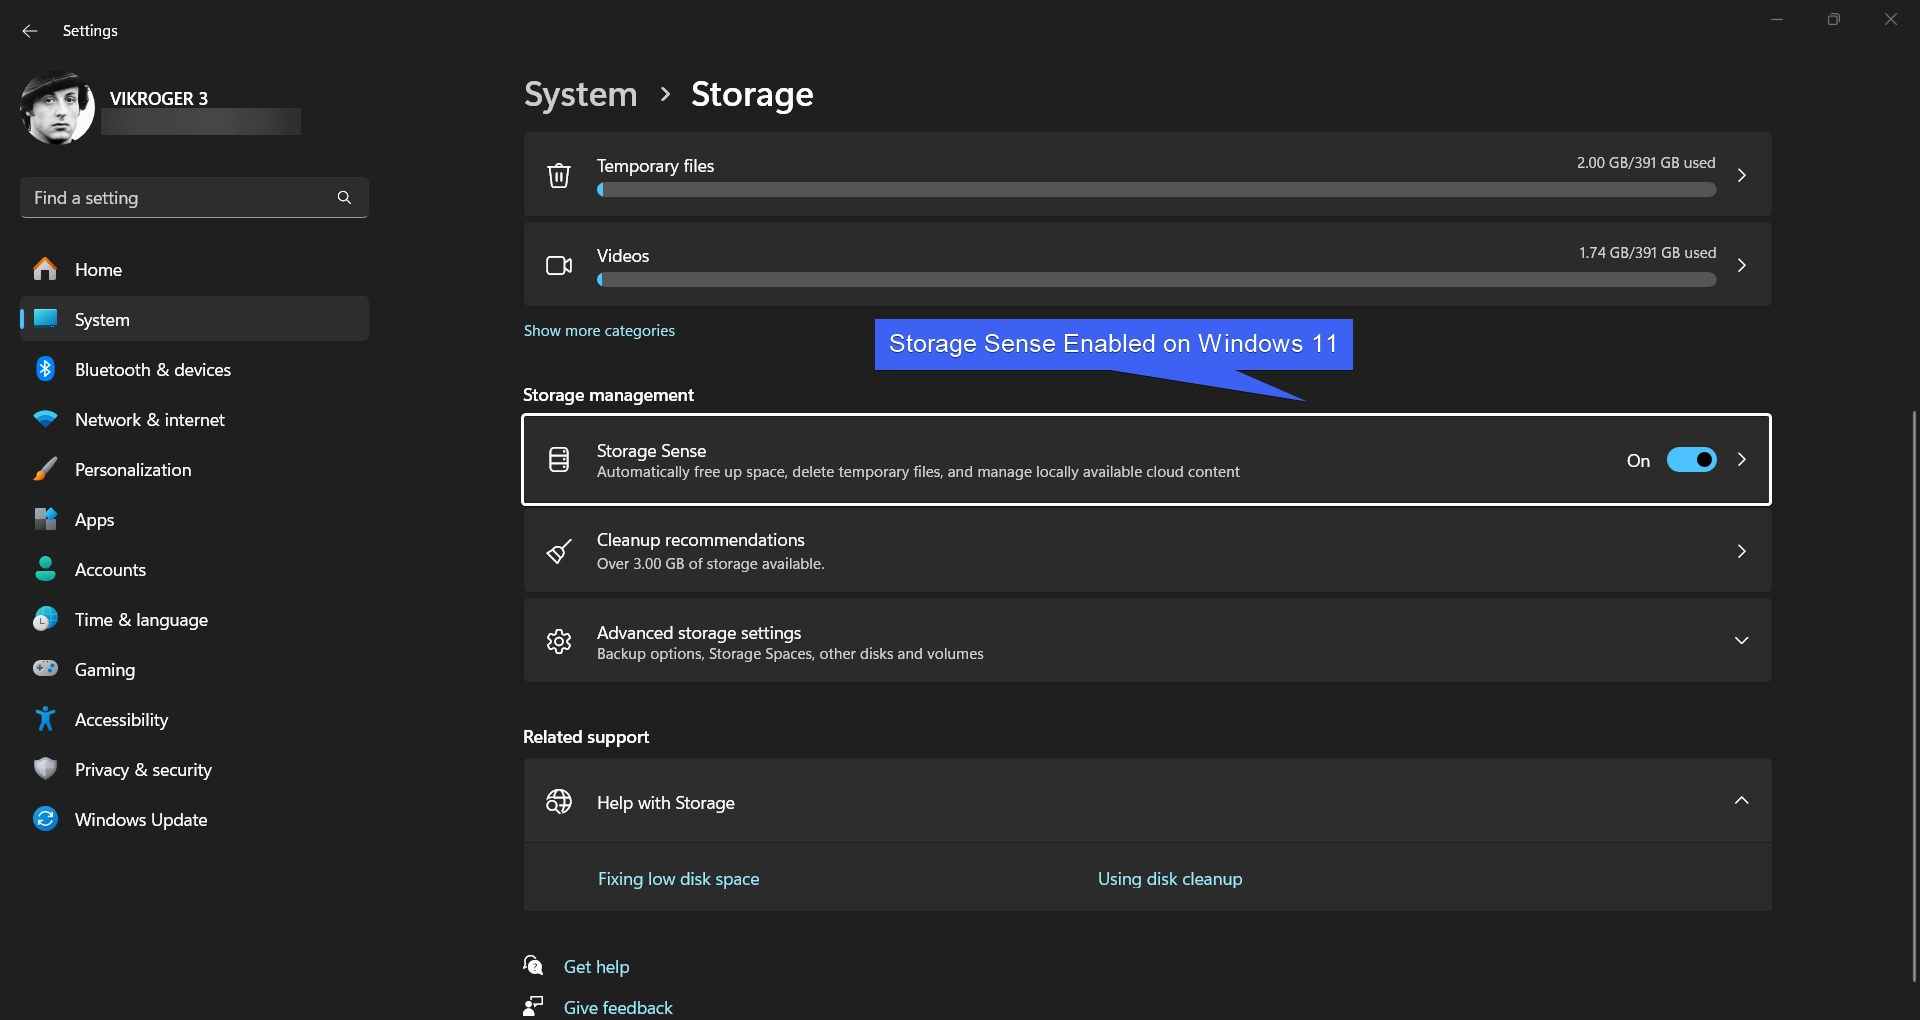
Storage Sense was first introduced on Windows 10, and with Windows 11, this feature has been improved with better automation and integration into system settings. Storage Sense automatically free up space, delete temporary files, and manage locally available cloud content. Let’s enable them on Windows 11.
- Open Windows Settings and click on System.
- Click Storage, and then under Storage Management, you can find “Storage Sense“. If the Feature is turned off, kindly enable it. Windows 11 will enable Storage Sense now. That’s it.
Take Away:
Cleaning Temporary Files on Windows 11 will ensure System Performance, free-up Storage Space, and reserve System Resources for essential things. Using the above methods, you can detoxify your system from time to time. If you have any queries, kindly let us know in the comment section. For more interesting articles, stay tuned to Winsides.com. Happy Computing! Peace out!
 How to Enable HDR Video Streaming on Windows 11?
 How to Use ODBC on Windows 11?
 How to Run Firefox as Administrator on Windows 11? 5+ Best ways!
 Run Google Chrome as Administrator on Windows 11! {6+} Best Ways