Activity History on Windows 11 is a feature that tracks your actions on the Windows 11 OS. These actions include the Apps you open, the Files you access, and the Website History of the Microsoft Edge Browser. The Silver Lining is that if you have an associated Microsoft Account, this data can be sent for cross-device synchronization for improving search results, resuming past activities, and personalized recommendations in the Start menu and Windows Search. This Data is locally stored, and if you have privacy concerns, you can turn this feature off on Windows 11.
How to View Activity History on Windows 11?
Windows 10 was loaded with a built-in Timeline Feature to view past activities such as the Apps, Files, and Websites from the past 30 days. This feature helped resume cross tasks across various devices, Search and Filter Activities. However, due to Privacy Concerns and Cloud-based Sync, Microsoft retired the Timeline Experience on Windows 11.
- Without this Timeline Experience on Windows 11, it is not possible to view these past activities, however, you can check the various activities in various places.
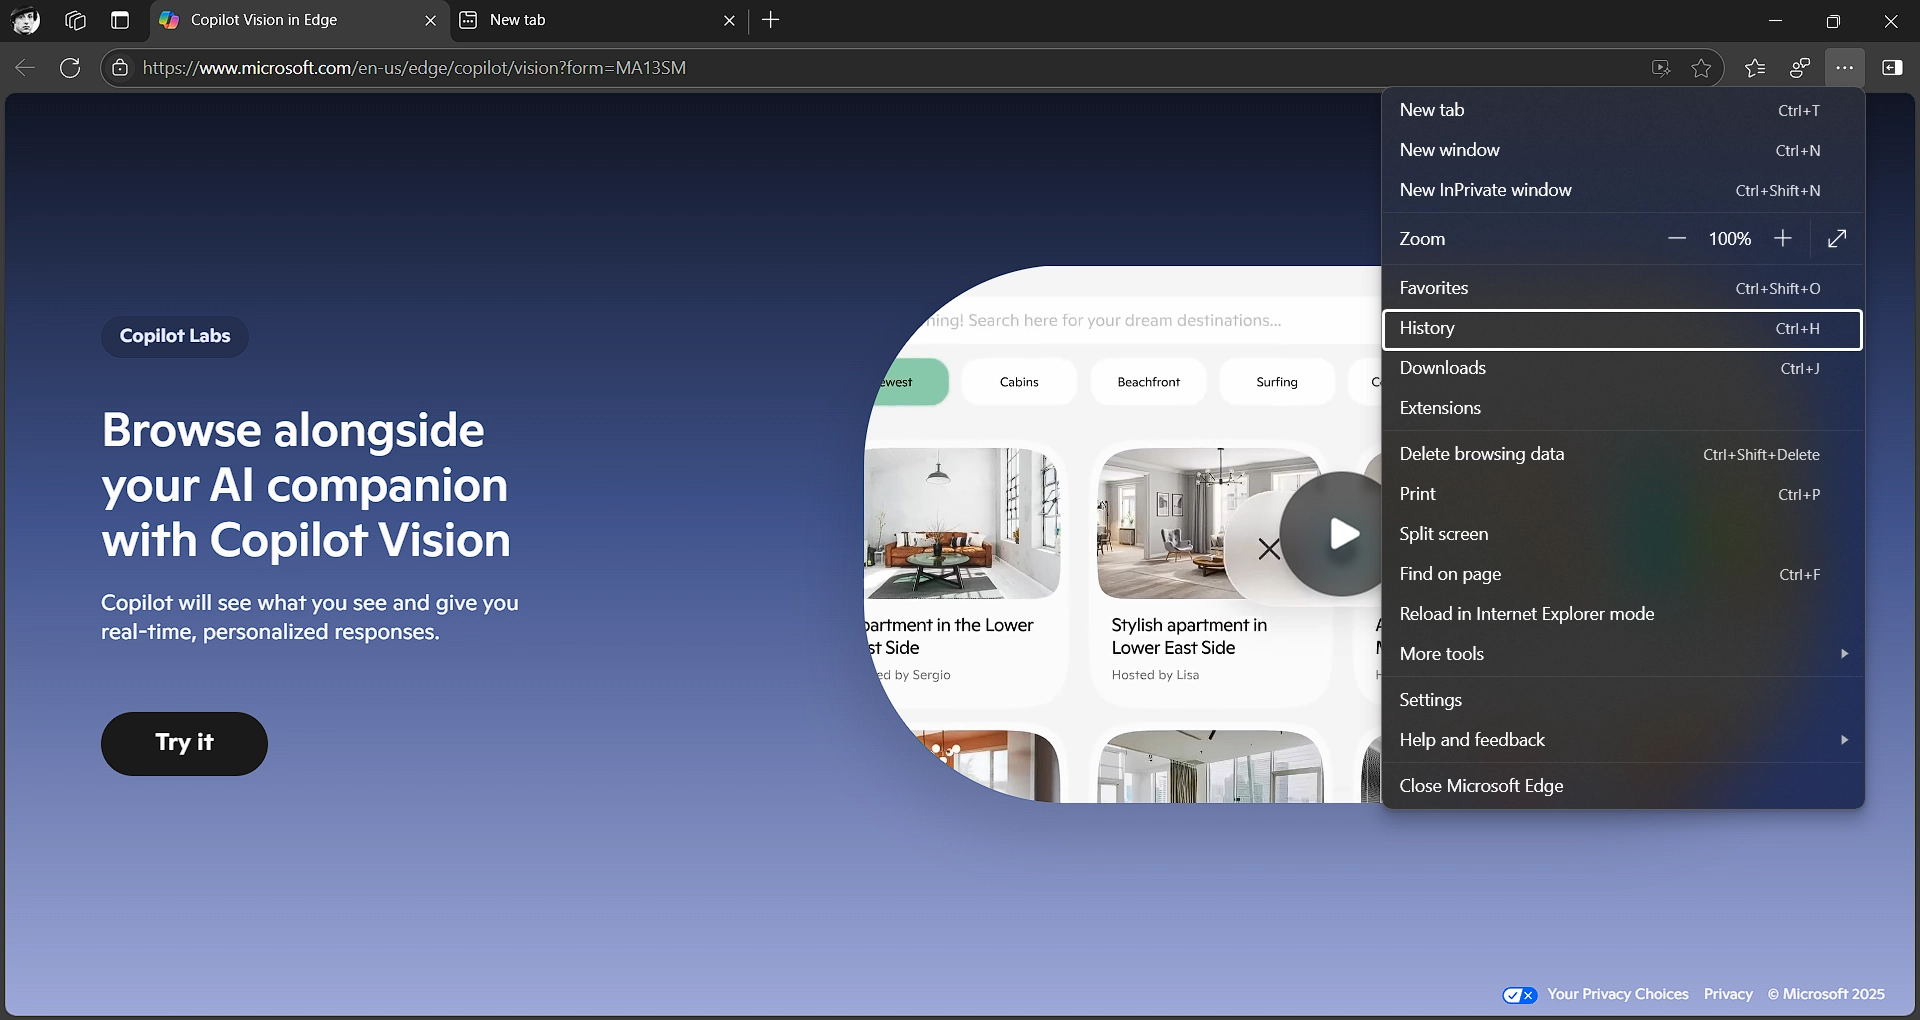
- For Example, we can view the Edge Browser History using the History Option (CTRL + H) in the Microsoft Edge Browser.
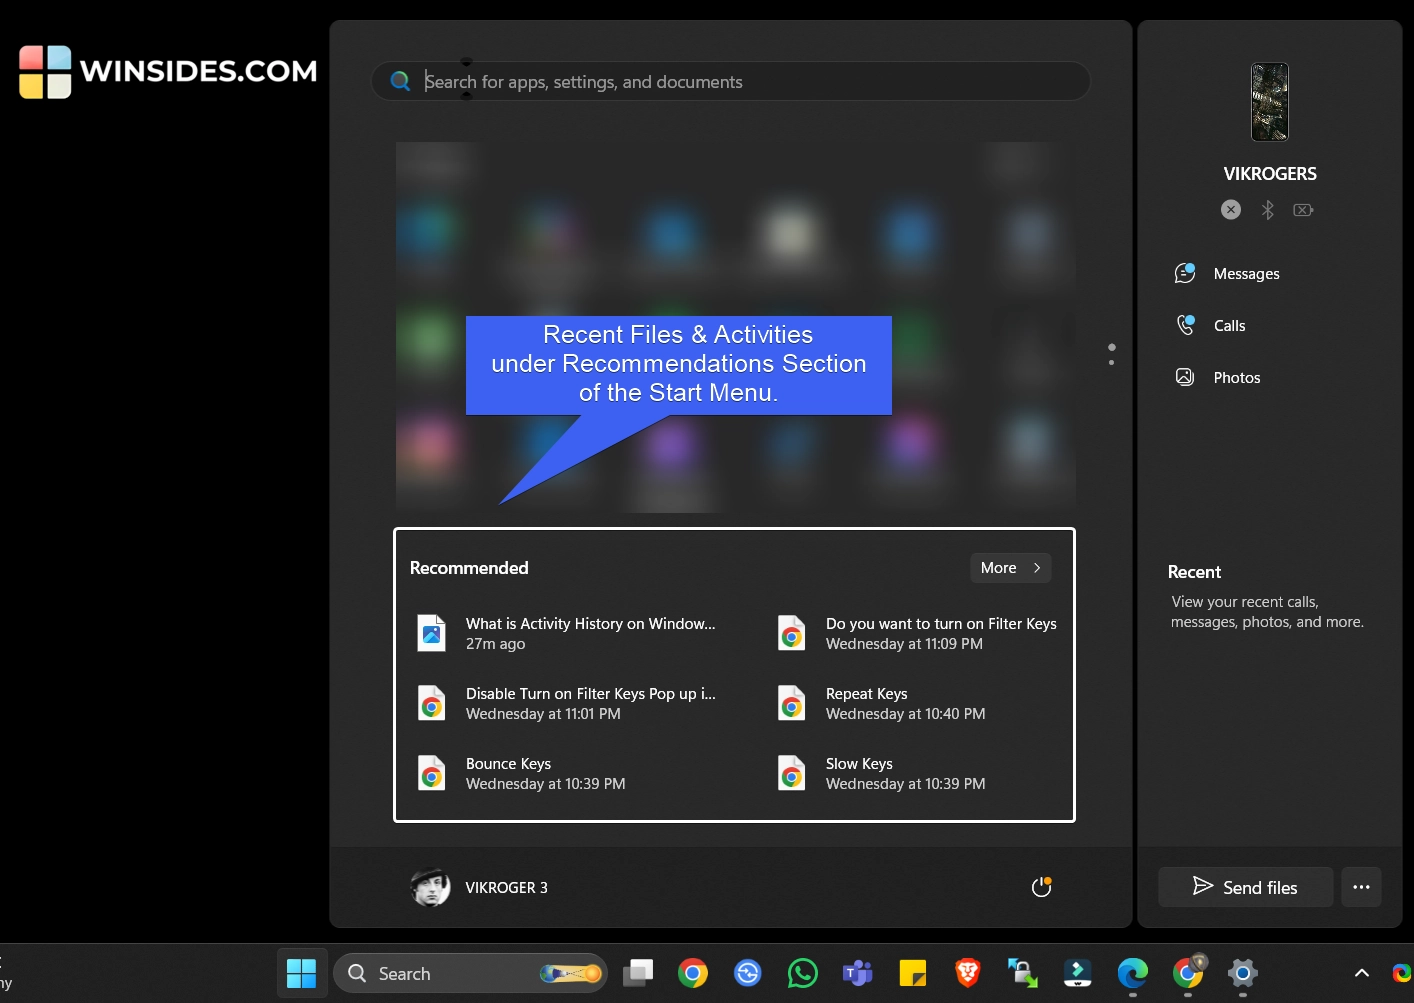
- Similarly, we can easily view the Recent Files and Activities under the Start Menu’s Recommendations section.
Easily Control Your Activity History on Windows 11
Users can easily control the Activity History on Windows 11. Though Activity History can be a convenient feature on Windows 11, Privacy can be a concern for users. By default, Activity History will be stored on the Local Device. The Data includes info about websites you browse, and how you use apps and services. This will help jump back into what you were doing on your device and cross-device synchronization. You can turn off this feature, and additionally, you can also Clear Activity History for this Account on Windows 11, if you want to keep this feature on and temporarily reset it.
How to Turn Off Activity History on Windows 11?
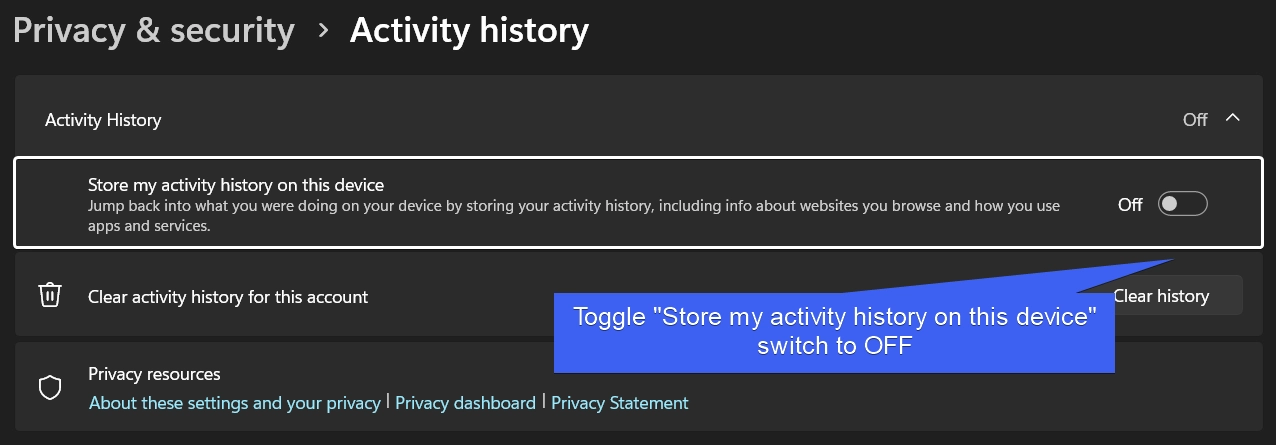
We can use the Windows Settings to tur off Activity History on Windows 11. There is an option called “Store my activity history on this device”. We just have to disable this option to turn off this feature on Windows 11. Here are the steps.
- Go to the Windows Settings using the shortcut Win Key + I.
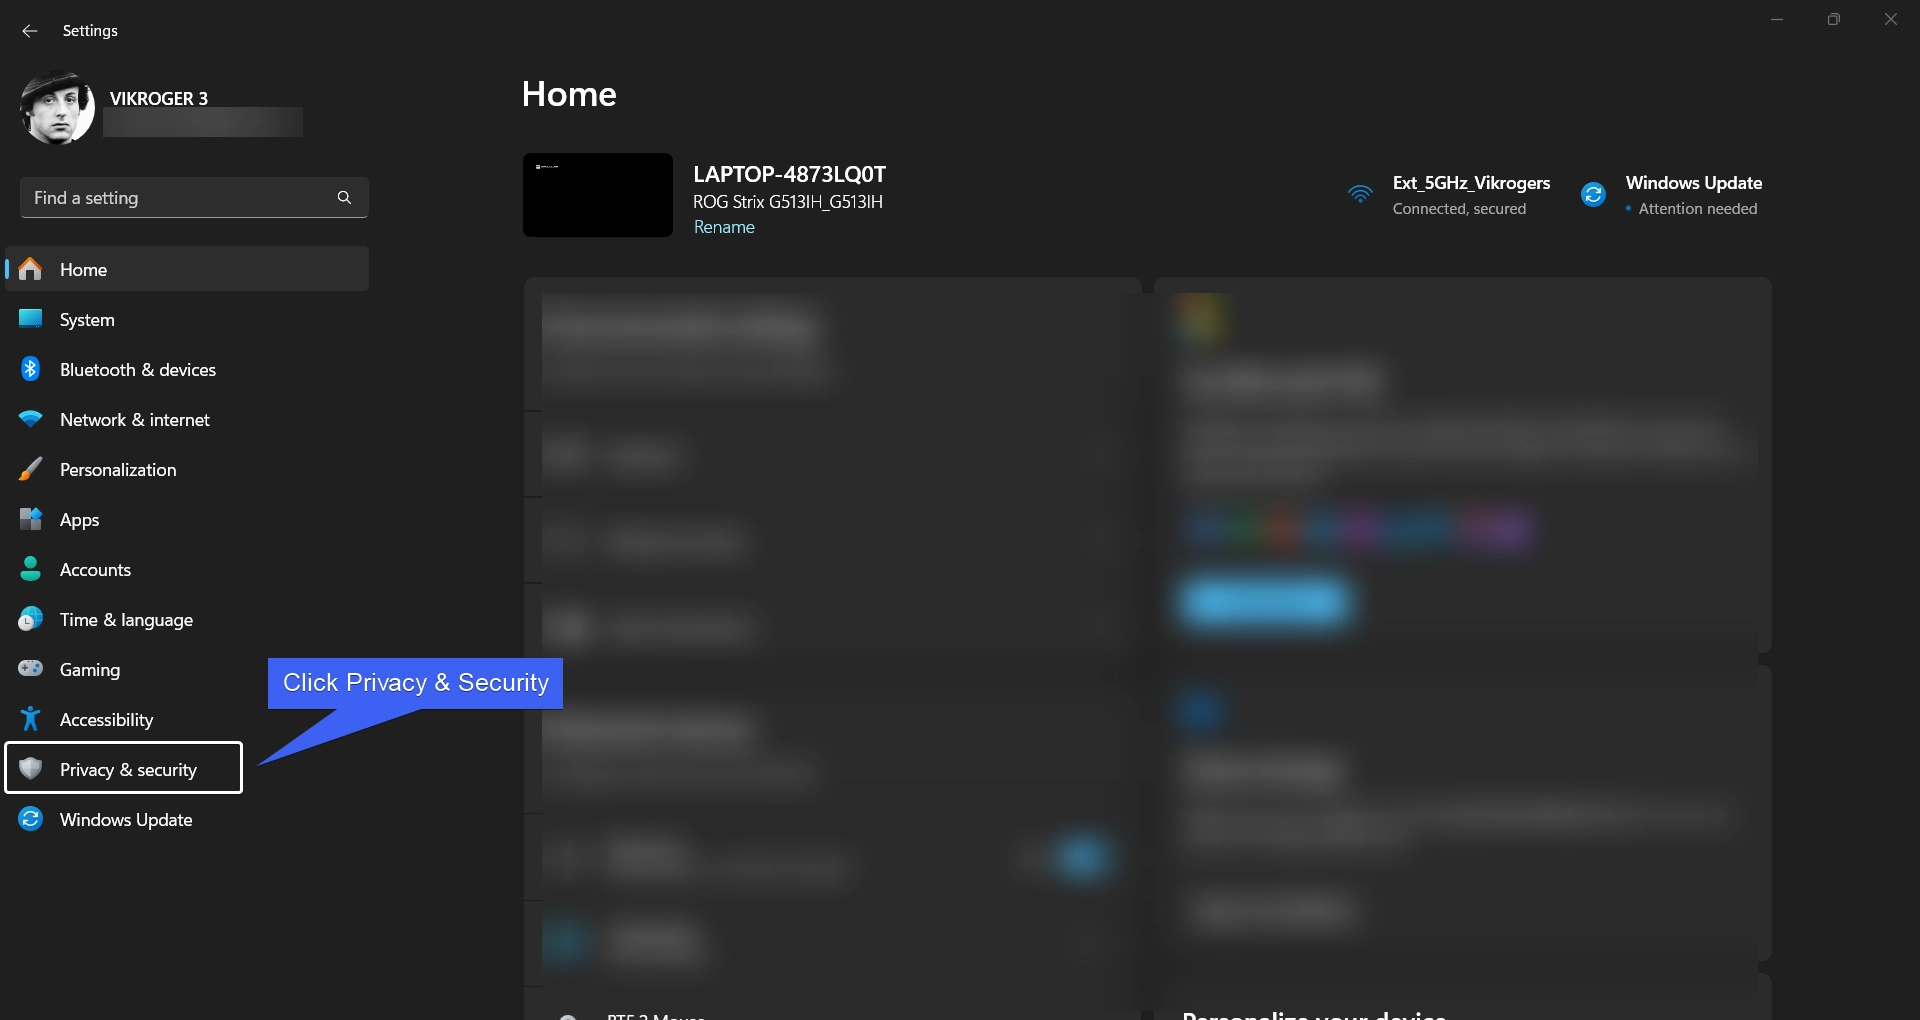
- In the Windows Settings, click on Privacy and Security from the Left pane.
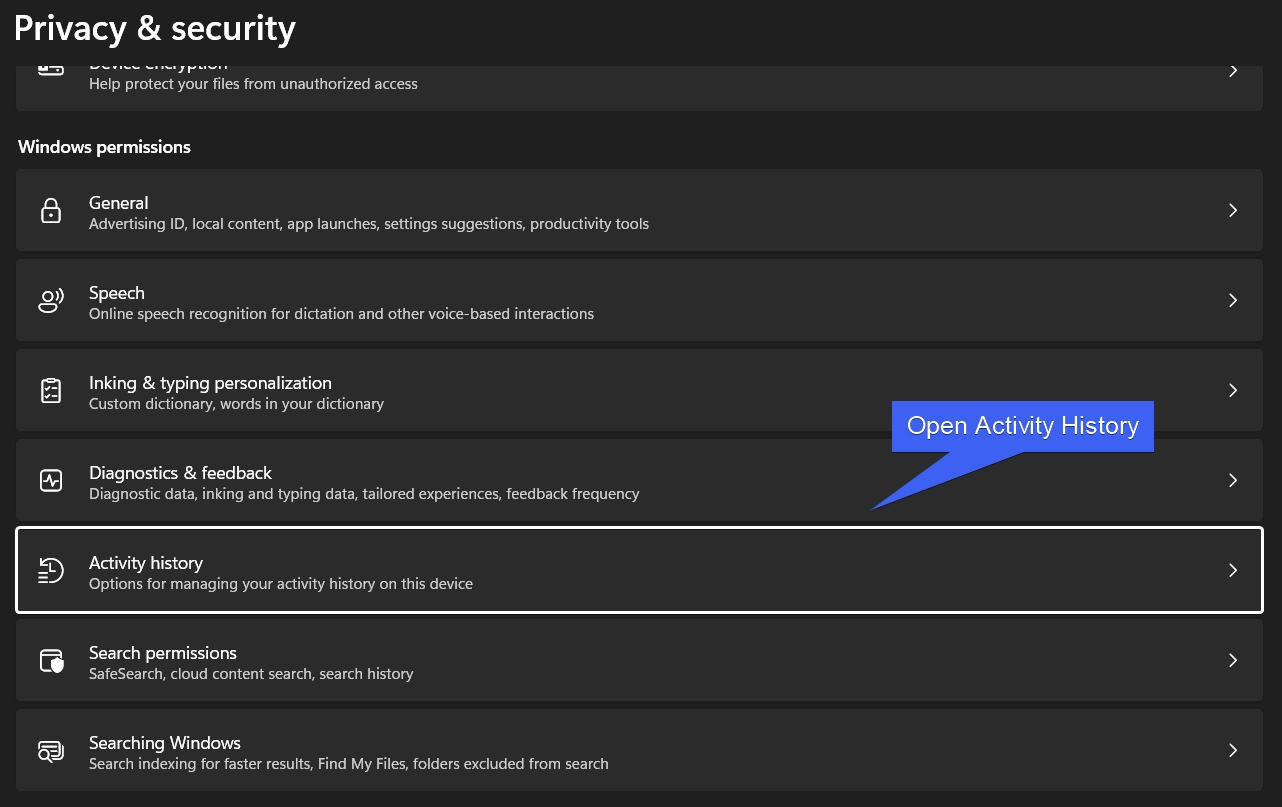
- Under Windows Permissions, you can find the option Activity History. Click on that to open it.
- Toggle “Store my activity history on this device” switch to OFF. This will Disable Activity History on Windows 11.
How to Clear Activity History on Windows 11?
You can use this option in two scenarios. Once you turn off Activity History on Windows 11, it is advisable to clear activity history for this account. This process will clear the saved Activity History from the Account. The second scenario is that you want to keep the Activity History ON, however, you just want to clear the existing data in the Activity History so that it can start collecting new data. The following are the steps to Clear Activity History on Windows 11.
- Go to the Windows Settings using the Keyboard combination Win Key + I.
- From the Left pane, click on Privacy and Security.
- You can find the Activity History under Windows Permissions. This section provides options for managing your activity history on Windows 11. Open Activity History.
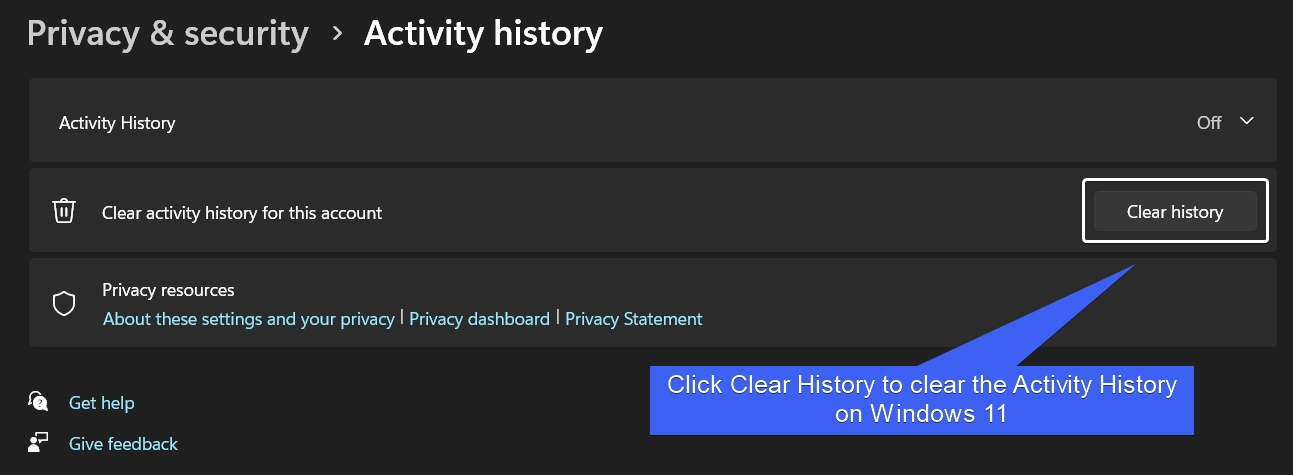
- Click on Clear History button to clear Activity History on Windows 11.
Take Away
Activity History on Windows 11 can be a convenient feature for users who prefer cross-device synchronization, and recent files and apps history. However, if Privacy is a concern for you, Microsoft provides the control of this feature to the users themselves. Activity History may not be quite as extensive as the Timeline Experience on Windows 10, but it can still be useful for accessing frequent files, apps, and website history.
Will you keep Activity History ON? Kindly let us know in the Comments. For more interesting articles, stay tuned to Winsides.com. Happy Computing! Peace out!