Delete and Rebuild Indexing Options Windows 11: Indexing is the process through which Windows 11 creates and maintains a catalog of files and data. This process makes searching faster and more efficient. Whenever we search for any files or folder in the Windows Search, sometimes, the search will be faster and sometimes it may take a long time. The indexing is the reason that influences this search time. The Index stores key attributes of files such as File Name, Contents, Locations, Metadata, and more. Rebuilding the indexing options ensures that all newly added or modified files are included and searchable, improving the overall search experience.
This latest post will guide you through the steps of How to access and use Delete and Rebuild Indexing Options on Windows 11. Check out: Easy Methods to Find and Search Video Files on Windows 11
Table of Contents
When Delete and Rebuild Indexing Options is recommended on Windows 11?
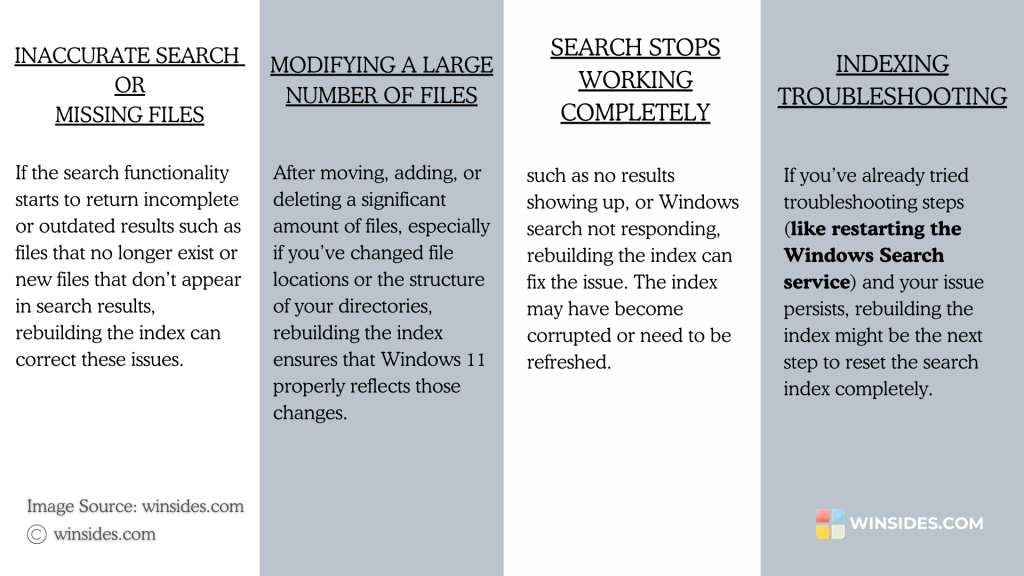
It is recommended in several scenarios to improve system performance, resolve search issues, or refresh the index. If the search functionality starts to return incomplete or outdated results such as Files that no longer exist, new files that do not appear in the search result, when we move, add, or delete a significant amount of files, after a System Crash, Search stops working completely altogether. As a part of Indexing Troubleshooting, we can Delete and Rebuild Indexing Options on Windows 11.
Different methods to access Delete and Rebuild Indexing options on Windows 11
Surprisingly, we have several options to access this setting on Windows 11. The following are the different options.
- Access it via the Start menu.
- Open Delete and Rebuild Indexing Options using the Control Panel.
- Open it via the Windows Settings.
- Access it via the Run Command.
Method 1: How to open Indexing Options on Windows 11 using the Start menu?
This method is the most straightforward option. The following are the steps.
- Go to the Start menu and Search for Indexing Options.
- When you find the setting, click on Open to open it.
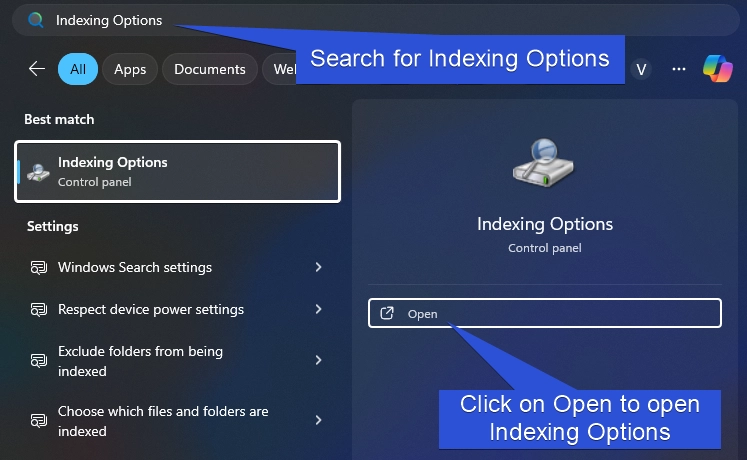
- Indexing Options will now open on your Windows 11.
Method 2: How to open Delete and Rebuild Indexing Options using Control Panel?
Here, we will use the Control Panel to access the Indexing Option.
- Go to the Start menu and search for Control Panel.
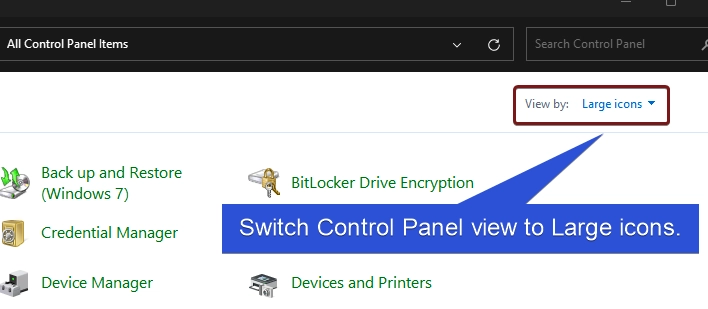
- In the Control Panel, switch the view to Large Icons.
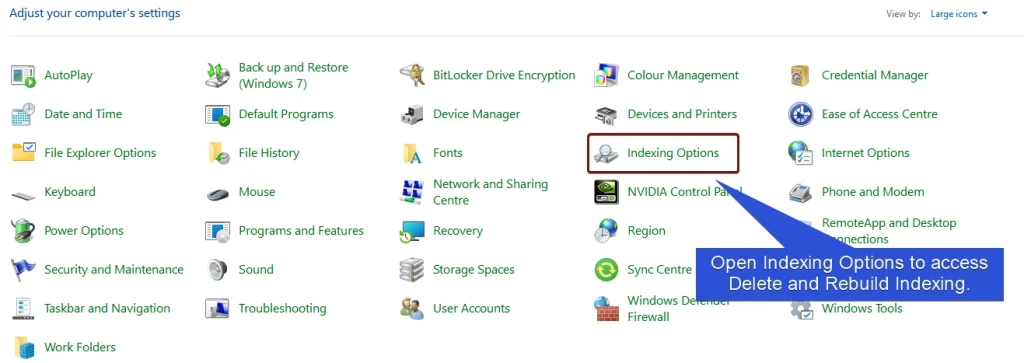
- Now, you can find Indexing Options. Click on that to open Indexing Options.
Method 3: Open Indexing Options using Windows Settings
- To open Windows Settings, we will use the shortcut Win Key + I.
- Click on Privacy & Security from the left pane.
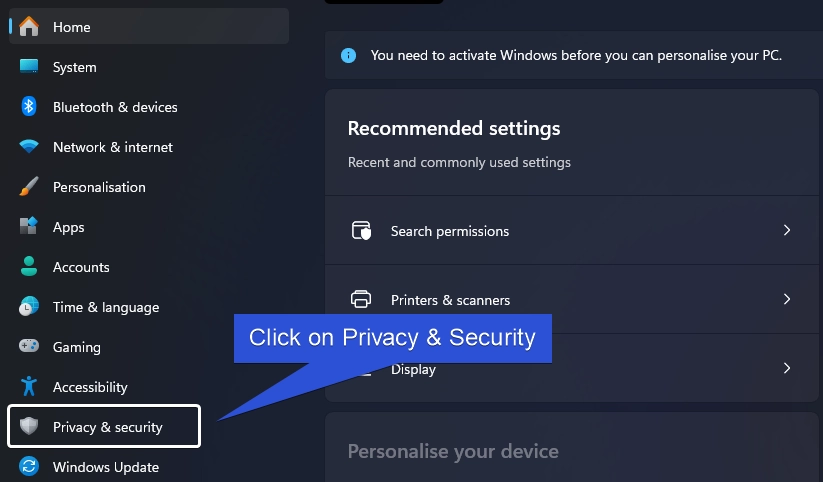
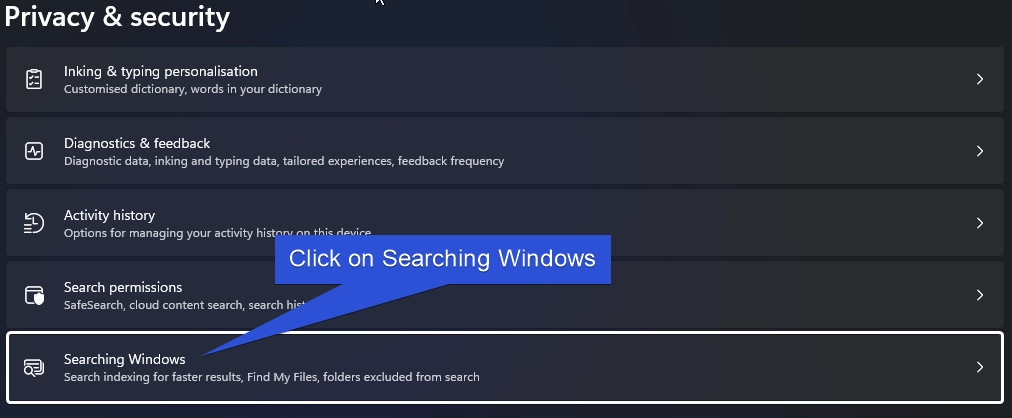
- Under Windows Permissions, click on Searching Windows.
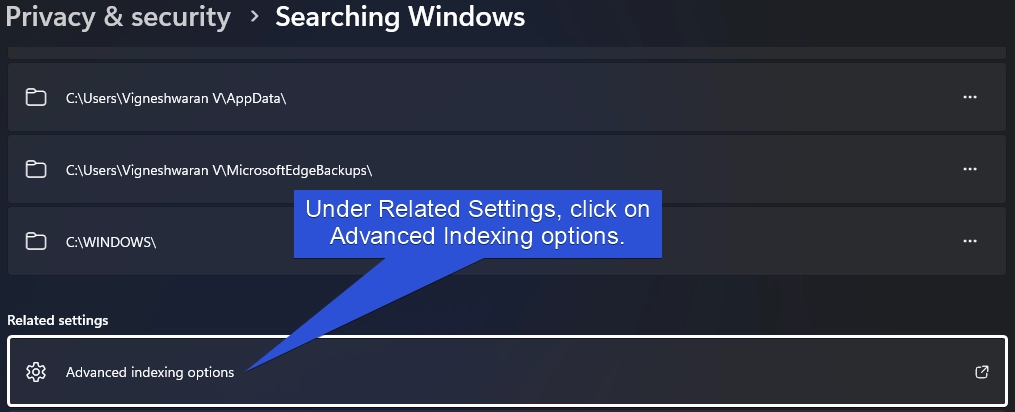
- Scroll down and under Related Settings, you can find Advanced Indexing options.
- Now, Indexing options will pop up.
Method 4: Open Indexing Options using the Run Command
- To open Indexing Options via the Run Command, execute the following command in the Run.
control.exe srchadmin.dll
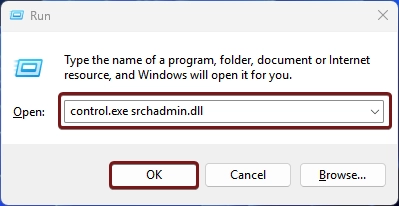
- This command will open Indexing options now.
How to use Delete and Rebuild Indexing Options on Windows 11?
You can use any of the above methods to access Advanced Indexing Options.
- On the Indexing options, click Advanced.
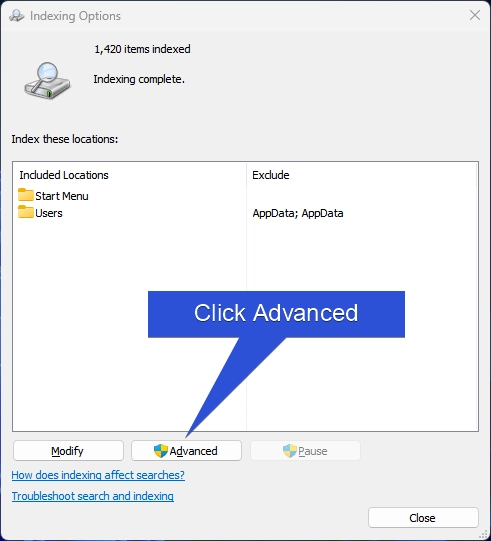
- Now, the Advanced options will open.
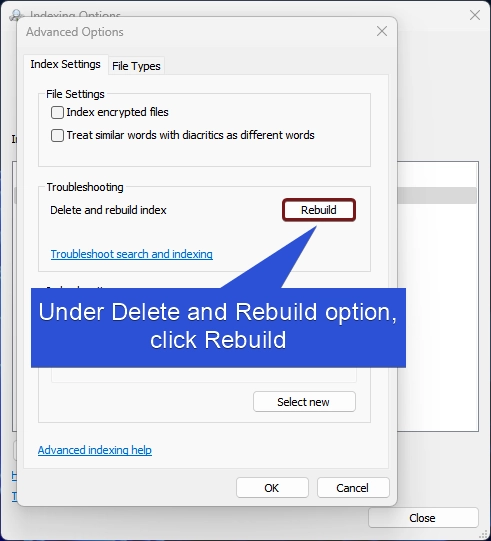
- Under Troubleshooting, you can find the Delete and Rebuild index option. Click on Rebuild.
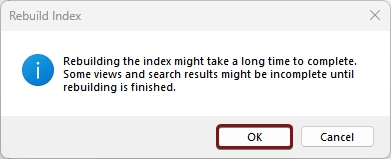
- Rebuild Index will provide the information “Rebuilding the index might take a long time to complete. Some views and search results might be incomplete until rebuilding is finished.” Kindly be aware of this and then click OK to proceed.
- The system will complete the changes. You can click Close.
Video Walkthrough for How to use Rebuild Indexing options on Windows 11
Take away
There are times when the index can become outdated or corrupted, leading to inaccurate search results, slow performance, or search failures. In such cases, rebuilding the index is a highly effective troubleshooting step and ensures all the data is up-to-date. We hope you are satisfied with our article and if you have any queries, kindly let us know in the comment section. For more interesting articles, visit Wisides.com. Happy Computing! Peace out!

 How to Check PC Specs without Logging into Windows 11?
 How to Enable HDR Video Streaming on Windows 11?
 How to Clean Temporary Files on Windows 11?
 How to Use ODBC on Windows 11?