In certain situations like Buying a used PC, Windows Crashes, Handling BSOD, checking for RAM or GPU Upgrades, etc., one may want to check PC Specs without logging into Windows 11 as their access might be limited or unavailable due to various Technical reasons. There are several ways with which you can check out your PC Specs on Windows 11 without logging into it, in this article, let us check out those methods with clear explanation and images. Let’s get Started.
Different Methods to check PC Specs without Logging into Windows 11
- Use BIOS/UEFI Settings to get the Hardware Specification.
- Windows Bootable USB (Windows Installation Media) to access System Details.
- Create a Bootable Live Linux USB.
Note: Out of the above three methods, the most effective and less time and effort consumption method is to use the BIOS/UEFI Settings to get access to the Hardware Specification.
#1 How to Check PC Specs without Logging into Windows 11 using the BIOS/UEFI Settings of your Computer?
This quick and easy method is applicable not only for PC, but also to a Laptop. Basically, we are accessing the System Information at Machine Level, and hence, we don’t even need to have an operating system. This methods works for Windows, Linux, DOS, etc. However, you may not get all the detailed information here rather just the basic and essential information.
Different Brands will have different Hot Keys to access BIOS/UEFI Settings on Laptop and PC Machines. Depending on your Brand, the Hot Keys will vary.
| Brand | BIOS/UEFI Hotkey | Alternative Keys |
| Acer | F2 | Del, F12(Legacy) |
| Asus | F2 | Del |
| Dell | F2 | F12 (Boot Menu) |
| HP | ESC & then F10 | F1, F2, F6 |
| Lenovo (Laptops) | F2 | Fn + F2 |
| Lenovo (Desktops) | F1 | F2 |
| MSI | Del | F2 |
| Gigabyte | Del | F2 |
| ASRock | Del | F2 |
| Razer | F1 | Del |
| Toshiba | F2 | ESC, F12 |
| Samsung | F2 | F10, ESC |
| Sony Vaio | Assist Button (on startup) | F1, F2, F3 |
| Microsoft Surface | Hold Volume Up while powering on | NA |
Steps to Access BIOS/UEFI Settings on your PC/Laptop
- To access your BIOS/UEFI Settings of your PC, you can do it during the startup process.
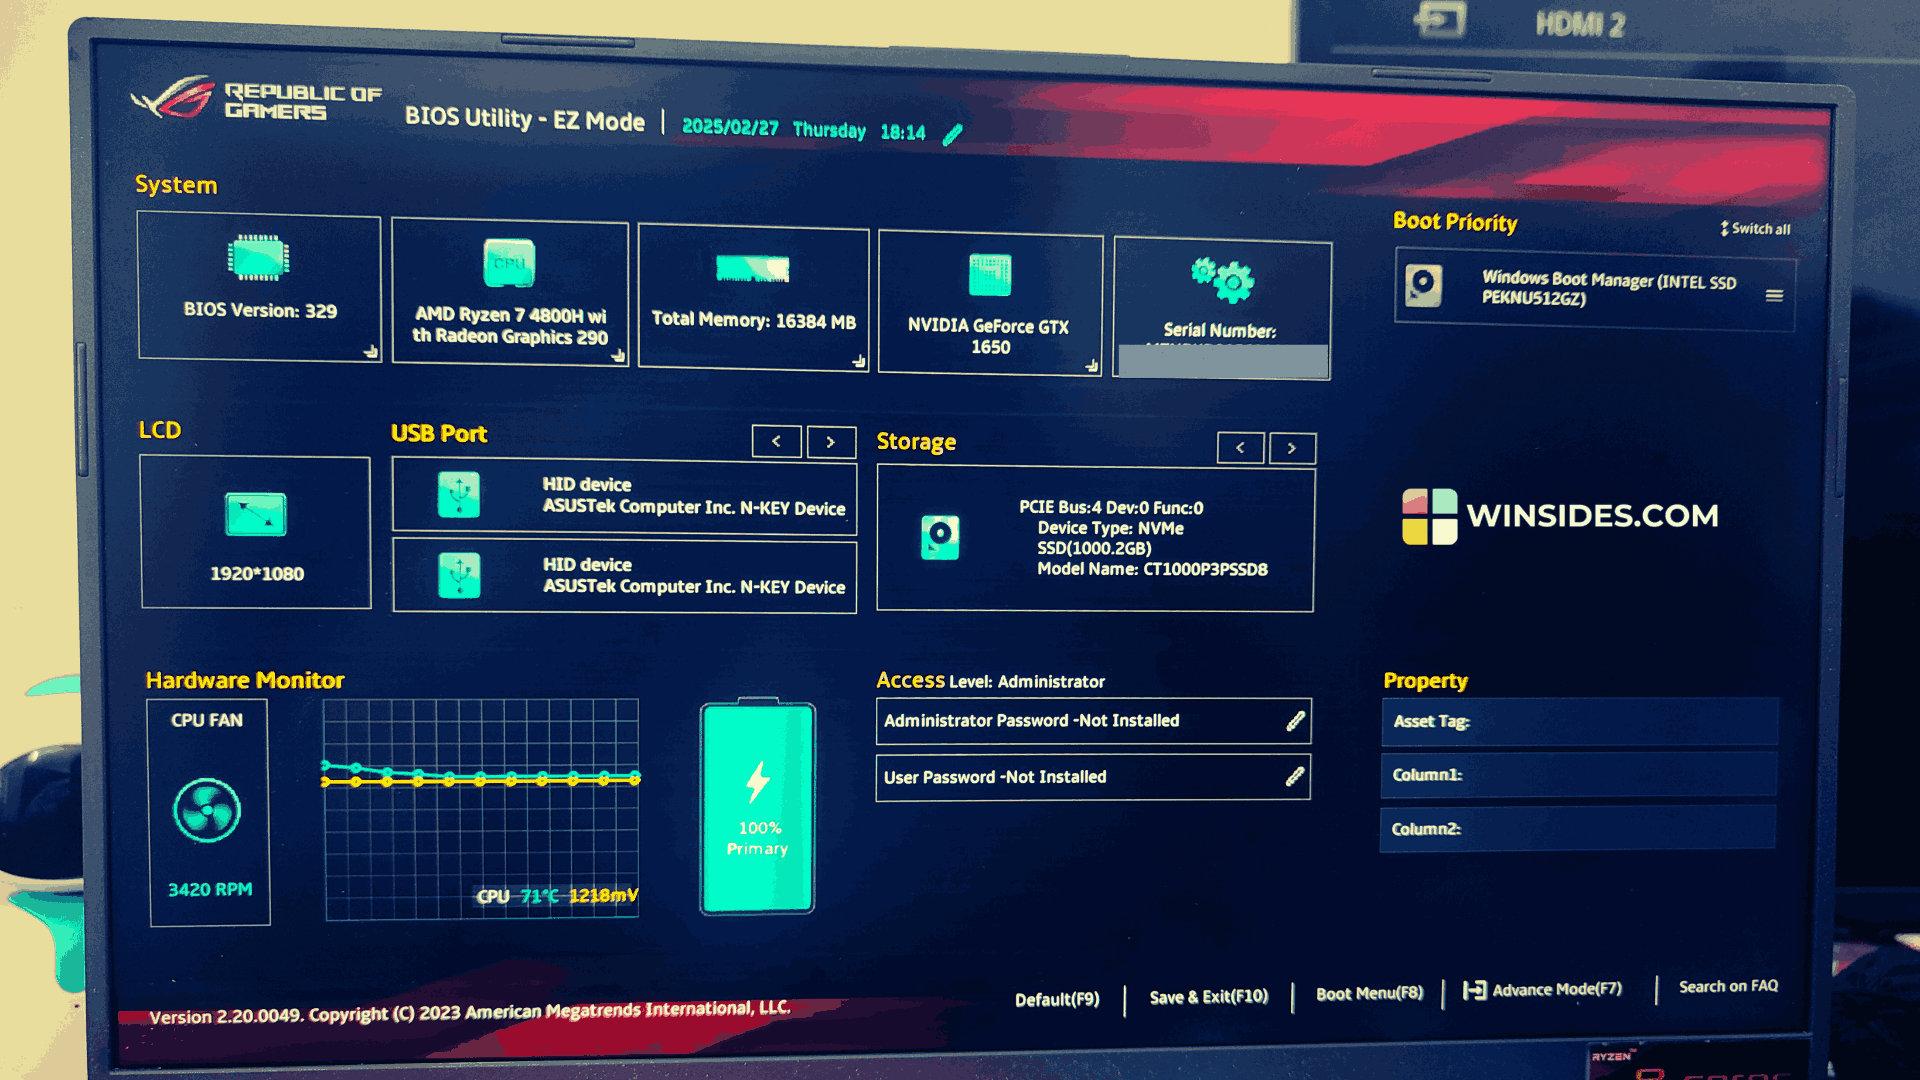
- Once you press the Power Button to turn on the machine, according to your PC or Laptop (kindly refer to the above table), press the Hotkeys. In my Case, I am using Asus ROG G15 Strix. I am going to press F2 a couple of times during the startup process. This will open the BIOS/UEFI Settings.
- Almost all of the modern Asus Computers (irrespective of the series) will open in BIOS Utility – EZ Mode.
- In the EZ Mode, under System you can find information such as BIOS Version, Processor Information, Total Memory, Graphics Card Information, and more. My Computer’s processor is AMD Ryzen 7 4800H with integrated Radeon Graphics 290, and GPU is NVIDIA GeForce GTX 1650.

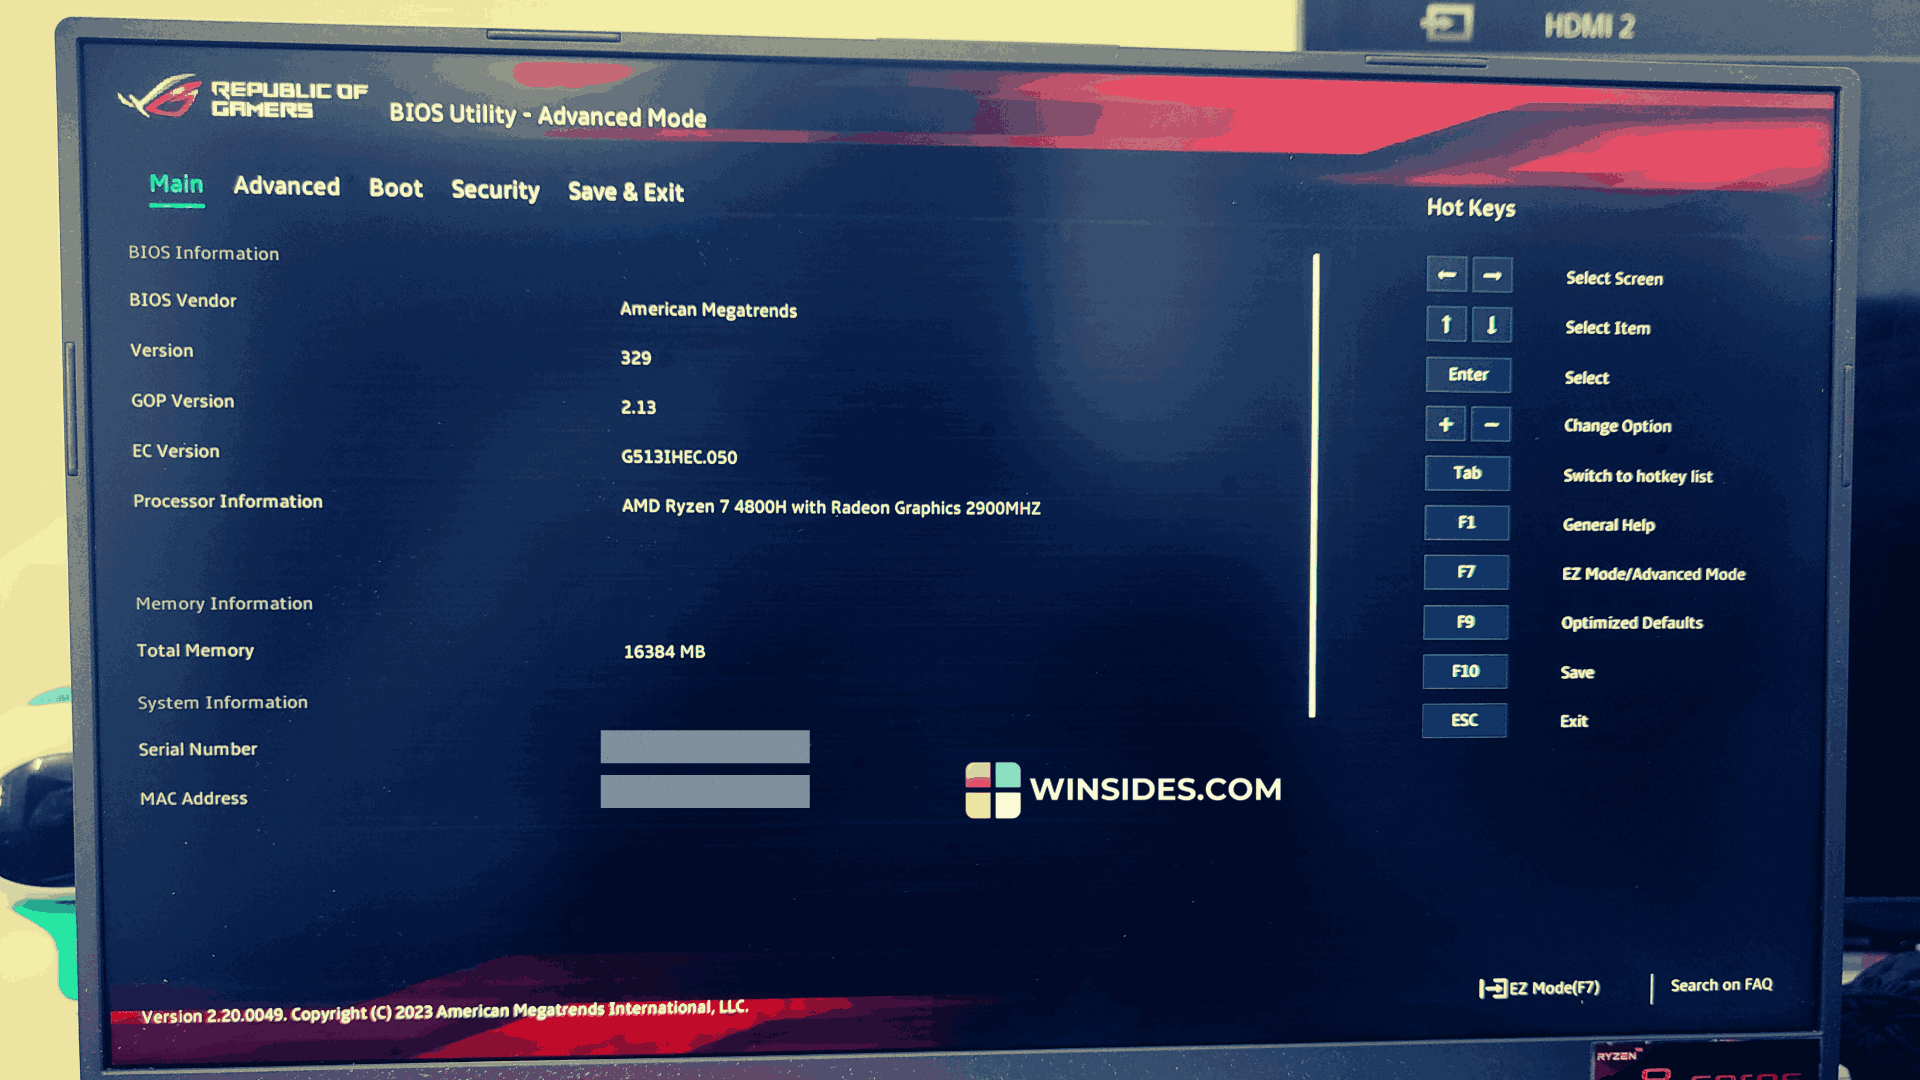
- Additionally, to access the Advanced Mode, press F7. This Advanced mode opens up more options, however the system information remains the same.

- Though this method provides some of the essential information, it may not provide all the crucial information that you are looking for. However, this is the quick and easy method to check PC Specs without Logging into Windows 11.
#2 Use Windows Bootable USB to Access System Details
This method has some prerequisites. First of all, we need a Windows Installation Media. We have a dedicated article explaining How to Create Bootable USB for Windows 11. Kindly refer to it.
- Please make sure that you have plugged the Windows Bootable USB to your PC
- Kindly start your PC, and during the startup process, access the Boot Menu (Accessing the Boot Menu may change change with different Brands). Keep this Windows Bootable USB in the Top Order of the Boot Priority and Save and Exit. The system will restart now.
- The Windows Media Installation will startup now instead of the regular Drive.
- When the Windows Setup Screen appears (Where it asks for Language and Region), press Shift + F10. This will open Command Prompt.
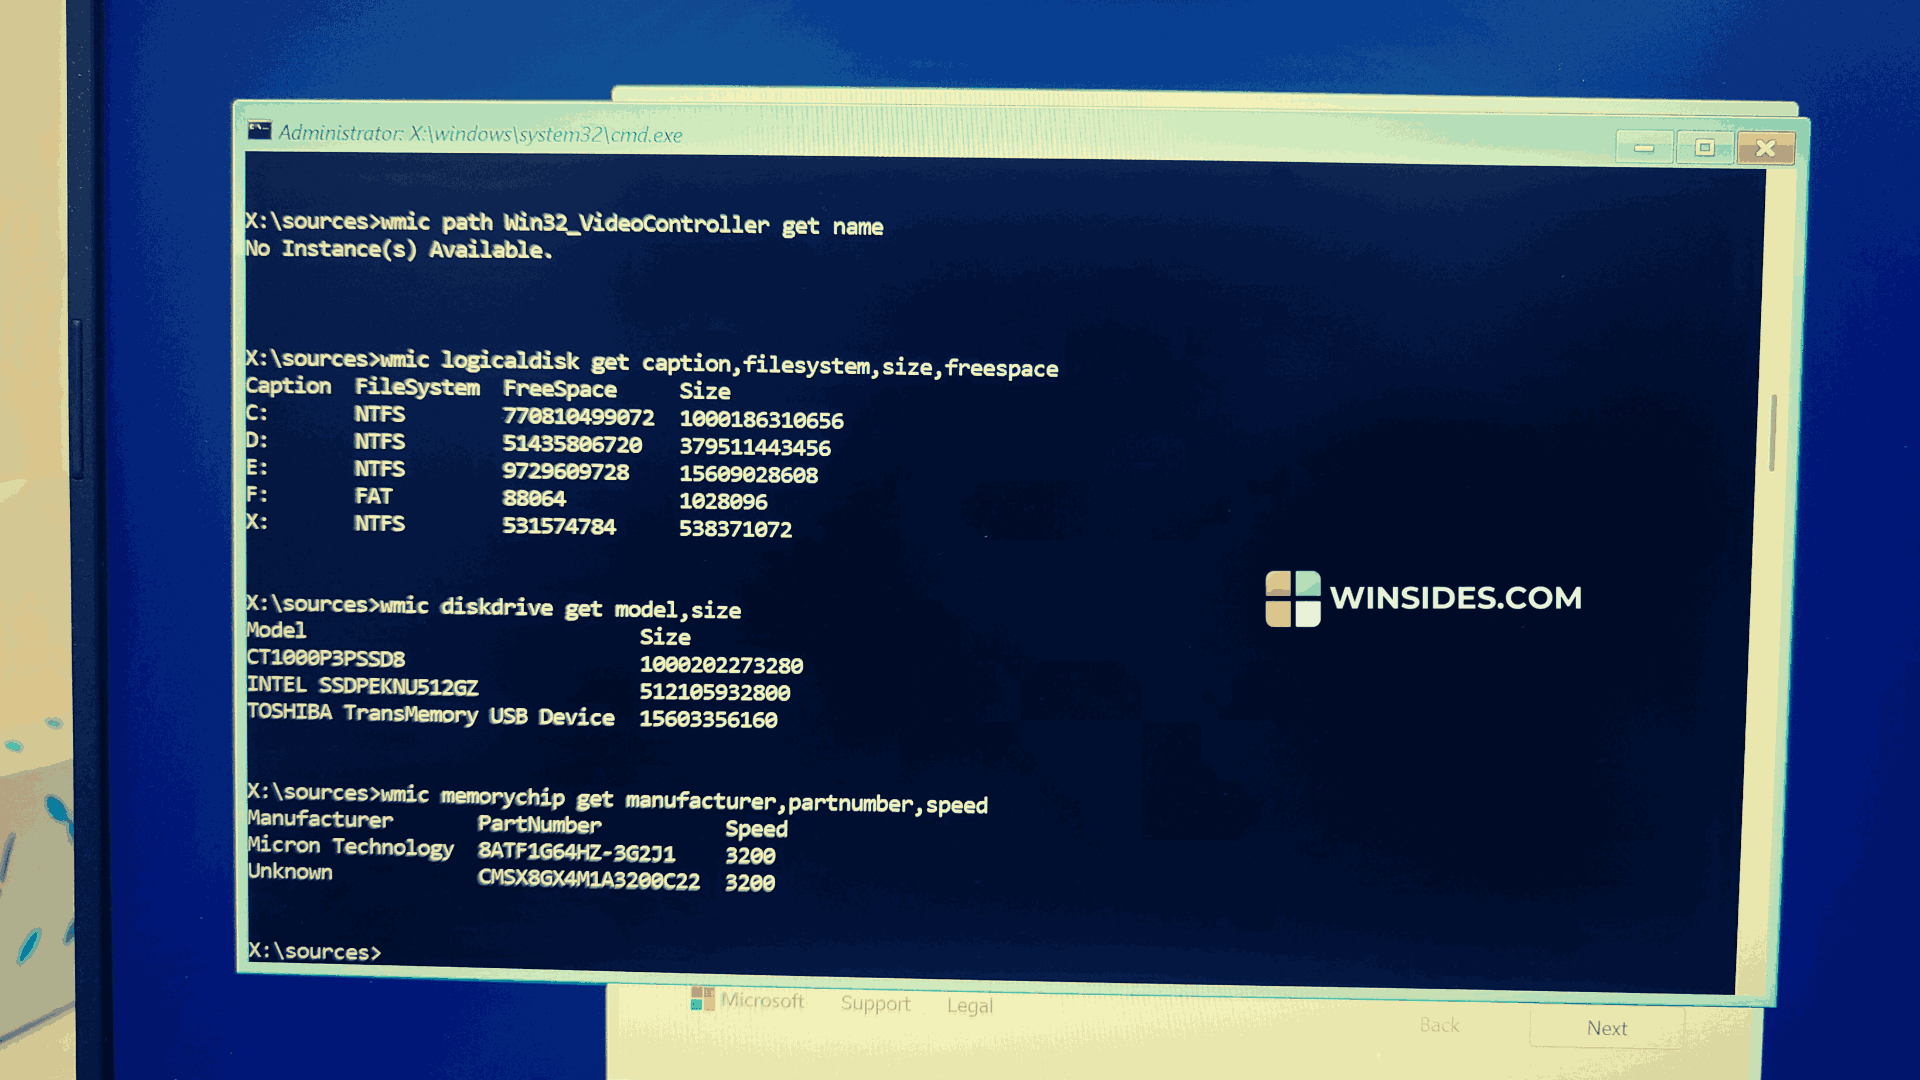
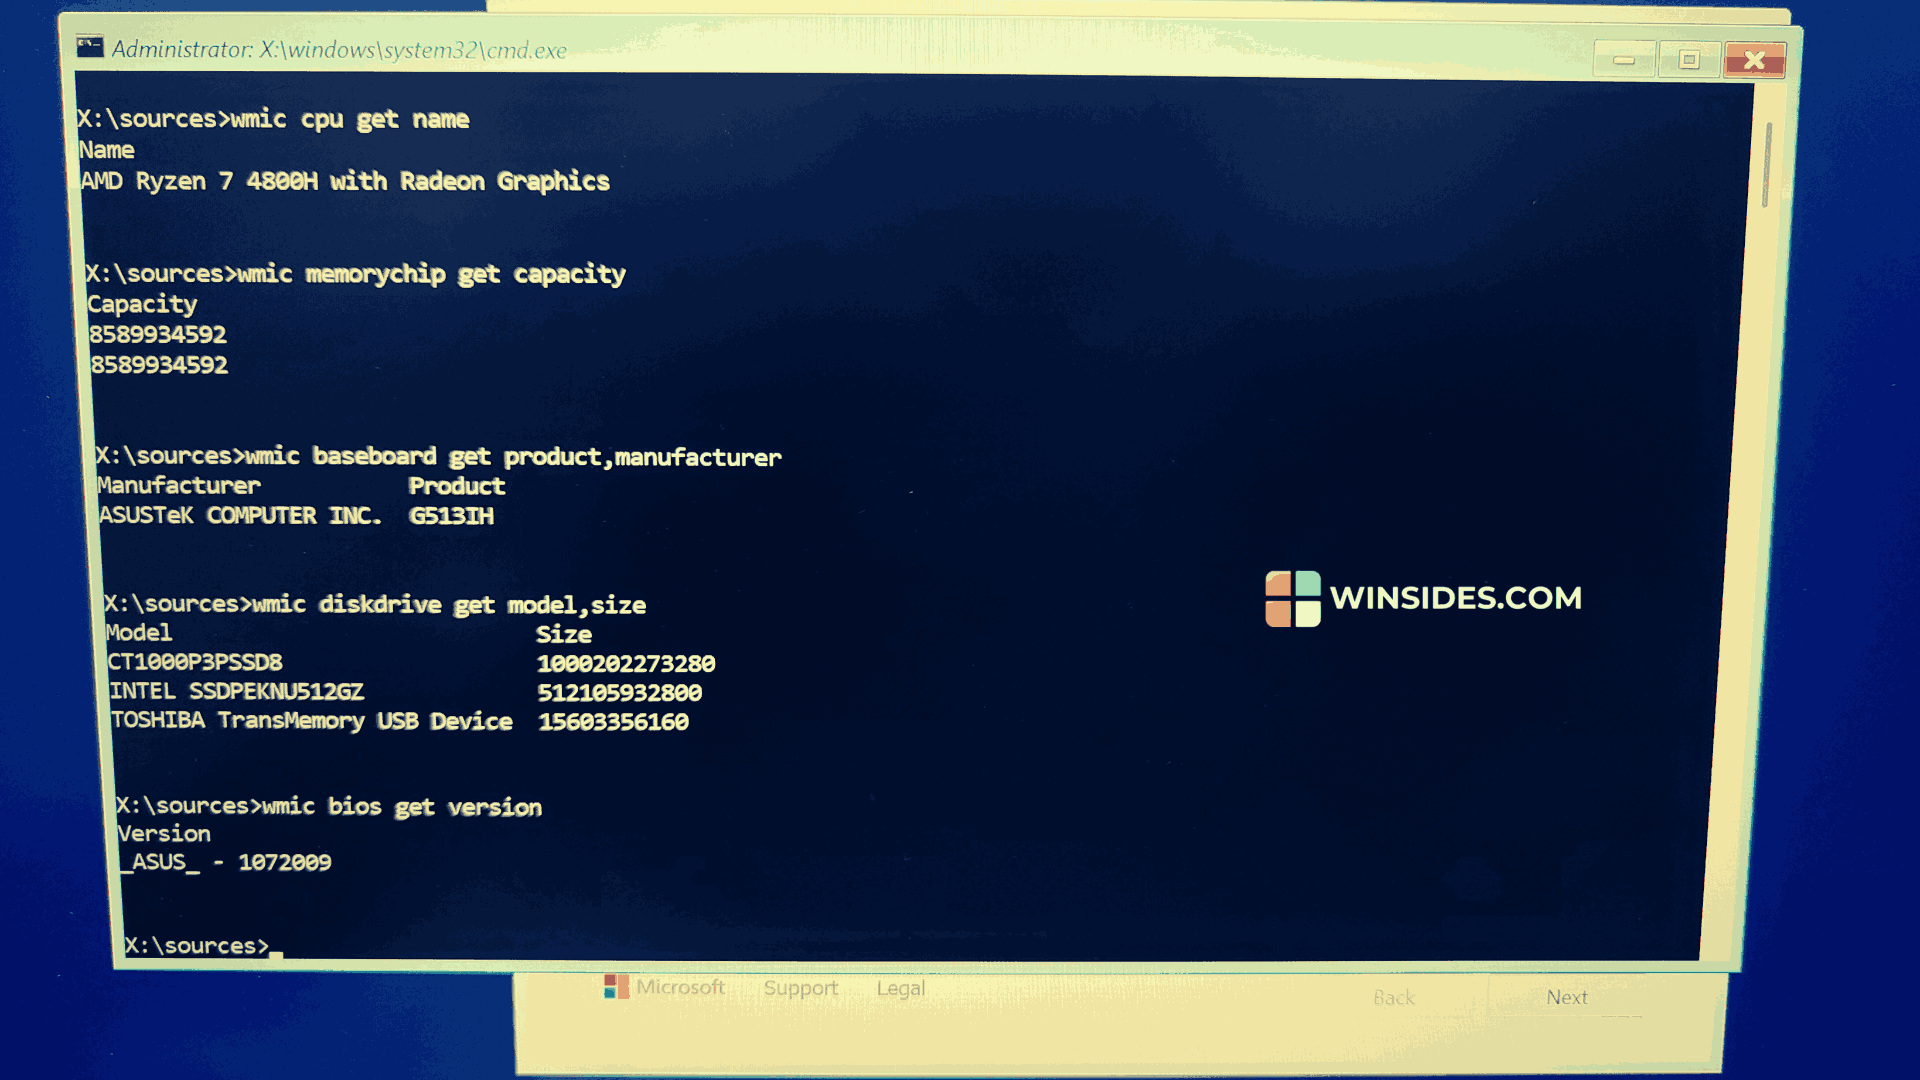
- In the CMD, you can execute the following commands to get your PC Specification without Logging into Windows 11.
| Command | Function |
wmic cpu get name | Shows CPU Model |
wmic memorychip get capacity | This Command will display installed RAM Size in Bytes |
wmic baseboard get product,manufacturer | It shows the Motherboard Label and Manufacturer |
wmic diskdrive get model,size | Lists storage drive (HDD/SSD) details |
wmic bios get version | Displays BIOS version |
| Shows CPU name, speed & manufacturer |
wmic memorychip get manufacturer, partnumber, speed | Shows RAM brand, part number & speed |
wmic logicaldisk get caption, filesystem, size, freespace | Shows disk partitions, file system & free space |
wmic path Win32_VideoController get name | Displays GPU (graphics card) model |
wmic path Win32_OperatingSystem get caption, version | Shows Windows version (if installed) |
wmic nic get name, macaddress | Lists network adapters & MAC addresses |
wmic path Win32_Battery get estimatedChargeRemaining | Shows battery percentage (For laptop) |
wmic path Win32_ComputerSystem get manufacturer, model | Displays PC manufacturer & model |


#3 Create a Bootable Linux USB to access System Spec without Logging into Windows 11
In this method, we will use a Linux Distribution Bootable USB and then access System Specification of Windows 11 PC. Don’t worry, we are not going to install any Linux Distributions, rather we will just use the option “Try Linux before Installing“.
- For a quick and easy process, I am using Puppy Linux, an extremely light-weight Linux Distribution. I will download the latest Puppy Linux ISO File (I am going with Slackware Base S15Pup64 as it is lighter) and then create a bootable USB using Rufus. If you want a safe and hassle-free process, you can stick with Ubuntu Distribution.
- Restart your PC, and go to the Boot Menu and adjust the Boot Priority, and set the Linux Bootable USB at the top and then Save and Exit.
- Once the Puppy Linux Loads, make sure to click on the option Try without Installing.
- The Puppy Linux will open now. Go to the Terminal.
- In the Terminal, you can execute the following commands to access different information.
| Command | Purpose |
cat /proc/cpuinfo | Shows CPU Details |
cat /proc/meminfo | Shows RAM Details |
free -m | Displays RAM Usage (In Mega Bytes) |
lsblk | Lists all storage drives & partitions |
lspci | grep -i vga | Provides information about the GPU Model |
ip a | Lists all Network Interfaces |
Why do we need different Methods to Check PC Specs without Logging into Windows 11?
If everything is fine, then the best way to get the complete specification is to use the System Information. Though we may get information on Device Manager, Windows Settings, etc, the System Information provides the complete information about a Windows 11 Machine. Check out: 5+ ways to run System Information as Administrator on Windows 11
However, as mentioned in the introduction, there may be scenarios where the Windows is Crashed, or struggling with Blue Screen of Death, fixing a public computers (School Labs, etc.) where we may not have the credentials, etc., we may need the above methods to check PC Specs without logging into Windows 11.
Take Away
From using the BIOS/UEFI Settings, which provides a convenient way to access some of the information to using a Bootable Installation Media Method, which provides more information but requires more amount of resources, depending on your requirements, and situation, choose your suitable methods wisely. We hope you are satisfied with our article on How to Check PC Specs without logging into Windows 11, and if you have any queries, kindly let us know in the Comment Section. For more interesting articles, stay tuned to Winsides.com. Happy Computing! Peace out!
 How to Enable HDR Video Streaming on Windows 11?
 How to Clean Temporary Files on Windows 11?
 How to Use ODBC on Windows 11?
 How to Run Firefox as Administrator on Windows 11? 5+ Best ways!