How to Check/View WiFi Signal Strength in Windows 11?
4 effective ways to view or check your connected Wifi Signal Strength!
Everything was working fine until the internet connection suddenly weakened. As a web app developer who spends most of the day in front of a PC,a stable internet connection is essential. Using optical fiber internet shared by a WiFi device,it was frustrating to deal with a volatile connection. To ensure a constant internet connection,I decided to check my WiFi signal strength. It turned out that the signal received by the device was weak,then I decided to move the WiFi router closer to my pc and the internet become stable again. I decided to share my experience in finding the WiFi signal strength on a Windows 11 PC as a tutorial for you.
Steps to View WiFi Signal Strength:
In this article,I will share multiple methods for viewing your WiFi signal strength using simple ways. The methods below will work on Windows 10 and Windows 11,including all versions such as Home Edition,Premium Edition,and Enterprise Edition.
Way 1:Using the Taskbar:
- You need to find the WiFi or network icon on the right side of the taskbar,near the clock.
- If you are connected to a WiFi network,the signal strength will appear as bars next to the WiFi icon.

Way 2:Using Network in Control Panel:
- You need to open the Control Panel and change the view from Large icons to Small icons.
- Now,a list of settings will appear on your screen. From that list,choose “Network &Sharing Center.“
- A list of connected devices will be displayed in the window,where you can see your WiFi device along with the WiFi signal strength,as shown in the image below.
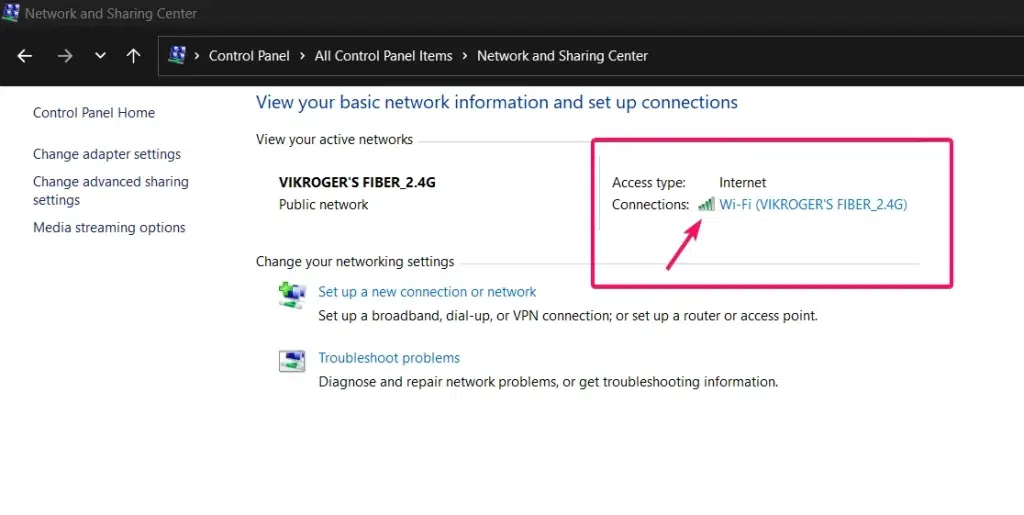
- If you want to see more details about the WiFi device,click on your WiFi device name.
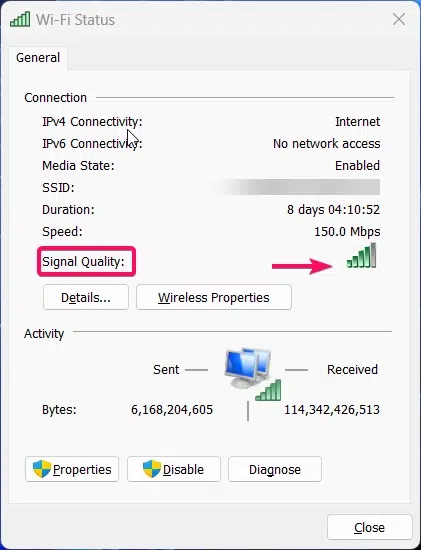
- The WiFi status window will appear on your screen,containing all primary data,including signal strength,as shown in the image below.
Way 3:Using Command Prompt:
- You need to use the
Winkey + Rshortcut to open the Run dialog box on your PC. - Then you need to type
cmdand press Enter button to open the Command Prompt. - Once the Command Prompt window appears on your screen,copy the command below,paste it into the window,and execute it.
netsh wlan show interfaces
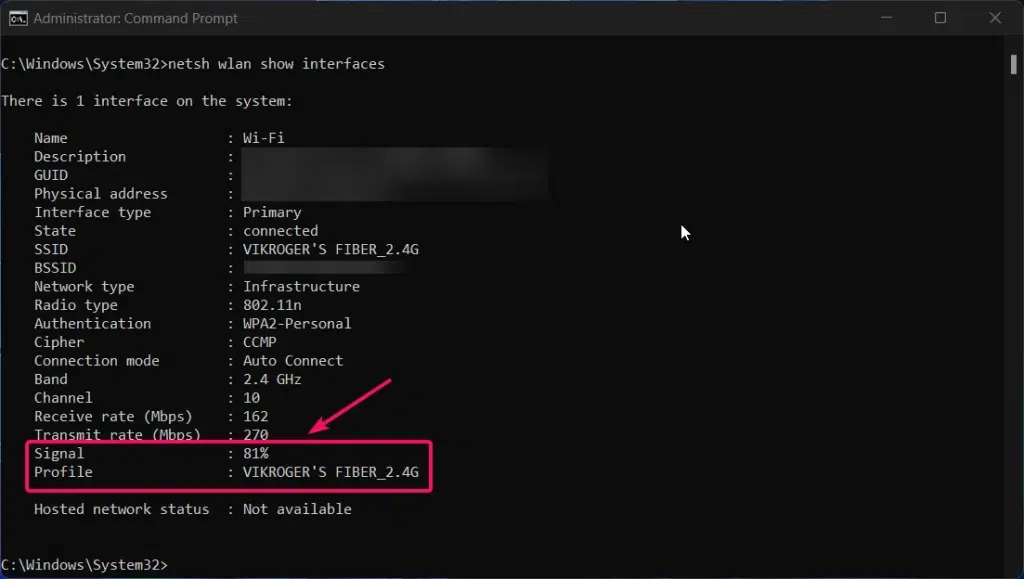
- Once you executed the command,it will display all the data of the network connected to your device. In the above image,you can able to see the Signal strength of my connected WiFi device.
Way 4:Using PowerShell:
- You need to use the
Winkey + Rshortcut to open the Run dialog box on your pc. - Then you need to type
powershelland press Enter button to open the PowerShell. - Once the powershell window appear on your screen,copy the below command,paste it into the window,and execute it.
netsh wlan show interfaces | Select-String '^\s+Signal'
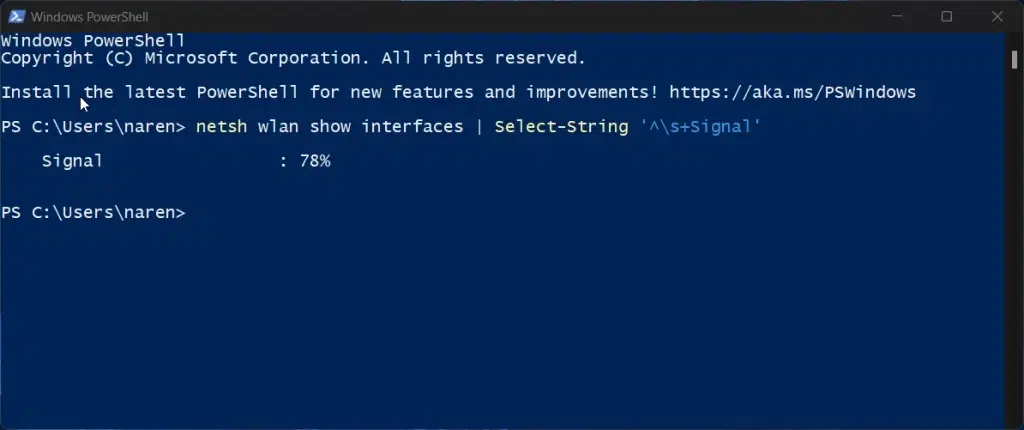
- Once you execute the command,as shown in the image above,you will be able to see the signal strength of your connected WiFi device.
Conclusion:
As you can see from the above methods,my PC’s WiFi strength varied between 75% and 85%. After moving the WiFi router closer to my PC,the WiFi strength reached 100%. Now,I can browse and work on my PC without any slow connection or volatile internet,and my productivity has also increased. I recommend you follow any of the above methods to find your WiFi strength if needed. Feel free to comment below and find more tips and tricks for Windows 11 on our blog at Winsides.com.
We combine expert insights with user-friendly guidance. We thoroughly research and test everything to give you reliable and simple to understand tech guides. Please take a look at our publishing process to understand why you can trust Winsides.


