MSCONFIG is otherwise known as System Configuration tool. This system configuration (MSCONFIG) tool is one of the powerful tool, which allows users to manage startup programs, services, boot configurations, and system settings for troubleshooting or optimizing performance. This tool covers most of the options under normal user rights itself, but you may need to elevated rights while accessing the system or os wide data on your windows device. Running this system configuration tool will helps you to adjust or modify the system level data without restrictions. In this tutorial, I will help you to Run MSCONFIG as Administrator on your windows pc.
Various Methods to open Msconfig as Administrator on Windows 11
There are different ways to access Msconfig as Administrator on Windows 11.
- Run MSCONFIG as Administrator using the Start menu.
- Open System Configuration with Administrative Privileges using the Run Command.
- Launch MSCONFIG with Elevated Permissions by creating a new task using the Task Manager.
- Always open MSCONFIG with Administrative Privileges by creating a Desktop Shortcut.
- Run CMD with Administrative Privileges and open MSCONFIG with Elevated Permissions.
IMPORTANT: Running applications as an administrator grants elevated privileges that can significantly affect your system. Please use caution when doing so, as it can lead to Unintended System Modifications, Security Vulnerabilities, Accidental Data Loss, Unauthorized Access, Irreversible Changes, etc.
#1. How to Run MSCONFIG as Administrator on Windows 11 using the Start menu?
- Open the Start Menu and search for
msconfig. - Right-click on the msconfig (System Configuration) and click on “Run as Administrator“.
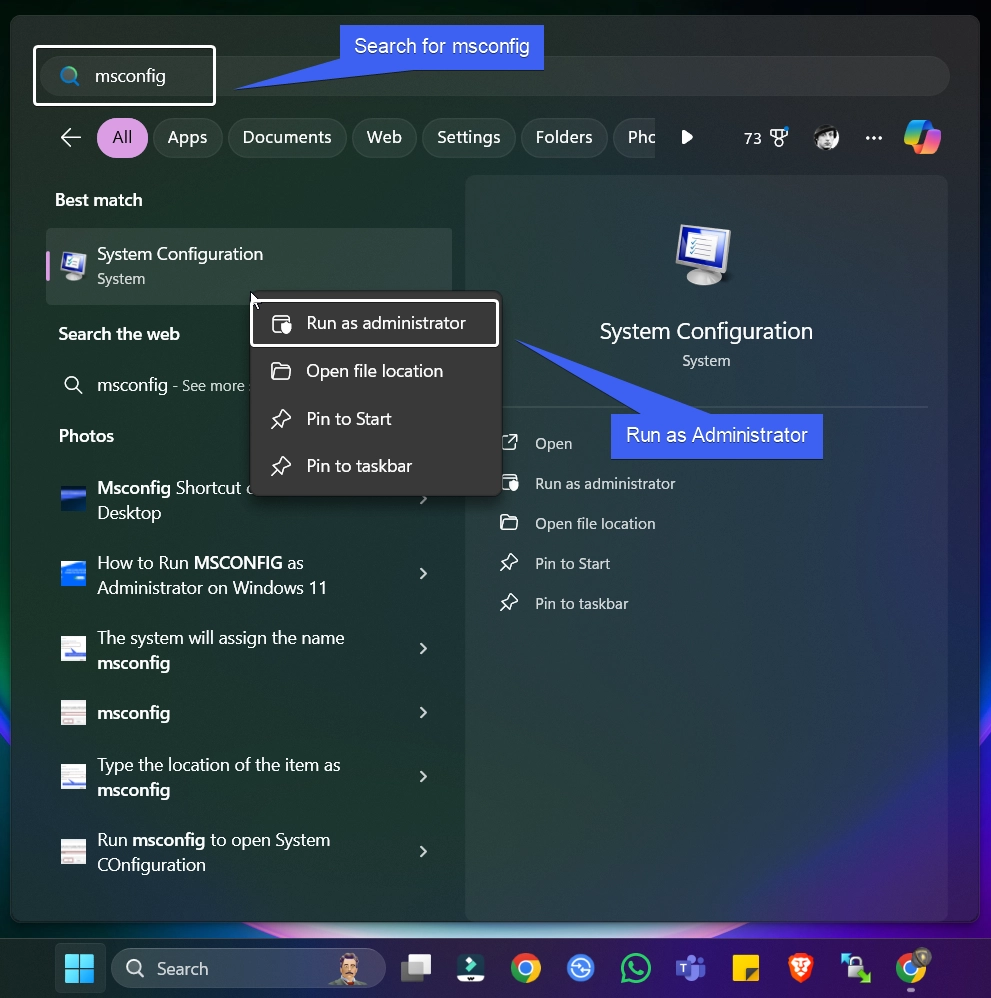
- The User Account Control will prompt for your confirmation and then open System Configuration with Administrative Privileges.
#2. How to Open System Configuration with Administrative Privileges using the Run Command?
In this section, we will use the Run Command to open System Configuration with Elevated Permissions.
- Go to the Run Command. It is easy to access the Run Command using the keyboard combination WinKey + R.
- In the Run, type the command
msconfigand press CTRL + SHIFT + ENTER.

- This will inform the system to execute the command with administrative privileges.
- UAC will prompt your confirmation and then open MSCONFIG with Administrator Permissions.
#3. Launch MSCONFIG as Administrator by creating a new task using the Task Manager
- Right-click on the Taskbar and then click on Task Manager.
- Under Processes, click on Create New Task.
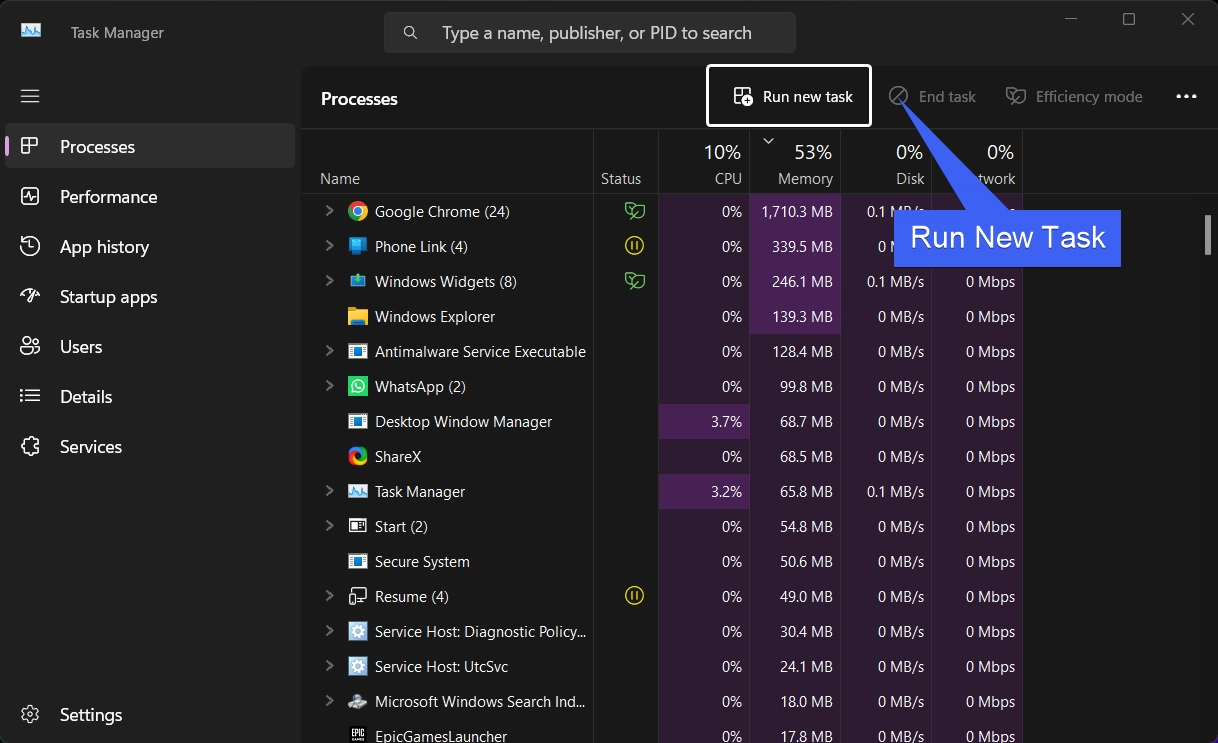
- Create Task dialog will open. Type the command
msconfig, and make sure to enable the check box “Create this task with Administrative Privileges“. Finally, click OK.
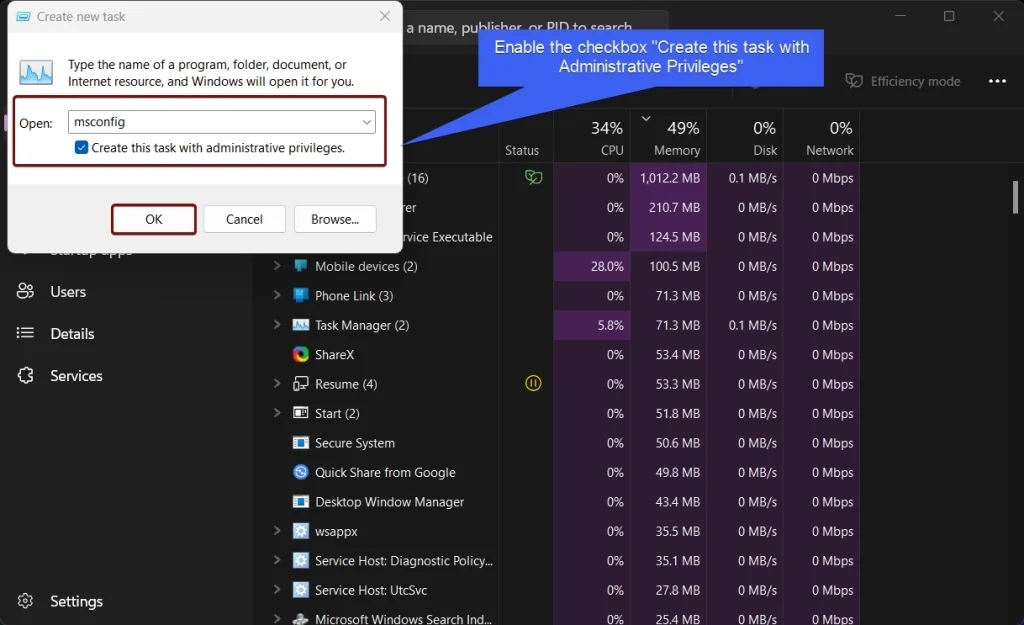
- The system will now open System Configuration with Administrative Privileges.
#4. Always open MSCONFIG with Administrative Privileges by creating a Dedicated Shortcut
- On the Empty space of the Desktop, right-click and then click New > Shortcut.
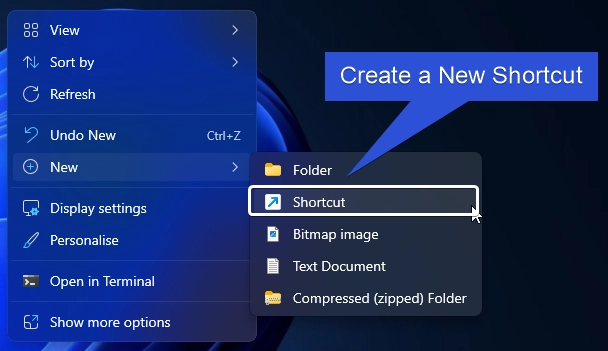
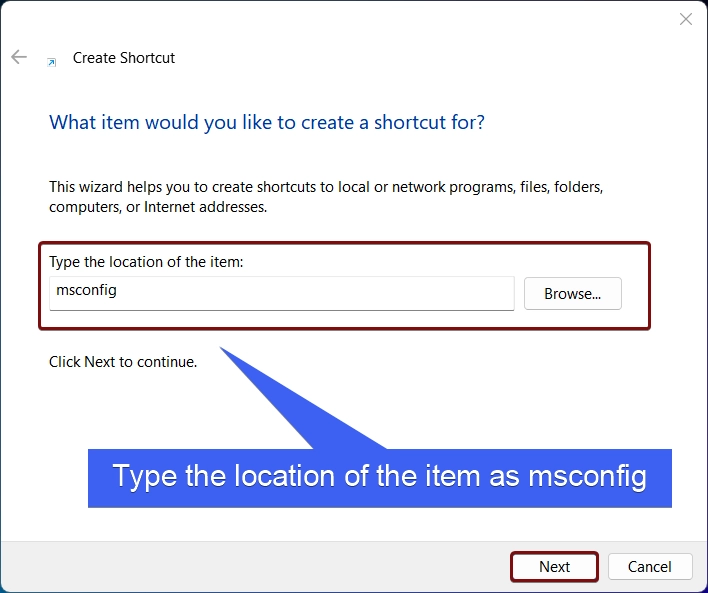
- The create Shortcut dialog box will open now. In Type the location of the item, enter the command
msconfigand then click Next.
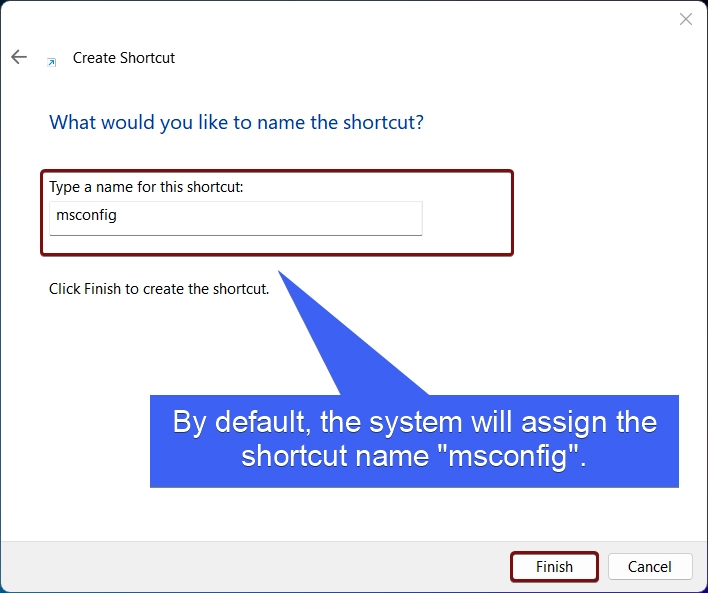
- The system will assign the Shortcut Name as msconfig. You can change it as per your convenience. Click Finish.
- MSCONFIG Shortcut will now be created on the Desktop.

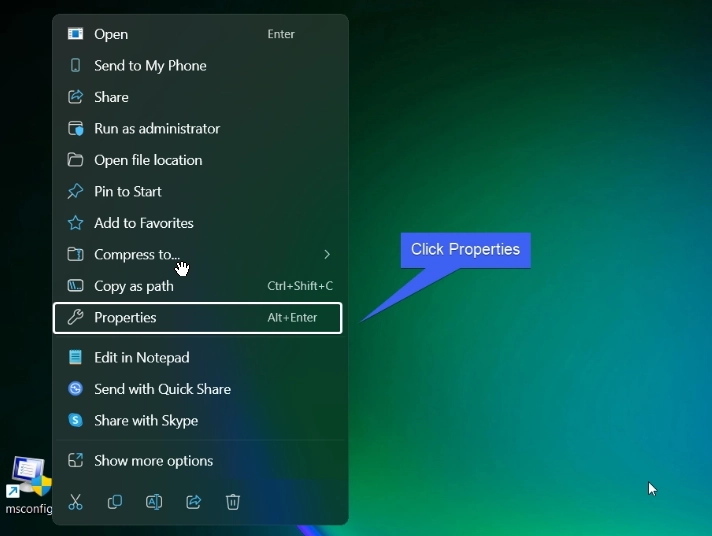
- Right-click on the MSCONFIG shortcut and click Properties.
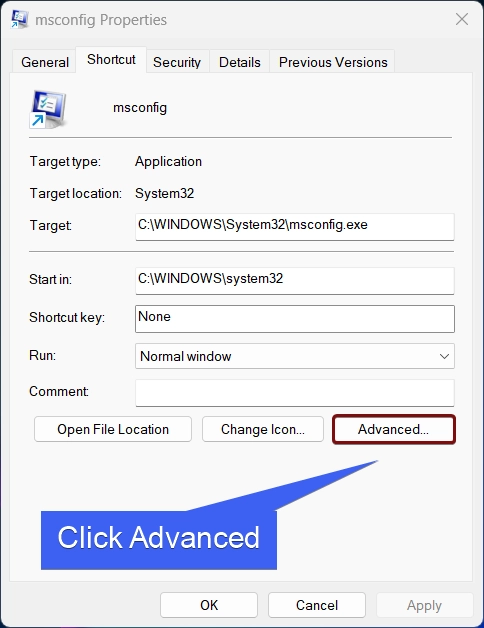
- MSCONFIG Shortcut Properties will open now. Click Advanced.
- In Advanced Properties, enable the checkbox to Run as Administrator. Click OK, and then Apply.
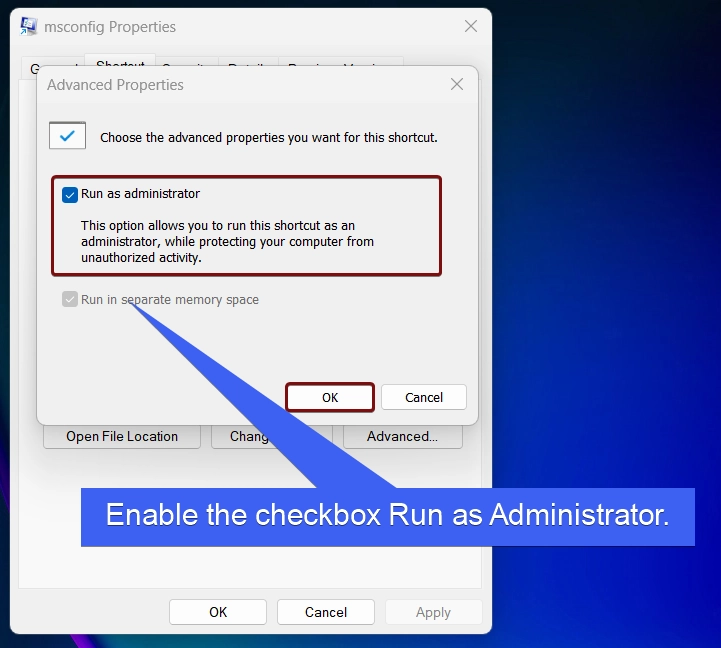
- The User Account Control will prompt your confirmation and open System Configuration as administrator.
#5. Run Command Prompt with Administrator Privileges and open MSCONFIG
In this section, we will check out How to use Command Prompt and launch MSCONFIG with Administrator Permissions.
- Open Run Command and type the command
cmdand press CTRL + SHIFT + ENTER. - In the Command Prompt, execute the following command.
msconfig.
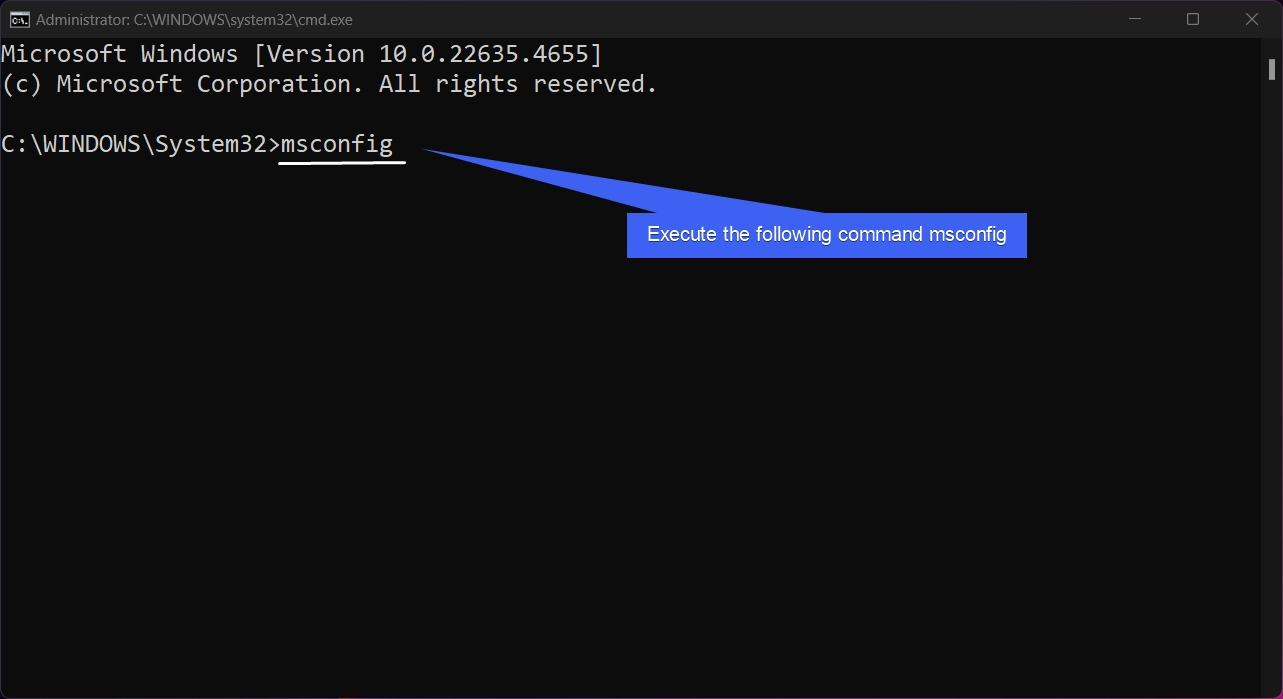
- The System will open System Configuration with Administrative Privileges.
Why do we have to be Cautious while Running an App as Administrator?
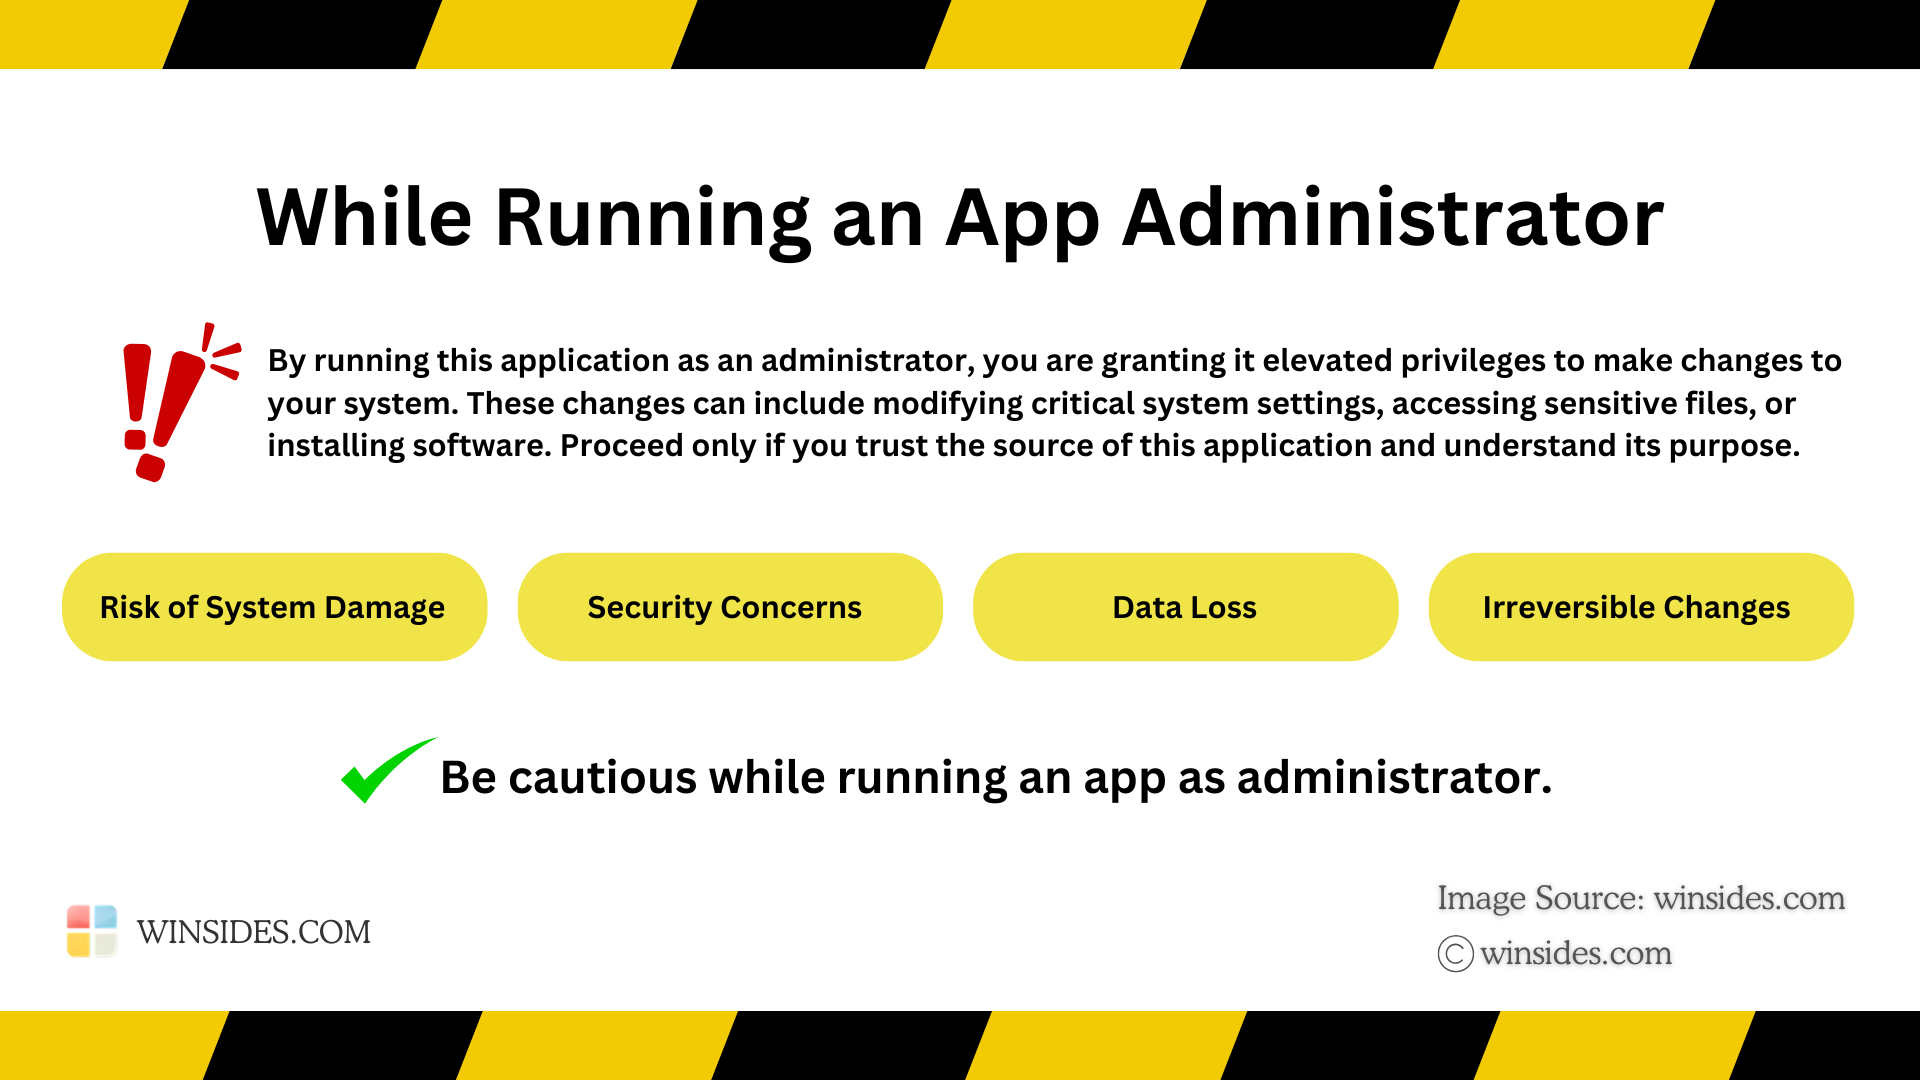
Running MSCONFIG as Administrator on Windows 11 grants it elevated privileges, which can potentially bypass system security restrictions. Please proceed with care and only run trusted applications in this mode. At Winsides.com, we advise our users to use Administrator privileges only when absolutely necessary to perform tasks requiring elevated rights. Misuse of administrative privileges may lead to System Vulnerabilities, Data Loss, System Instability, Security Concerns, Irreversible Changes, etc.
System Configuration Options
The System Configuration contains various options such as Startup Selection, Boot Options, System Services, Tools, etc.
General Tab
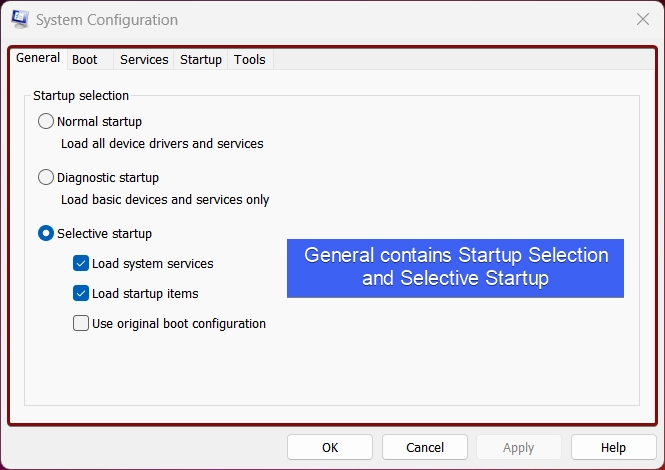
- In General Tab, options such as Normal Startup, Diagnostic Startup, Load System Services, Load Startup items, and Use Original Boot Configuration.
Boot Tab
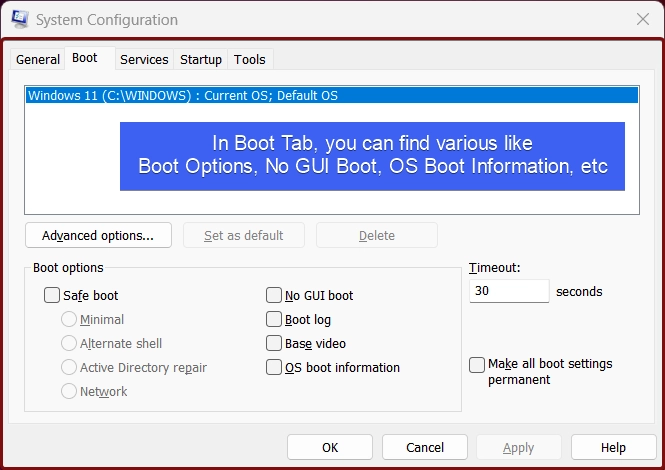
- In Boot Tab, various options like Boot Options, Current OS, and Default OS, No GUI Boot, Boot Log, OS Boot Information, etc are available.
Services Tab
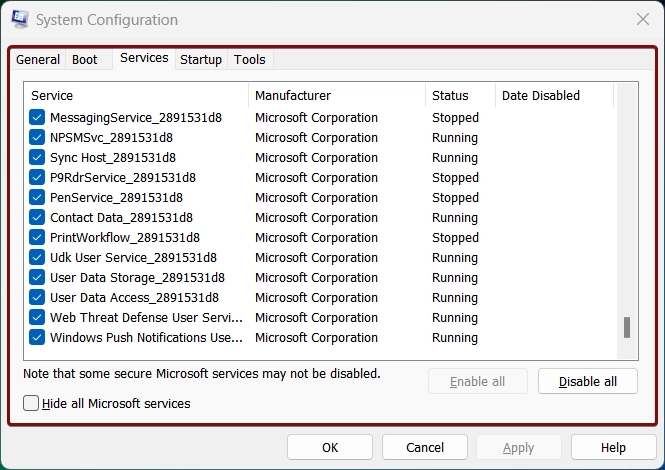
In Services Tab, you can find various services related to the System, Microsoft Corporation, Processor Services, Graphics Services, etc.
Tools Tab
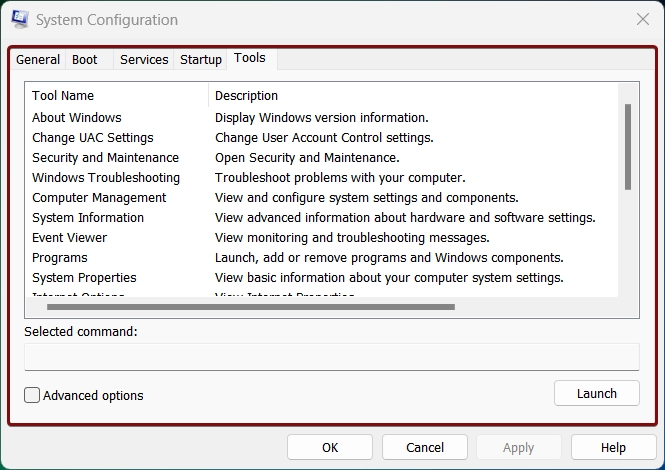
- The Tools tab launches various tools, such as UAC Settings, Security and Maintenance, Computer Management, and System Properties.
Verdict:
You need to Run MSCONFIG as administrator is necessary for making advanced changes to your Windows 11 system settings. Elevated rights will make sure that you have full control over startup configurations, services, and boot options, enabling you to troubleshoot your PC effectively. By using any of the methods above, you can quickly and easily elevate MSCONFIG and make necessary adjustments without encountering permission issues. Find more interesting tutorials on our homepage: WinSides.Com.
 How to Check PC Specs without Logging into Windows 11?
 How to Enable HDR Video Streaming on Windows 11?
 How to Clean Temporary Files on Windows 11?
 How to Use ODBC on Windows 11?