The Event Viewer is one of the important tool in Windows 11 for monitoring and managing system logs. It helps users and administrators diagnose system errors, track events, and troubleshoot various issues. While the Event Viewer can be accessed with standard permissions, certain advanced operations require running it as an administrator. Running Event Viewer as administrator provides elevated privileges, allowing you to view and manage sensitive logs, such as security and system level events.
With the help of Event Viewer, you can create new events and monitor how they work! For example, if you want to schedule an automatic shutdown for your Windows PC, follow these steps:
- Open Task Scheduler and create a new task.
- In the Triggers tab, choose Begin the task from the dropdown menu and select On an Event.
- Set up the trigger details:
- Log: Enter the event log where the trigger will monitor (e.g.,
System). - Source: Choose the source of the event (e.g.,
User32orKernel-Power). - Event ID: Enter
6006for the shutdown event in the Event Viewer.
Save the trigger and proceed to define an action for the task, such as running the shutdown.exe command.
Ways to Run Event Viewer with Administrative Privileges on Windows 11
- Simple way to Run Event Viewer as Administrator using the Start menu.
- Open Run Event Viewer as Administrator using the Run Command.
- Create New Task to run Event Viewer with Administrative Privileges using the Task Manager.
- Always Run Event Viewer with Elevated Privileges by created a Dedicated Shortcut.
In this article, we will check out all the above methods in detail with clear steps. Let’s get started.
IMPORTANT: Running applications as an administrator grants elevated privileges that can significantly affect your system. Please use caution when doing so, as it can lead to Unintended System Modifications, Security Vulnerabilities, Accidental Data Loss, Unauthorized Access, Irreversible Changes, etc.
How to Run Event Viewer as Administrator on Windows 11 using the Start menu?
This is the simplest way to run this app as admin on Windows 11.
- Open the Start menu. Search for Event Viewer.
- Right-click on the Event Viewer and click on Run as Administrator.
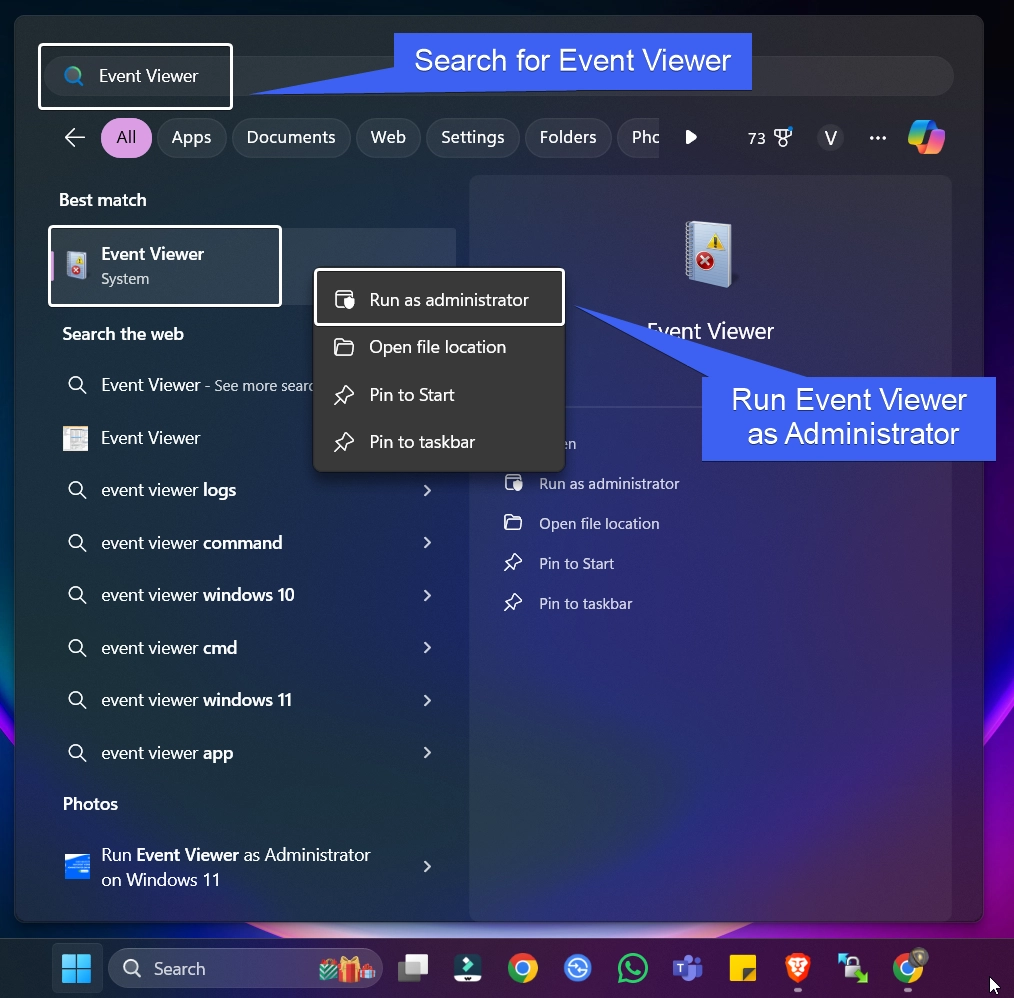
- The System (User Account Control) will prompt for your confirmation to run this app as administrator.
- Now, the Event Viewer will open as Administrator.
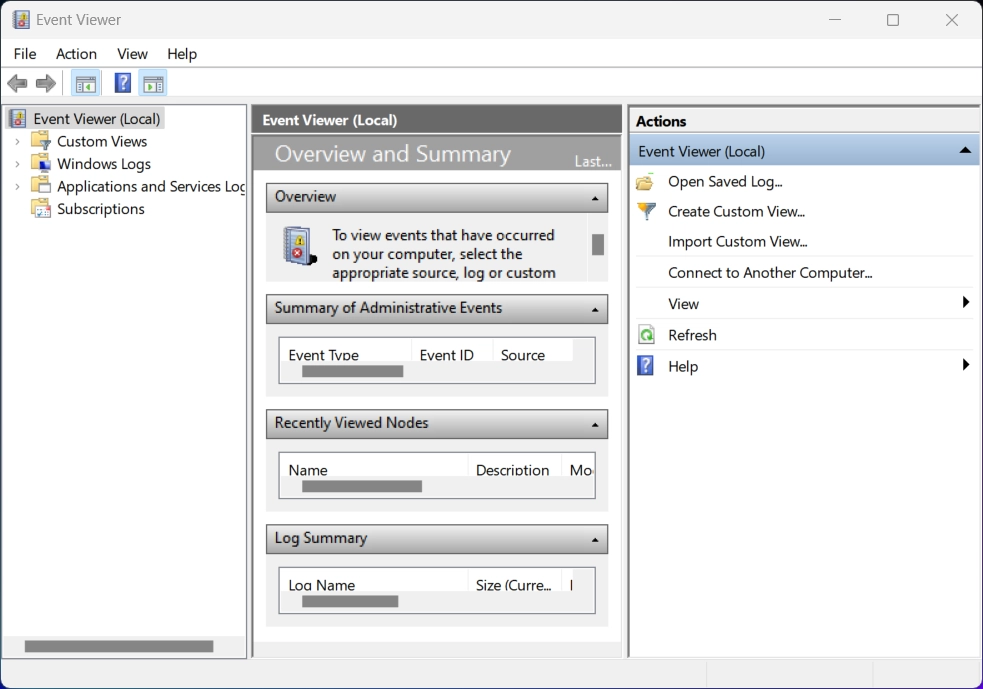
2. Open Event Viewer as Administrator using the Run Command on Windows 11
In this section, we will use Run Command to run this application with elevated permissions.
- Open Run Command using the shortcut WinKey + R.
- In the Run Command, type the following command
eventvwr.mscand press CTRL + SHIFT + ENTER.
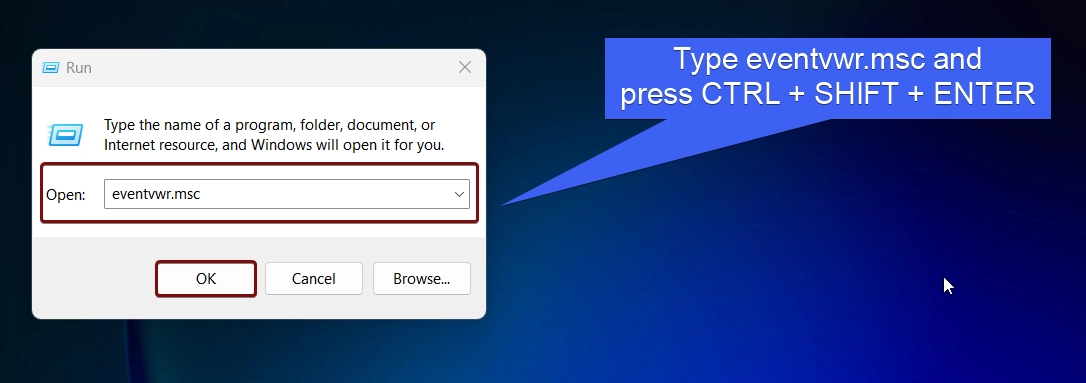
- UAC will confirm and then open Event Viewer with Administrative Privileges.
3. Use Task Manager to Create New Task to Run Event Viewer with Administrative Privileges
- Open Task Manager. You can either use the the key combination CTRL + ALT + Delete, or you can just right-click on the taskbar and click Task Manager.
- Under Processes, click on Run new task. Create New Task dialog will open now.
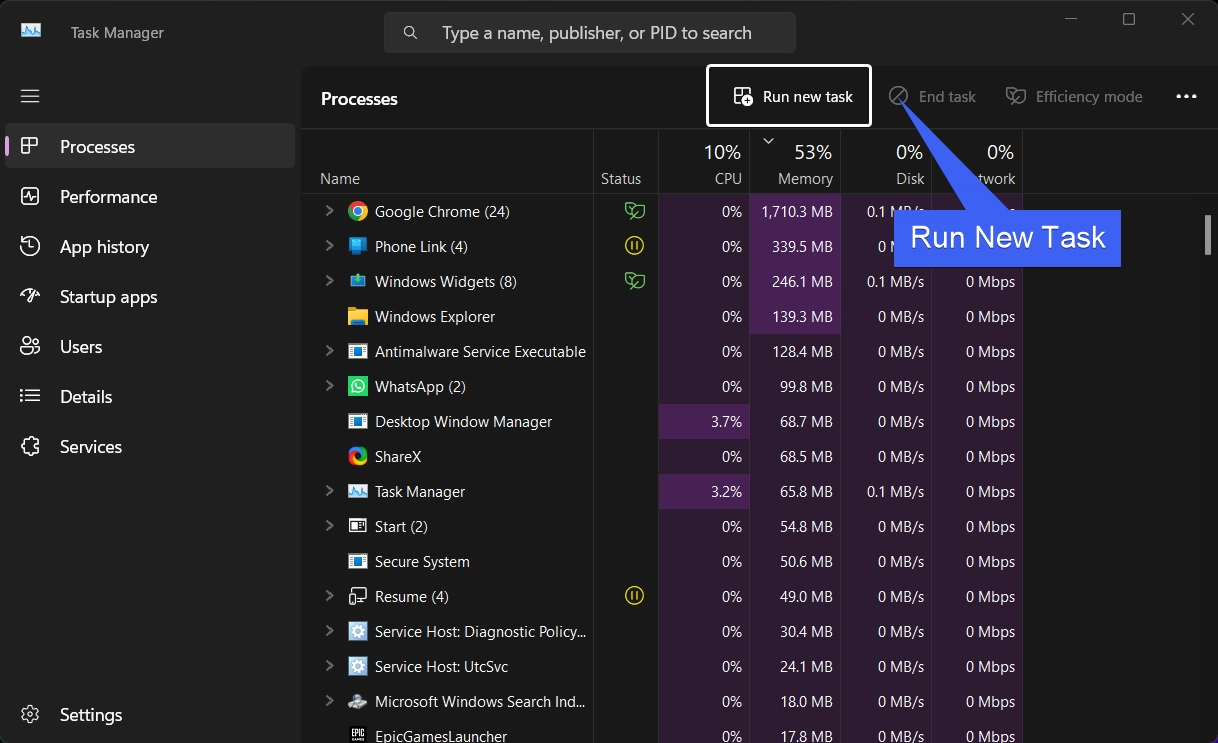
- Enter the command
eventvwr.mscand click on the checkbox “Create this task with administrative privileges“. Click OK.
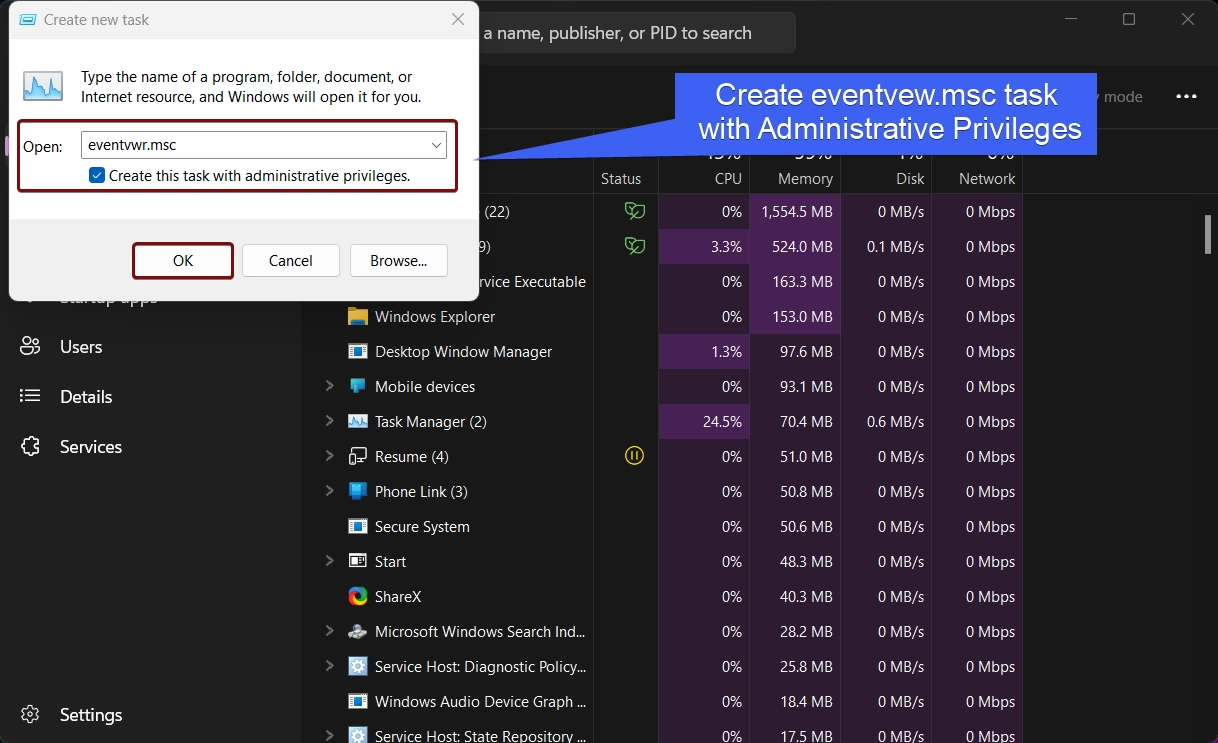
- User Account Control will prompt for your confirmation and open Event Viewer with Elevated Permissions.
4. Always open Event Viewer as Administrator by creating Dedicated Shortcut
This section is handy for users who are frequently using Event Viewer as Administrator on Windows 11.
- Right-click on the empty space of the Desktop and go to New > Shortcut.
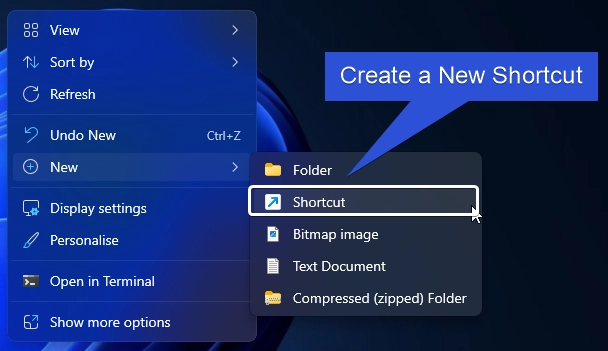
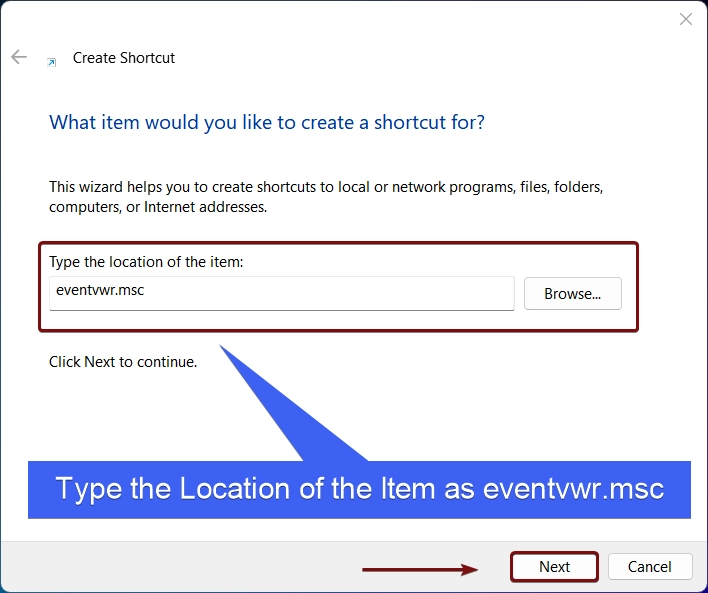
- Create Shortcut dialog box will open now. In Type the location of the item, enter the command
eventvwr.mscand then click Next.
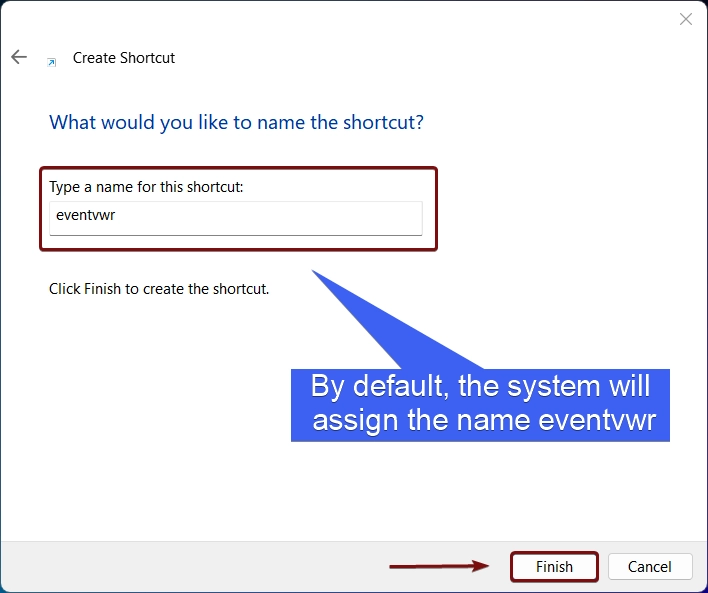
- By default, the system will assign the Shortcut Name. You can change it as per your convenience. Click Finish.
- Event Viewer Desktop Shortcut will now be created on the Desktop.

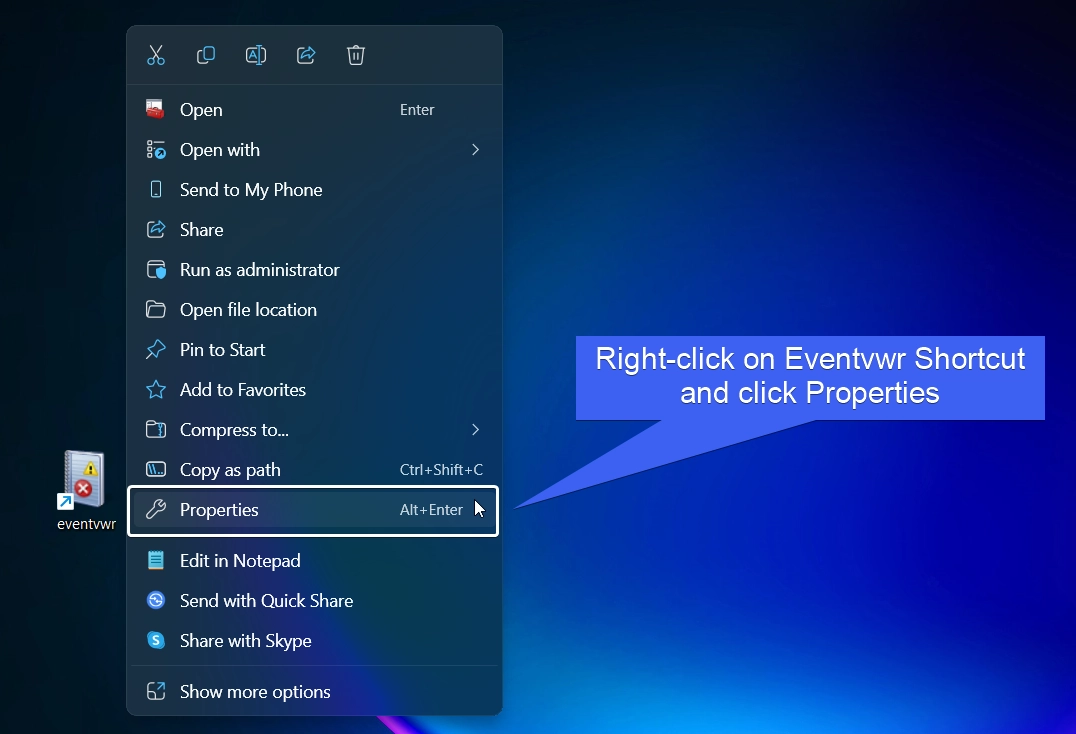
- Right-click on the Event Viewer shortcut and click Properties.
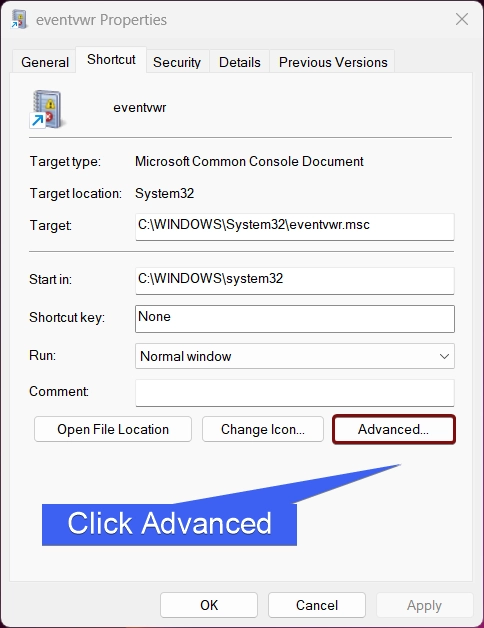
- Event Viewer Shortcut Properties will open now. Click Advanced.
- In Advanced Properties, enable the checkbox to Run as Administrator.
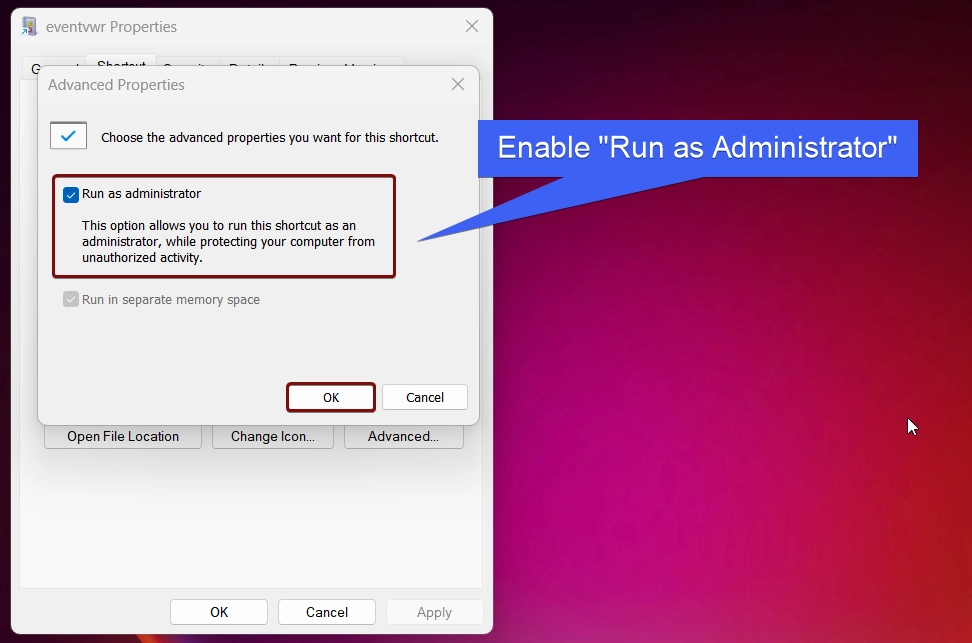
- The System will prompt your confirmation and open eventvwr.msc as administrator.
Be Cautious while Running an App as Administrator
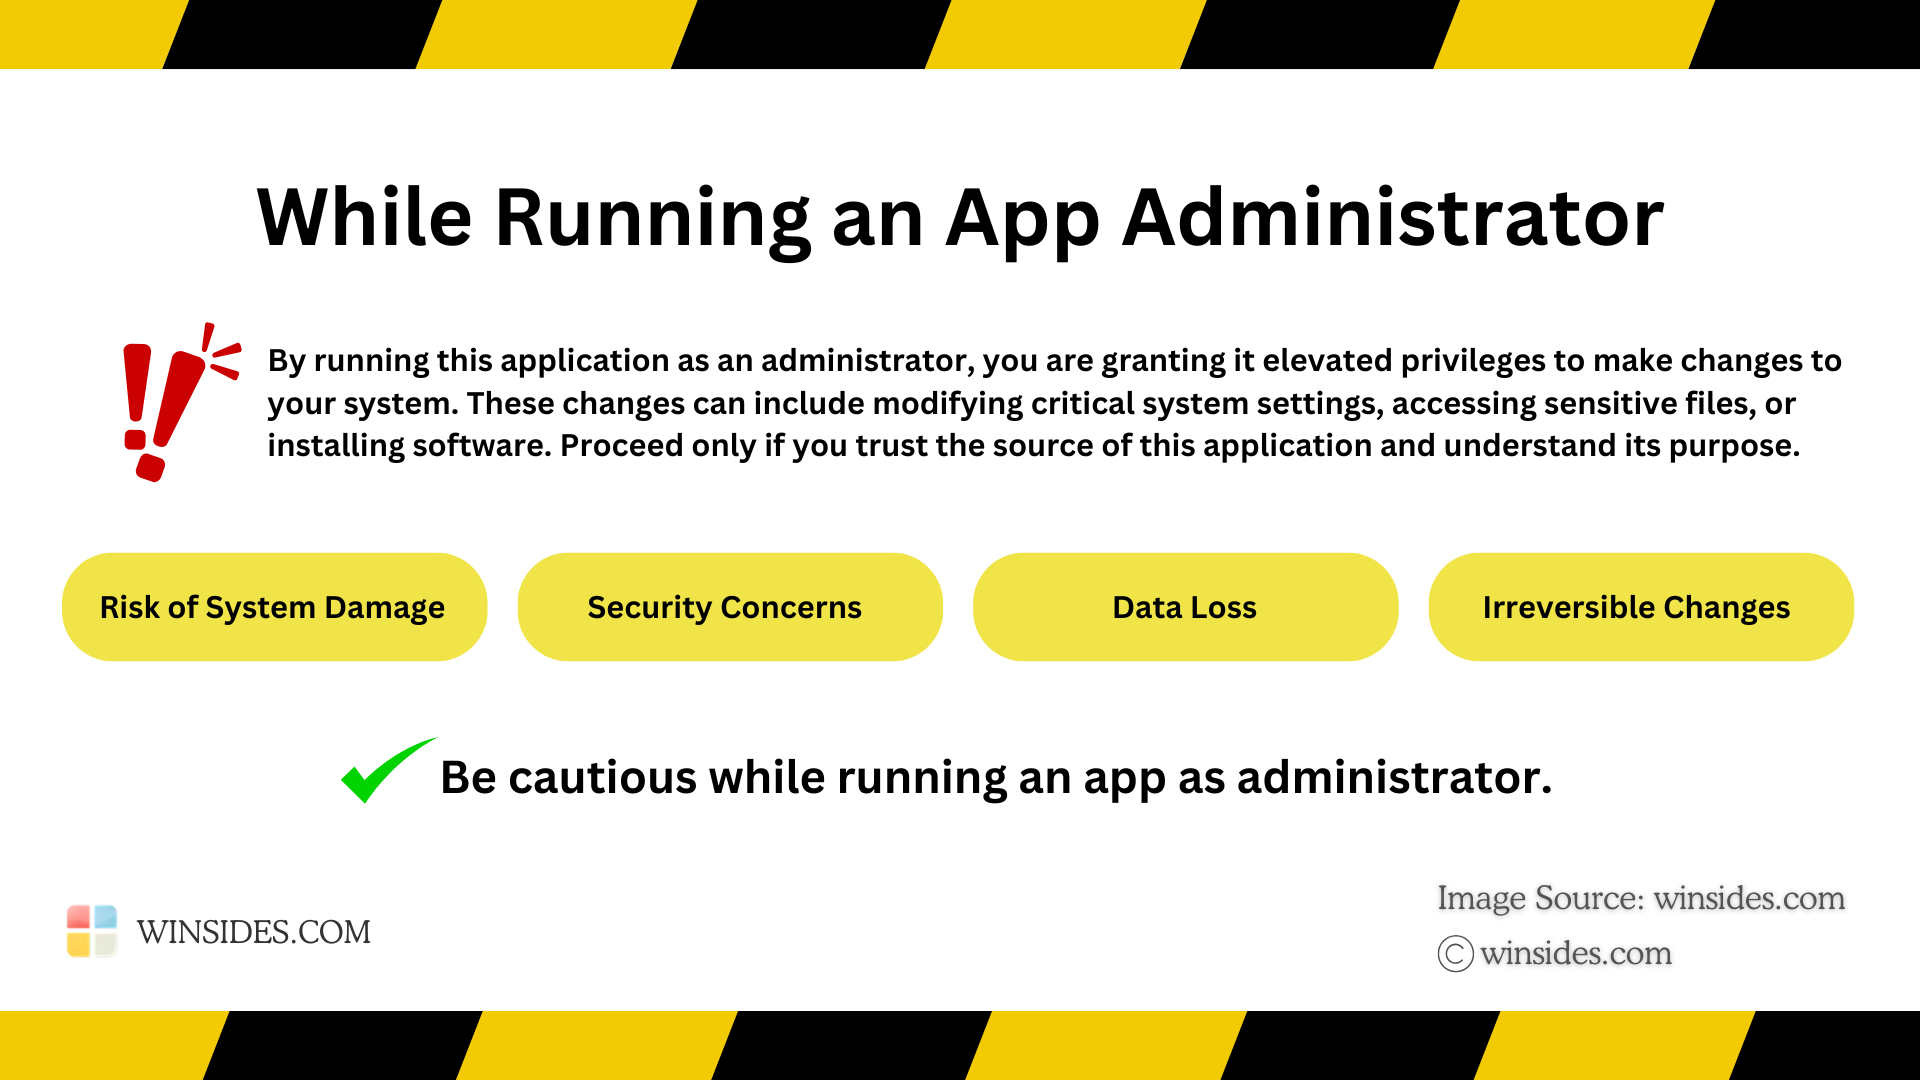
Running Event Viewer as Administrator on Windows 11 grants it elevated privileges, which can potentially bypass system security restrictions. Please proceed with care and only run trusted applications in this mode. At Winsides.com, we advise our users to use Administrator privileges only when absolutely necessary to perform tasks requiring elevated rights. Misuse of administrative privileges may lead to System Vulnerabilities, Data Loss, System Instability, Security Concerns, Irreversible Changes, etc.
Key Functions of Event Viewer on Windows 11
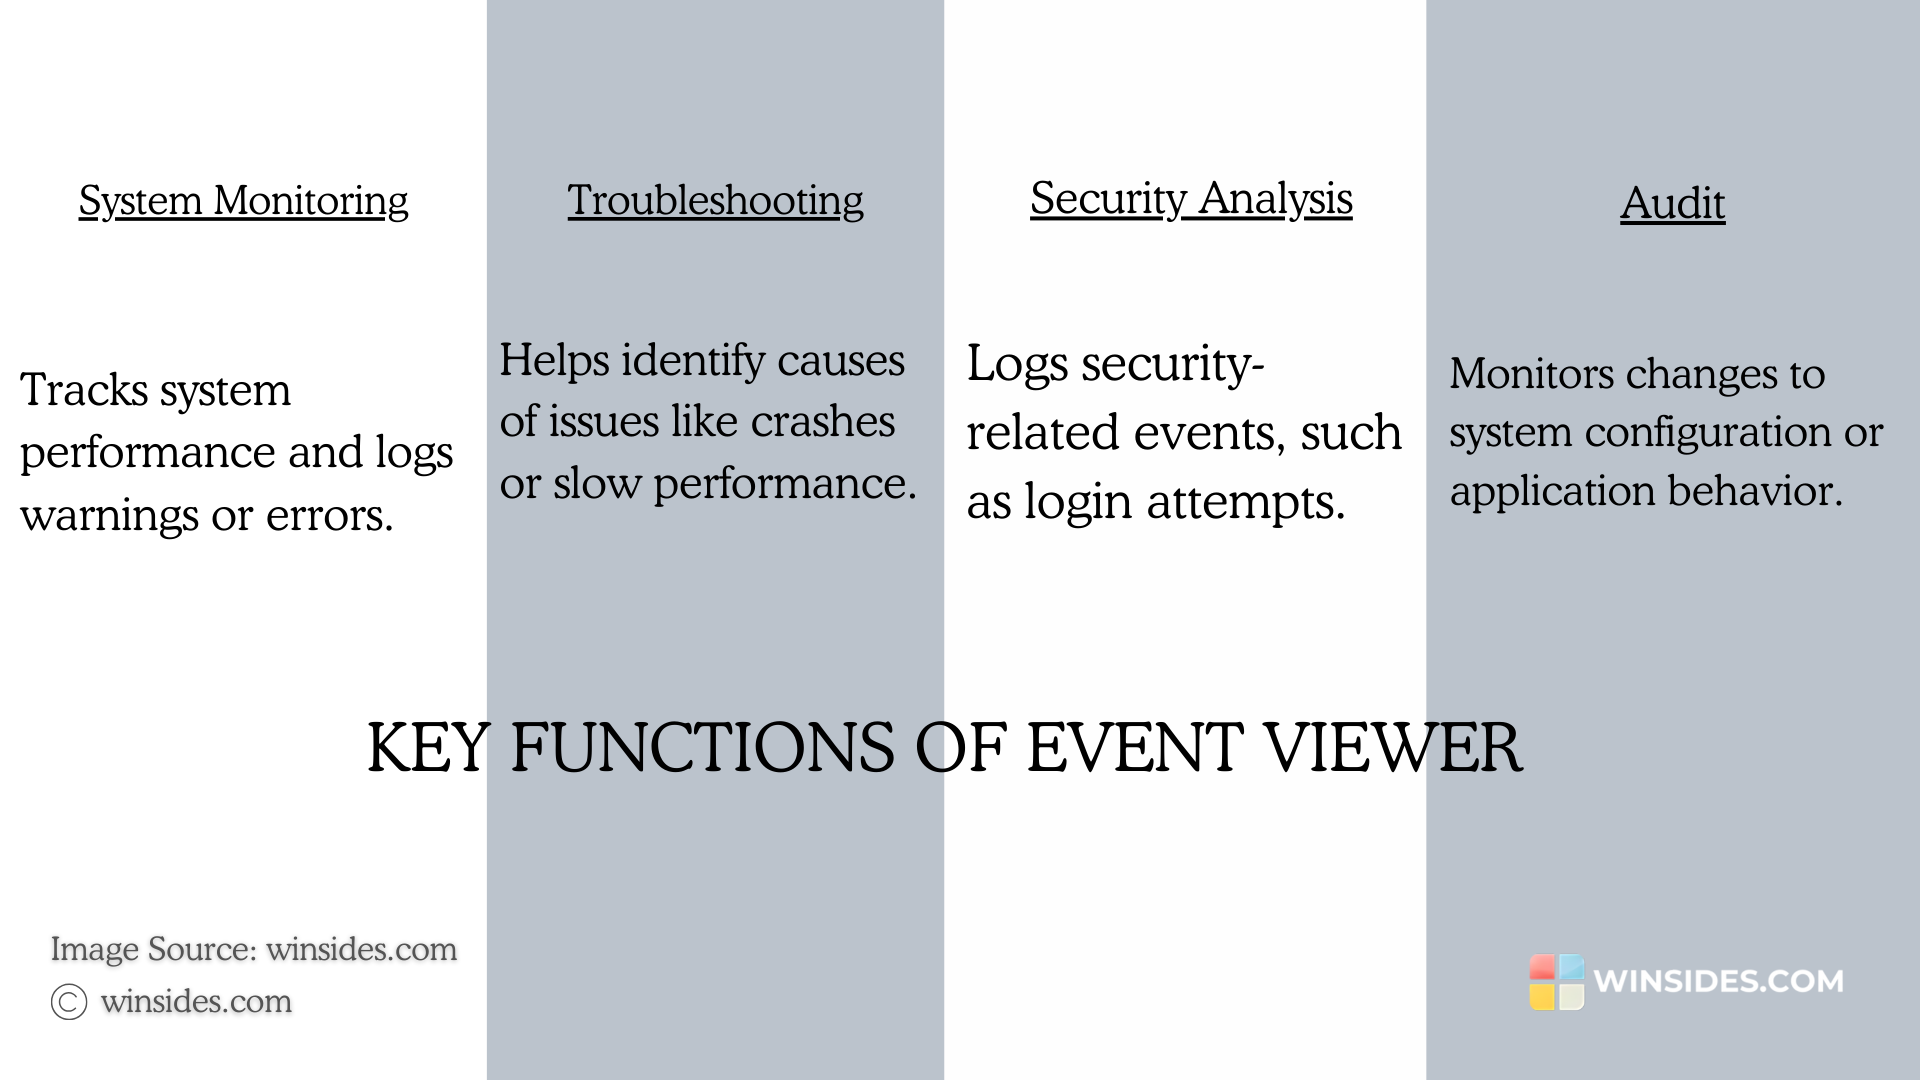
The Event Viewer in Windows is a built-in tool that allows users to view detailed logs about system, security, and application events. It’s primarily used to troubleshoot and analyze issues by monitoring logs such as system errors, warnings, or information about hardware and software operations.
Take Away:
The Event Viewer is a powerful tool that provides detailed insights into your Windows 11 system’s operations. You can Run event viewer as administrator unlocks advanced features, enabling you to troubleshoot and manage system logs more effectively. If you have any queries related to the above topic and then feel free to comment us below, I’ll will reply with my best effort to solve your issue. Find more informational tutorial on our Homepage: WinSides.com
 How to Check PC Specs without Logging into Windows 11?
 How to Enable HDR Video Streaming on Windows 11?
 How to Clean Temporary Files on Windows 11?
 How to Use ODBC on Windows 11?