Viewing the folder or file size is one of the most common tasks anyone performs when they need to check storage usage. Depending on the situation, there are different ways to view the size of a directory. While you may think there are only one or two methods to show folder sizes, there are actually more than 6 methods available. These methods vary, and some may involve using the Command Prompt, PowerShell, or even third-party apps. In this article, I will provide you with different methods to view folder or directory sizes in File Explorer on Windows 11, as well as other options.
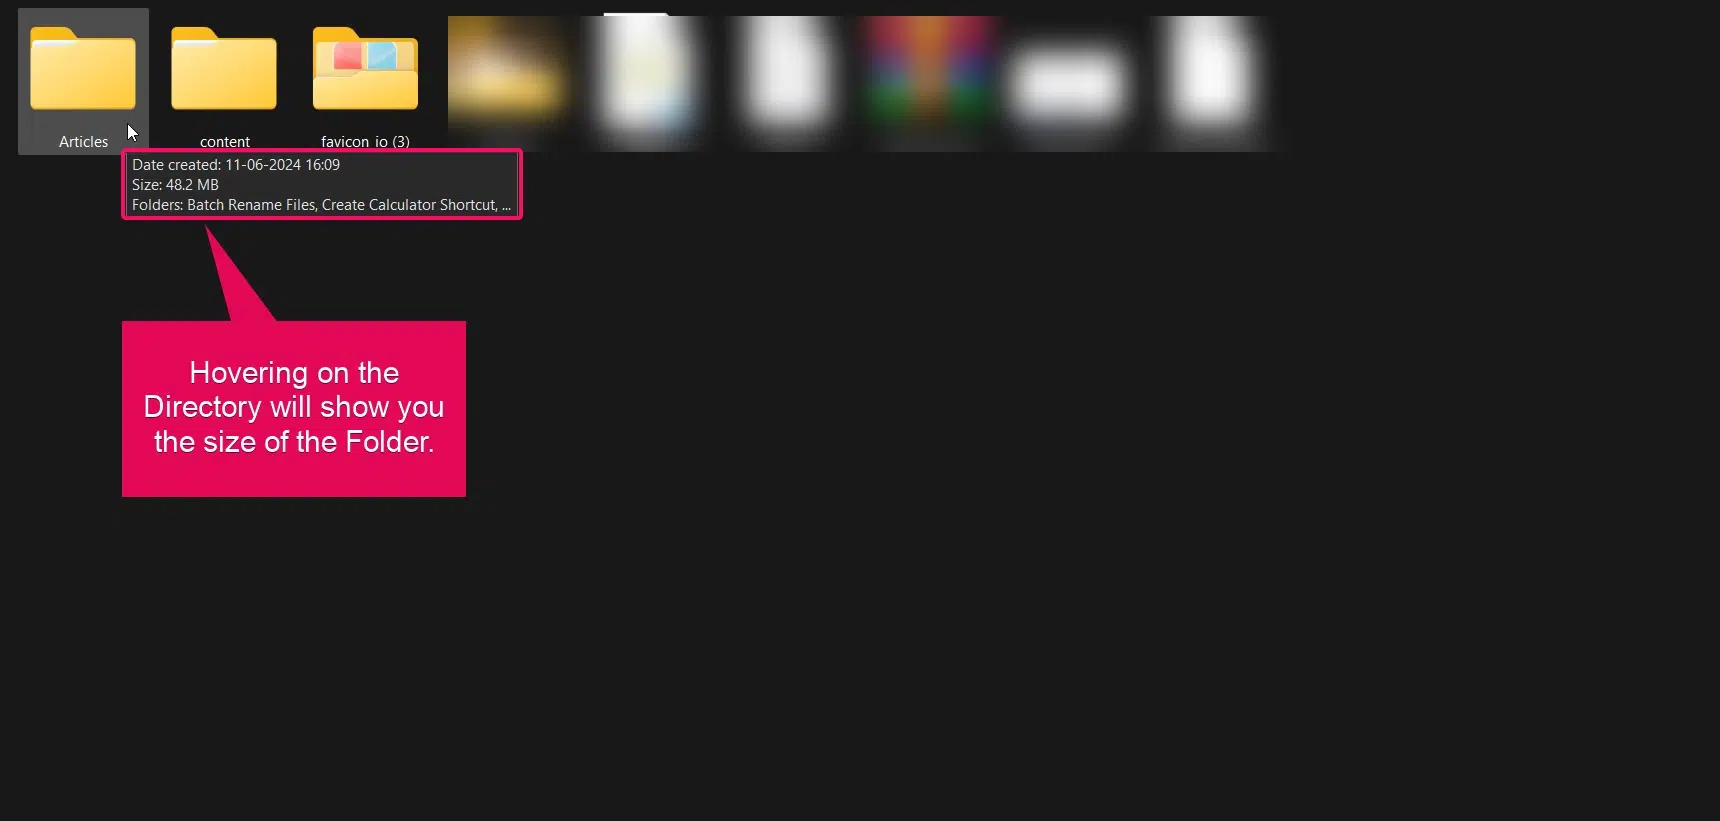
Method 1: Viewing Folder Size by Hovering on it:
This is the simplest way to view the folder size. All you have to do is hover over the folder, and the folder size will be displayed as a tooltip. Refer to the image below for a visual example.
Method 2: Finding Folder Size using File Explorer Properties Option:
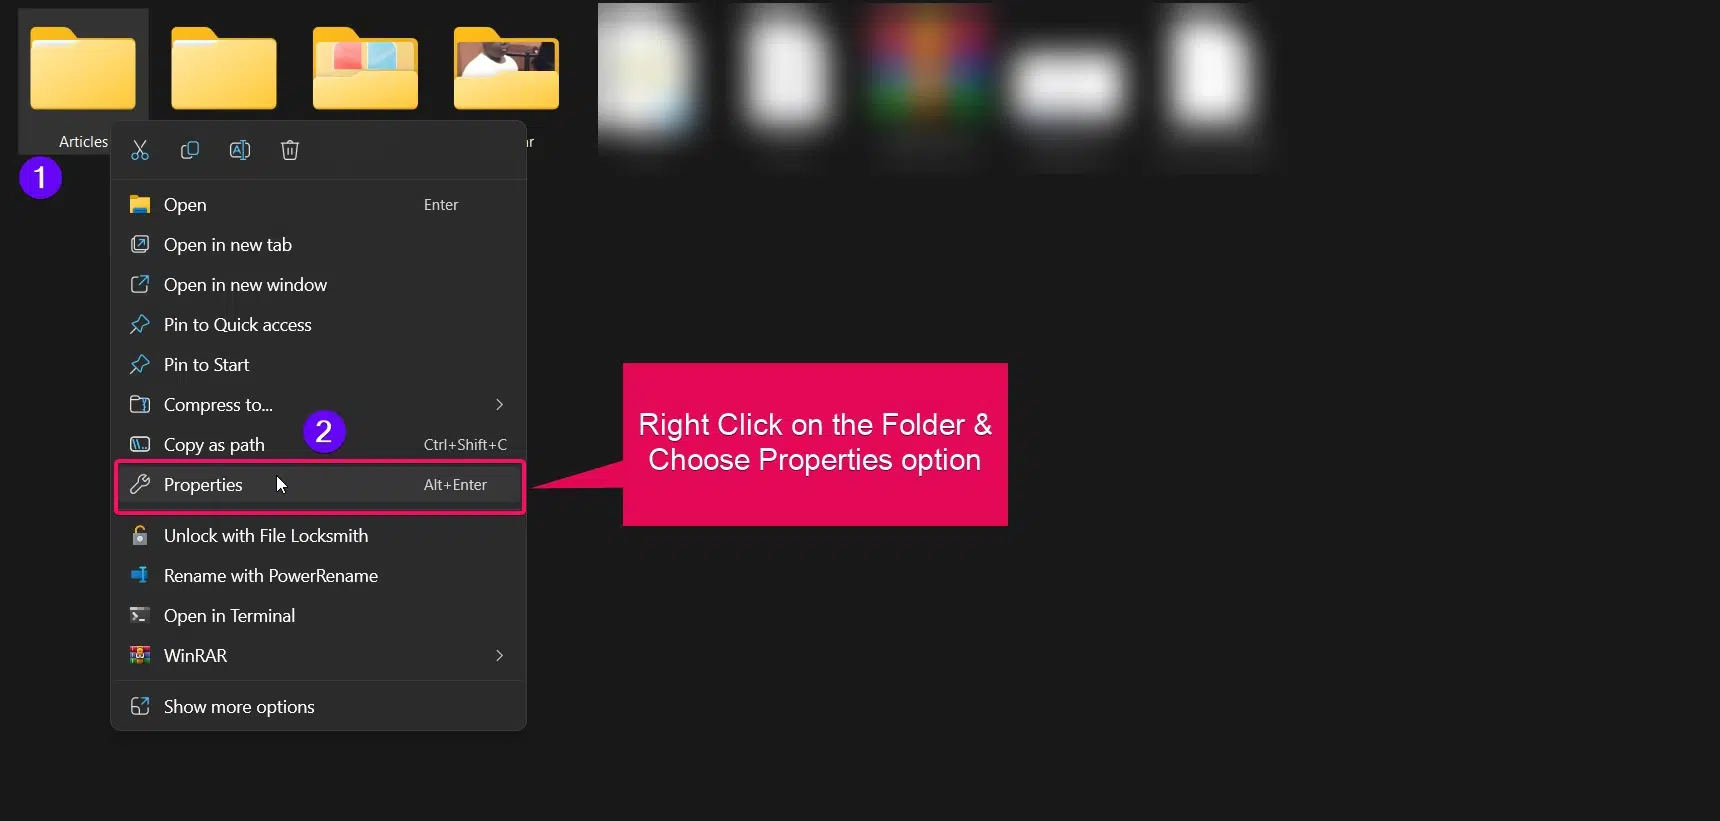
This is an another simple method, similar to the one above one. Instead of hovering, you just need to right click on the folder and choose Properties option to view the folder size. It will display the directory size under both “Size” and “Size on Disk” options. Alternative you can use the keyboard shortcut ALT + Enter button to launch the properties after choosing the folder/directories.
Step 1: Right Click -> Properties:
Step 2: Viewing Folder Size:
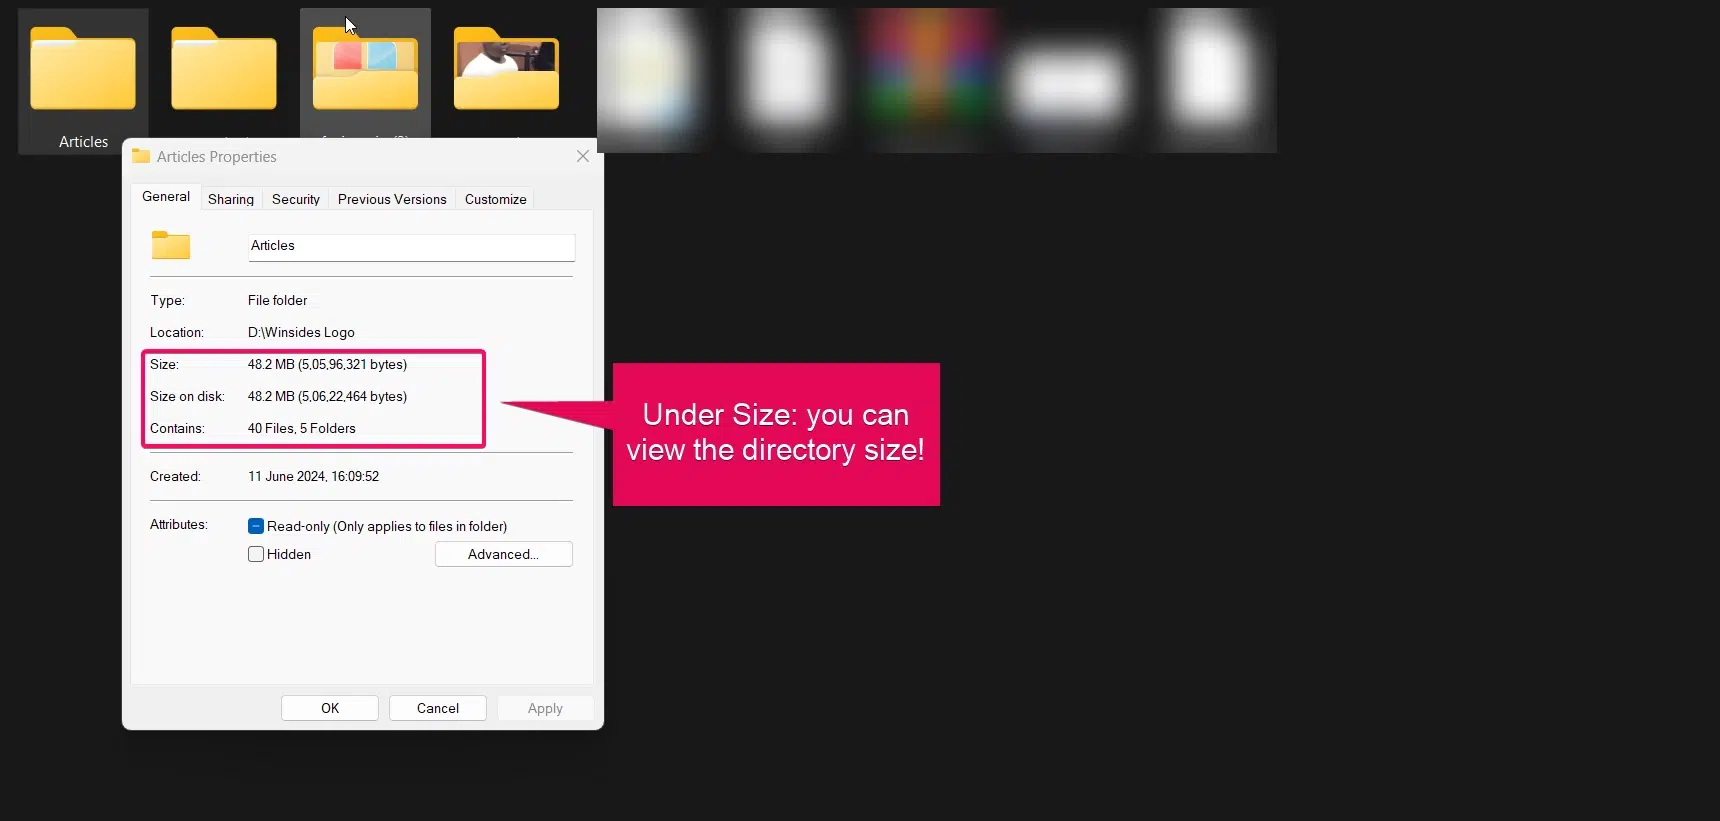
You can enlarge the image by clicking on the image above.
Method 3: Viewing Folder Size from Details in File Explorer:
This method is similar to the previous one and also relies on the Properties option. First, select the folder or directory, then in the right pane, you will see an option named Details. Click on it, and from there, you can access the Properties option. Once clicked, you can view the folder size in the Properties window.
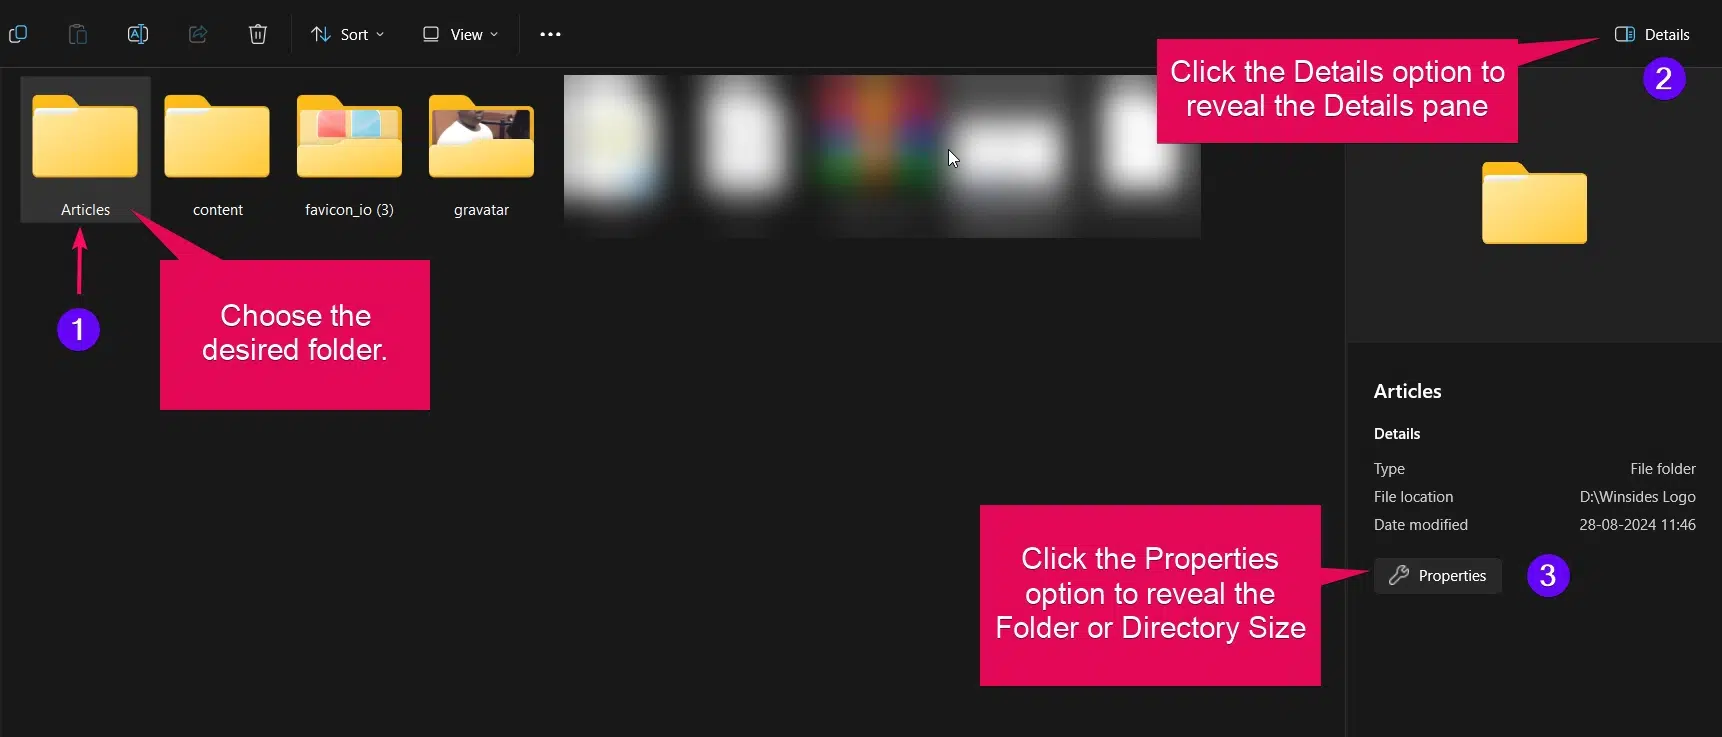
Now, you can view the size of the directory from the properties option.

Method 4: Listing Folder Size using PowerShell:
- Click the Start Menu and search for PowerShell
- You need to choose the “Run as Administrator” option to launch the powershell in admin mode.
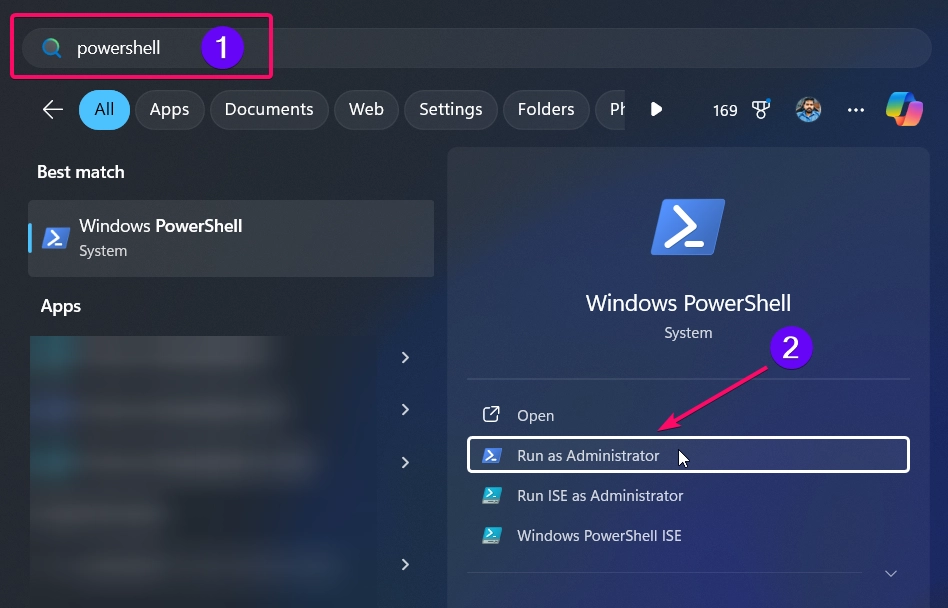
- Now, you need to run the command:
cd "C:\path\to\your\folder"
- Replace the above path with yours.

- Executing the command will change the directory to your input directory in the powershell.
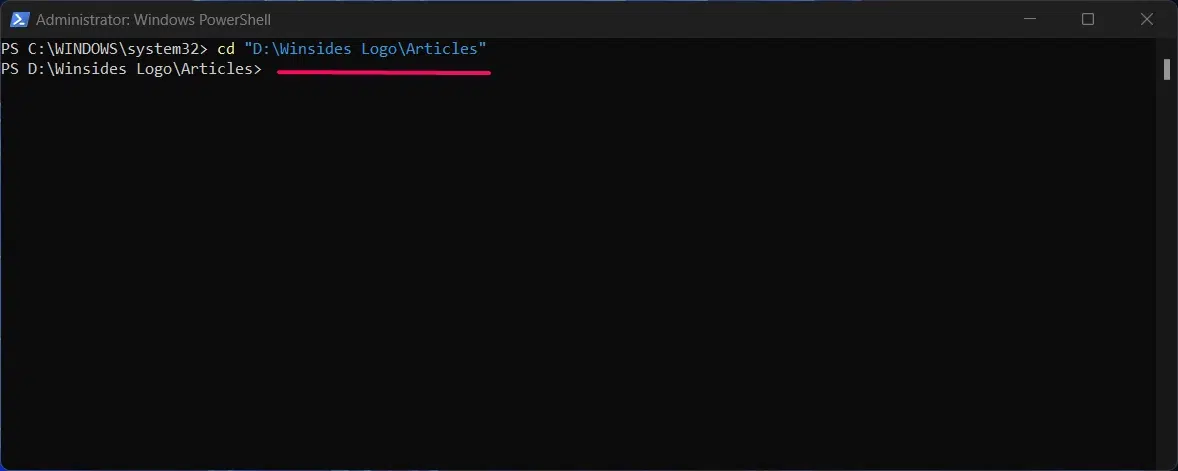
- Now, you need to execute the following command:
Get-ChildItem -Recurse | Measure-Object -Property Length -Sum
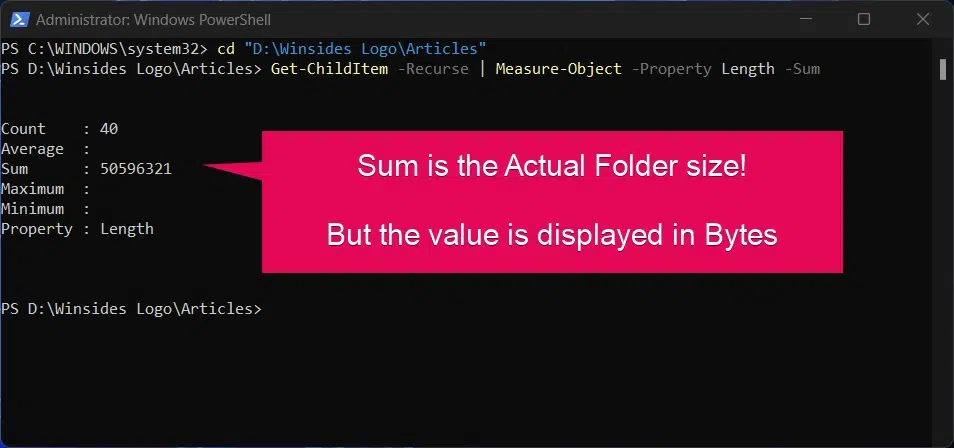
- The command will display the output in the Bytes value & You can use the external tools to convert your bytes to KB: https://www.gbmb.org/bytes-to-mb
- You can compare the values with those obtained from methods 1 to 3.
Method 5: Get Folder Size using Command Prompt:
- Click the Start Menu and search for Command Prompt
- You need to choose the “Run as Administrator” option to launch the command prompt in admin mode.
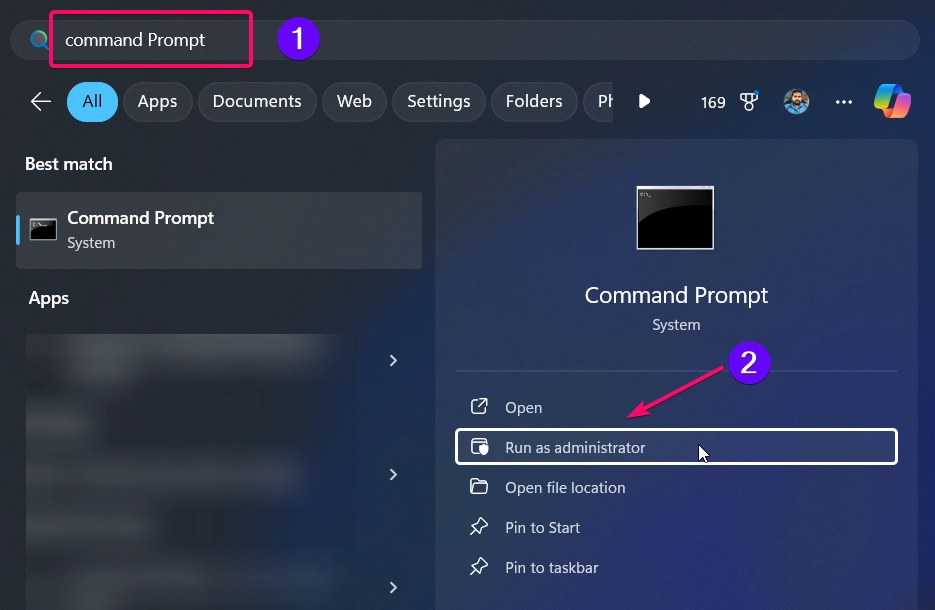
- Now, you need to enter the Drive ID, In my case, I’m going to change to D: drive.
D:
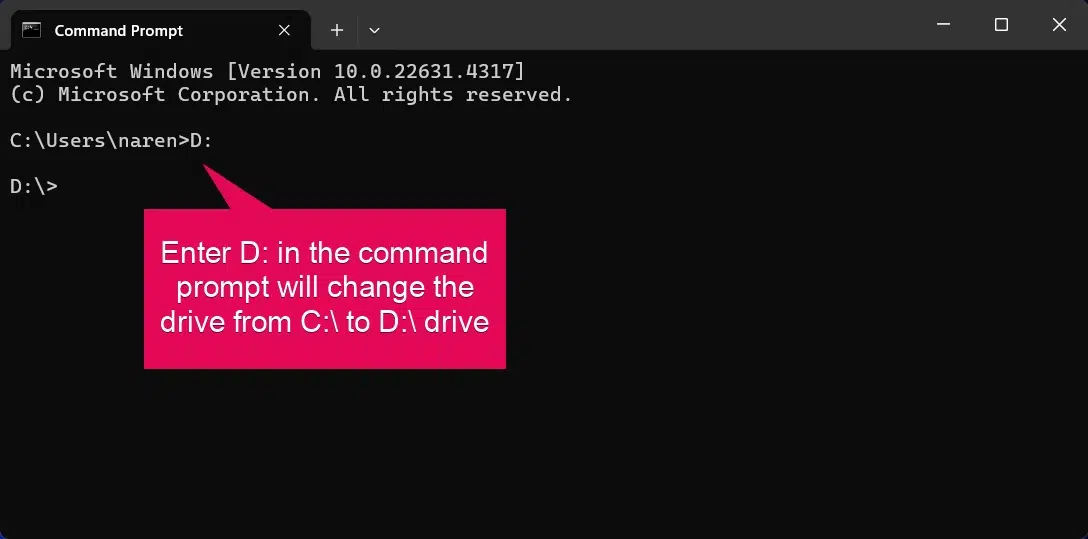
- Use the command now:
cd "path\to\your\folder"
- Replace the above path with yours.

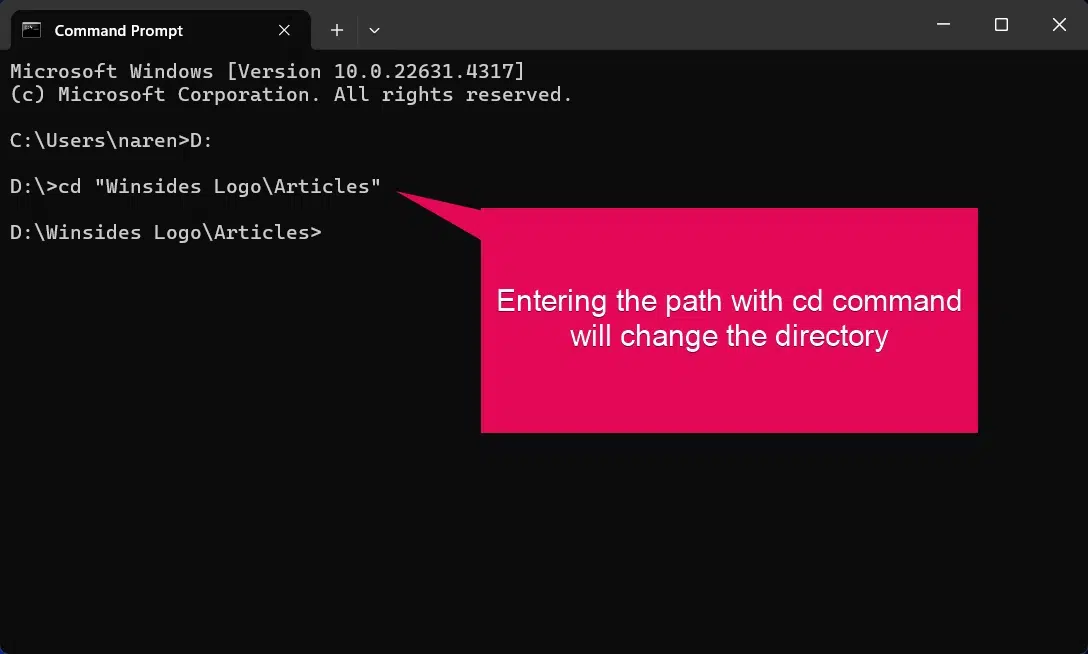
- Now, you need to execute the following command:
dir /s

- The command will display the output in the Bytes value & You can use the external tools to convert your bytes to KB: https://www.gbmb.org/bytes-to-mb
- You can compare the values with those obtained from methods 1 to 3.
Method 6: Using 3rd Party Apps:
If you’re interested in trying a unique way to view folder sizes, you’ll need to install third-party apps. I have listed some lightweight and effective apps that work well to display folder and directory sizes on Windows PCs.

WinDirStat is a popular and powerful disk usage statistics viewer. It provides a visual representation of the files and folders on your drive, making it easy to identify which files or directories are taking up the most space. The graphical treemap helps you understand disk space allocation by representing files as colored rectangles based on their size, allowing you to quickly spot large folders and files. It’s a lightweight tool that making it an excellent option for users who need to analyze disk usage. You can download the app here: https://windirstat.net/

TreeSize Free is another widely used tool to view folder sizes and disk usage. It provides a hierarchical view of your folder structure, showing sizes in a clear and readable format. You can quickly drill down into subfolders to see where storage is being used the most. It’s highly efficient for scanning drives and directories, even for larger storage volumes. TreeSize Free also allows you to sort and filter results. You can download the app here: https://www.jam-software.com/treesize_free
Conclusion:
In conclusion, checking folder or file sizes is an essential task for managing storage on your Windows 11 PC. With the methods mentioned above, from using File Explorer to leveraging Command Prompt, PowerShell, or third-party apps, you now have a variety of tools at your disposal to easily view directory sizes. Whether you prefer a quick hover or more detailed analyses with apps like TreeSize Free or WinDirStat, these methods ensure you can efficiently manage your storage. Find more interesting tutorials on WinSides.com
Frequently Asked Question by Users?
The below are the commonly asked questions by the users related to this topic.
How can I view the folder size in Windows 11?
To view the folder size in Windows 11, you can use the Properties option by right-clicking on the folder and selecting Properties. The size will be displayed under both “Size” and “Size on Disk”.
Why doesn’t Windows 11 show folder sizes in File Explorer?
Windows 11 File Explorer doesn’t natively display folder sizes in the Size column. You can either hover over the folder, check its Properties, or use third-party apps like WinDirStat or TreeSize Free to view detailed folder sizes.
How can I see the size of all folders in a directory in Windows 11?
To view the size of all folders in a directory, you can use tools like TreeSize Free or WinDirStat, which scan directories and provide a detailed breakdown of folder sizes.
 How to use Microsoft iSCSI Initiator on Windows 11?
 How to Enable Game Mode on Windows 11?
 How to Check PC Specs without Logging into Windows 11?
 How to Enable HDR Video Streaming on Windows 11?