Internet Information Services (IIS) is a powerful web server developed by Microsoft for hosting websites, services, and applications. It is commonly used by developers and system administrators to test, host, or manage web based content. However, running IIS with standard permissions may limit configure settings, manage applications, or access certain features. To perform advanced tasks, you need to run IIS as administrator on Windows 11.
In this tutorial, I will explain the simple & effective steps to run IIS with elevated permissions. Whether you are a developer or someone managing a local web server, these methods will help you run IIS as administrator.
Prerequisites
Before getting into the article, we will have to make sure that the Internet Information Services, and IIS Management Console is enabled as they are mandatory for running IIS as Administrator. Additionally, you can also enable optional features IIS Management Scripts and Tools, and IIS Management Service. These features are essential for the active functioning of the IIS Servers.
Fix Windows cannot find inetmgr error
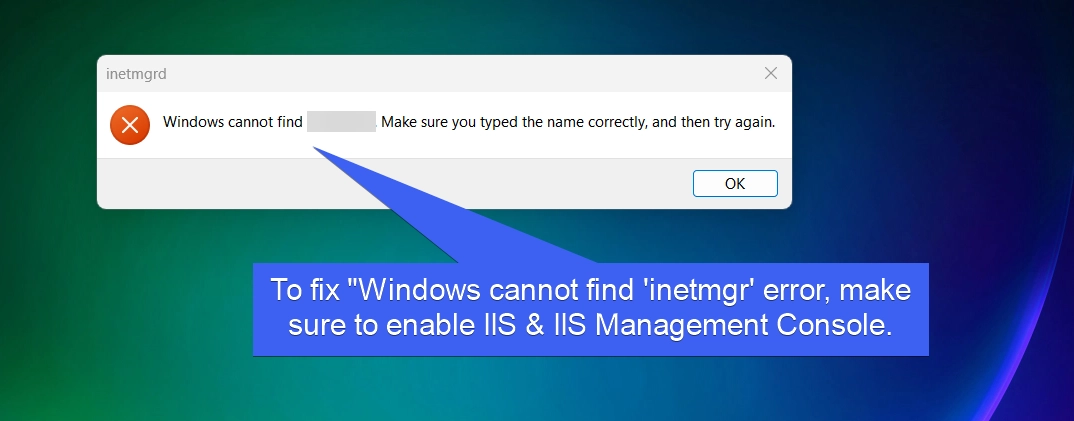
If you are encountering the error “Windows cannot find ‘intemgr’. Make sure you typed the name correctly, and try again“, then it is because IIS and IIS Management Console are not enabled. To fix this issue, you can enable these features via Windows Features dialog.
Different Methods to run Internet Information Services Manager as Administrator on Windows 11
Windows 11 offers several methods to use this feature with elevated permissions. The following are the methods.
- Running IIS as Administrator using the Start Menu.
- Use Run Command and run IIS as Administrator
- Create New Task to open IIS Manager with Administrative Privileges
- Always open IIS as Administrator by creating a dedicated shortcut.
This article covers all the above methods in detail. However, you can choose your convenient method.
IMPORTANT: Running applications as an administrator grants elevated privileges that can significantly affect your system. Please use caution when doing so, as it can lead to Unintended System Modifications, Security Vulnerabilities, Accidental Data Loss, Unauthorized Access, Irreversible Changes, etc.
1. How to Run IIS as Administrator on Windows 11 using the Start menu?
This is a simple and straight-forward method. Assuming that the above mentioned services (IIS & IIS Management Console) are enabled, let’s get started.
- Open the Start menu and search for inetmgr. Internet Information Services Manager will show up.
- Right-click on the App and click “Run as Administrator“.
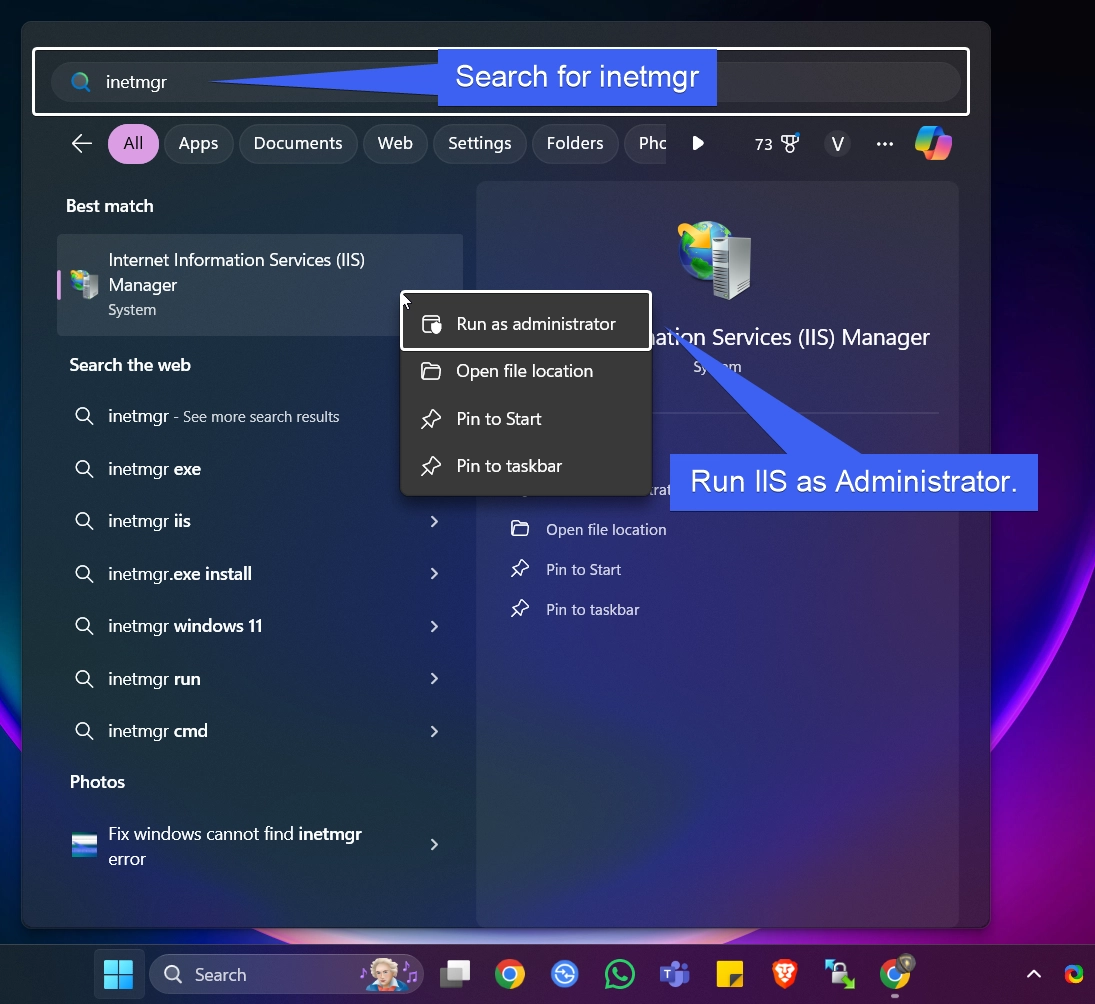
- User Account Control will prompt your confirmation to run this app as administrator on Windows 11. Click Yes if you would like to proceed forward .
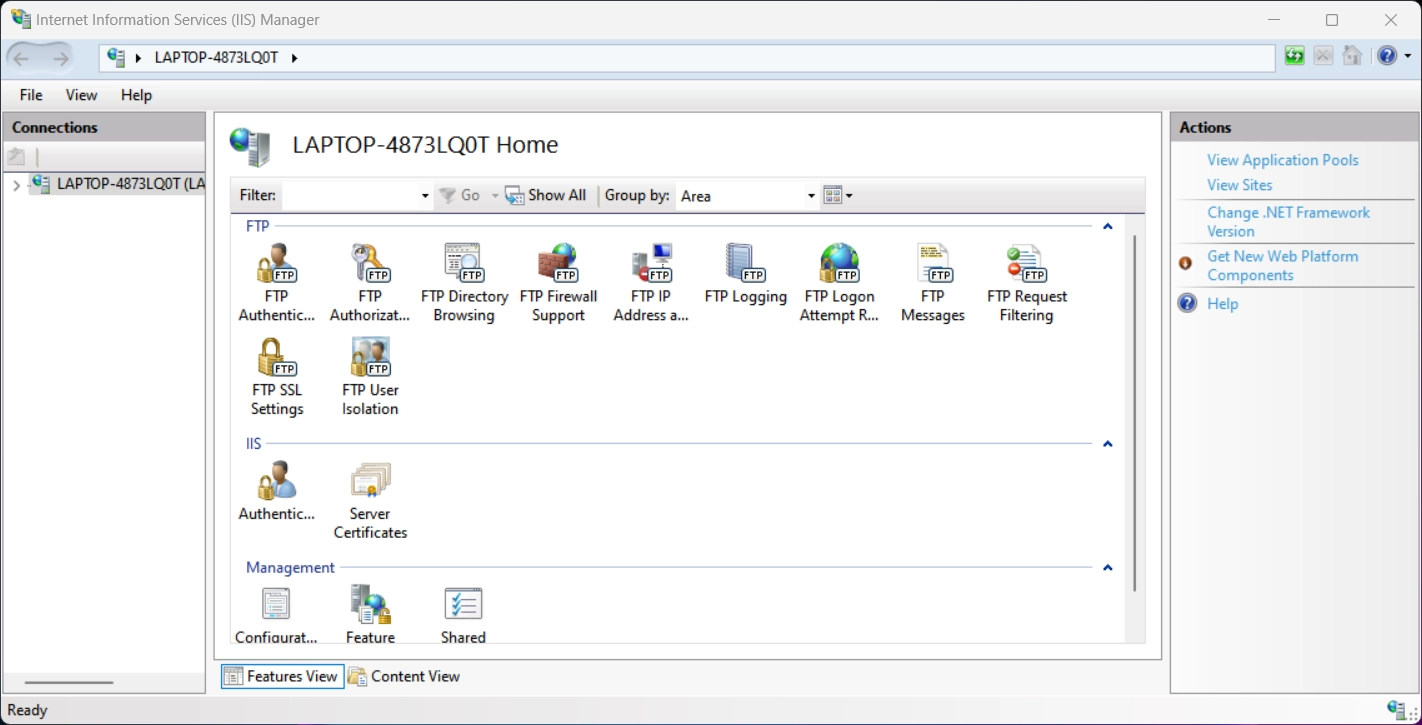
- Now, the system will open inetmgr as administrator.
2. Use Run Command to open IIS with Administrative Privileges
In this section, we will use Run command box to open Internet Information Services with Elevated Privileges. The following are the steps.
- Go to the Run Command. You can use the Key combination WinKey + R.
- Type the following command
inetmgrand press CTRL + SHIFT + ENTER.
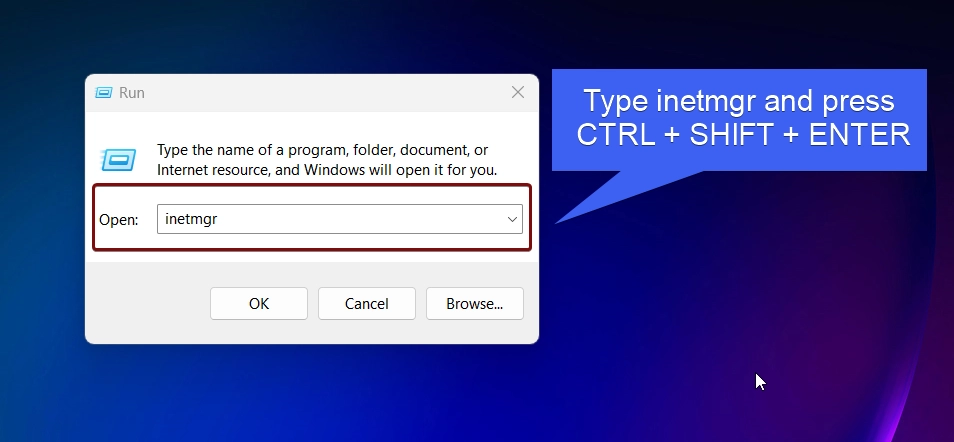
- UAC will prompt your confirmation and then open inetmgr with administrative permissions.
3. Create New Task to Open IIS with Administrative Privileges
- Open Task Manager. If you are using Windows 11, you can either use the the key combo CTRL + ALT + Delete, or you can just right-click on the taskbar and click Task Manager.
- Under Processes, click on Run new task. Create New Task dialog will open now.
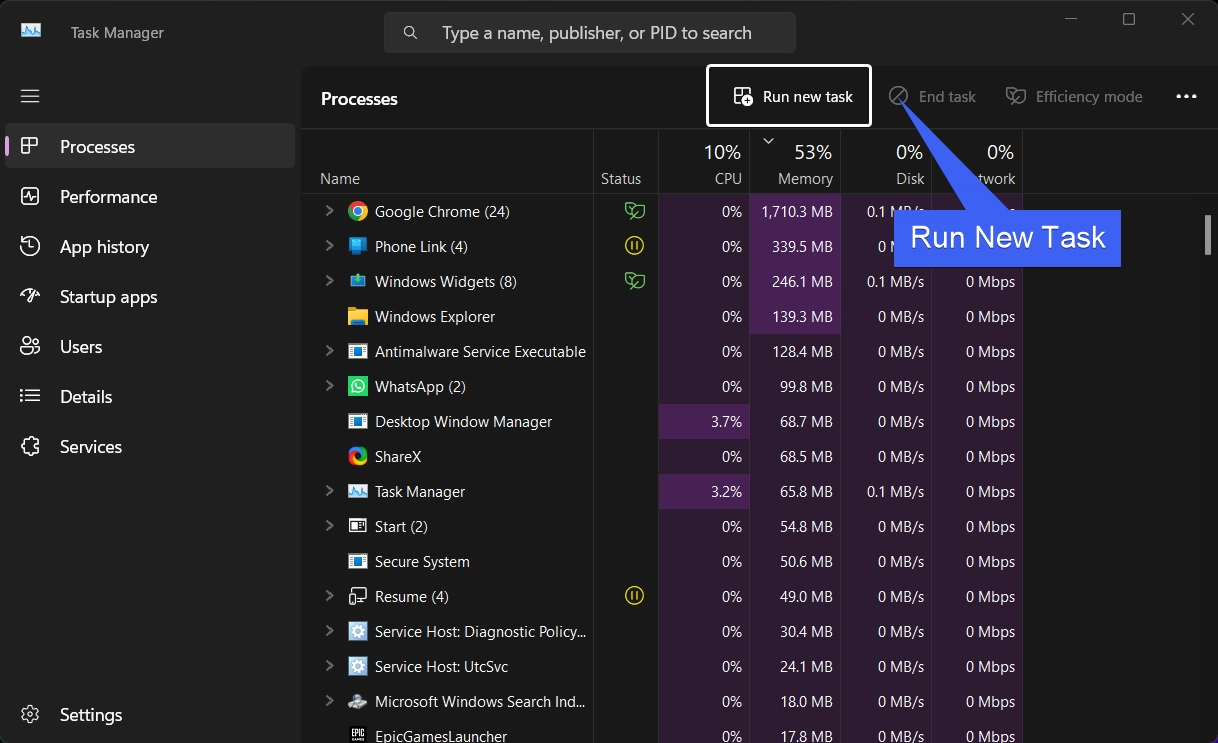
- Type the following command
inetmgrand click on the checkbox “Create this task with administrative privileges“.
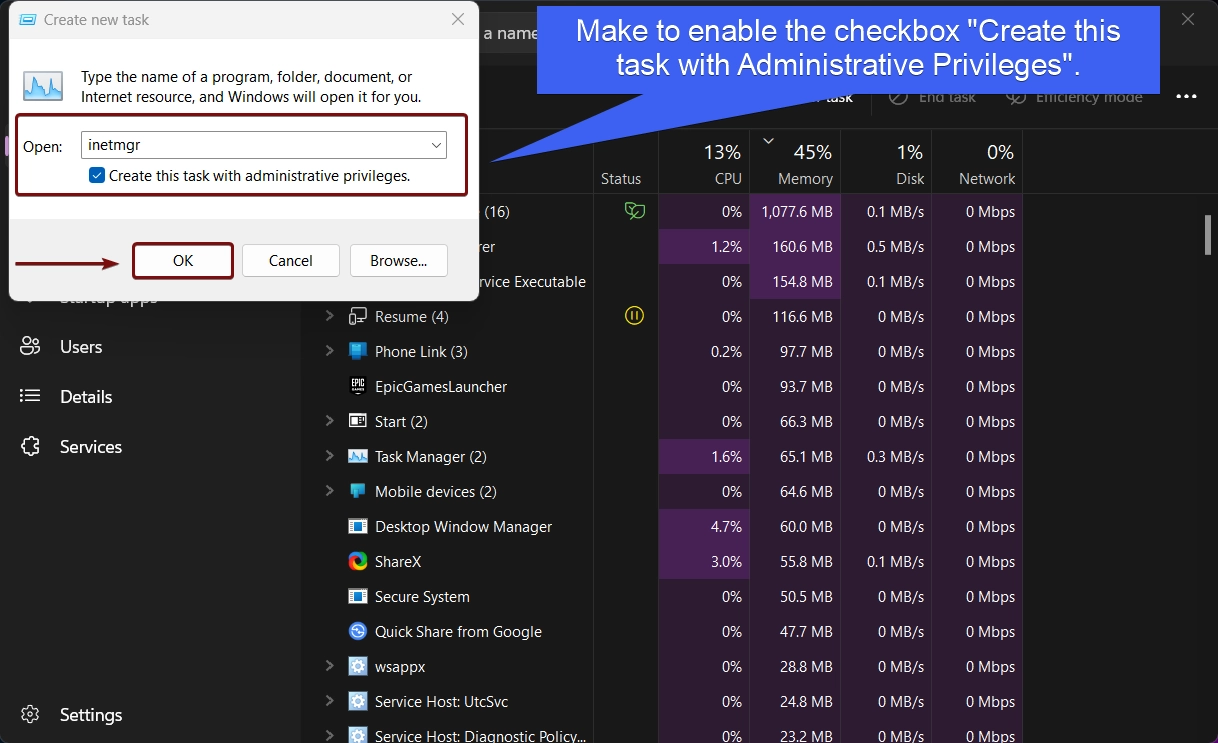
- The system will now open IIS as Administrator.
4. Always Open IIS as Administrator on Windows 11 using Desktop Shortcut
If you using Internet Information Services as Administrator frequently, then a desktop shortcut with Administrator privileges can be really useful. You can always open IIS as Administrator.
- Right-click on the Desktop and click New -> Shortcut.
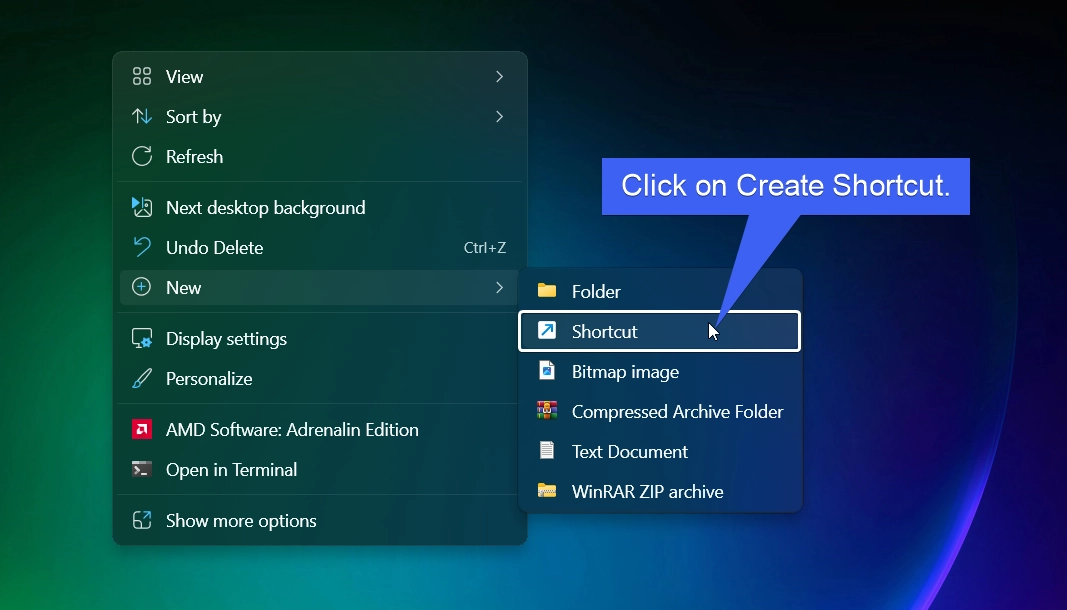
- Now, the Create Shortcut dialog box will open now. In “Type the location of the item“, enter
C:\Windows\System32\inetsrv\InetMgr.exe. Click Next.
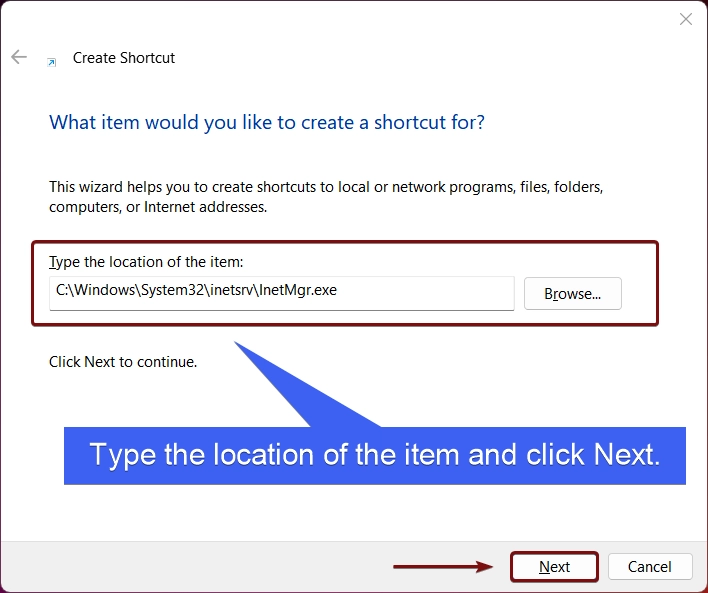
- The system will assign the name of the shortcut as InetMgr. You can either change the name or leave the field as it is. Click Finish.
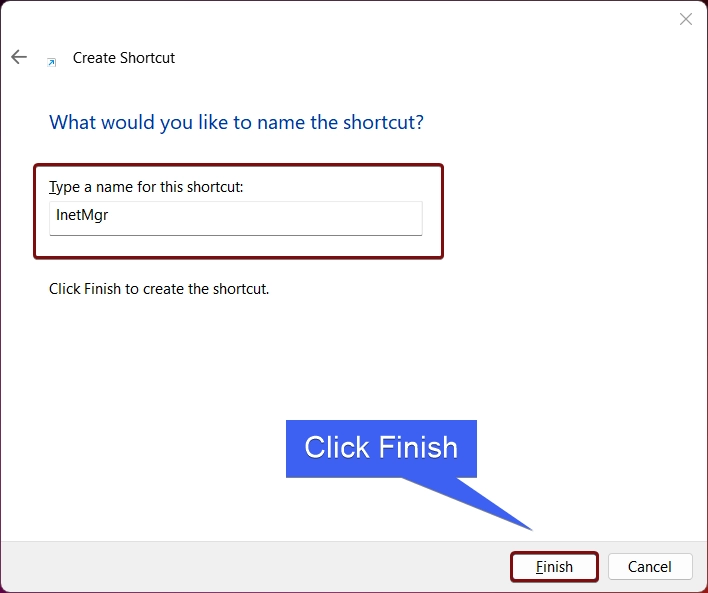
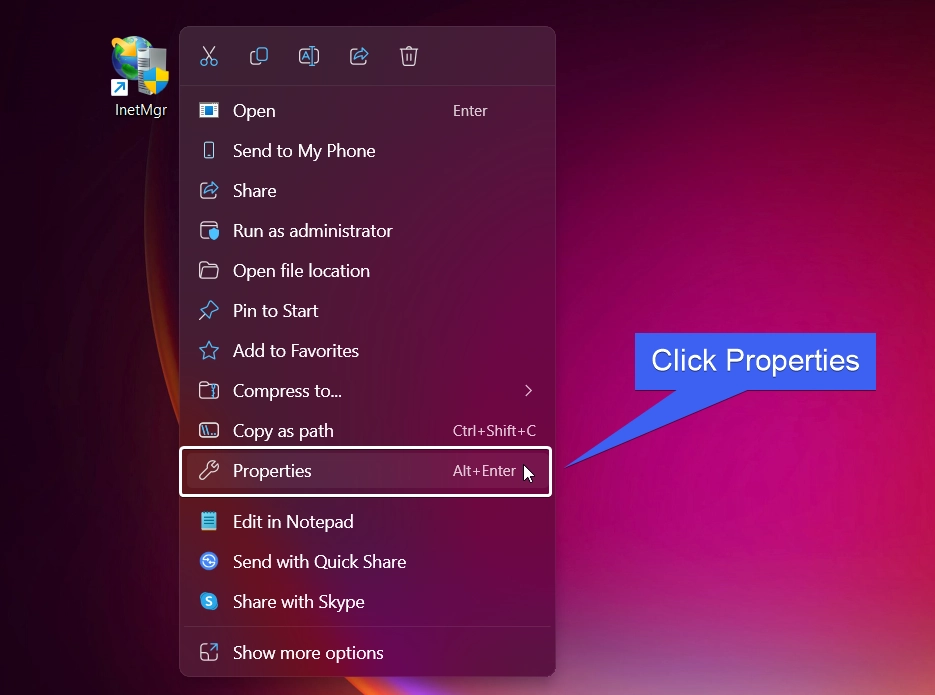
- InetMgr shortcut will now be created.

- Right-click on the shortcut and click Properties.
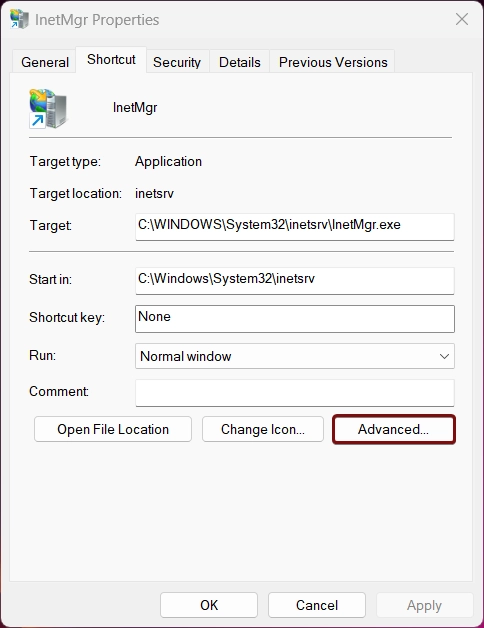
- InetMgr Properties will open. Click Advanced.
- InetMgr Advanced Properties will pop up now.
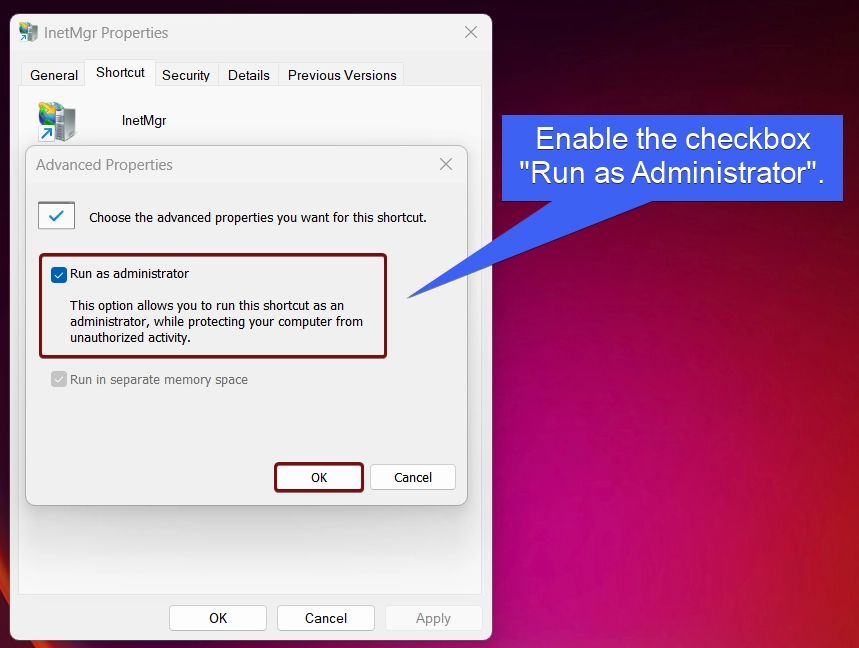
- That’s it. InetMgr will open with Administrative Privileges.
Be Cautious while running Apps with Administrative Privileges
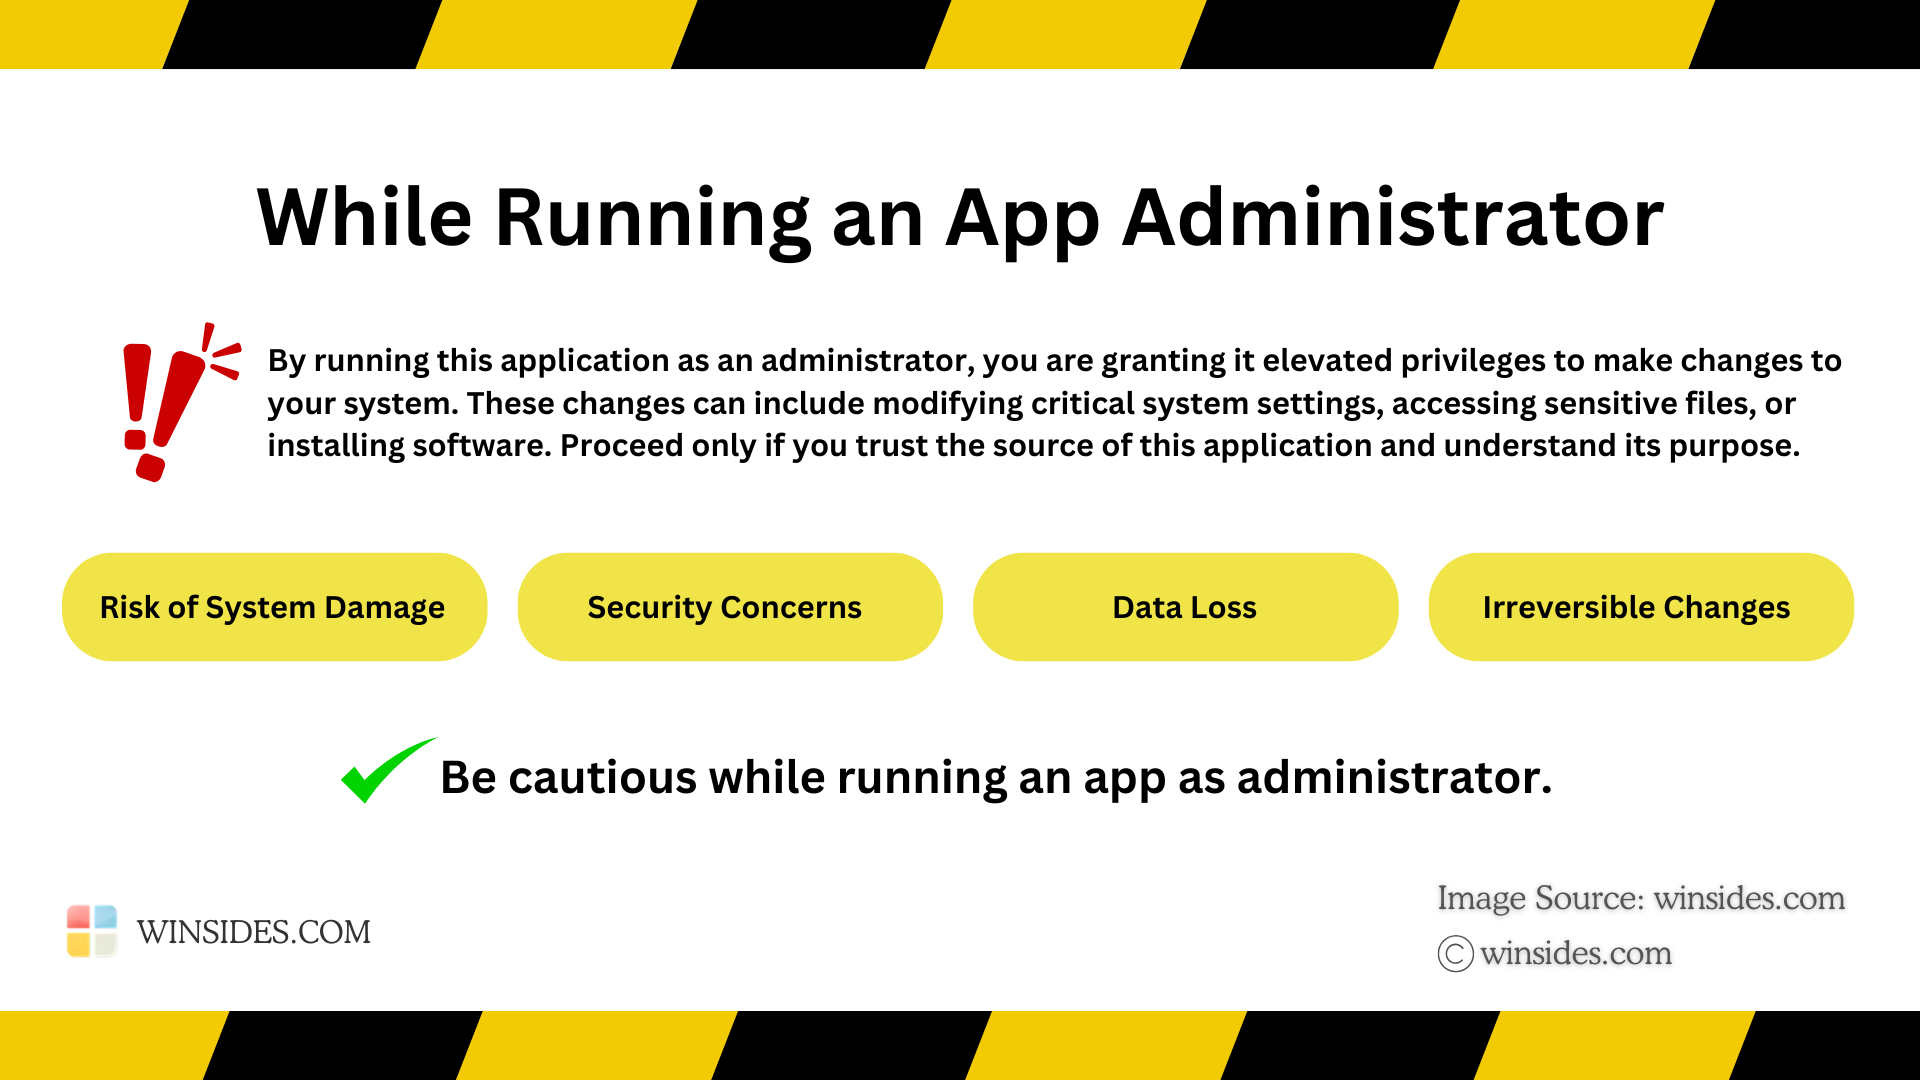
Running Internet Information Services (InetMgr) as Administrator on Windows 11 grants it elevated privileges, which can potentially bypass system security restrictions. Please proceed with care and only run trusted applications in this mode. At Winsides.com, we advise our users to use Administrator privileges only when absolutely necessary to perform tasks requiring elevated rights. Misuse of administrative privileges may lead to System Vulnerabilities, Data Loss, System Instability, Security Concerns, etc
Advantages of running IIS as Administrator on Windows 11
Running Internet Information Services as an Administrator on Windows 11 can offer several advantages, particularly for advanced management and configuration tasks that require elevated privileges such as
- Access to System Level Configurations and modify protected files, modifying Global IIS Settings, etc.
- Manage Application Pools to configure advanced settings like CPU Throttling, Identity, etc.
- Use Elevated Management Features like Binding to Reserved Ports, Advanced Module Configuration, etc
- Manage Server Extensions such as ASP.NET, CGI, etc
- Remote Management Services
- Security and Permissions Management
Conclusion:
Running IIS as an administrator on Windows 11 is essential for accessing advanced features, managing web applications, and configuring server settings. Totally, I’ve mentioned more than 3 methods to run iis as administrator. I will recommend you the method 4 for permanently accessing the IIS with elevated rights! If you have any queries related to the above topic and then kindly comment us below. Find more interesting tutorials on WinSides.com
 How to Check PC Specs without Logging into Windows 11?
 How to Enable HDR Video Streaming on Windows 11?
 How to Clean Temporary Files on Windows 11?
 How to Use ODBC on Windows 11?