Find Your Windows 11 is 64-bit, 32-bit, or ARM using 8 Top Methods!
How to find your Windows 11 device is manufactured with 32-bit or 64-bit or ARM Architecture?
Is there any need to find the device architecture in Windows 11? Yes, there is a need to get to know about your device’s architecture type, there are three primary chip architectures available: 32-bit, 64-bit AMD, and 64-bit ARM. Most modern applications are developed for 64-bit systems, but Windows 11 still supports 32-bit devices.
Key Differences Between 32-bit and 64-bit Systems
The main difference between 32-bit and 64-bit chips is compatibility:
- 32-bit devices: only support 32-bit operating systems and software.
- 64-bit devices: however, they are compatible with both 32-bit and 64-bit operating systems and software.
Another crucial distinction is in RAM support:
- 32-bit devices can handle up to 4GB of RAM.
- 64-bit devices support significantly more RAM, with some models accommodating up to 16GB or more which allows you for enhanced hardware resource management and performance.
Why It Matters
Understanding your device’s architecture is essential to fully utilize its performance and ensure compatibility with the software you want to run. In this tutorial, I’ll walk you through 8 solid methods to find out whether your Windows 11 device is 32-bit, 64-bit AMD, or ARM.
Method 1: Check Windows 11 bit Version using Settings App:
- First, you need to use the keyboard shortcut to open the Settings app in Windows 11
- Winkey + I
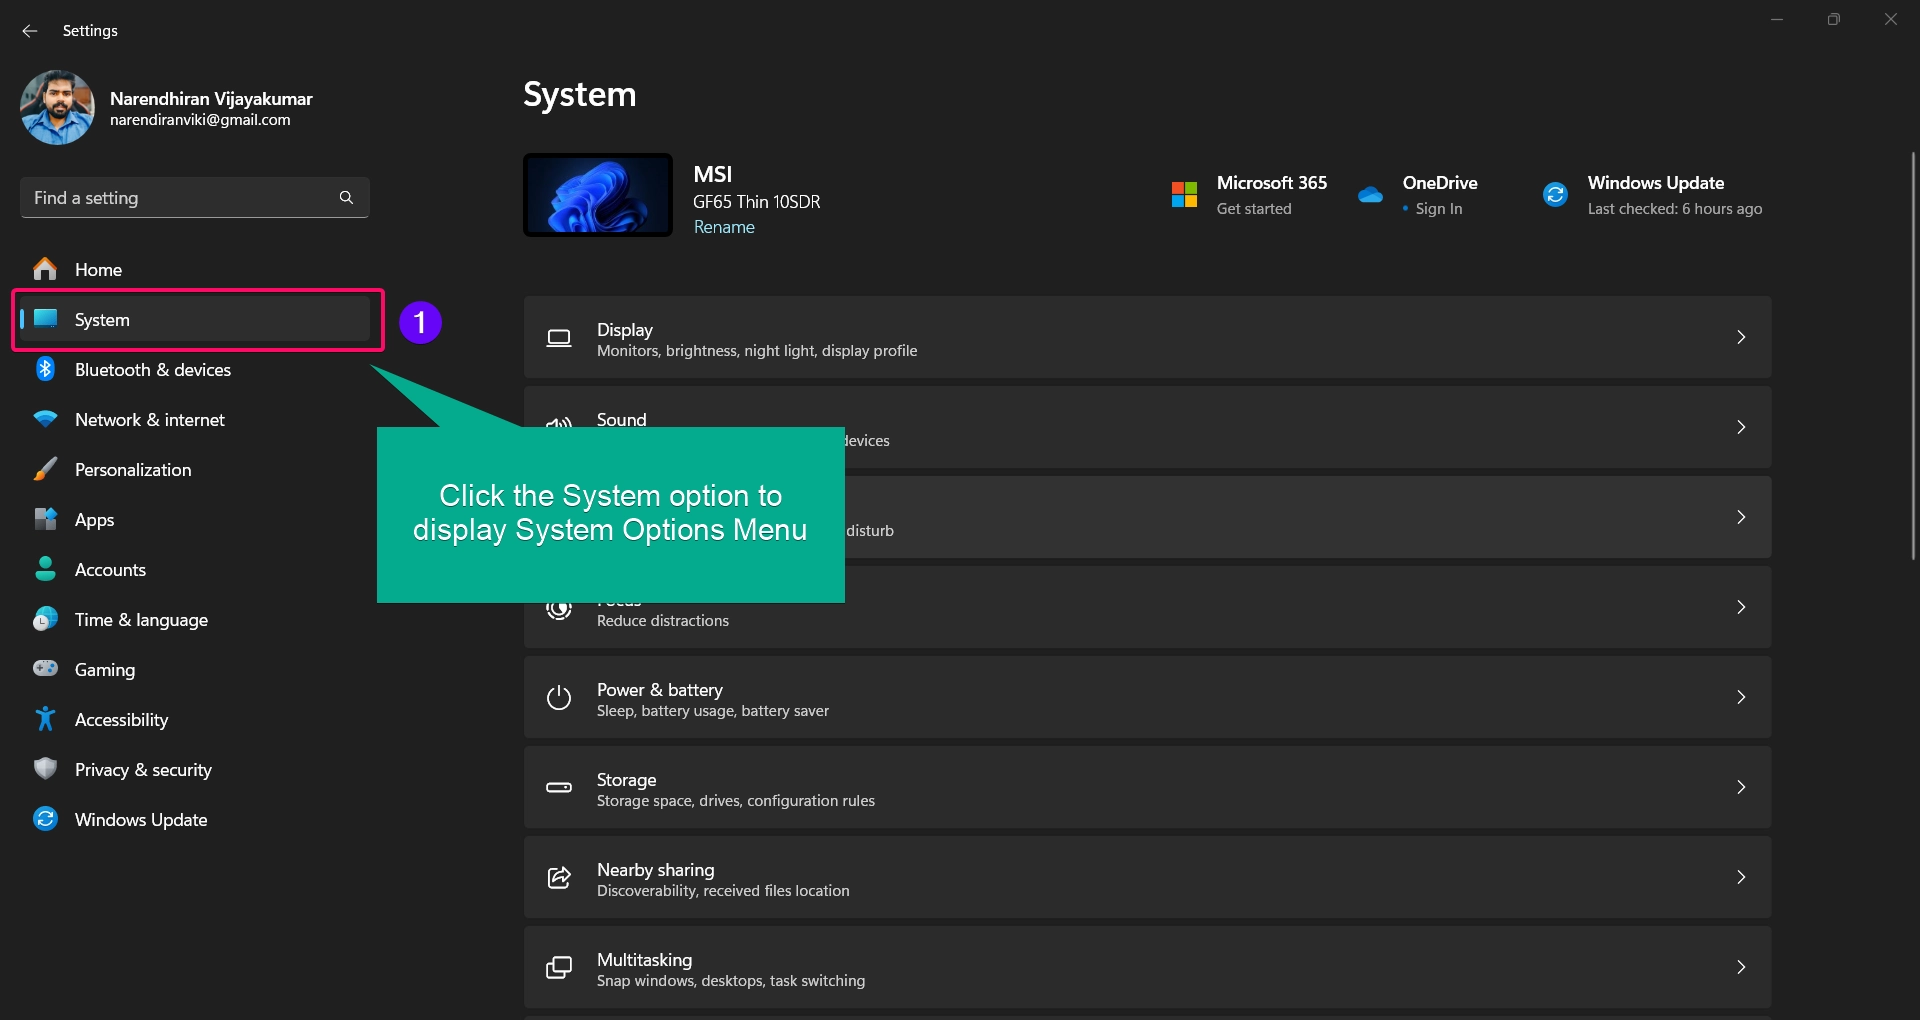
- Then, you need to choose the System option located just below the Home option on the left side of the Settings menu.
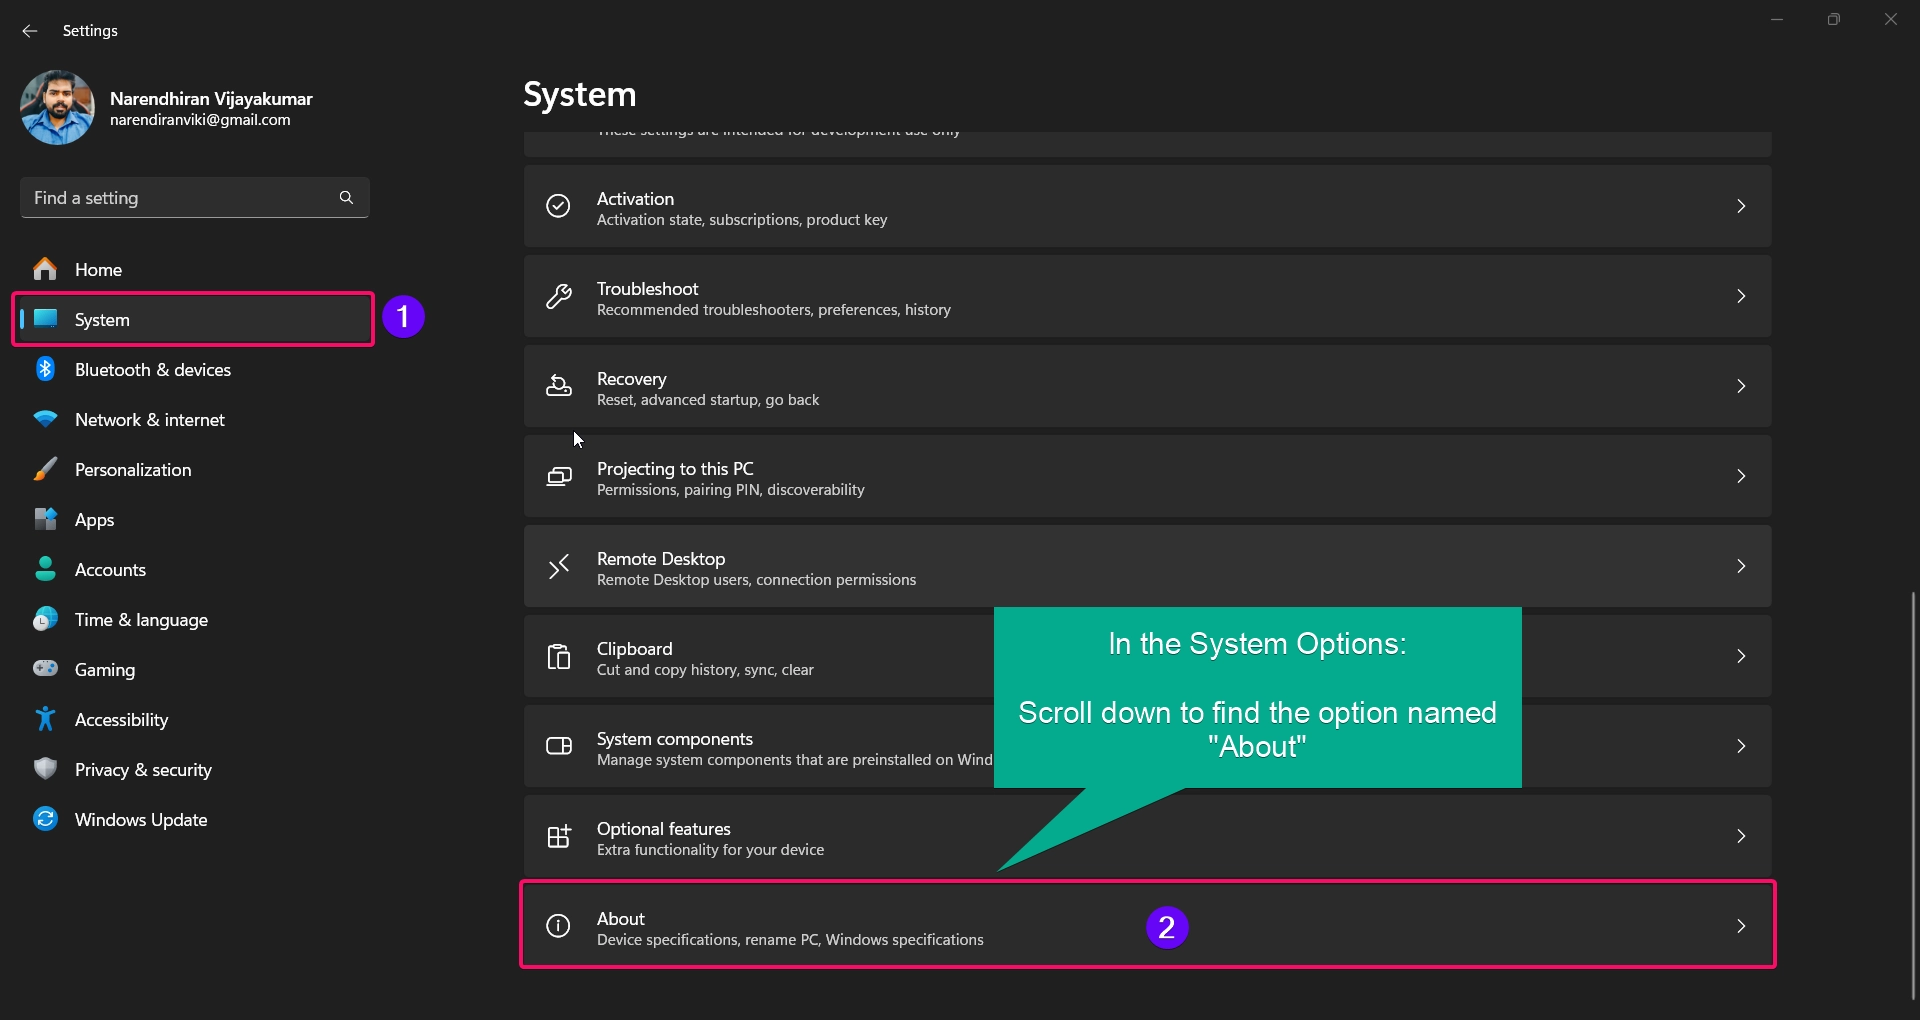
- Scroll down to find the About option, most likely it is located in the end of the options.
- Under the Device Specifications, you can find your devices chip architecture model.
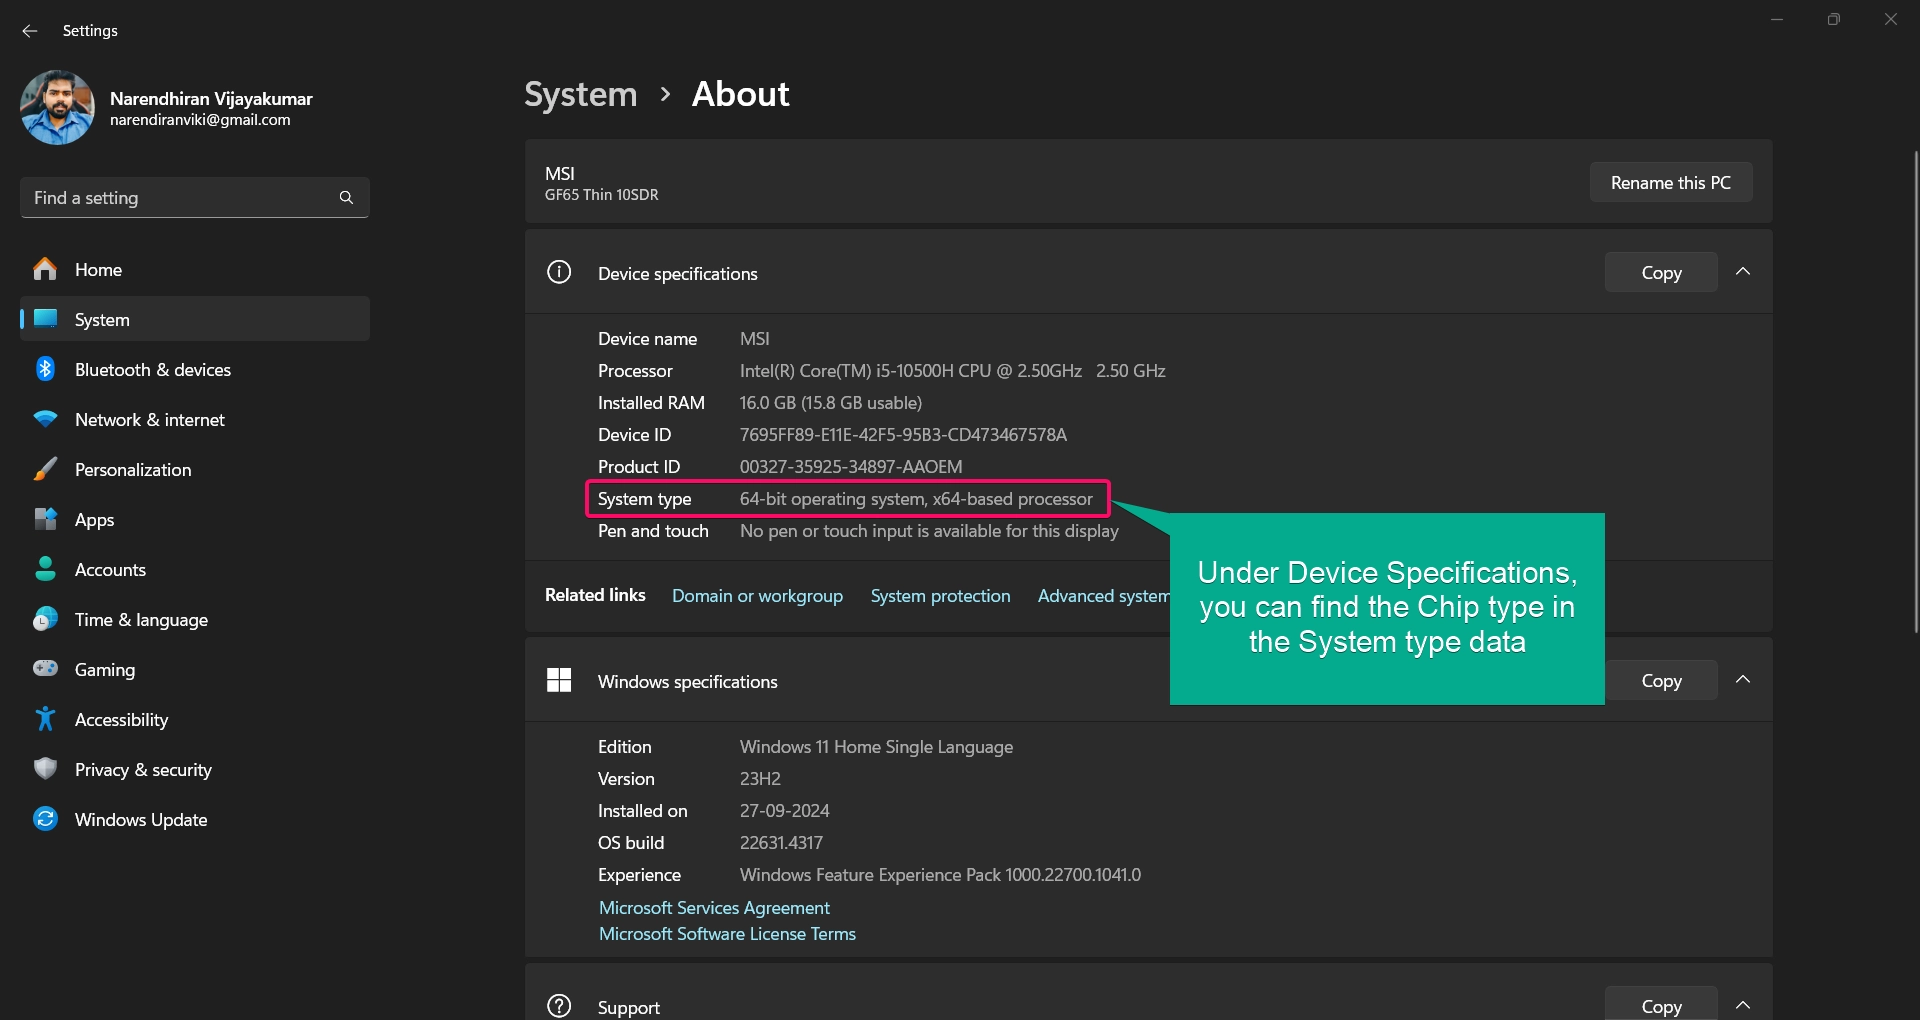
As you can see in the above image, my device is manufactured with 64-bit operating system and x64-based processor.
Method 2: Check Windows 11 System Type using the Control Panel:
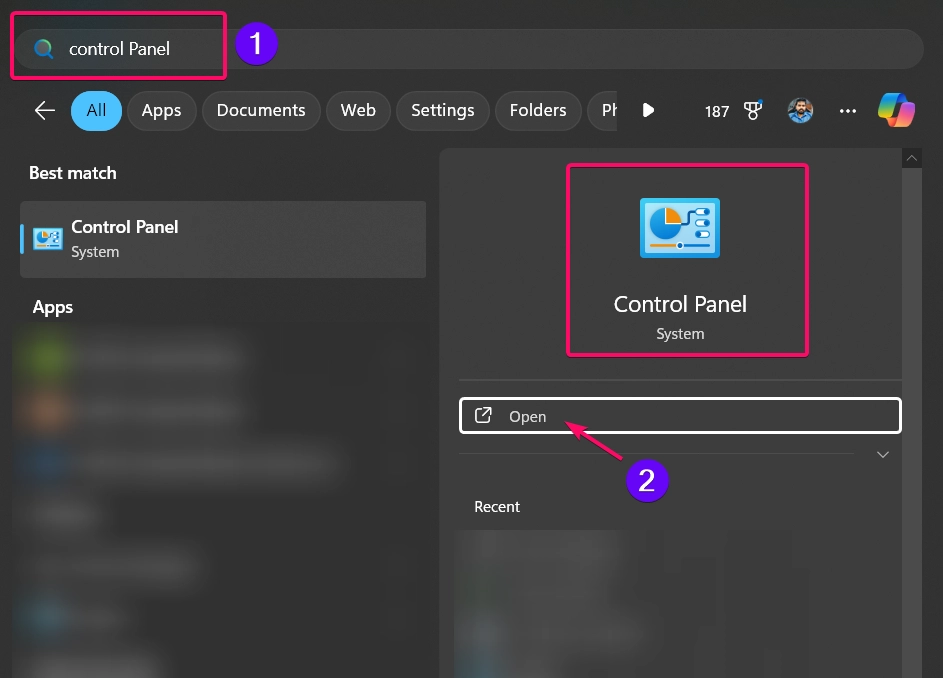
- From the Start menu, you need to launch the Control Panel application.
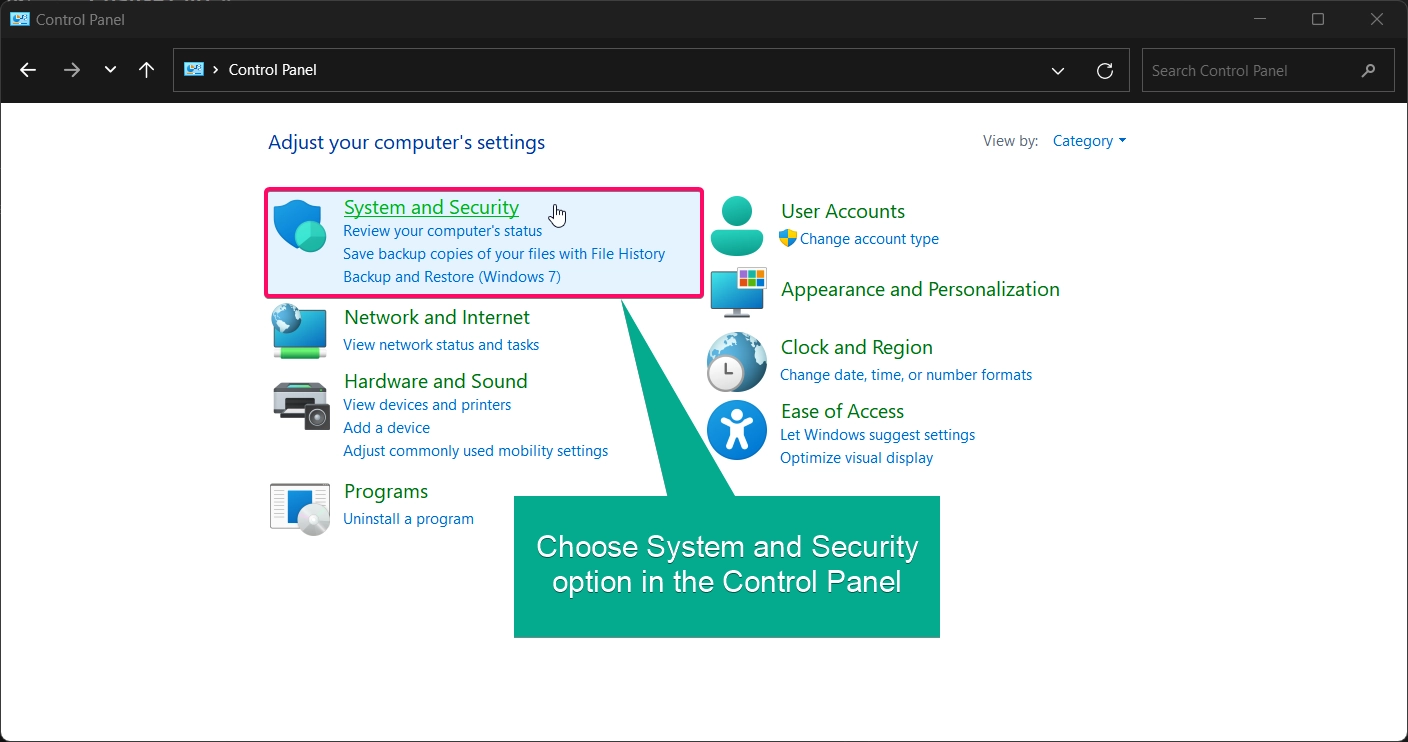
- Now in the control panel, you need to choose the “System and Security” option. Which is most likely located in the first position.
- Choose the System option, which will open the About section of your PC directly within the Settings app. Here, you’ll find complete details about your Windows device, including its architecture type.
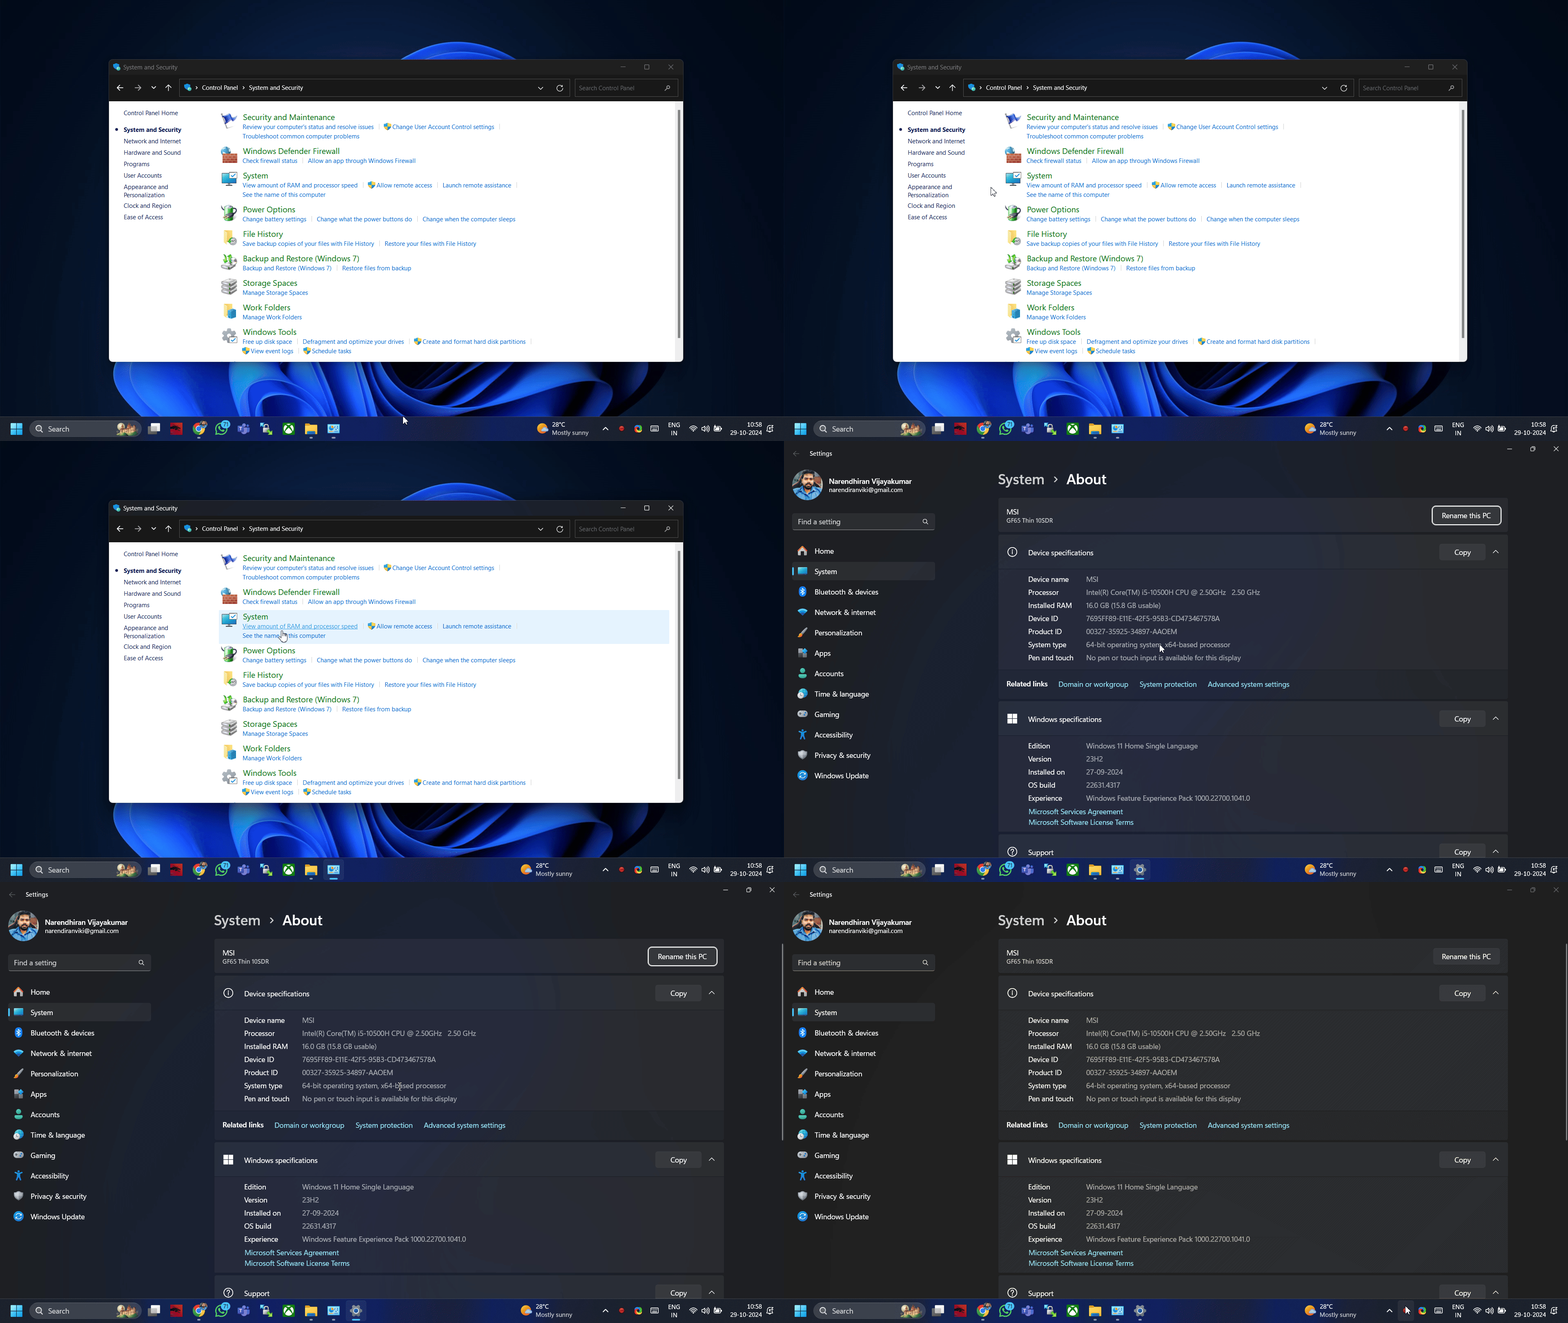
From the above image, you can see the chip type from the about section.
Method 3: Identify your Windows 11 Architecture using Task Manager:
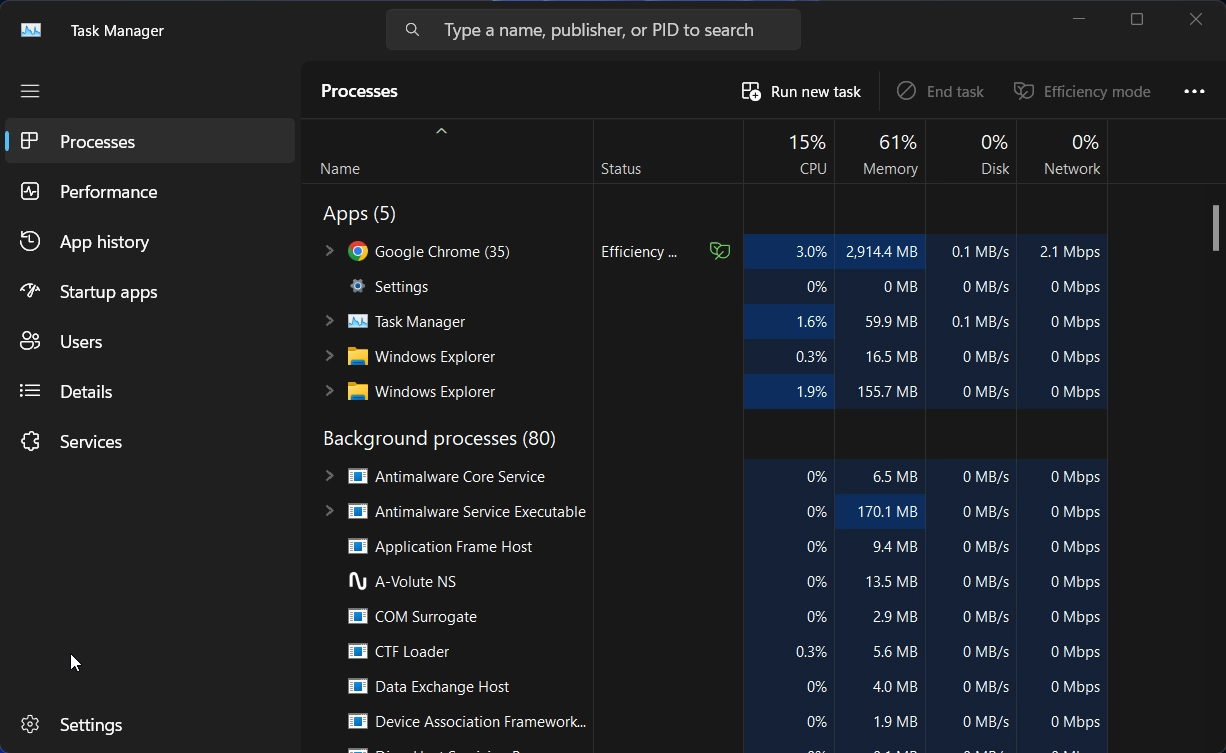
- Use the following keyboard shortcut to open Task Manager on your PC.
- CTRL + SHIFT + Esc
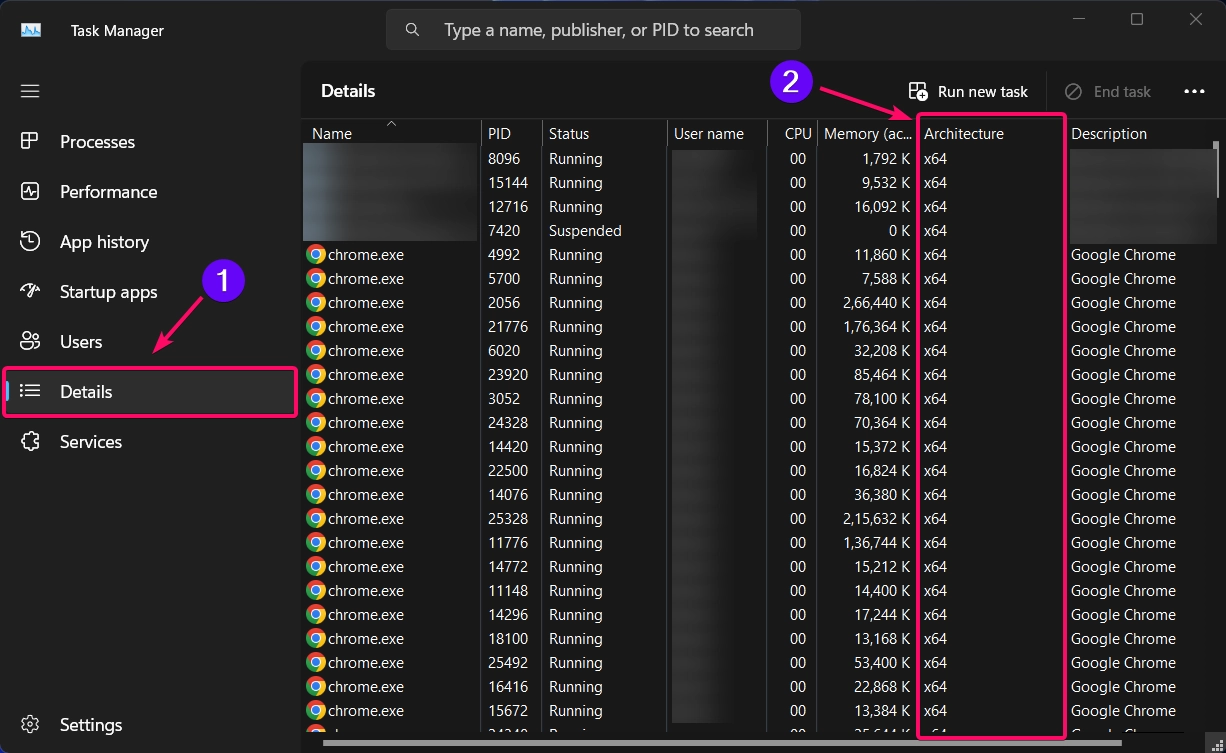
- Choose the Details option from the left-side menu of the task manager.
- Under the Architecture menu:
- If you see (x86 or x64) next to some application names, then it’s likely a 64-bit system (since Windows 64-bit can run 32-bit apps).
- If you see x86 only next to all application names and then you device is 32-bit system and the device will not support 64-bit or x64 bit applications.
- An ARM-based system will have emulation for some apps, though ARM-specific details aren’t as explicit here.
Method 4: Find Windows 11 System Architecture using File Explorer:
- First, you need to open the This PC file explorer.
- Open the drive which contains the installation of Windows OS.
- I’ve installed the Windows in my C: drive and so I choose the C: drive.
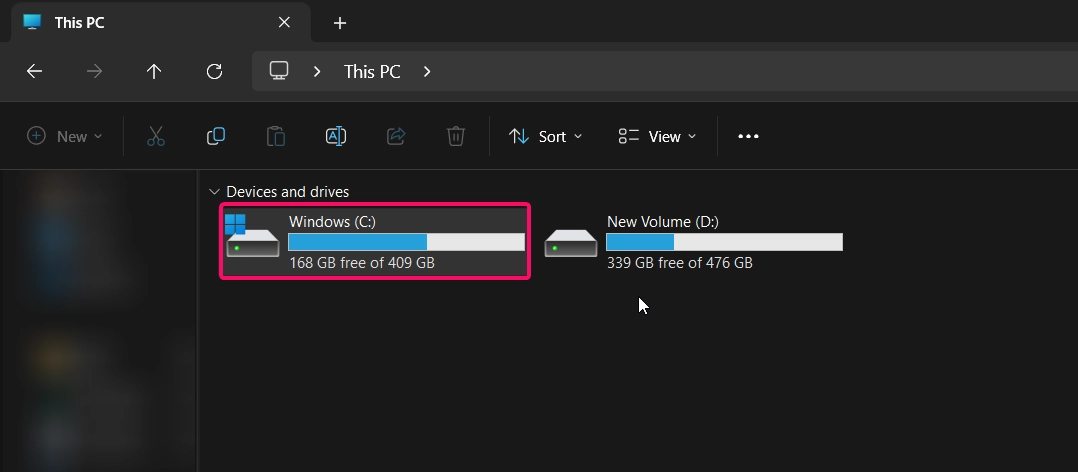
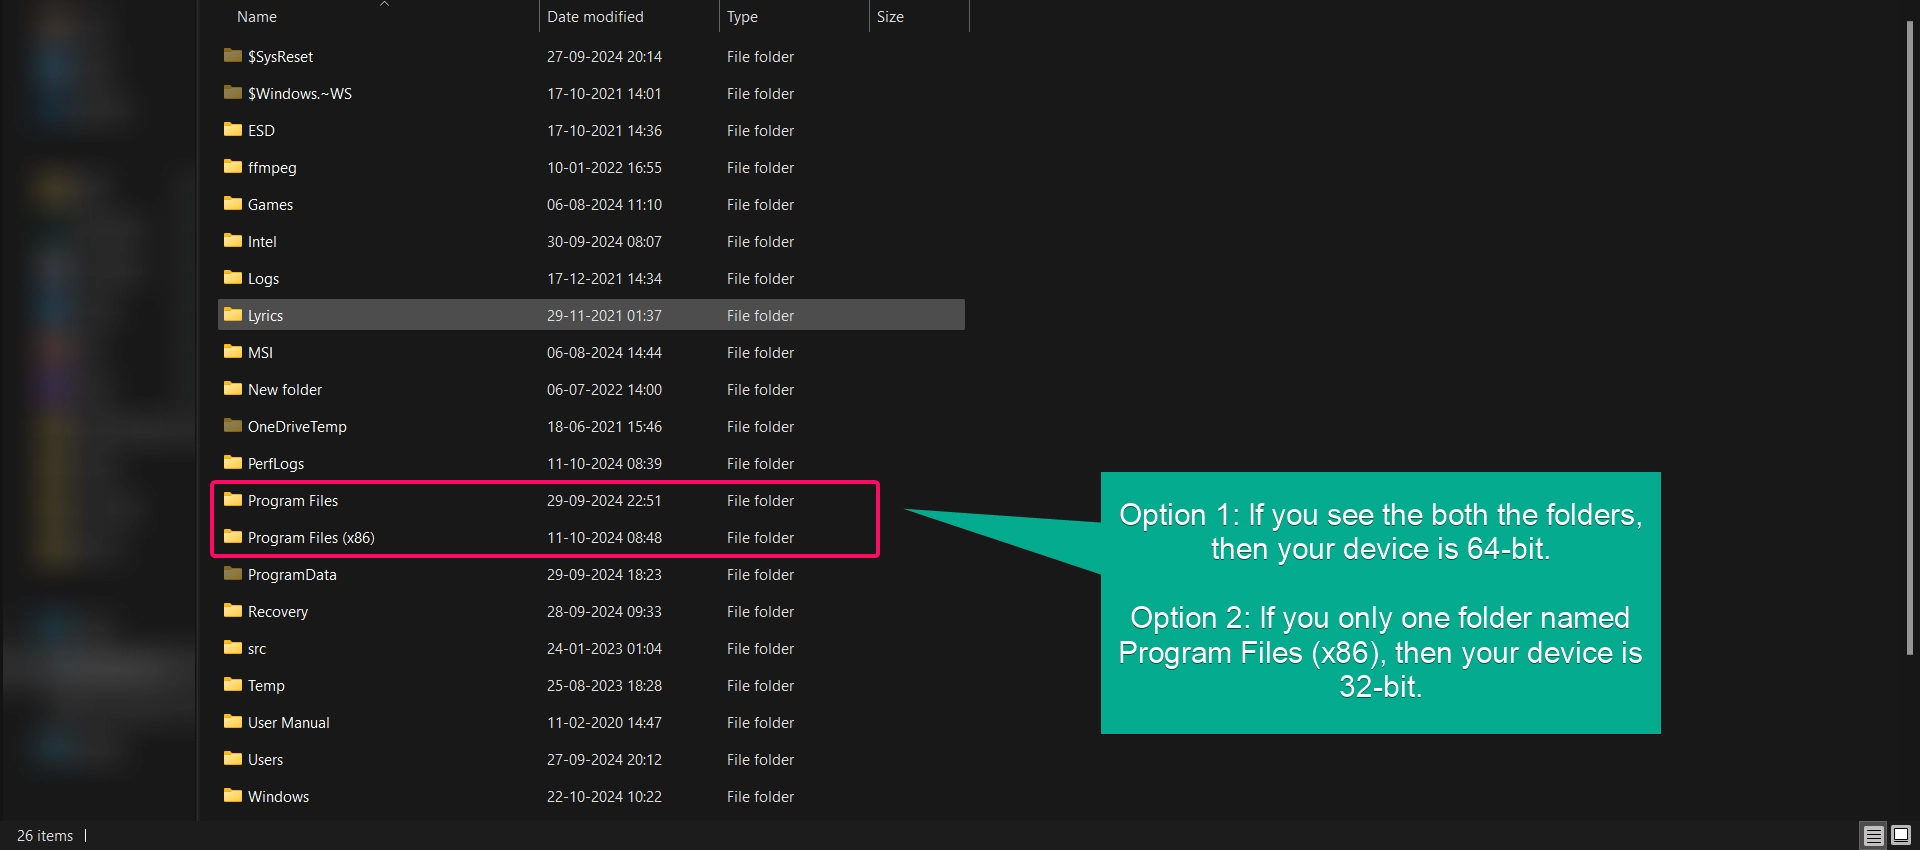
- Open the C: drive, and If you see both Program Files and Program Files (x86) folders, you’re on a 64-bit system.
- If you see only Program Files (x86) folder alone, then your device is 32-bit architecture.
Method 5: Check Windows 11 Bit Version using System Information Tool:
This method is unique and quick, follow the instructions mentioned below.
- You need to use the keyboard shortcut to launch the Run command Window.
- Winkey + R
- Once the Run window launched, Enter the following command and hit the ENTER button to launch the System Information tool window.
msinfo32
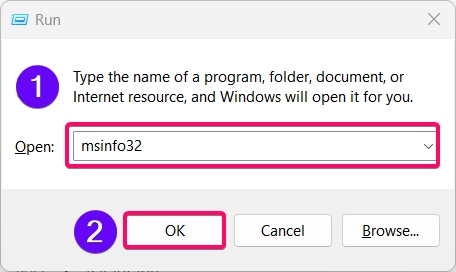
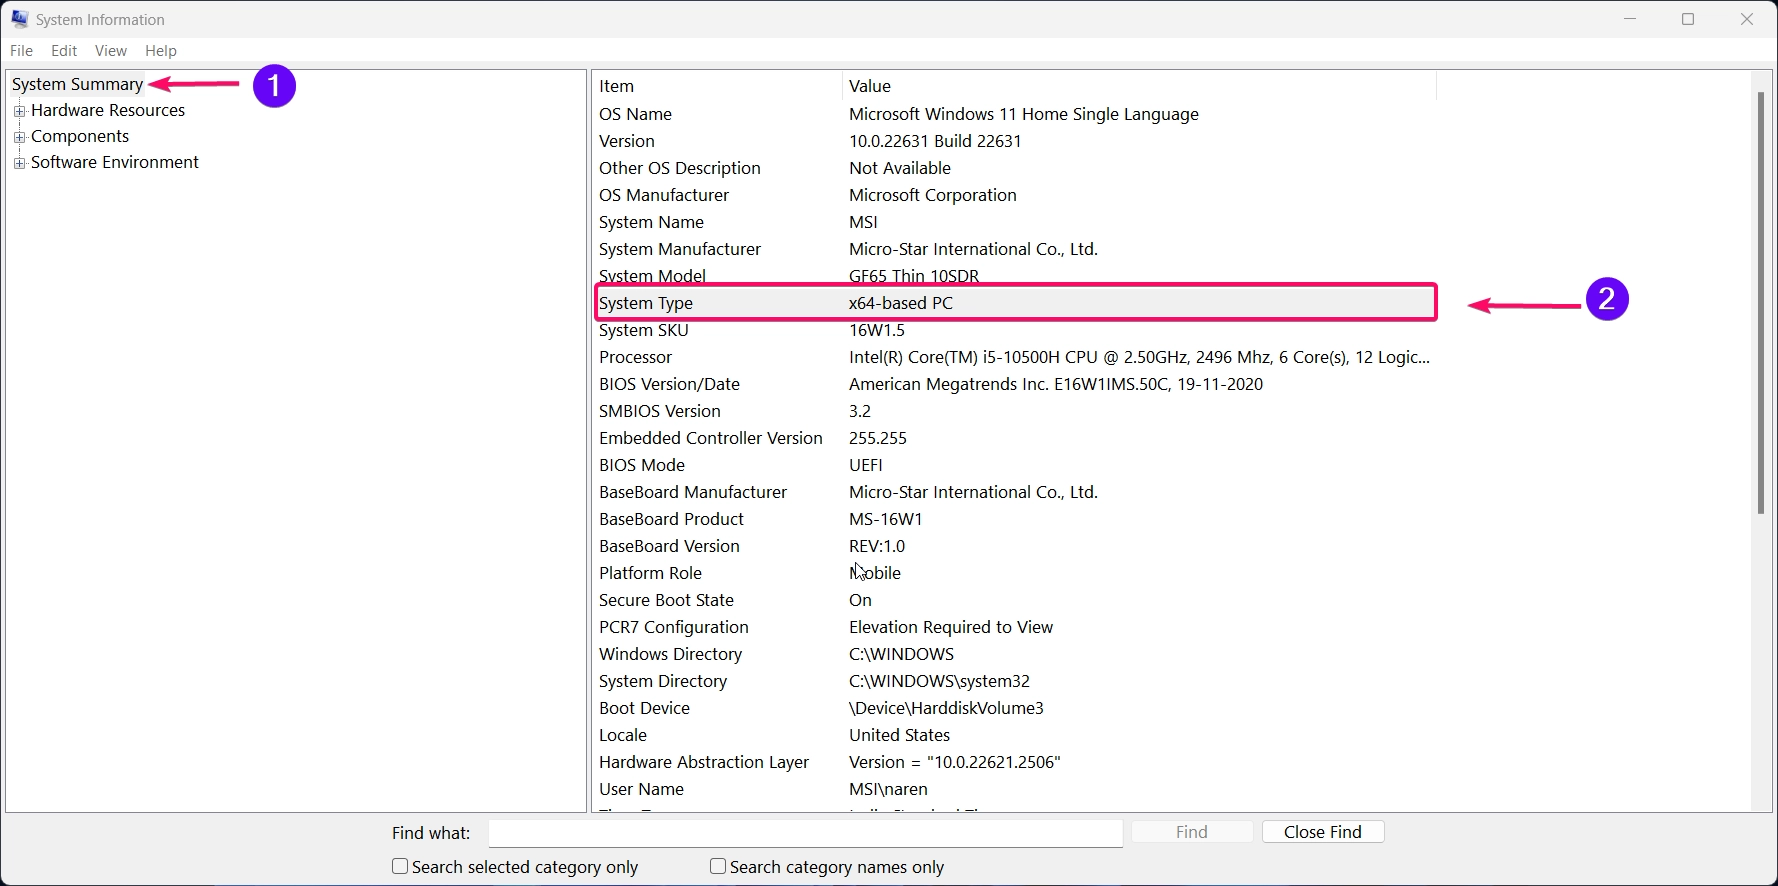
- In the System Summary section, you need to look for System Type:
x64-based PCmeans 64-bit architecture.x86-based PCmeans 32-bit architecture.ARM-basedmeans ARM architecture.
Method 6: Finding Windows 11 Architecture Type using Command Prompt:
- Click the Start Menu and search for Command Prompt
- You need to choose the “Run as Administrator” option to launch the command prompt in admin mode.
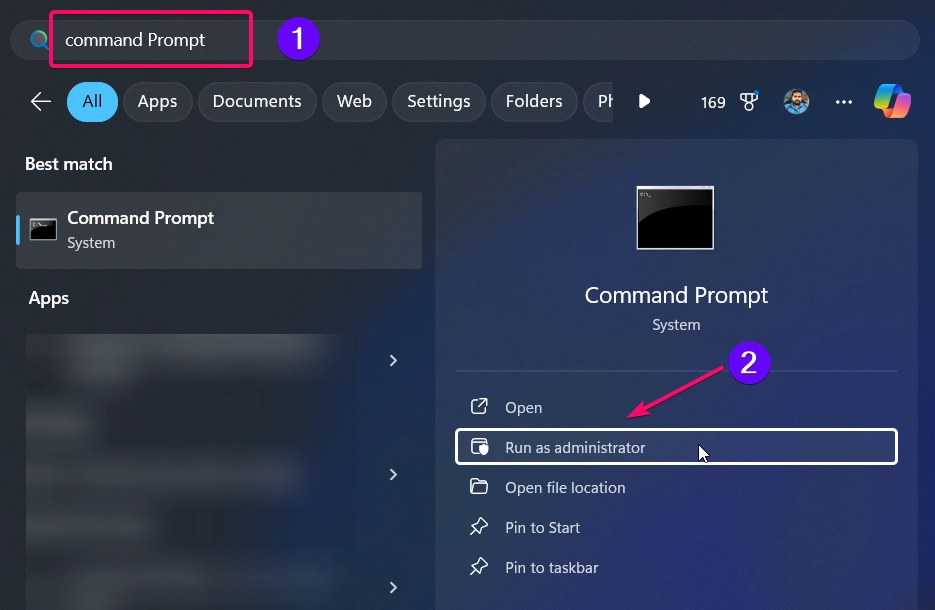
- There are two commands available to get the details about your device architecture and they are:
echo %PROCESSOR_ARCHITECTURE%- or
systeminfo | findstr /C:"System Type"
- You can use any of the above commands.
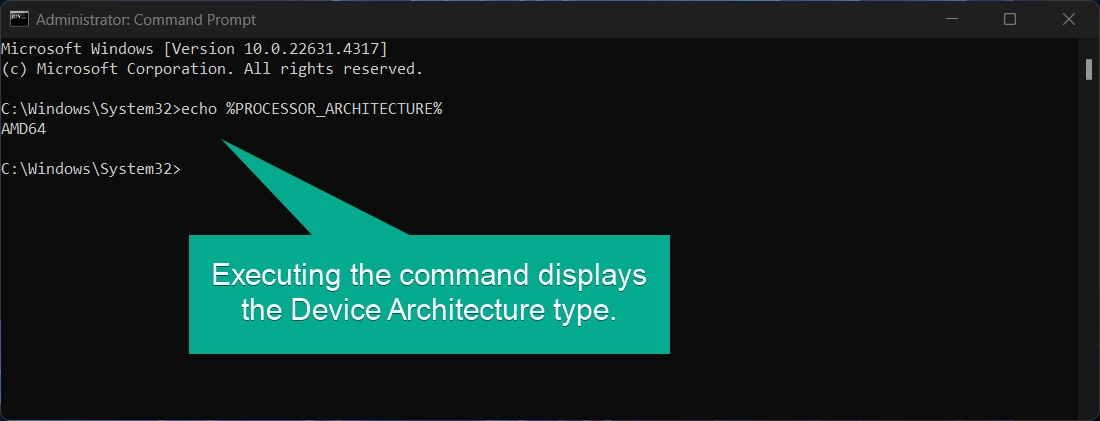
- You can identify your device type with the following output:
- x86: if you have a 32-bit based processor
- AMD64: if you have a 64-bit processor
- ARM64 :if you have a ARM-based processor
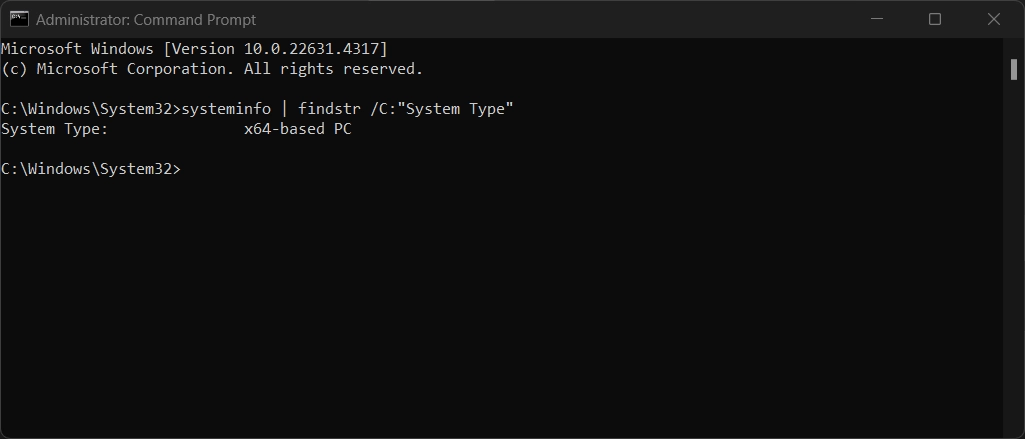
- You can find the following outputs by executing the commands:
x64-based PCindicates a 64-bit system.x86-based PCindicates a 32-bit system.ARM-basedreveals an ARM-based architecture.
Method 7: Checking Windows 11 Bit Type using PowerShell:
- Click the Start Menu and search for PowerShell
- You need to choose the “Run as Administrator” option to launch the powershell in admin mode.
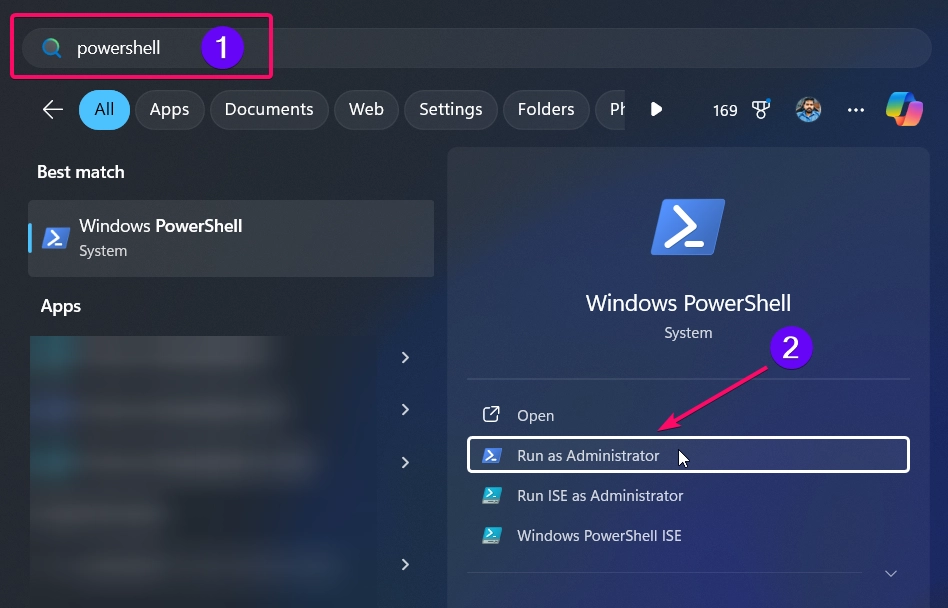
- Run the command:
Get-ComputerInfo | Select-Object WindowsVersion, OsArchitecture
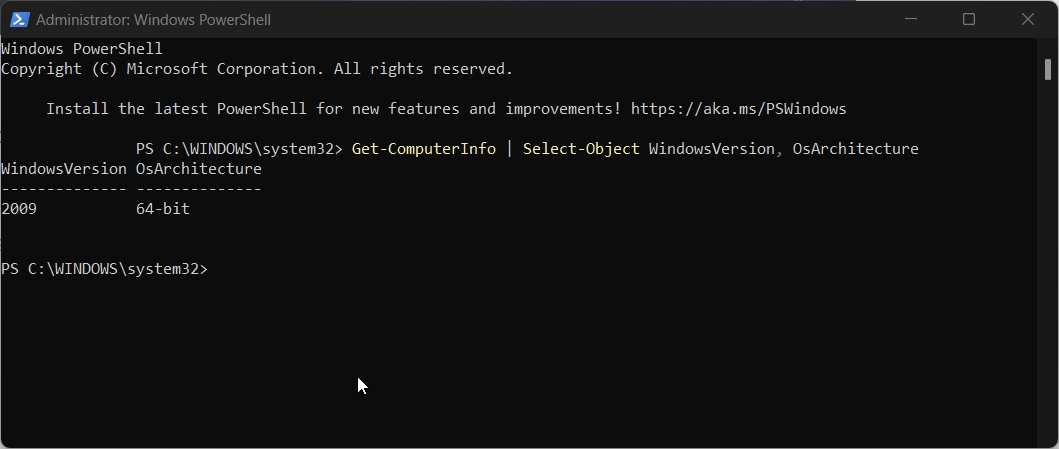
Method 8: Finding System CHIP type using Registry Editor:
- You can open the Registry editor via Run Window, to do this use the keyboard shortcut:
- Winkey + R
- Once the Run window has been launched, use the command
regeditto open the registry editor.
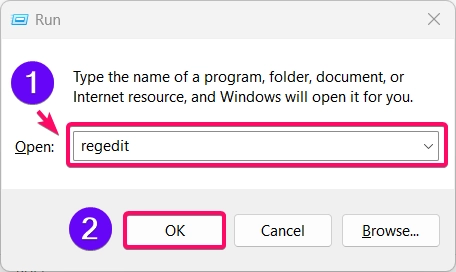
- Once the Registry editor is launched, copy the command and paste in the address bar and hit the ENTER button to navigate to the desired Environment directory.
HKEY_LOCAL_MACHINE\SYSTEM\CurrentControlSet\Control\Session Manager\Environment
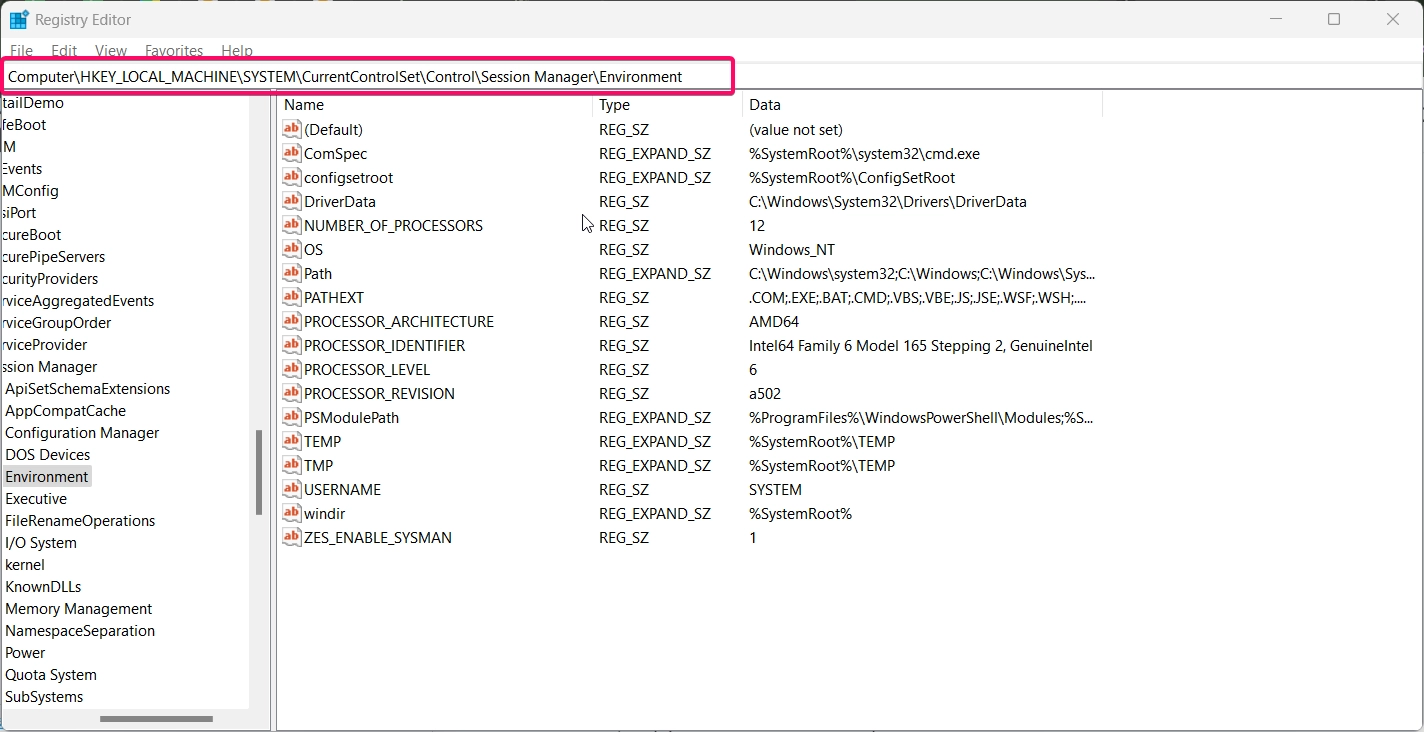
- Now, you need to look for the PROCESSOR_ARCHITECTURE entry, which will provide your device chip’s architecture type.
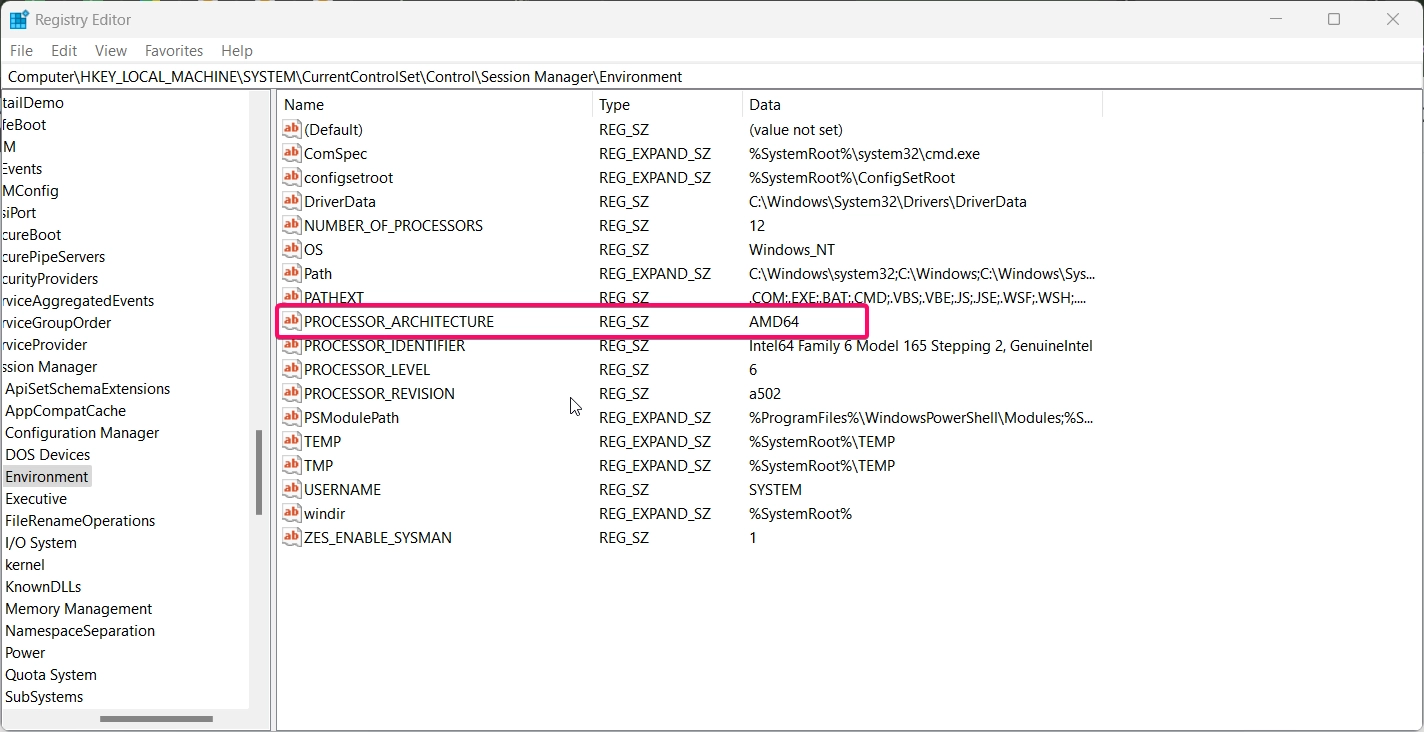
You can get the following outputs from the registry editor:
AMD64indicates a 64-bit system.x86indicates a 32-bit system.ARM64indicates ARM.
Conclusion:
Nowadays knowing your device’s architecture is more important than ever. Whether you’re trying to install software, optimize performance, or ensure compatibility. If your Windows 11 device is 32-bit, 64-bit AMD, or 64-bit ARM can make all the difference. By following these 8 simple methods, you can quickly determine your device’s architecture. Find more interesting tutorials on our Homepage: WinSides.Com
Read More:
- 6 Best Ways: Show Folder Size in Windows 11 File Explorer!
- 5 Ways: Show Hidden or Unhide Files & Folders in Windows 11 PC!
- Properly Eject USB or External SSD/HDD in Windows 11!
We combine expert insights with user-friendly guidance. We thoroughly research and test everything to give you reliable and simple to understand tech guides. Please take a look at our publishing process to understand why you can trust Winsides.


