How to Check DirectX Version Installed in Windows 11?
5+ Quick Methods to Find DirectX version installed in your Windows 11 PC!
For my website (Winsides) YouTube channel, I was looking for the best video editing tools and found that Adobe After Effects and Adobe Premiere Pro were the top choices. I discovered that my device needs to meet certain software requirements. Both applications require a video graphics driver that runs on DirectX 12. While I’m sure that Windows 11 comes with DirectX 12 by default, I’ve heard that some basic Windows 11 Home versions come with older versions. To confirm whether version 12 is installed, I found some easy and quick methods to check DirectX version on my Windows 11 PC. I’ll guide you through this.
Recommended: Check Wddm Version On Windows 11
Quick Steps: Find DirectX Version in Windows 11:
- Firstly, you need to open Run Window using Winkey + R.
- Enter the command “dxdiag” and hit Enter button.
- The DirectX Diagnostic Tool window will open. Under the “System” tab, look for the “DirectX Version” at the bottom of the list.
- This will display the installed DirectX version.
The guide below contains multiple methods for finding the DirectX version on your PC. Some methods may not directly show the installed DirectX version, and you might need to compare the results with the graphical drivers installed on your PC. Don’t worry, I’ve attached a table that you can use to refer to and find out the installed DirectX version based on your graphical drivers.
1: Finding DirectX version using Command Prompt:
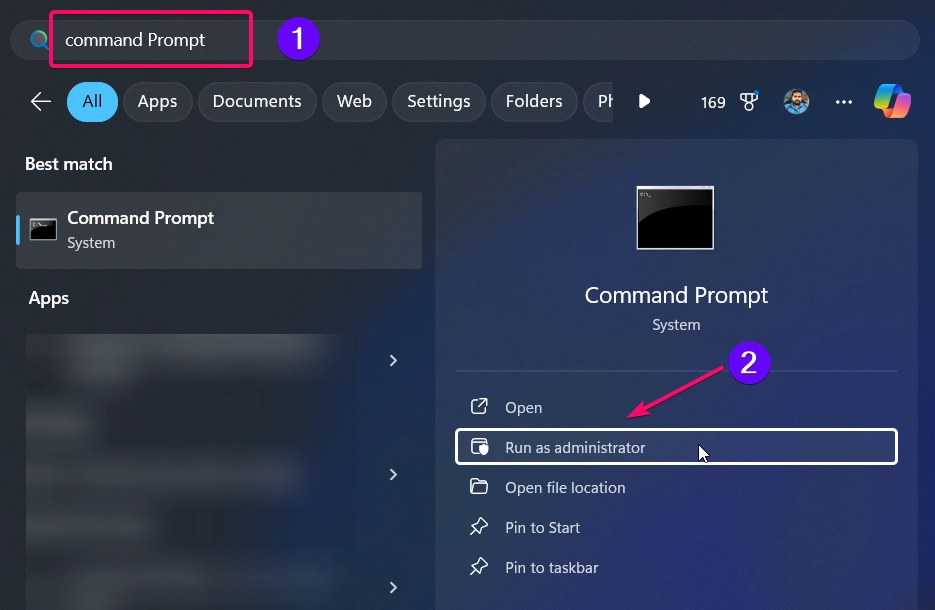
- Click the Start Menu and search for Command Prompt
- You need to choose the “Run as Administrator” option to launch the command prompt in admin mode.
- Now, you need to enter the following command:
dxdiagand hit the Enter button. - After a few seconds, the DirectX diagnostic tool window will appear on your screen.
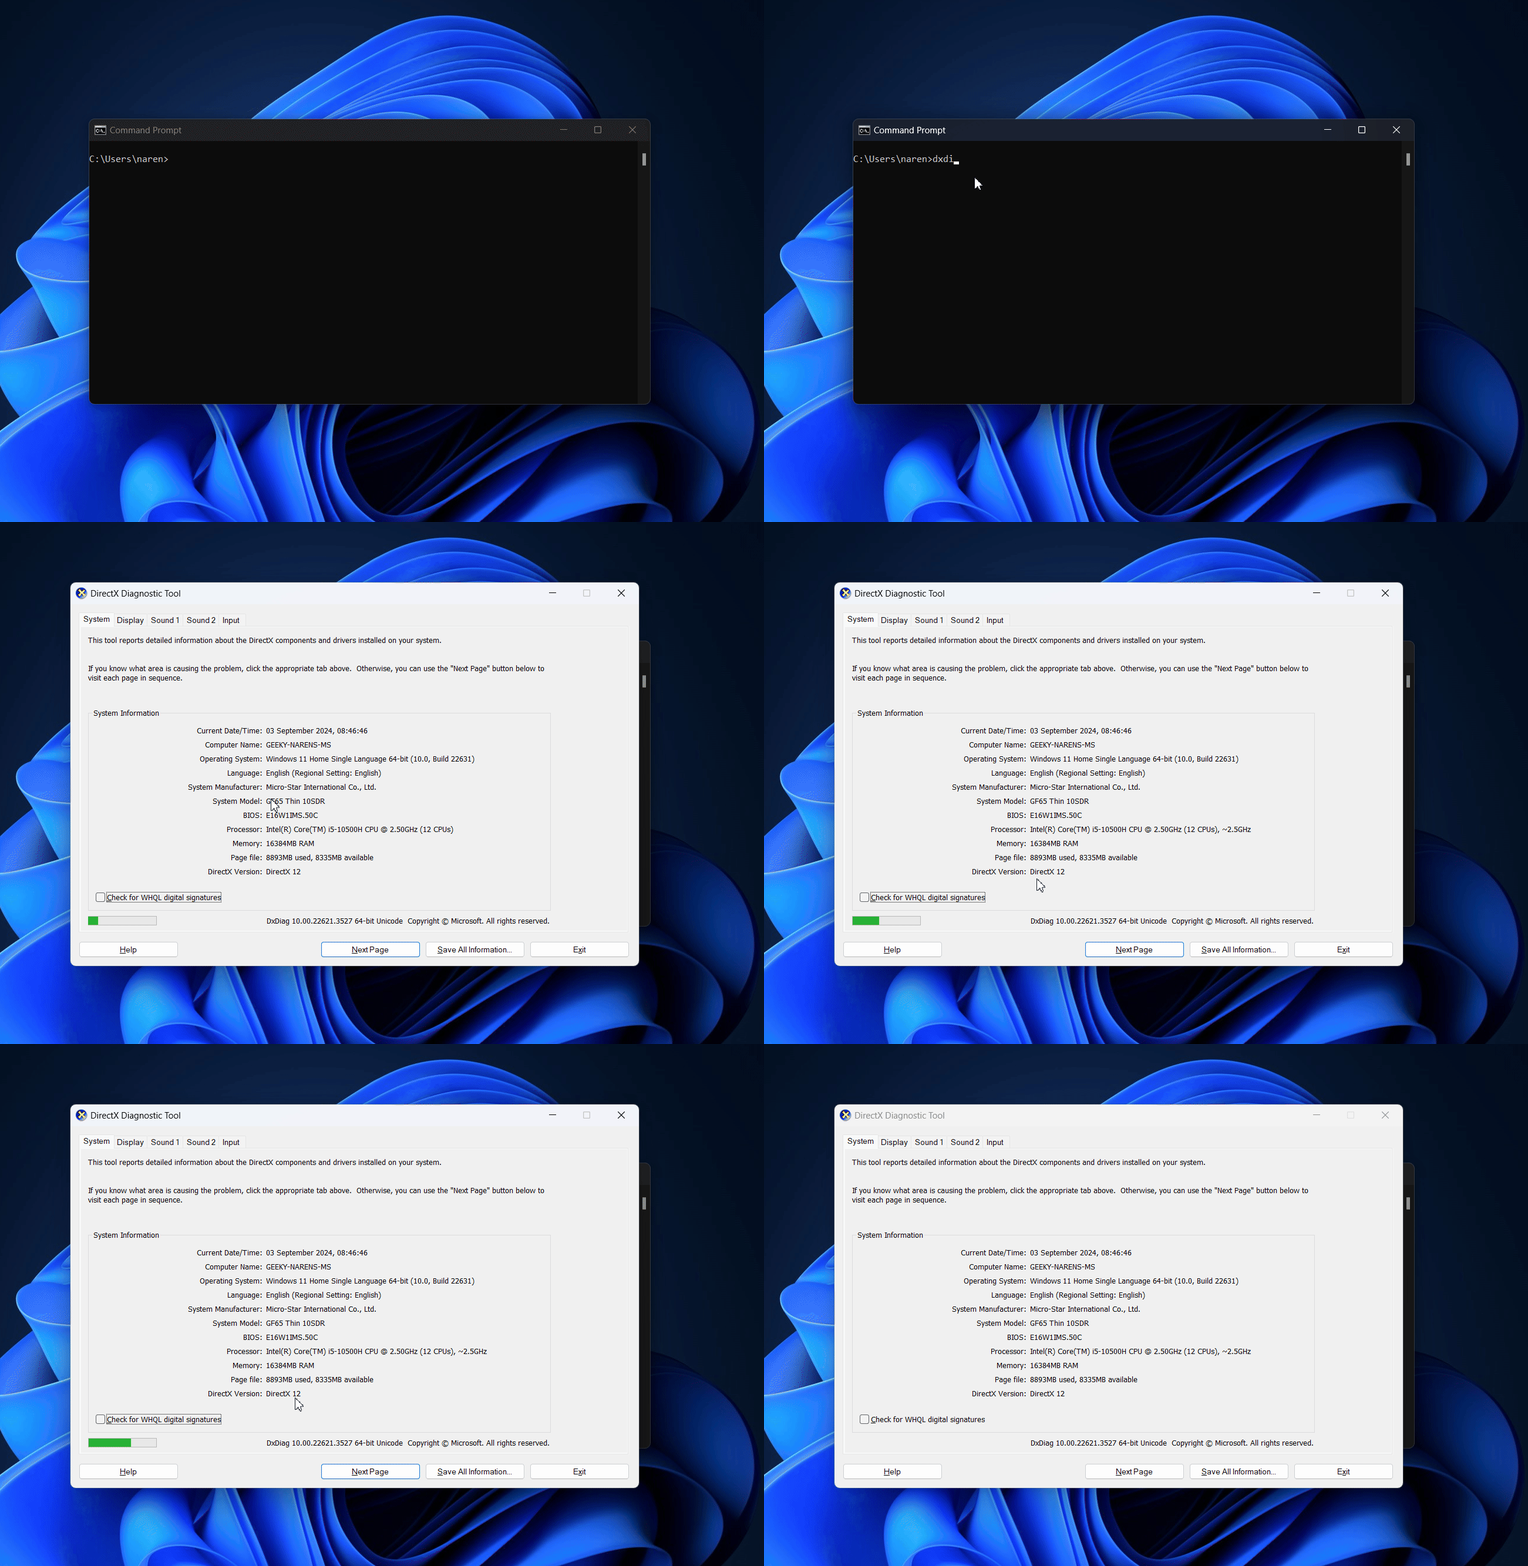
- In the bottom of the tool, you can find the DirectX version 12 has been installed which is listed under DirectX Version option.
This is the quickest and easiest way to check the directx version but it may need to use one command in command prompt.
2: Check DirectX version from Run Window:
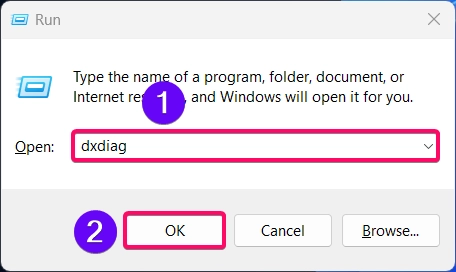
- Firstly, you need to open the Run Command Window using the keyboard shortcut
Winkey + R. - Once the Run window appears, enter the following command
dxdiagand hit the Enter button to launch the DirectX diagnostic tool.
- The DirectX Diagnostic Tool window will appear on your screen.
- Under the “System” tab, you need to look for the “DirectX Version” at the bottom of the list.
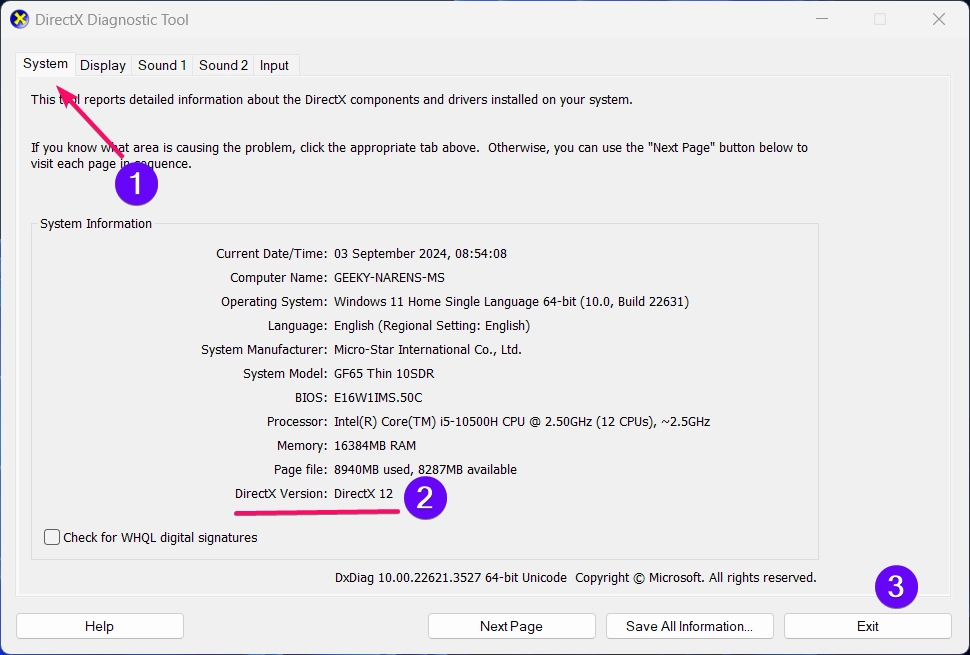
- This will display the installed DirectX version under Direct version option.
- Once you found the version and click the Exit button to close the DirectX diagnostic tool window.
3: Finding DirectX version using PowerShell:
This and the following methods won’t directly show the installed DirectX version. Instead, they will provide details about the installed graphics and display drivers. By comparing these details with the references, you can determine the DirectX version installed on your Windows 11 PC.
- Click the Start Menu and search for PowerShell
- You need to choose the “Run as Administrator” option to launch the powershell in admin mode.
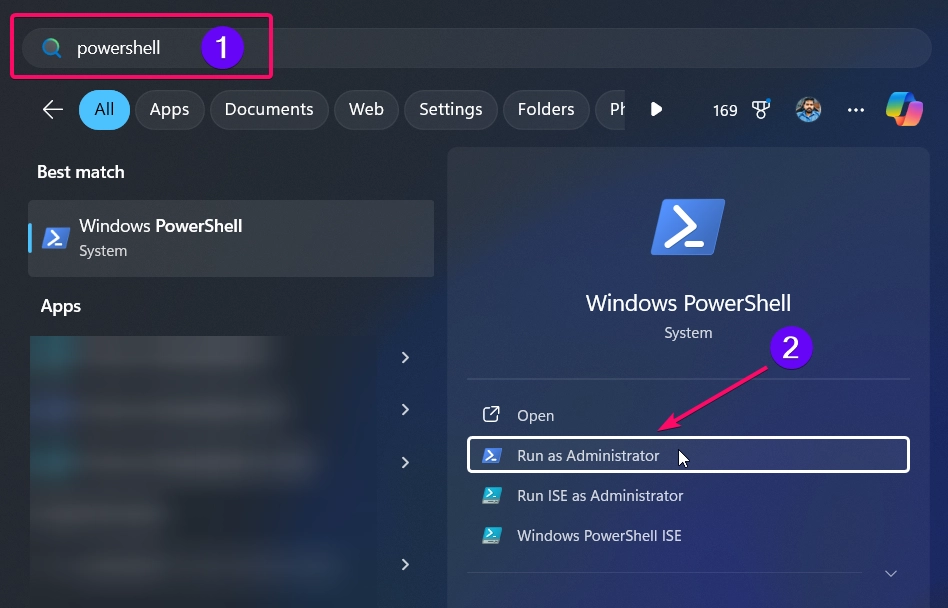
- Now you need to copy the command
Get-WmiObject Win32_VideoController | Select-Object Name, DriverVersionand hit the Enter button.
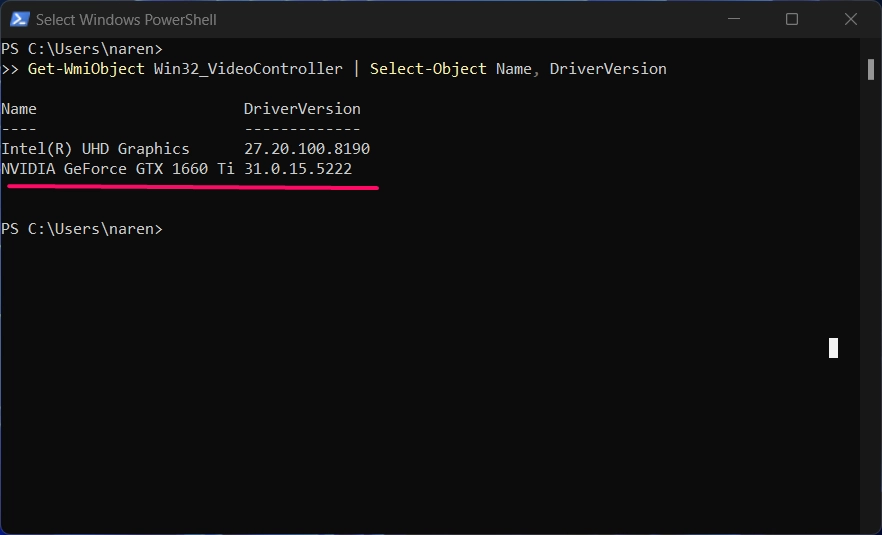
| GPU | Driver Version | Likely Supported DirectX Version |
|---|---|---|
| Intel(R) UHD Graphics | 27.20.100.8190 | DirectX 12 |
| NVIDIA GeForce GTX 1660 Ti | 31.0.15.5222 | DirectX 12 |
This driver version is associated with the Intel UHD Graphics series. The driver version 27.20.100.xxxx indicates support for DirectX 12. The NVIDIA GeForce GTX 1660 Ti is a modern GPU that fully supports DirectX 12, and the driver version 31.0.15.xxxx confirms compatibility with DirectX 12.
4: Using System Information Window:
- Firstly, you need to open the Run Command Window using the keyboard shortcut
Winkey + R. - Once the Run window appears, enter the following command
msinfo32and hit the Enter button to launch the System Information Window.
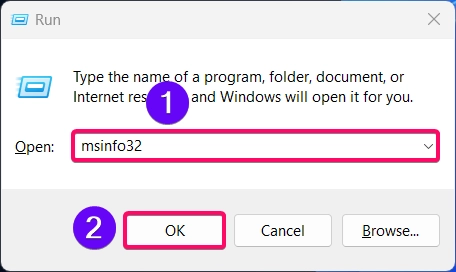
- Now the System Information Window will appear on your screen.
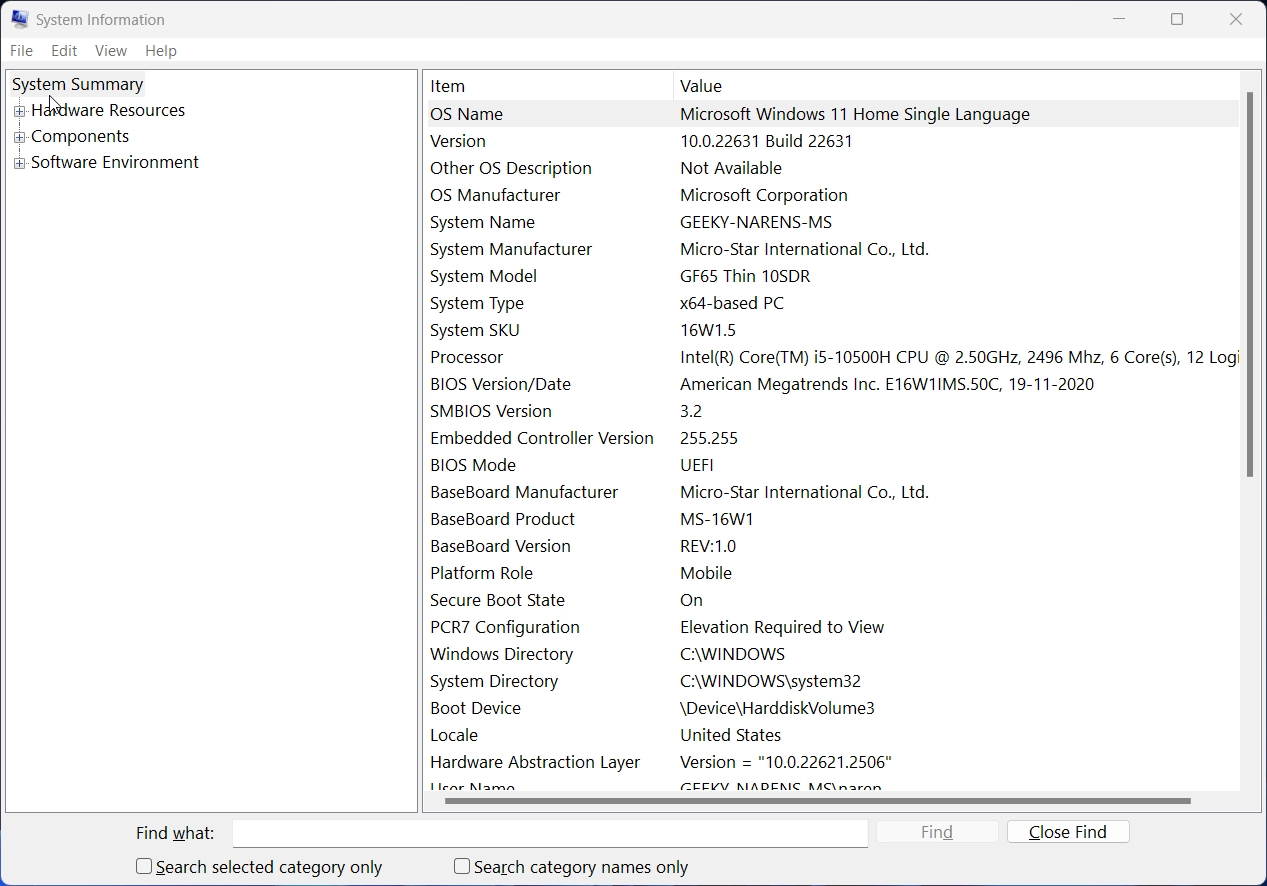
- Now, you need to expand the Components and click the Display option to display all details.
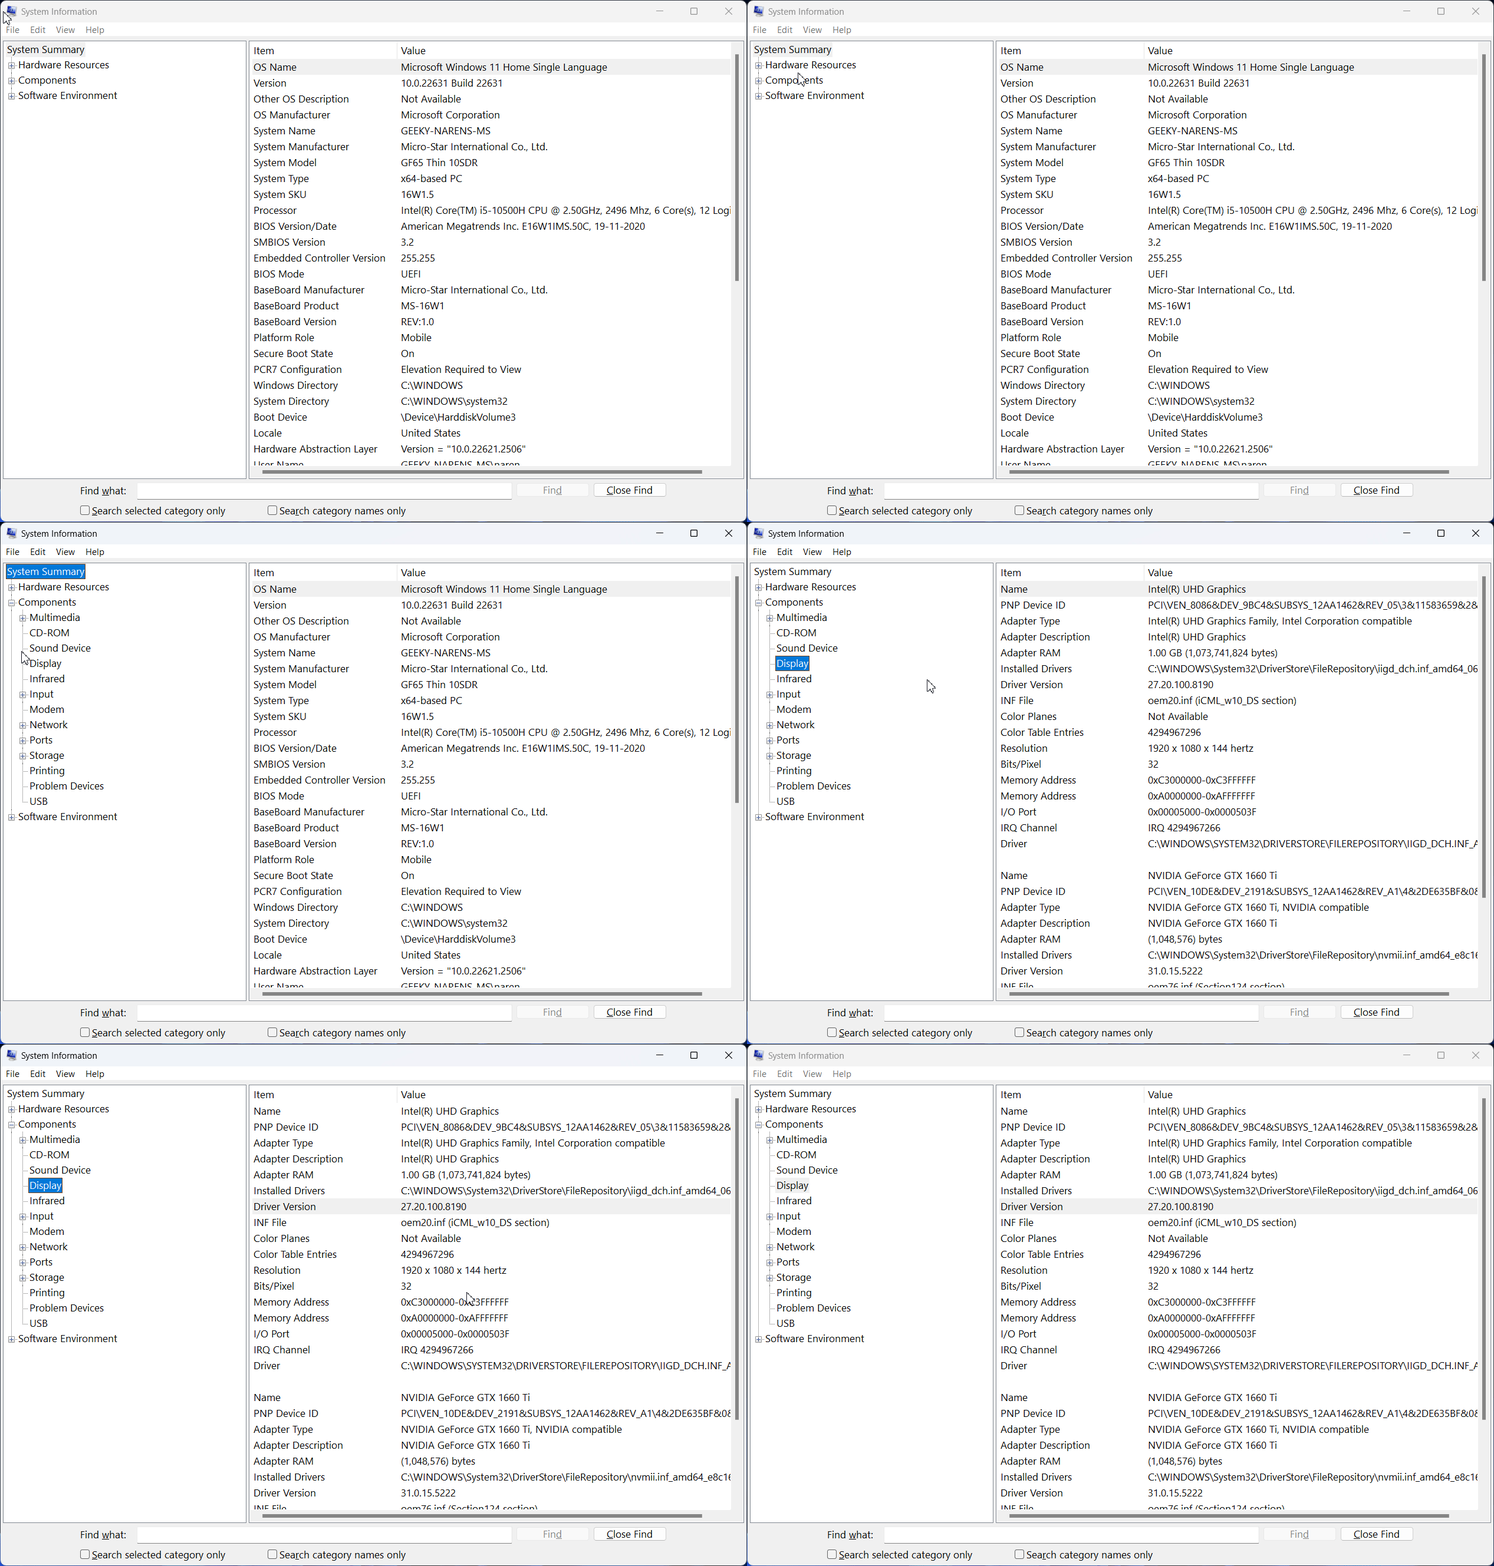
- Now in the item title, you need to look for the “Driver version” and its value will be displayed near to it. For example the value like “27.20.XXX.XXXX”
- The 27.XX.XXX.XXXX driver series will support DirectX 12 version only.
In this way, you can easily determine the directx version from the system information tool.
5: Using 3rd Party Tool “TechPowerUp GPU-Z”:
TechPowerUp GPU-Z is one of the best and lightweight utility tools designed to give you all the information about your video card and GPU. You can download the tool directly from their official website. They offer two versions: Standard and Asus ROG Theme. I recommend downloading the standard version, as it gets the job done.
Check Out: Check Installed Windows 11 Edition
- Once you have downloaded the application, install the application in your pc.
- Otherwise you can use this application as standalone app.
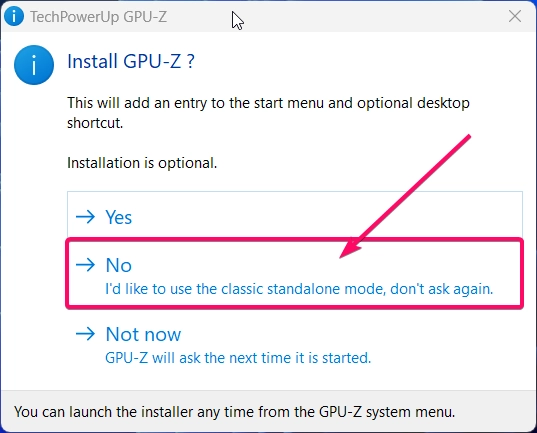
- Click the second option “No” and proceed to the application without installing this app on your pc.
- By default, the application will launch with Intel Graphics card driver details, in the bottom you can see the dropdown and choose NVIDIA Graphics card to display driver details.
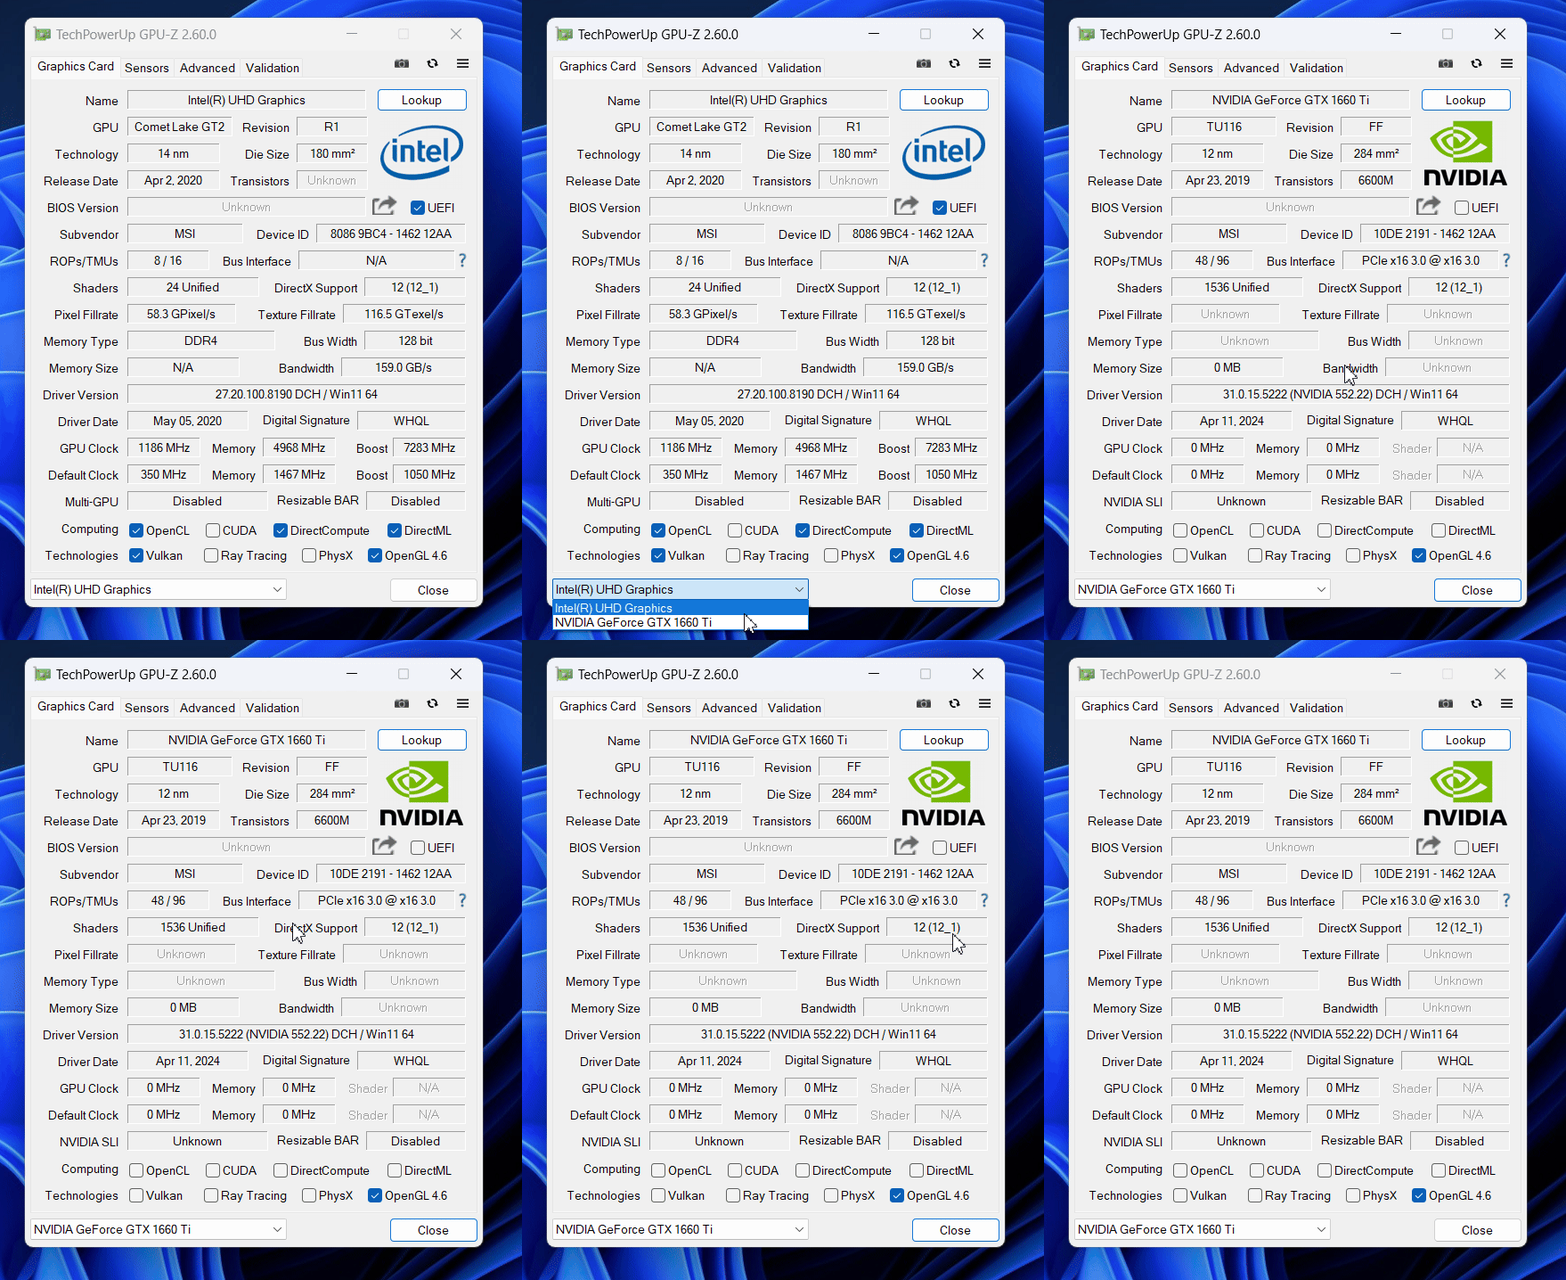
As you can see in the above image, the GPU-Z tool displays the directx version used by your NVIDIA graphics driver. That’s it. These are the multiple methods to find or check directx version installed on your pc.
Conclusion:
With these methods, you can quickly check if DirectX 12 is installed on your Windows 11 PC. This ensures your system is ready to run powerful tools like Adobe products & PC Games smoothly. If needed, update to DirectX 12 for the best performance. Find more interesting tutorials on WinSides. Happy Coding.
Related Post:
Related Articles:
- How to Auto Hide Taskbar on Windows 11?
- What is servicehost.exe on Windows 11?
- GTA 6 Release Date is set to on May 26, 2026
We combine expert insights with user-friendly guidance. We thoroughly research and test everything to give you reliable and simple to understand tech guides. Please take a look at our publishing process to understand why you can trust Winsides.


