How to Enable Variable Refresh Rate on Windows 11?
Windows 11 Native VRR Support Enhances your Gaming Experience to the Next Level
Variable Refresh Rate on Windows 11: Microsoft introduced Native support for on their Windows 10 1903 update in the year of 2019. Previously, VRR Support relied on Nvidia’s G-Sync and AMD’s Free Sync who pioneered this Display Technology. In this article, let’s check out how to enable Variable Refresh Rate on Windows 11.
How does Variable Refresh Rate Technology works?
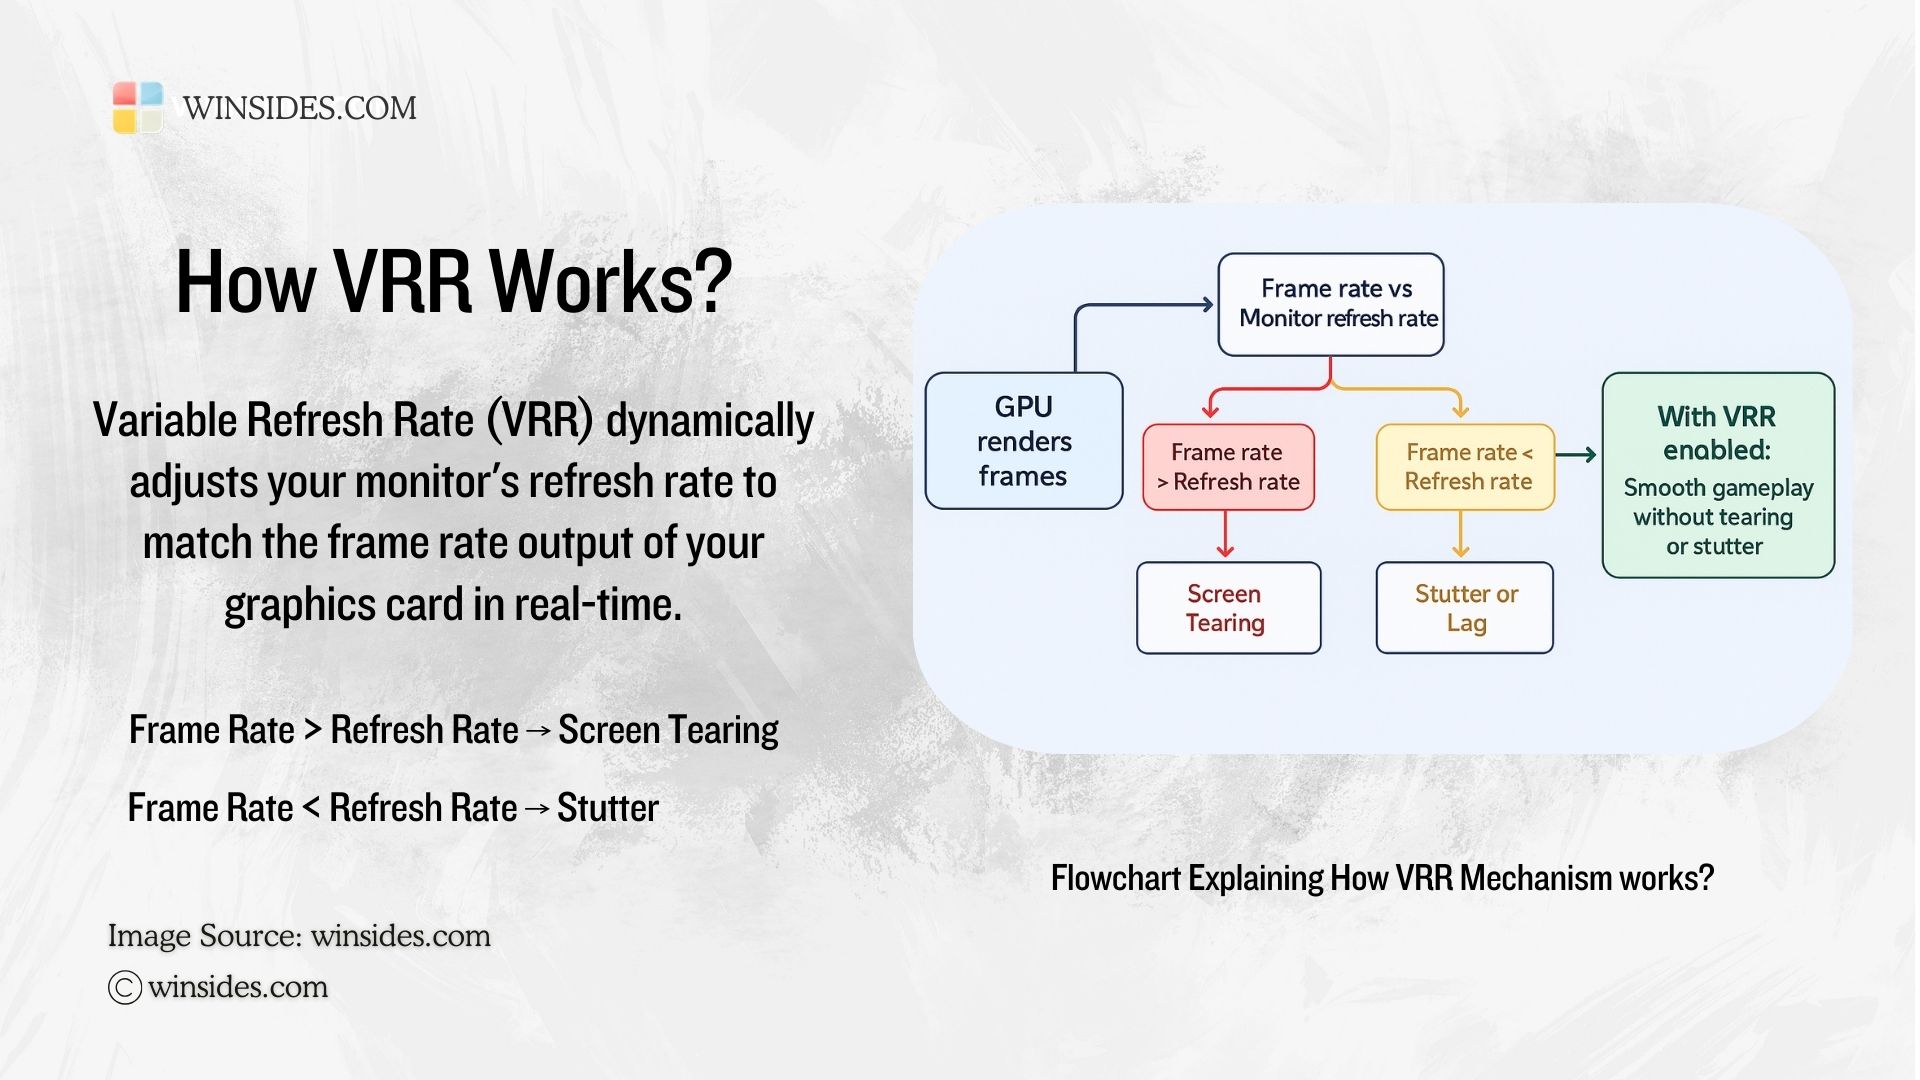
Variable Refresh Rate allows monitors to dynamically adjust their Refresh Rate in real time to match the frame output of the GPU. When the GPU is rendering higher Frame Outputs, why restrict them to the conventional 60 Hz. This Display Technology eliminates Screen Tearing, reduce Stuttering, and improve Gameplay Smoothness.
When the GPU Frame Rate is more then the Monitor output Refresh Rate, then it will result in Screen Tearing. On the other hand, if the GPU Frame Rate is less than the Monitor output Refresh Rate, then it will result in Screen Stuttering or Screen Lag.
It is Healthy to check WDDM Version before Enabling VRR Support on Windows 11
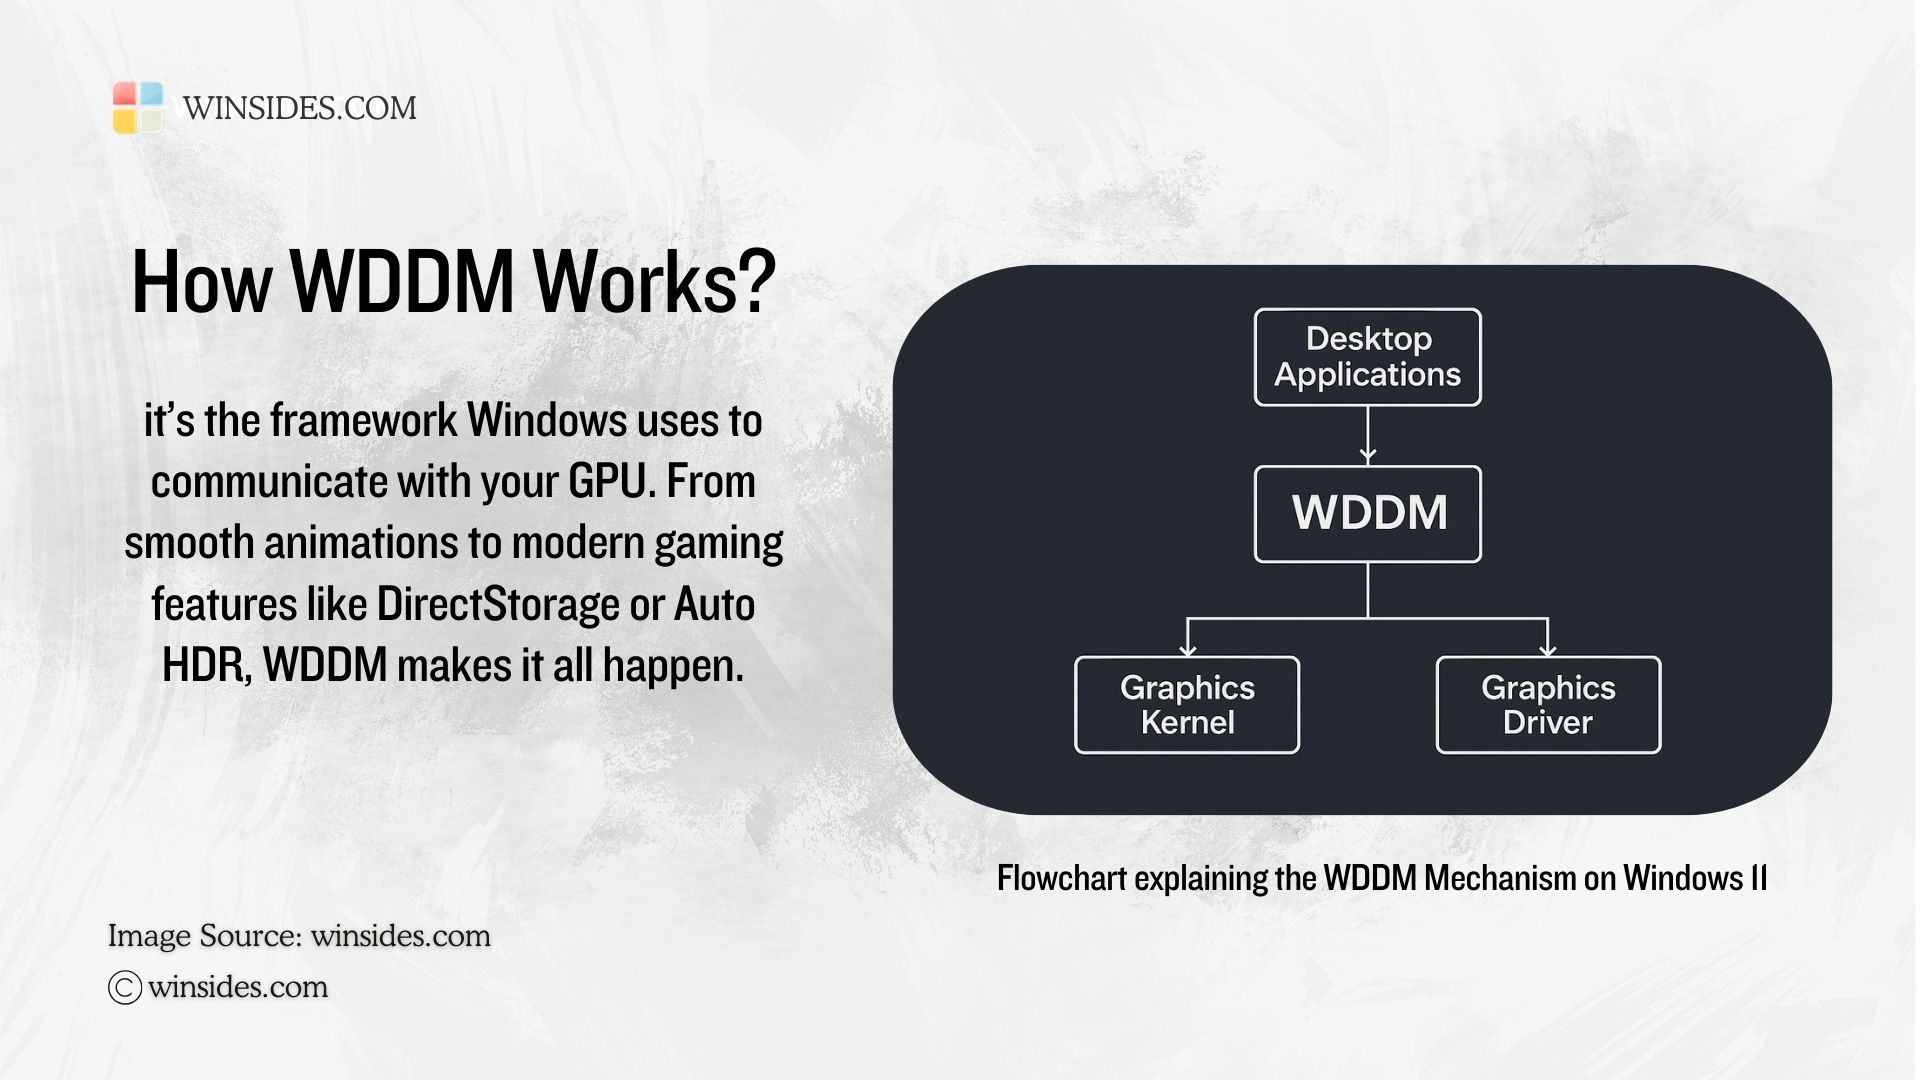
Before getting to Enabling VRR on Windows 11, it is recommended to check the WDDM Version to make sure the functionality of VRR because, VRR Support was initially introduced on WDDM 2.6. Hence, we have to make sure that our WDDM is to the latest version. We have detailed article explaining How to Check WDDM Version on Windows 11. Kindly refer to it.
If your system is using older Windows Display Model Version, then VRR Support may not appear in the Windows 11 Settings or it may not function properly.
Facts on the Go!
Hardware Accelerated GPU Scheduling, a part of WDDM Updates, reduces latency, and improve performance. It is a worthy option.
Enable Variable Refresh Rate on Windows 11 – Detailed Steps
- To Enable VRR Support, we will use the Windows Settings. Open the Windows Settings using the Keyboard Combination Win Key + I.
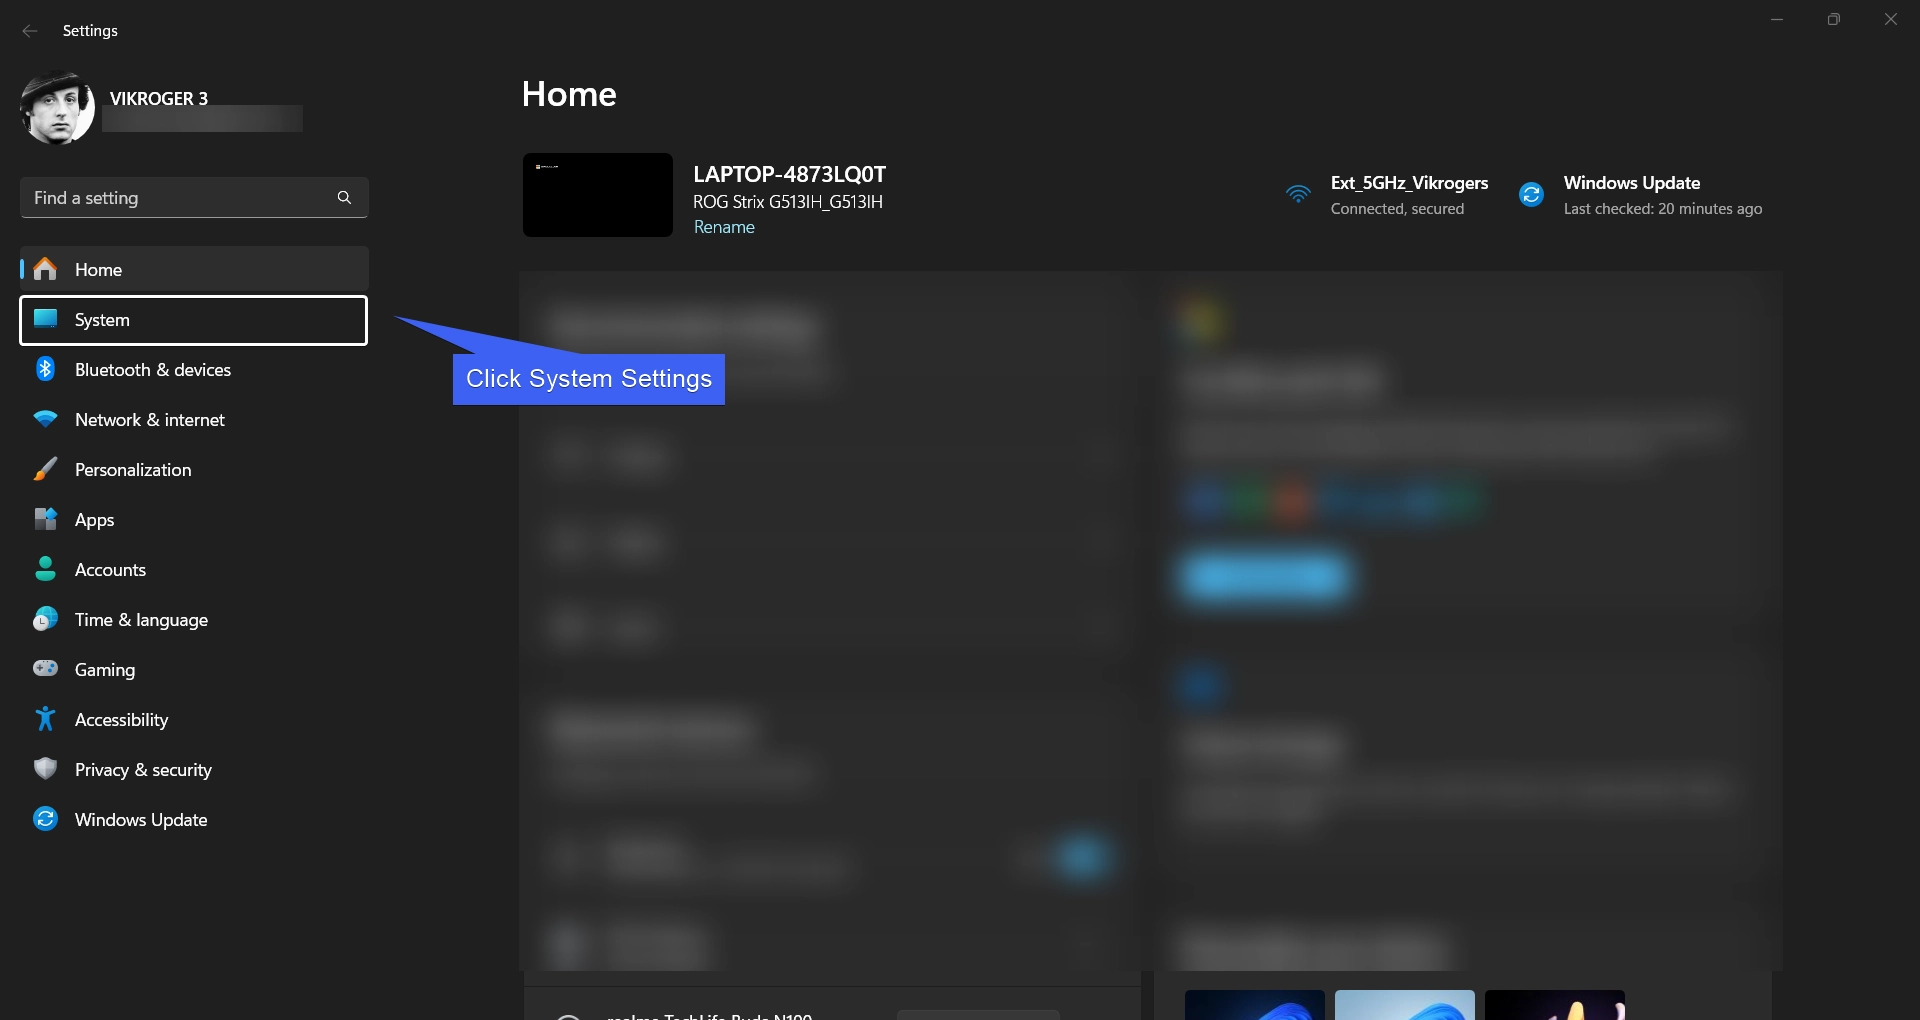
- From the Left Pane, click on System.
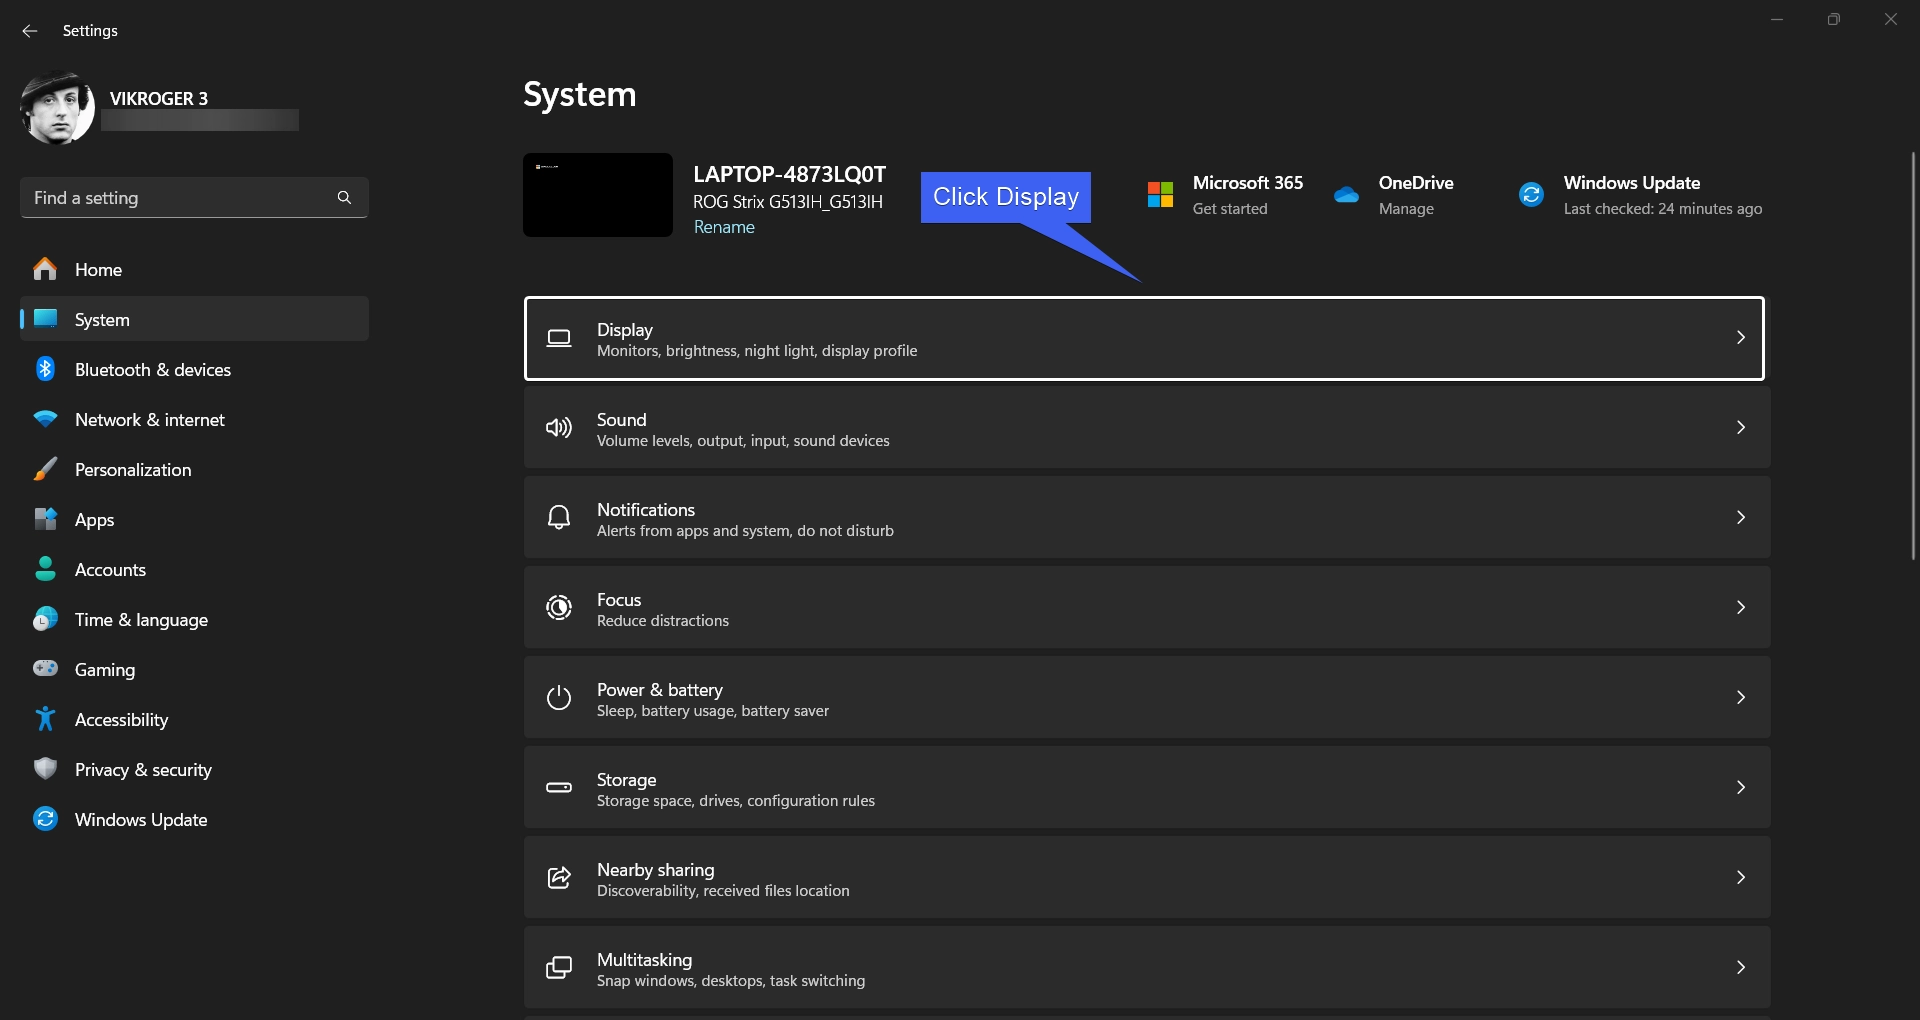
- In the System Settings, proceed with Display.
- Under Related Settings, you can find the option “Graphics”. Select Graphics.
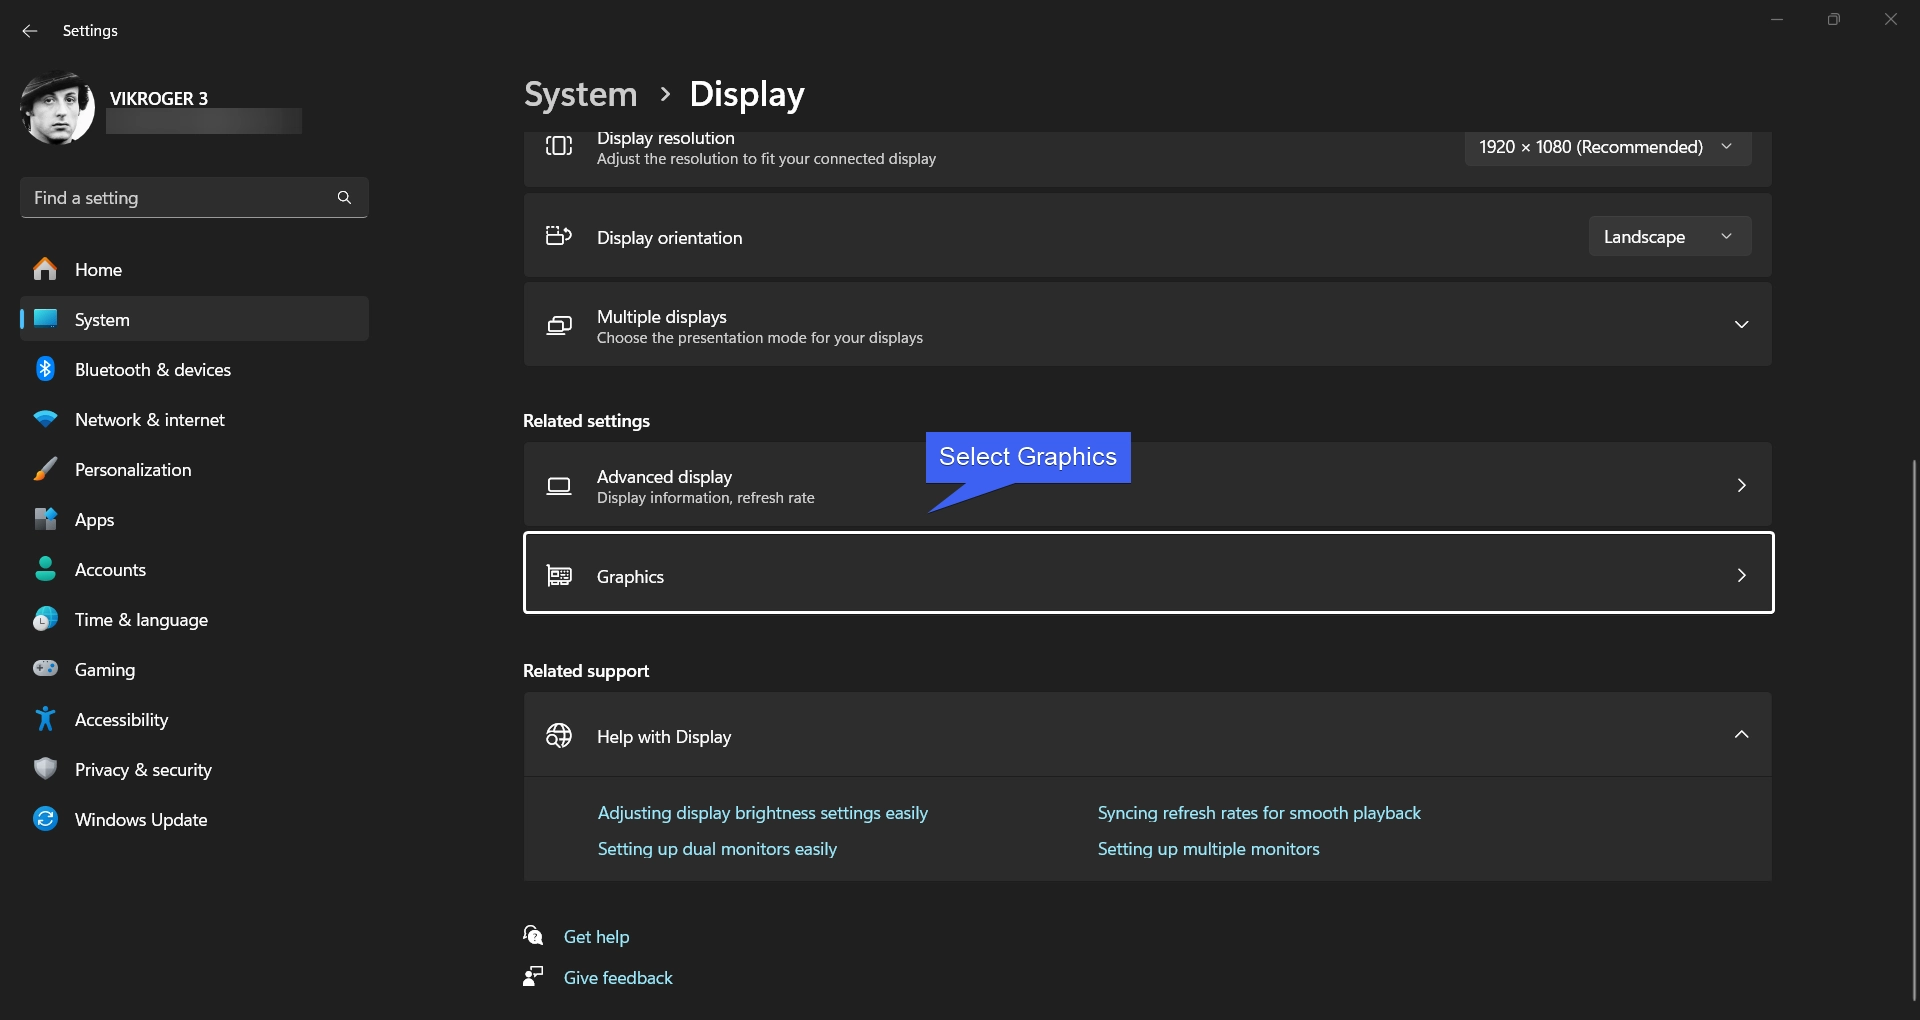
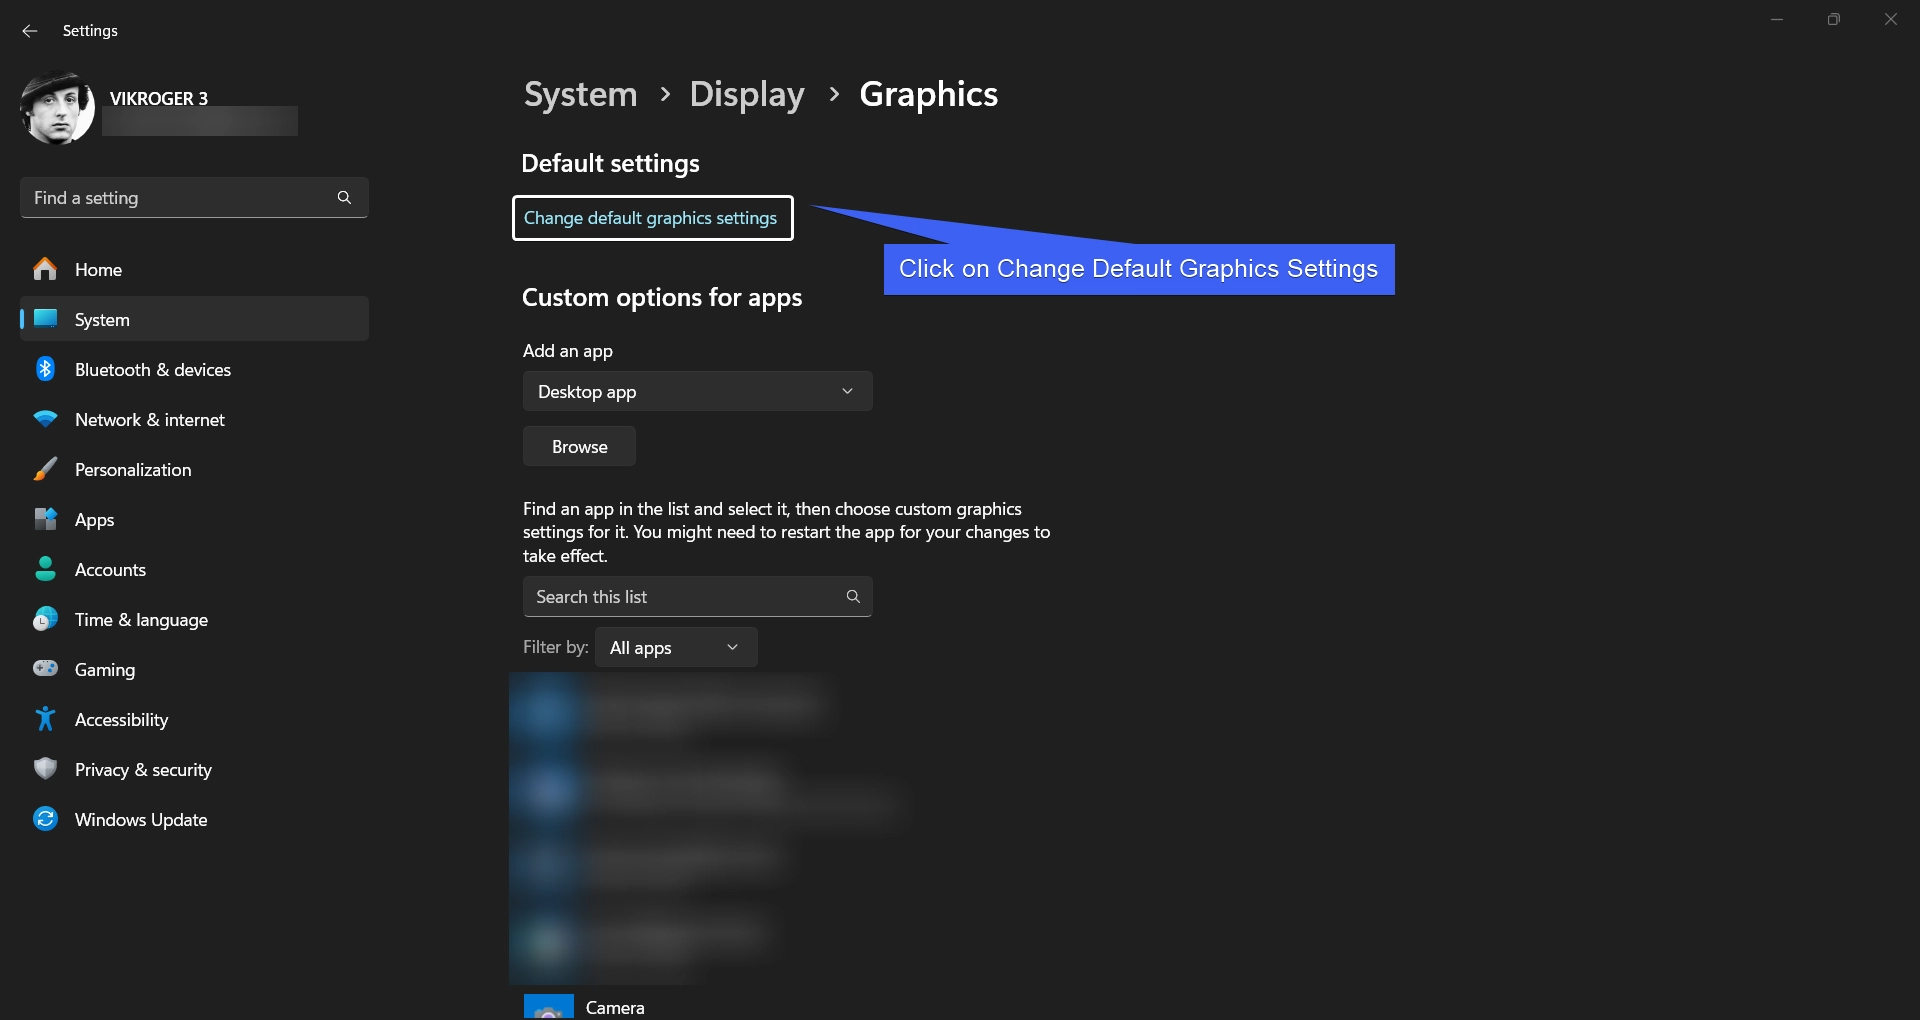
- Now, under Default Settings, click on Change default graphics settings.
- Here, you can find “Variable Refresh Rate”. Toggle Variable Refresh Rate switch to ON.
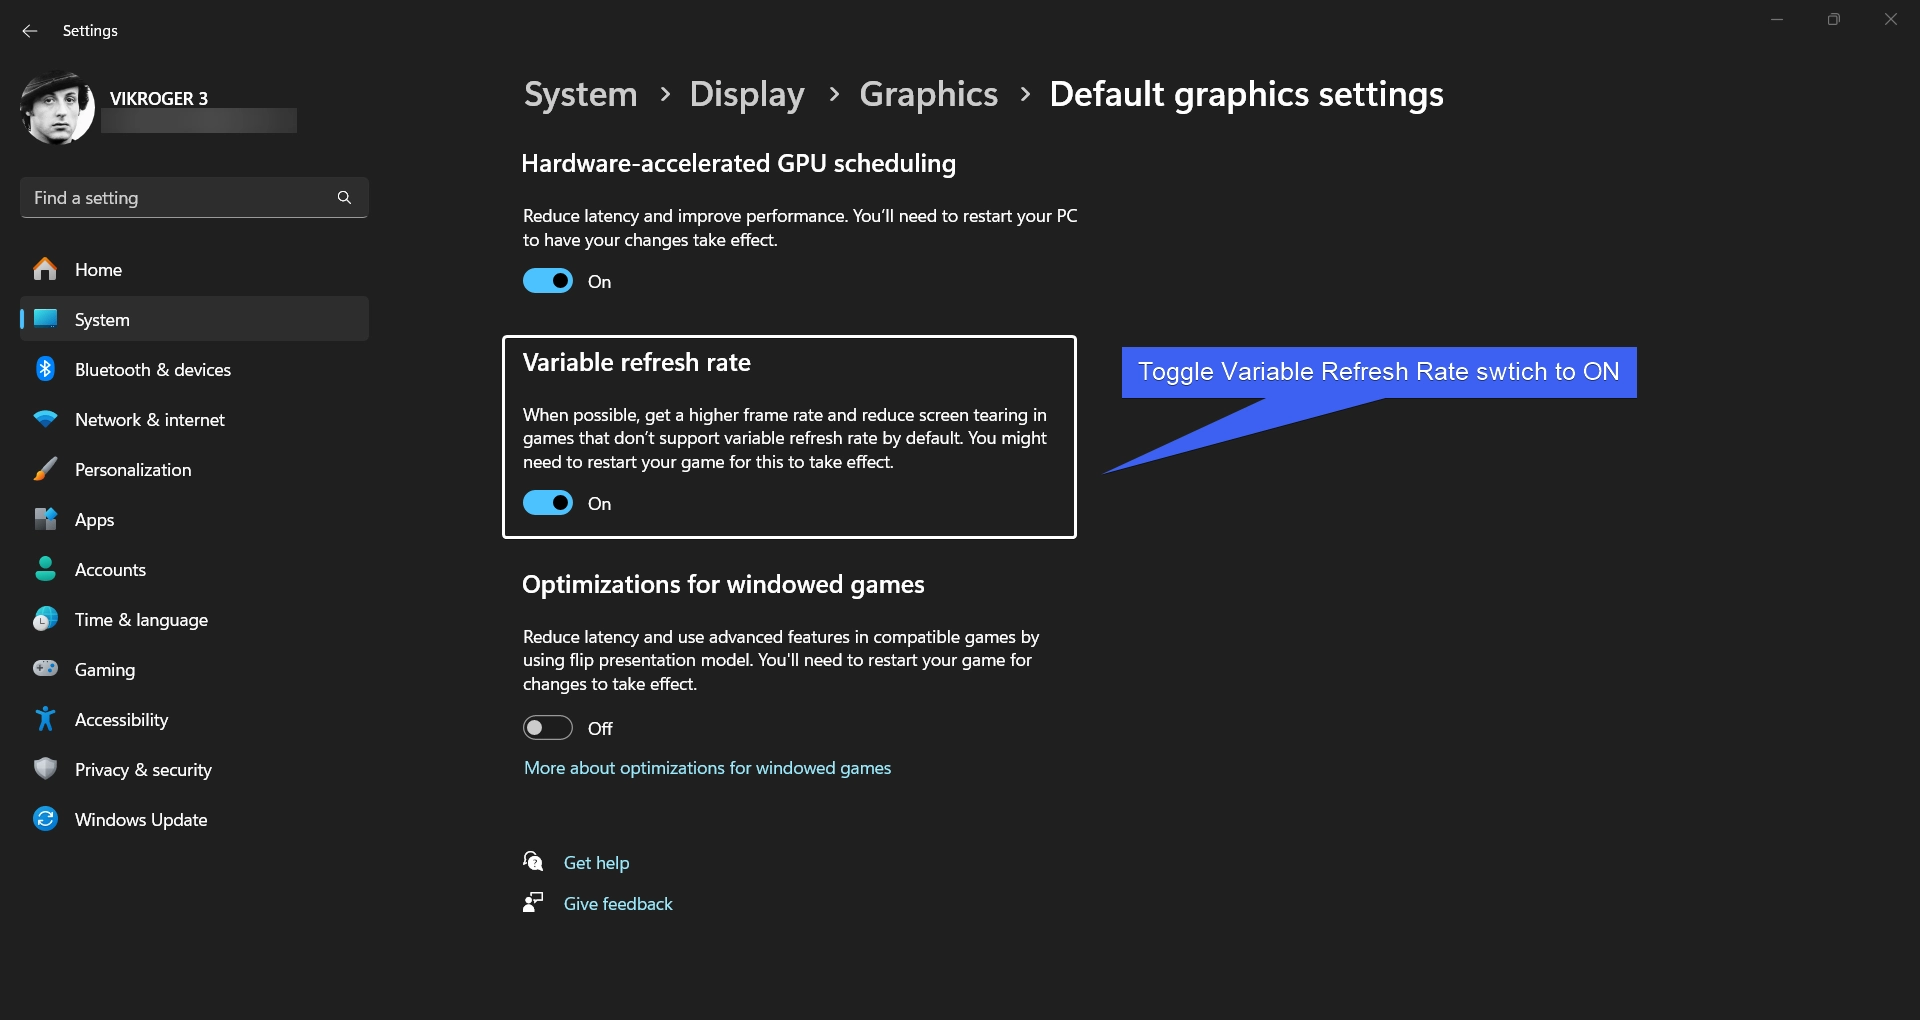
- Once Variable Refresh Rate is ON, when possible, you may get a higher frame rate and reduce screen treating in games that don’t support variable refresh rate by default. kindly Restart your system so that the changes made will reflect. Check out: How to change Refresh Rate on Windows 11?
Take Away
With Technological Advancements, We are enhancing our Experience to a better spot everyday, and Variable Refresh Rate is one of those advancements that is intended to enhance your Gaming Performance on Windows 11. Thanks to NVIDIA, and AMD for pioneering such technologies.
Have Queries?
We hope you are satisfied with our article on How to Enable Variable Refresh Rate on Windows 11, and if you have any queries, kindly let us know in the Comments. For more wonderful insights, stayed tuned to Winsides.com. Happy Gaming! Peace out!
We combine expert insights with user-friendly guidance. We thoroughly research and test everything to give you reliable and simple to understand tech guides. Please take a look at our publishing process to understand why you can trust Winsides.


