When I connected my external SSD to transfer files from my PC, I noticed that the SSD was using up space, but when I opened it, there were no visible files. I tried ejecting the SSD and reconnecting it to my PC, but the SSD still showed space being consumed, even though I couldn’t see any files. I thought ejecting and reconnecting the SSD, similar to how we handle external USB drives, would fix the issue, but it didn’t. Later, I found that it wasn’t an issue with the SSD itself, some files were hidden, which was why space was being used. I found out that there are five methods available to show hidden or unhide files and folders on your Windows 11 PC.
Method 1: Unhide or Show Hidden Files & Folder using File Explorer:
- Firstly, You need to open the File Explorer or navigate to the desired directory.
- Click on the View tab in the top of the tool bar.
- In the View tab, you need to click the Show option and choose the Hidden Items if the checkmark is not present as shown in the image below.

This is the simplest and quickest method to display all the hidden files & folders on your pc.
Method 2: View Hidden Files & Folder using Folder Options:
This method is also the simplest method, and it is also similar to the above one, follow the below steps.
- Like the first method, You need to open the File Explorer or navigate to the desired directory.
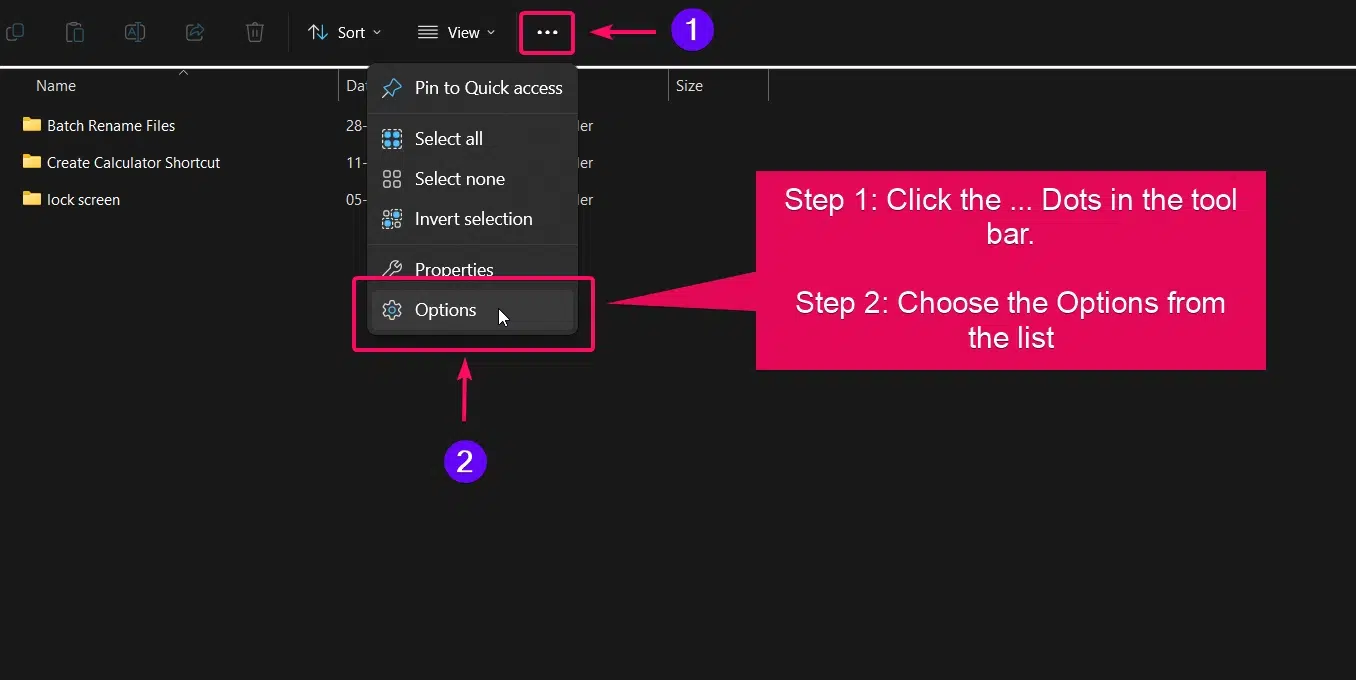
- Now you need to click on the (. . .) three dots (ellipsis) in the toolbar and choose the Options.
- Now the Folder options window will be appear on your screen.
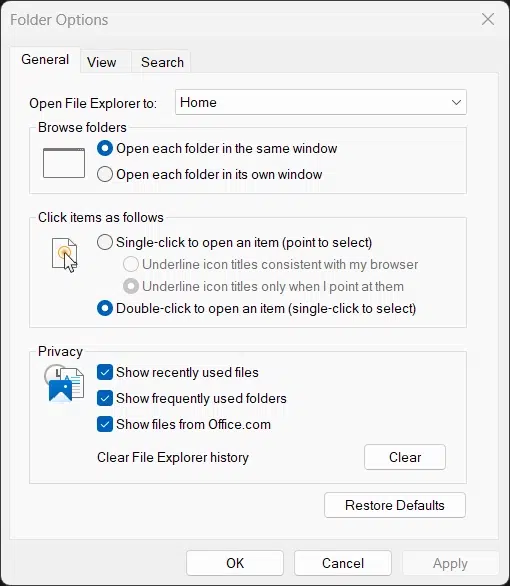
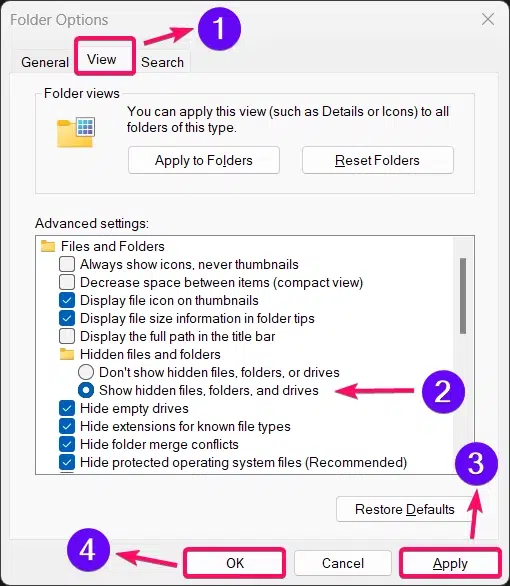
- Click the View tab located near to the General tab to explore view folder options.
- Select the radio button to enable the Show hidden files, folders, and drives option.
- Click the Apply button and finally click the OK button to confirm the changes.
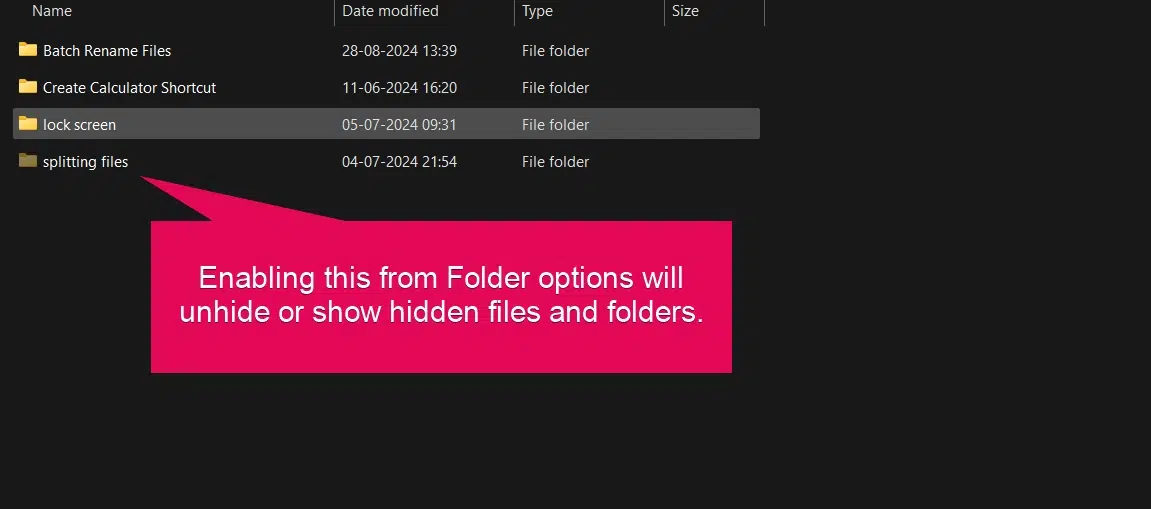
- Now, the hidden files and folders will be appear on your file explorer.
Method 3: Changing Hidden File & Folder to Show from its Properties:
- Once you find the hidden files, you can change their properties to permanently switch them from hidden to unhide.
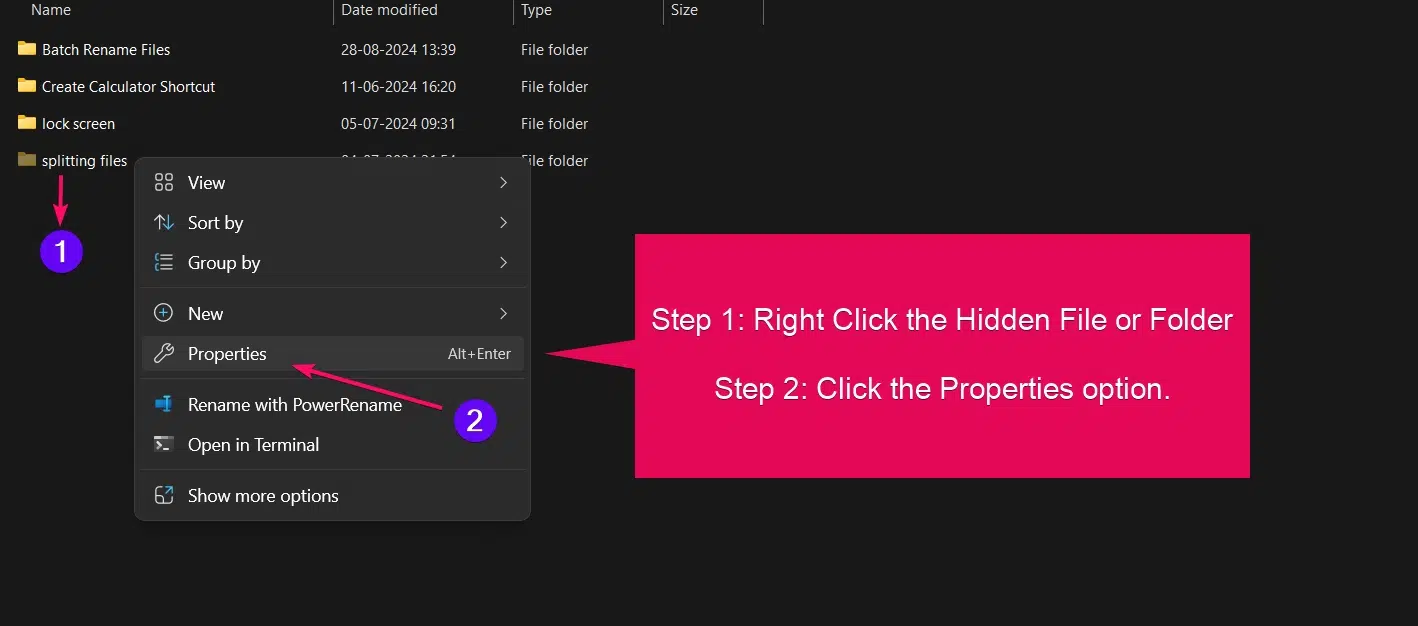
- To do this, you need to right click on the hidden file or folder.
- Choose the properties from the list of options.
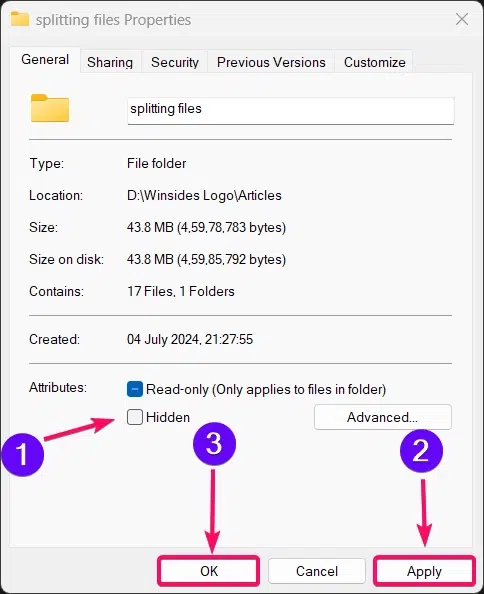
- In the General tab, under Attributes, uncheck the Hidden checkbox option.
- Click the Apply button to apply the changes and click the OK button to confirm the changes.
Method 4a: Unhide Files or Folders using Command Prompt:
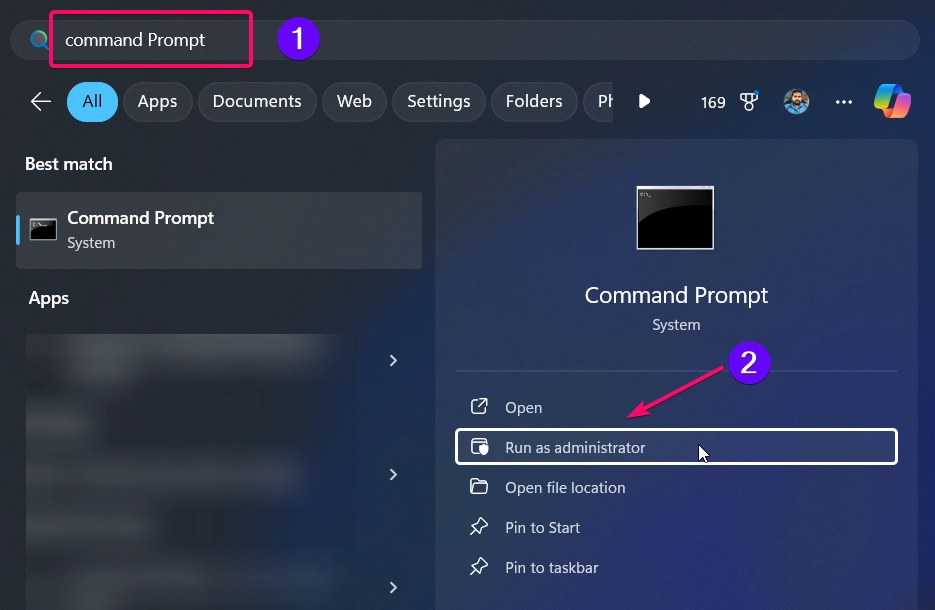
- Click the Start Menu and search for Command Prompt
- You need to choose the “Run as Administrator” option to launch the command prompt in admin mode.
- Now you need to go to the folder where the hidden file or folder is located using the
cdcommand. - Then you need to execute the following command:
attrib -h -s <Filename.txt or "Folder Name">
- Replace with your folder or filename. If you are using it for files, make sure to add the file’s extension along with the command.
- For example:
- For Files:
attrib -h -s sample_file.txt - For Folders:
attrib -h -s "splitting files"
- For Files:
Note: For directories, you may need to use double quotes (“”) around the name & You may need to add extensions for files.
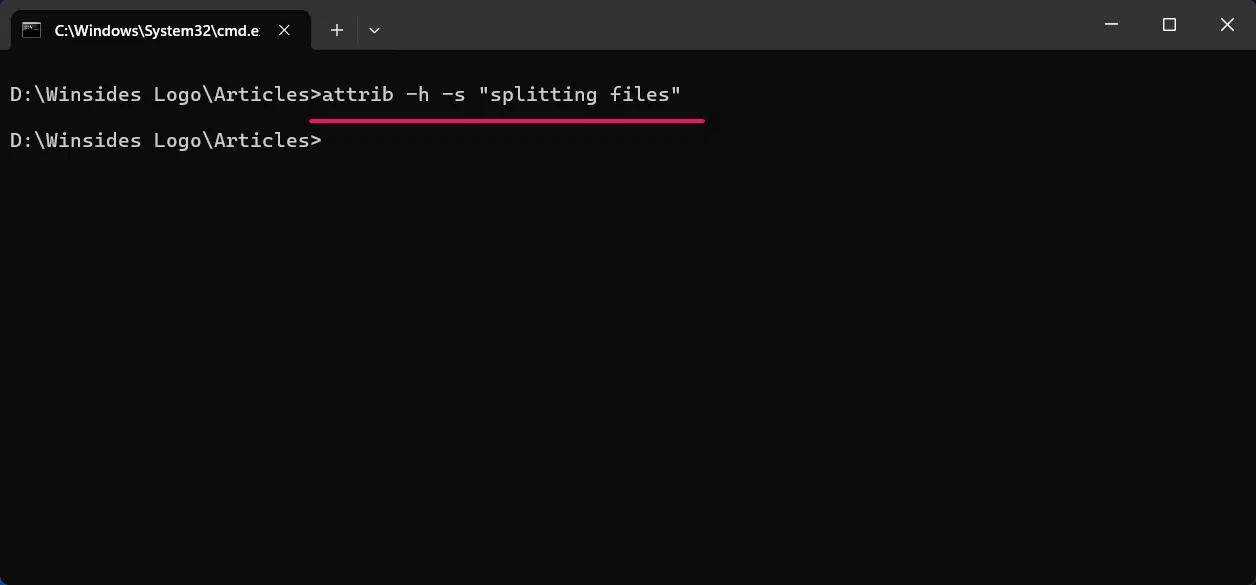
- Executing the above command will instantly remove the directory or file for the hidden status.
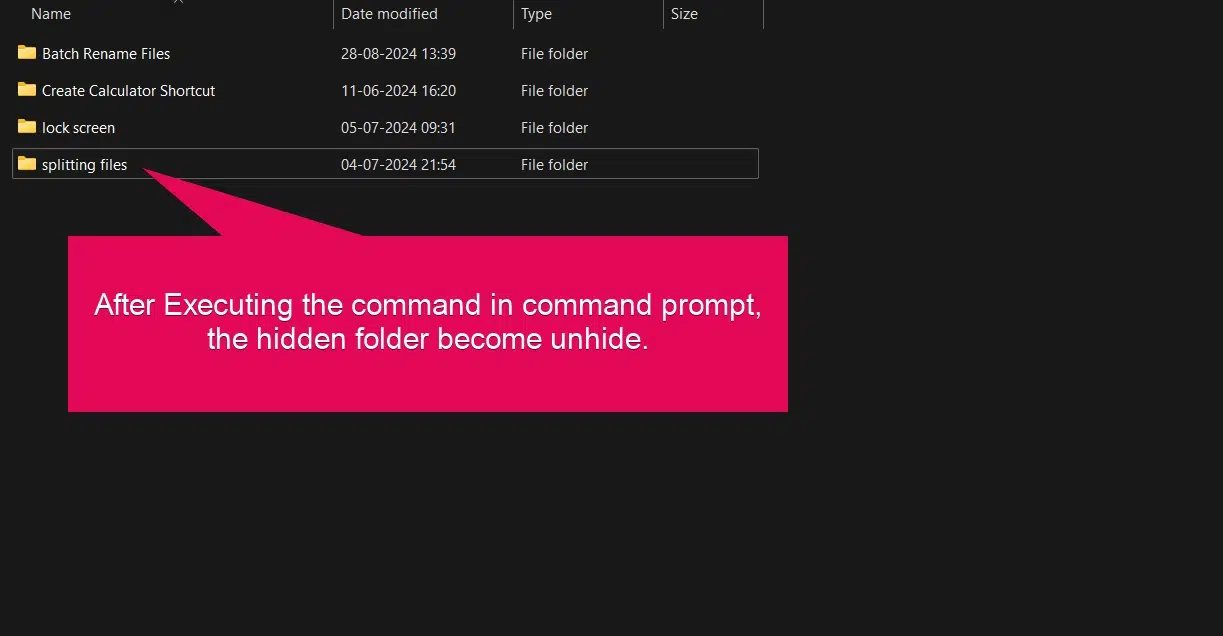
Method 4b: Unhide Bulk Files & Folders using Command Prompt:
- To unhide multiple files in a directory using Command Prompt, navigate to the directory and use the following command:
attrib -h -s *.*
- To unhide all folders in a directory, use this command:
attrib -h -s /d /s
| Command | Explanation |
|---|---|
| *.* | Applies the command to all files in the current directory. |
| -h | Removes the hidden attribute. |
| -s | Removes the system attribute, if present. |
| /s | Applies the command to all subdirectories and files in the current directory. |
| /d | Applies the command to folders as well as files. |
Method 5: Change Hidden Files, Directories, Drives to Normal using PowerShell:
- Click the Start Menu and search for PowerShell
- You need to choose the “Run as Administrator” option to launch the powershell in admin mode.
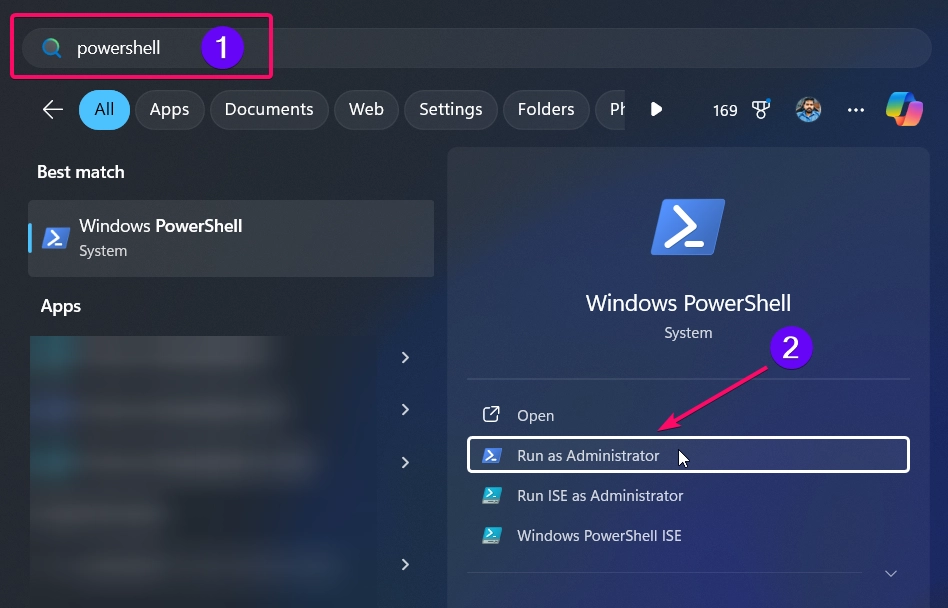
- Now you need to go to the folder where the hidden file or folder is located using the
cdcommand. - Then you need to execute the following command for unhiding the folder or directory:
Get-Item -Force "My Folder" | % { $_.Attributes = 'Normal' }
- Execute the following command for unhiding the file:
Get-Item -Force "document.txt" | % { $_.Attributes = 'Normal' }
- Replace the folder name or document.txt with your needs.
Note: For directories, you may need to use double quotes (“”) around the name & You may need to add extensions for files.
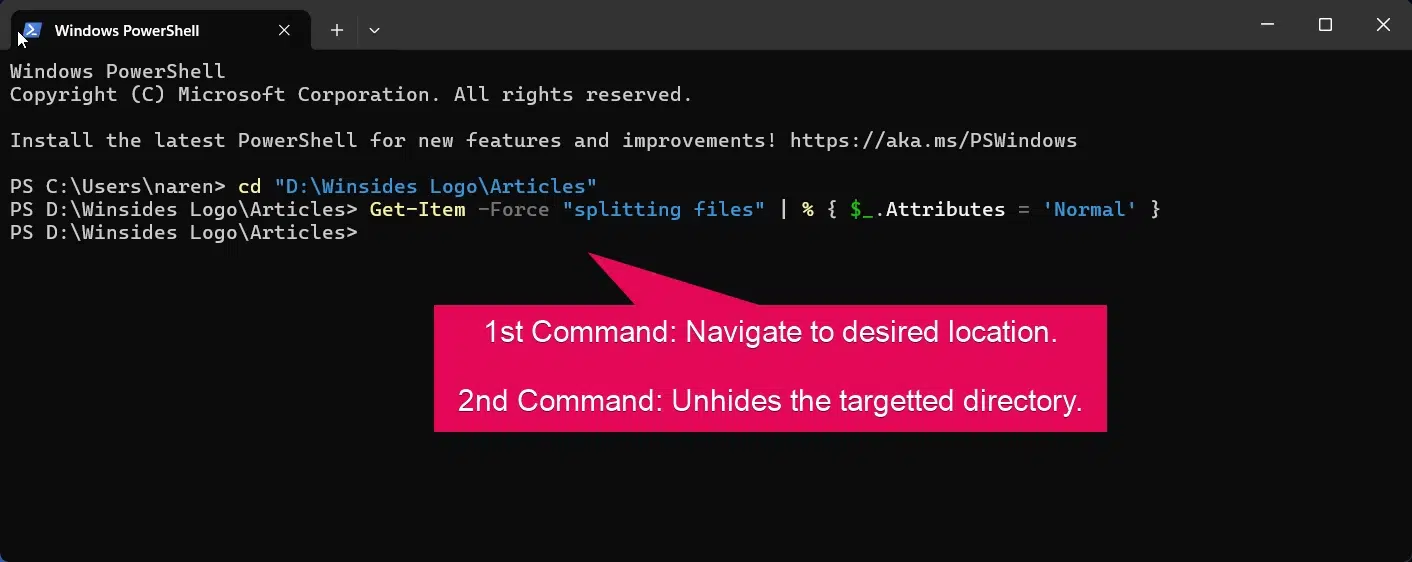
- The PowerShell command will instantly unhides the targeted directory or file.
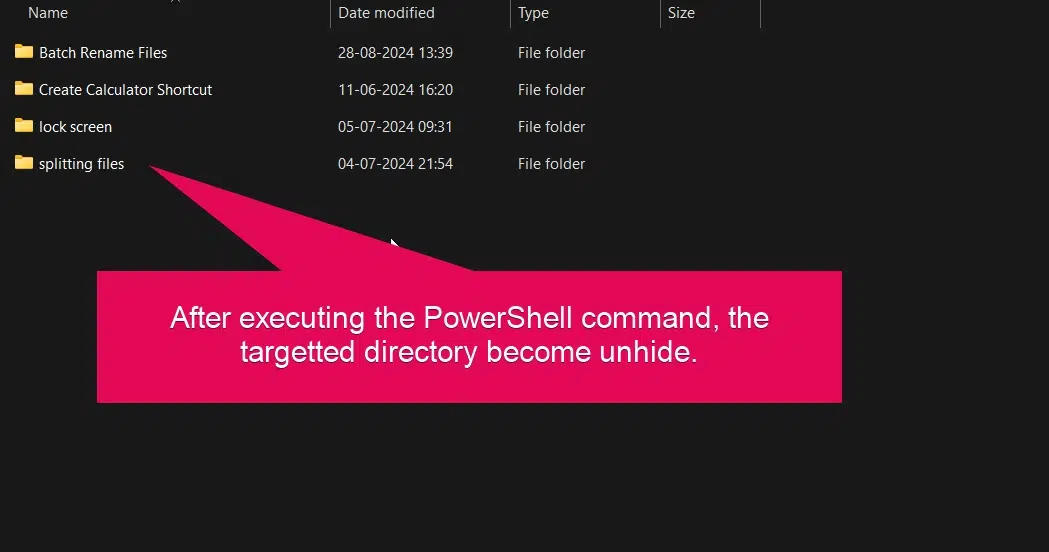
Method 5b: Unhide Bulk Files & Folders using PowerShell:
- To unhide all files in a directory using PowerShell, run the following command:
Get-ChildItem -File -Recurse | ForEach-Object { $_.Attributes = 'Normal' }
- This will reset the attributes to ‘Normal‘, effectively unhiding the files.
- To unhide all folders, you can use this command:
Get-ChildItem -Directory -Recurse | ForEach-Object { $_.Attributes = 'Normal' }
- This will reset the folder attributes to ‘Normal’, unhiding the folders.
| Command | Explanation |
|---|---|
| -File | Targets only files. |
| -Recurse | Applies the command to all files in the current directory and subdirectories. |
| -Directory | Targets folders only. |
| -Recurse | Applies the command to all subdirectories. |
Take Away:
If you’re struggling to locate files or folders on your external SSD that seem to be consuming space, it’s likely that these files are hidden. By using one of the five available methods to unhide files and folders on Windows 11, you can quickly identify and manage them. This guide will help you understand how to make hidden files visible. For more interesting articles, kindly visit WinSides.com
 How to Check PC Specs without Logging into Windows 11?
 How to Enable HDR Video Streaming on Windows 11?
 How to Clean Temporary Files on Windows 11?
 How to Use ODBC on Windows 11?