4 Easy Ways: Run Windows Terminal as Administrator With Elevated Permissions!
Manage System Files, Services, Network Configuration & more using WT as Admin
Windows Terminal is the modern and powerful version of command prompt introduced by the Microsoft for Windows users. This terminal console combines both the functionality of command prompt, PowerShell and WSL into an one unified interface. However, for certain scenario, you might need to run the terminal with elevated permissions also known as Running Terminal with Administrator Privileges which allows you to execute commands and operations without facing any permission related issues. This tutorial, I’ve explained the multiple steps to Run Windows Terminal as Administrator with elevated permissions in windows 11 pc.
Kindly be Cautious while Running Windows Terminal as Administrator
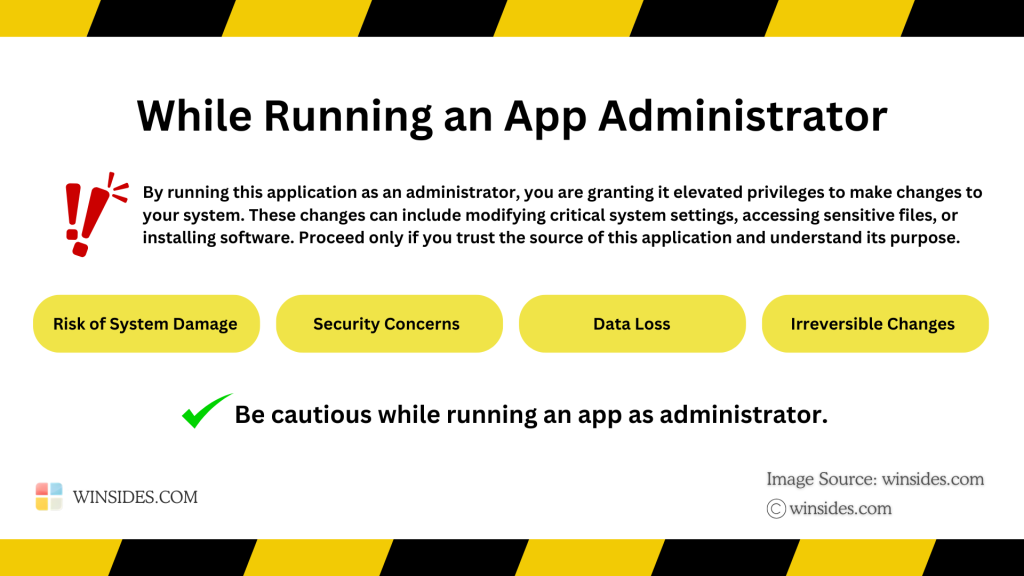
While Running Windows Terminal as Administrator on Windows 11 grants it elevated privileges, which can potentially bypass system security restrictions. Please proceed with care and only run trusted applications in this mode. At Winsides.com, we advise our users to use Administrator privileges only when absolutely necessary to perform tasks requiring elevated rights. Misuse of administrative privileges may lead to System Vulnerabilities, Data Loss, System Instability, Security Concerns, etc.
Different Methods to open Windows Terminal with Admin Privileges on Windows 11
There are multiple methods available to enable Windows Terminal to open with Elevated Privileges.
- Run Windows Terminal as Administrator using the Start menu.
- Open Windows Terminal (Admin) using the Quick Access menu.
- Open Windows Terminal with Administrator Privileges using the Run Command.
- Create New Task to run Windows Terminal as Admin using Task Manager.
- Always run Windows Terminal as Administrator by creating a Dedicated Shortcut.
Method 1: How to Run Windows Terminal as Administrator using the Start menu?
This is the easiest way to open WT as Admin.
- Open Start menu and search for Windows Terminal. Right-click on it and then click on Run Windows Terminal as Administrator.
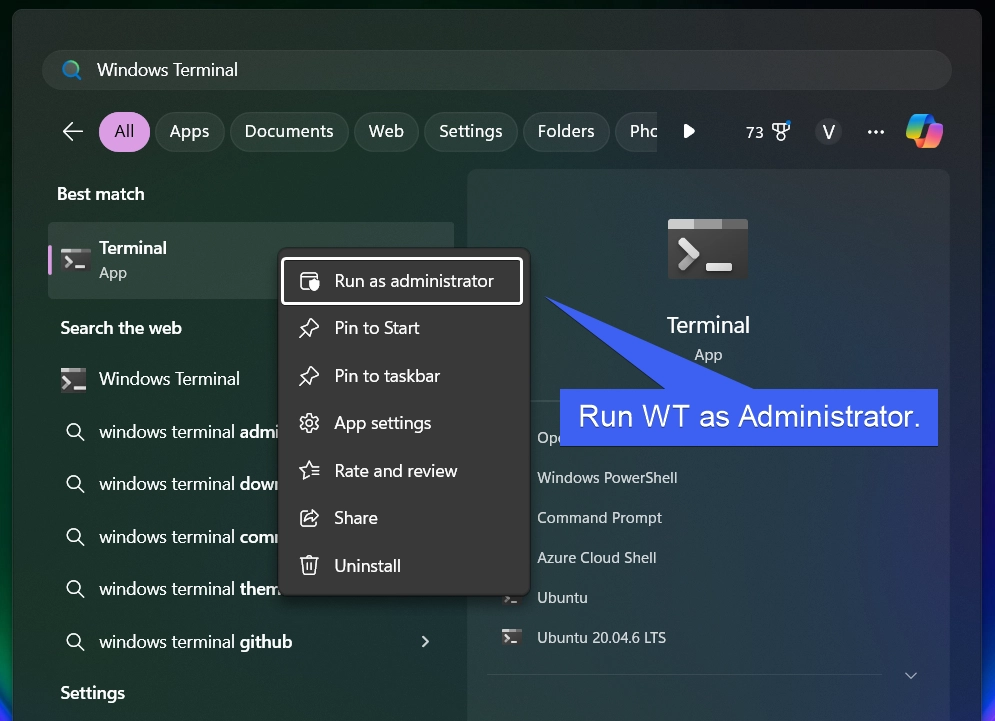
- The UAC (User Account Control) will prompt for confirmation to open the app with Administrator privileges. Click Yes,if you would like to proceed further.
- Finally, Windows Terminal will now open as Administrator.
Method 2: Open Terminal (Admin) using Quick Access Menu
- Use the key combination Win Key + X to open Quick Access menu.
- There, you can find Terminal (Admin).
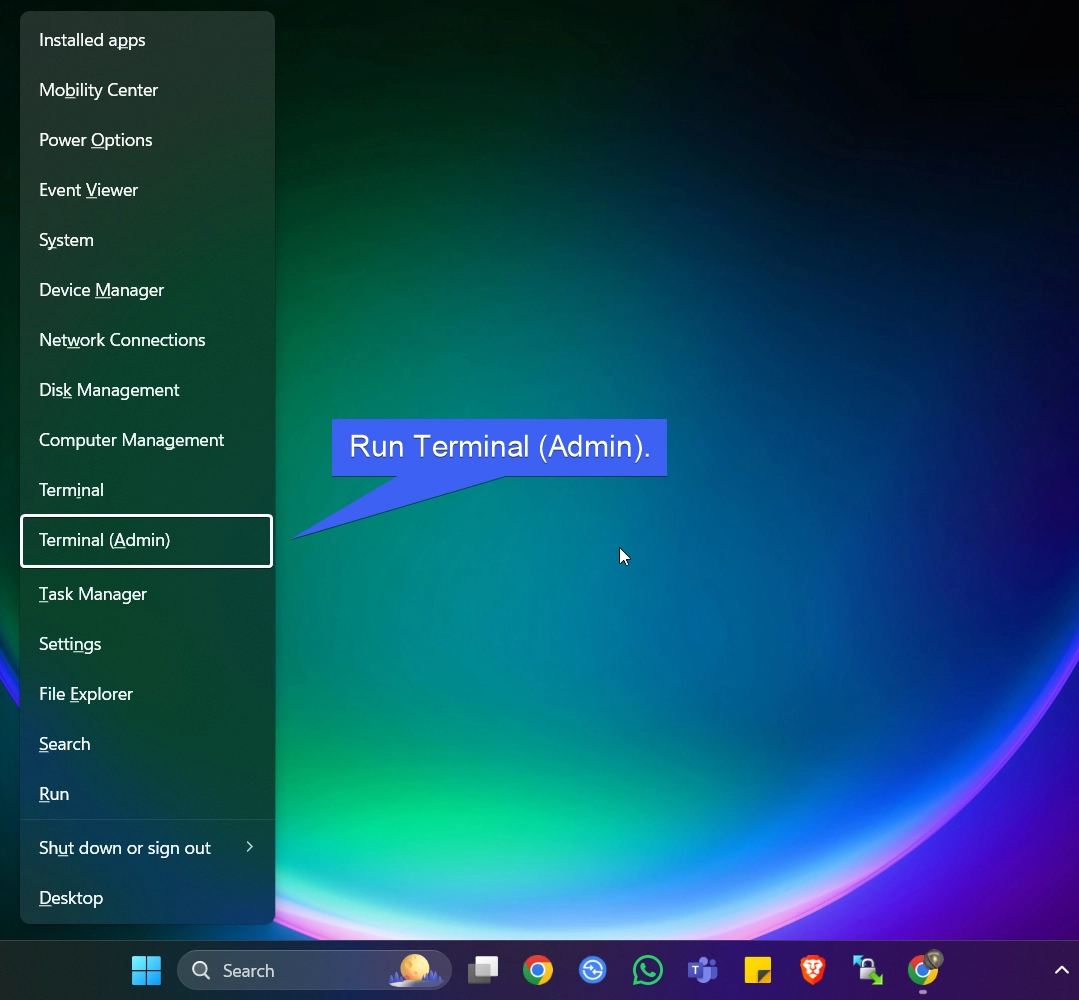
- UAC will prompt for your confirmation.
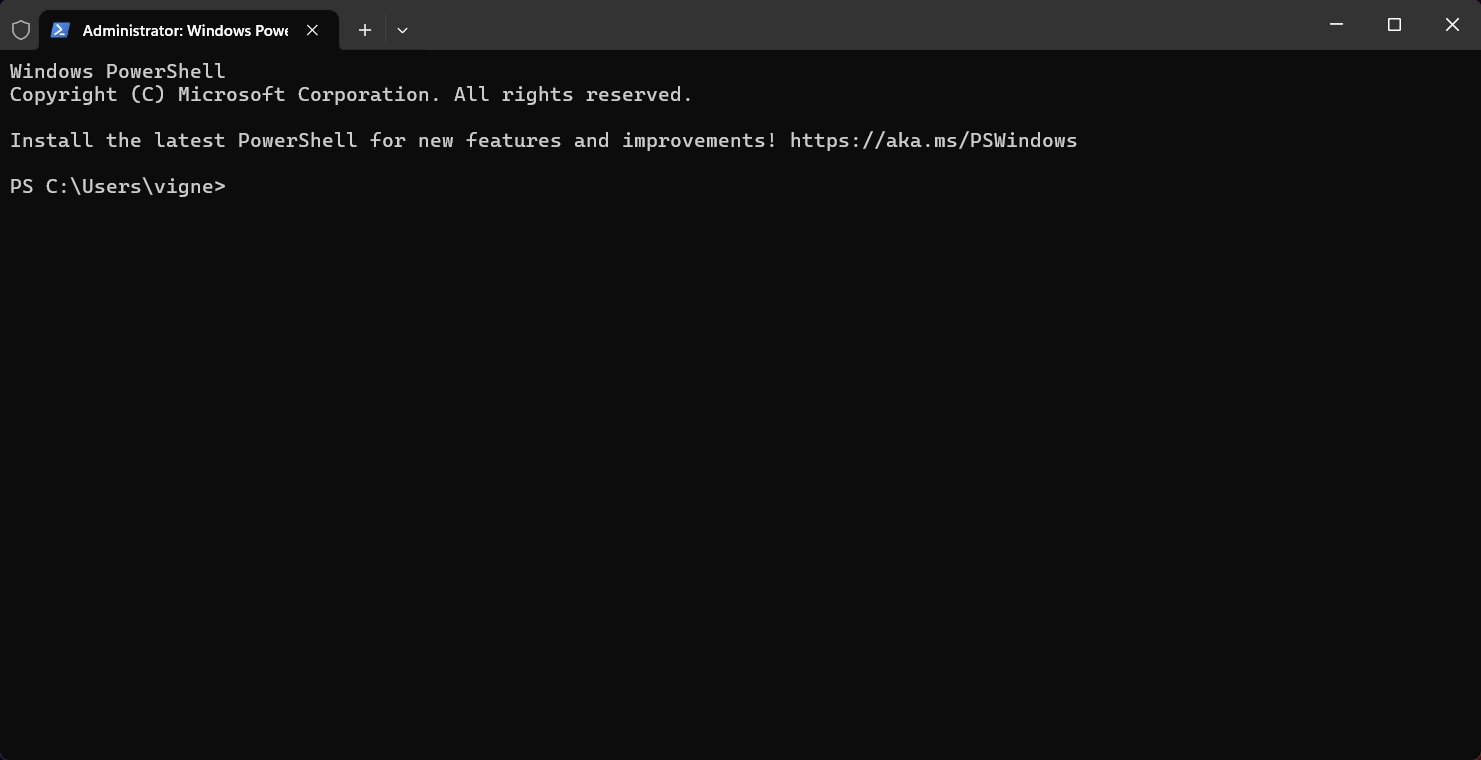
- Now, Windows Terminal will run as Admin.
Method 3: Run Windows Terminal with Administrator Privileges using the Run Command
This method is the conventional one.
- Open Run Command using the shortcut WinKey + R.
- Type the command
wtand press CTRL + SHIFT + ENTER. This will inform system that we are looking to open Windows Terminal as Administrator.
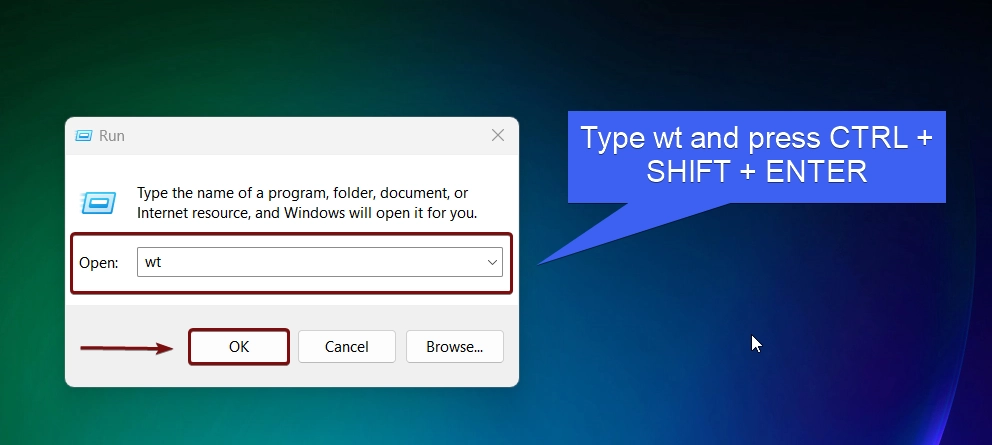
- After confirming with UAC, WT will open with Elevated Privileges.
Method 4: Create New Task to run Windows Terminal Administrator using Task Manager
In this method, we will use Task Manager to create a special task for Windows Terminal Admin.
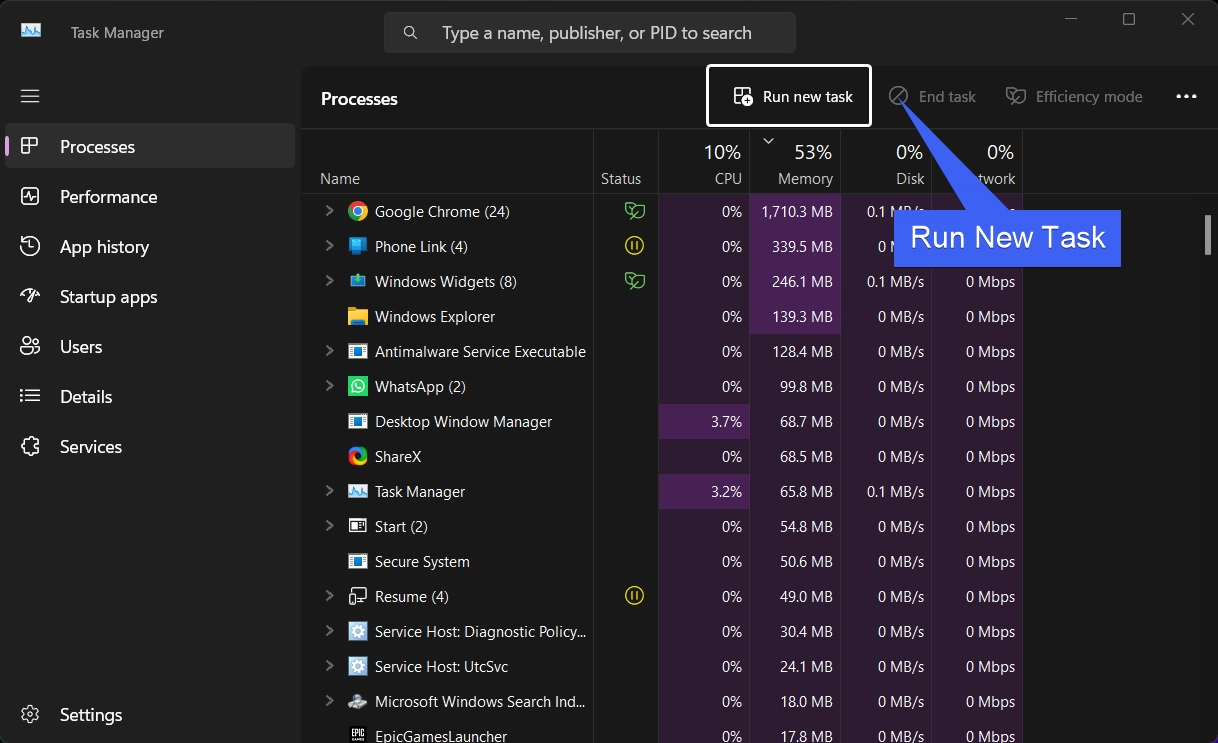
- Right-click on the Task bar and then click on Task Manager.
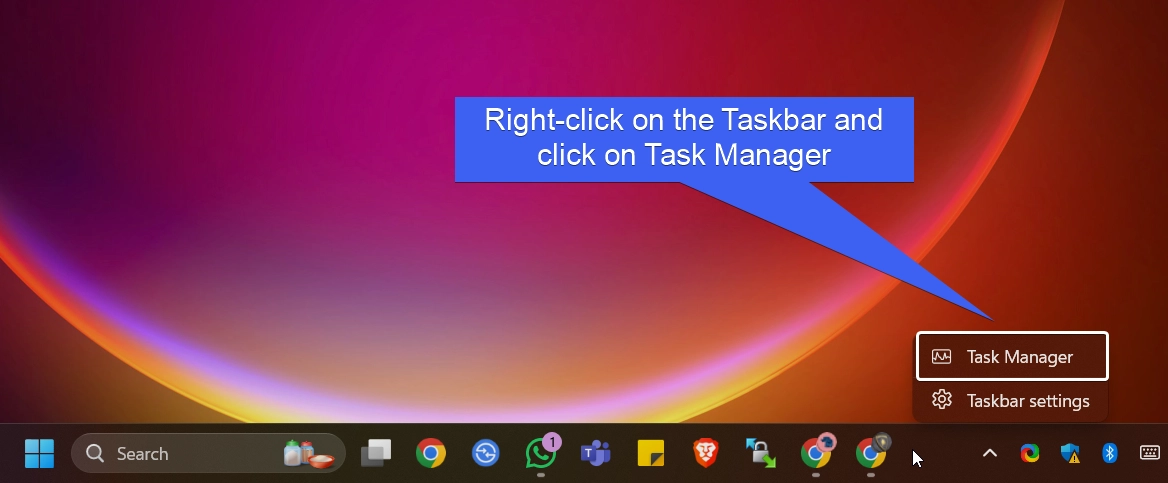
- Now, click on Run New Task.
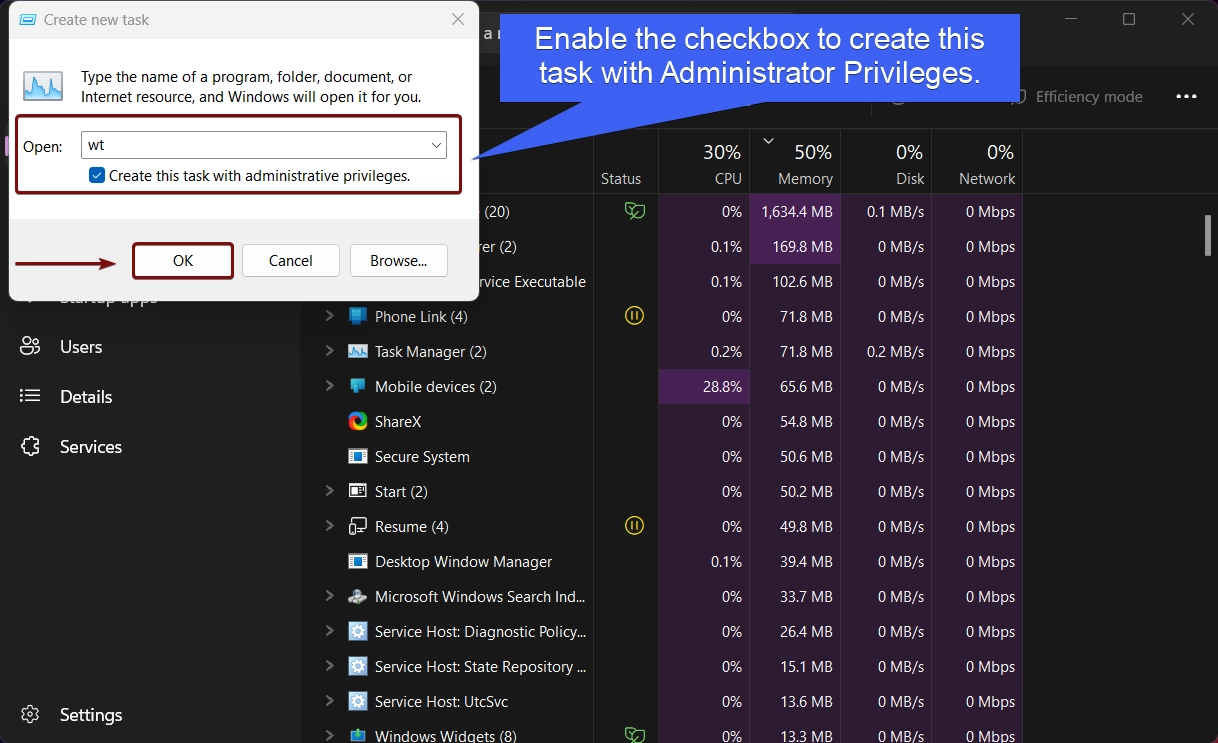
- In Create New Task Dialog, type wt and enable the checkbox “Create this task with Administrative Privileges“. Finally, click OK.
- Now, Windows Terminal will open as Administrator.
Method 5: Set Windows Terminal to always run as Administrator on Windows 11
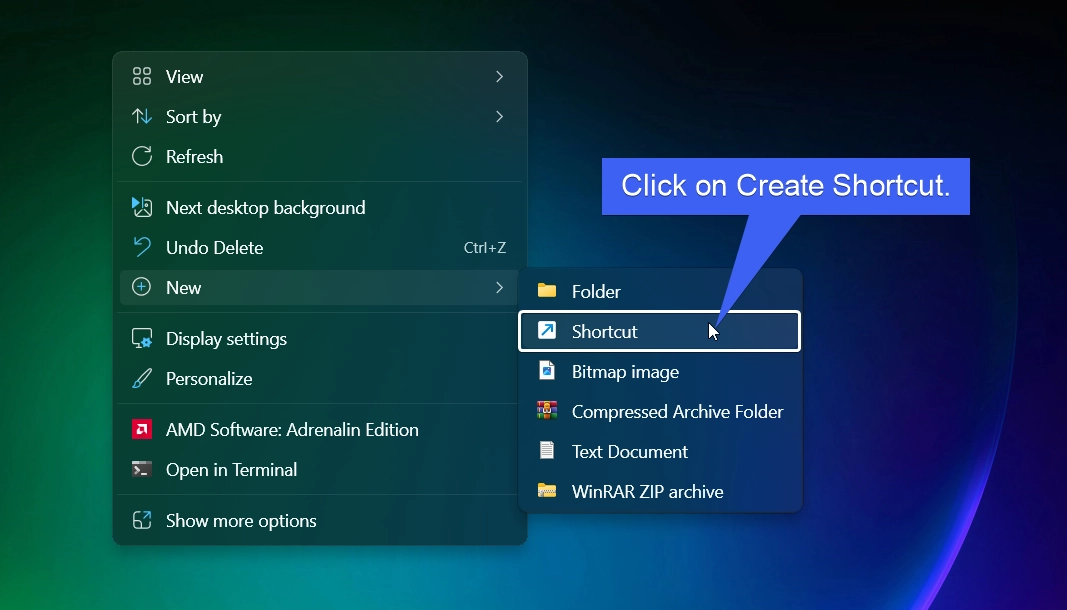
- Right-click on the empty space of the Desktop and then click Create New > Shortcut.
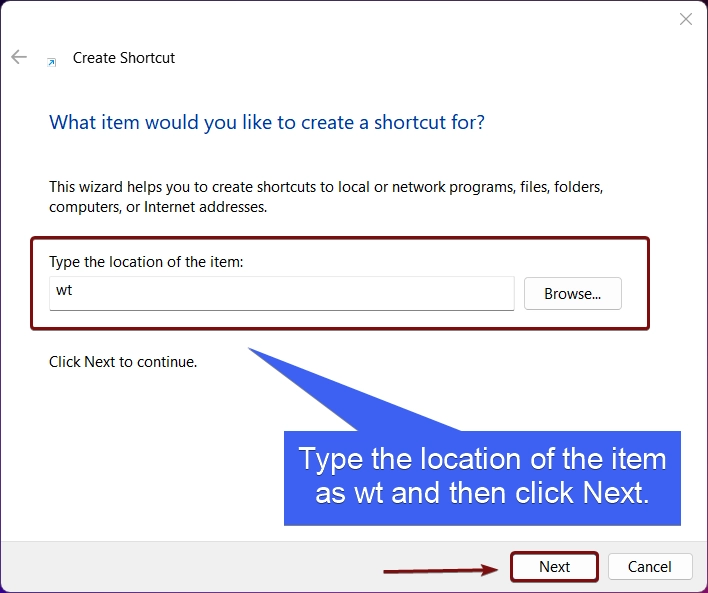
- Create Shortcut dialog box will open now. In “Type the Location of the item“, enter the following command and then click Next.
wt
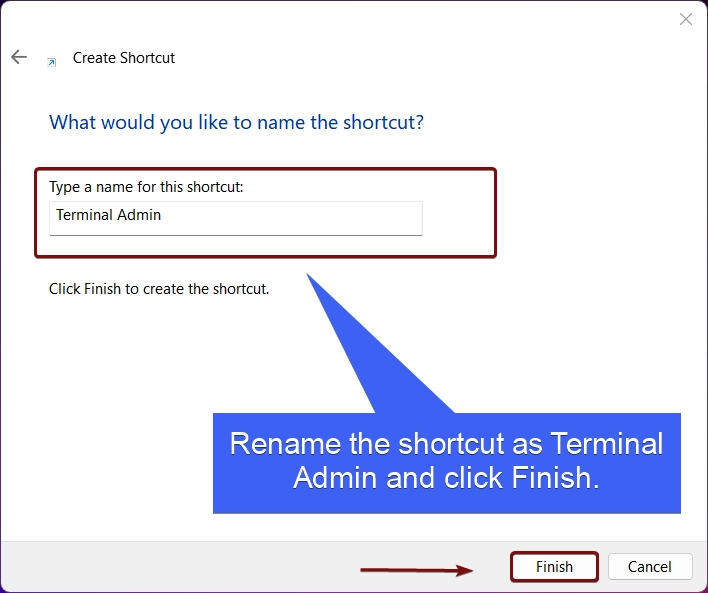
- Rename the Shortcut to Windows Terminal Admin. Finally, click Finish.
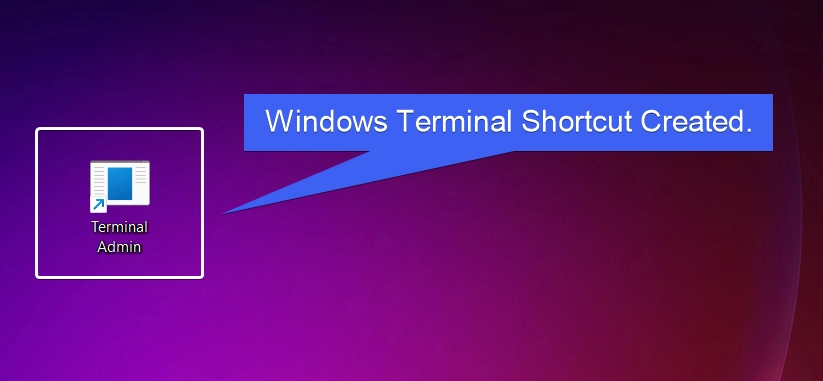
- Windows Terminal Shortcut is now created.
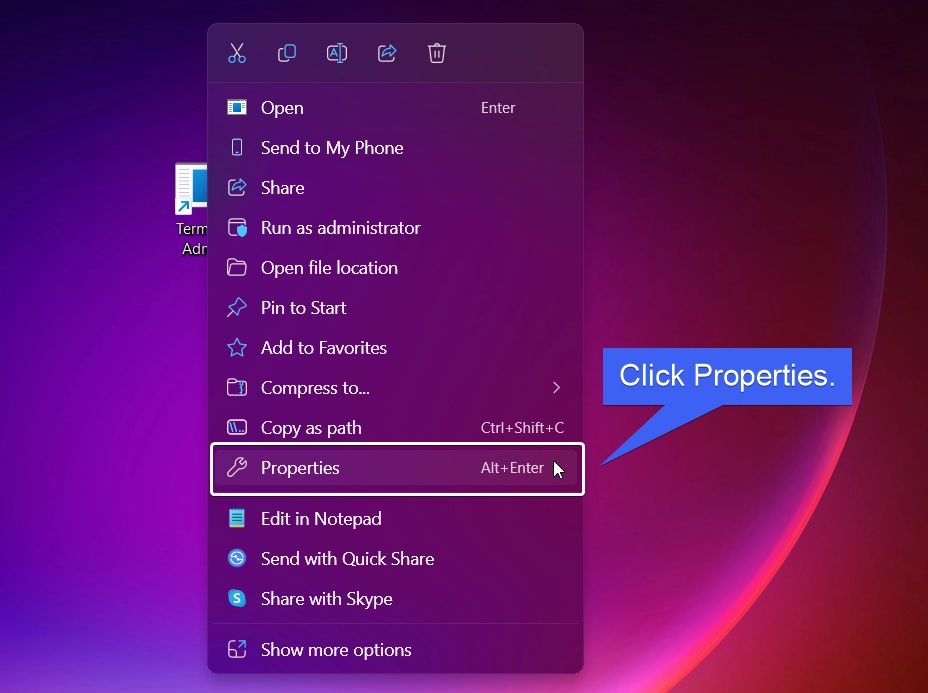
- Right-click on the Windows Terminal Shortcut and click Properties.
- In Windows Terminal properties, click Advanced.
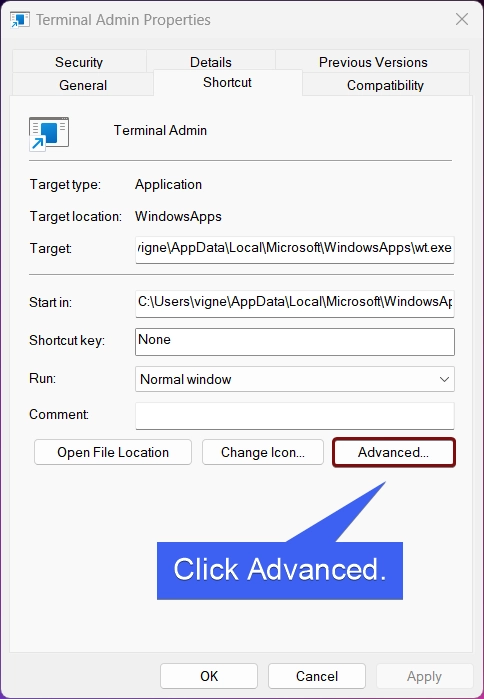
- Advanced Properties will open now. Enable the checkbox “Run as Administrator”. This option allows you to run this shortcut as as administrator, while protecting your computer from unathorized activity. Finally click OK, and then Apply. That is it.
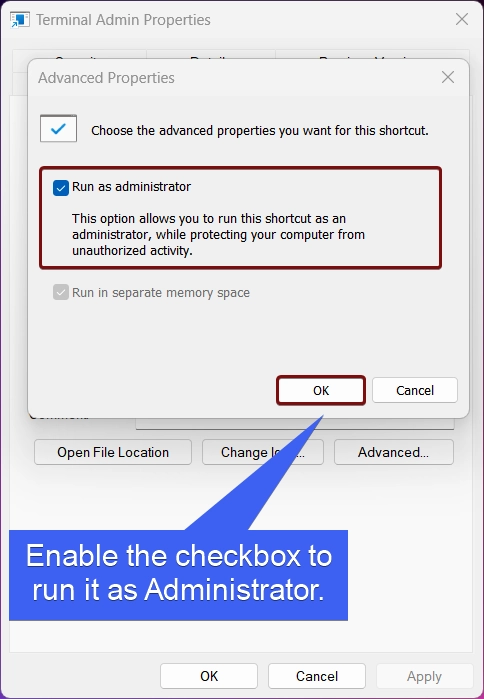
- When you use that shortcut to open WT, UAC will prompt for your confirmation and then open WT as Admin.
Benefits of running Windows Terminal as Admin on Windows 11
Running Windows Terminal with administrative privileges allows access to protected system resources, enabling tasks like modifying system files, managing user accounts and permissions, configuring network settings, and running advanced commands such as DISM, SFC, or bcdedit for diagnostics and repairs. This is essential for configuring system policies, managing Windows services, and performing advanced networking tasks, making it a powerful tool for system administrators.
Take away
Running Windows Terminal as an administrator with elevated permissions is a essential skill for power users and system administrators. It unlocks advanced options and ensures limitless execution of crucial tasks that standard user permissions cannot handle. By following the methods above, you can quickly and efficiently open Windows Terminal with administrative privileges whenever needed. You can use the desktop shortcut method to launch the Windows terminal application always with elevated rights on Windows. If you have any queries and then kindly mention those in the comment section. Find more interesting tutorials on our Homepage.
We combine expert insights with user-friendly guidance. We thoroughly research and test everything to give you reliable and simple to understand tech guides. Please take a look at our publishing process to understand why you can trust Winsides.


