I was watching my personal and family photos on my personal laptop at the office when, all of a sudden, my colleague came into my cabin without any announcement. I had to protect my private space among them, so I tried to close the albums immediately. However, the photos were in slideshow fullscreen mode, and I couldn’t close the apps instantly, so my colleagues saw my personal family photos. This incident made me realize the importance of protecting my private space quickly, especially in public places. That’s when I learned about locking my screen in Windows 11. In this article, I will share the different ways to access the lock screen by locking your screen on Windows 11 devices.
Key Points to Lock Your Screen In Windows 11
- On your keyboard, use the shortcut
Winkey + L- It will instantly lock your screen & take you out to the login screen.
Method 1: Using Start Menu:
This is one of the old, unique, and straightforward methods to lock your screen on your Windows 11 device. However, this method is suitable for those who prefer using the GUI and a mouse.
- Step 1: Click the Start button located at the bottom-left corner of your screen.
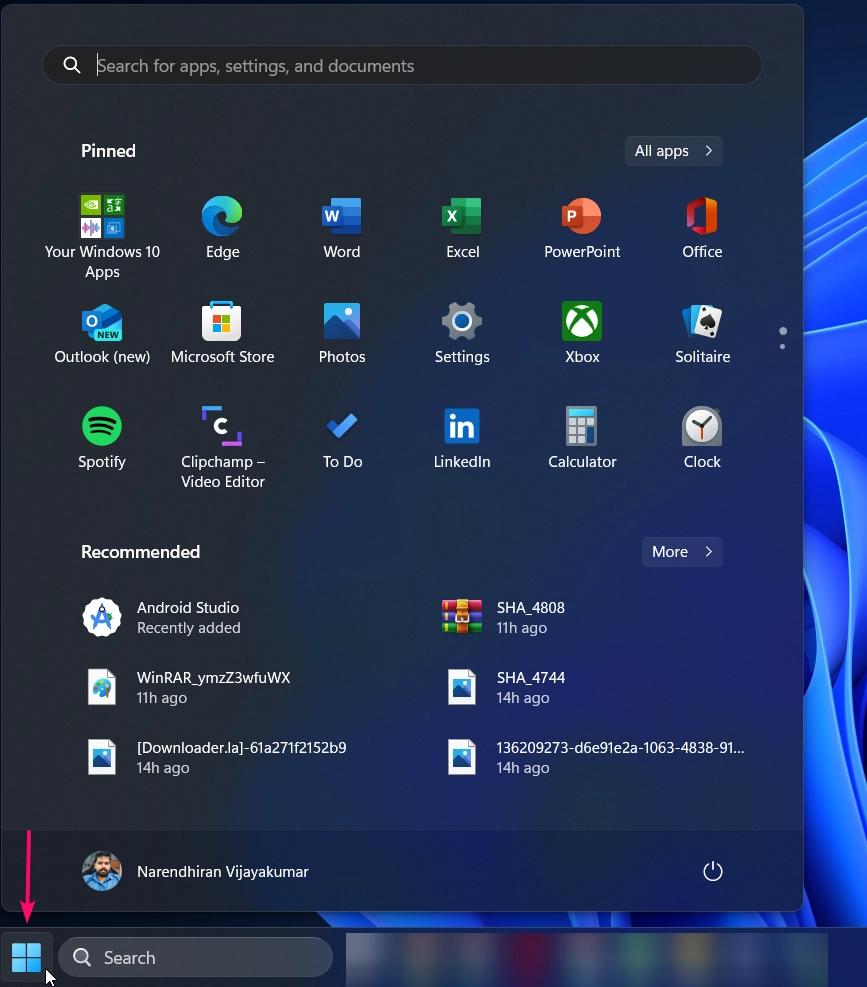
- Step 2: Now you need to click on your profile icon at the top of the Start menu.
- Step 3: From the dropdown menu, select Lock, It will instantly lock your screen.
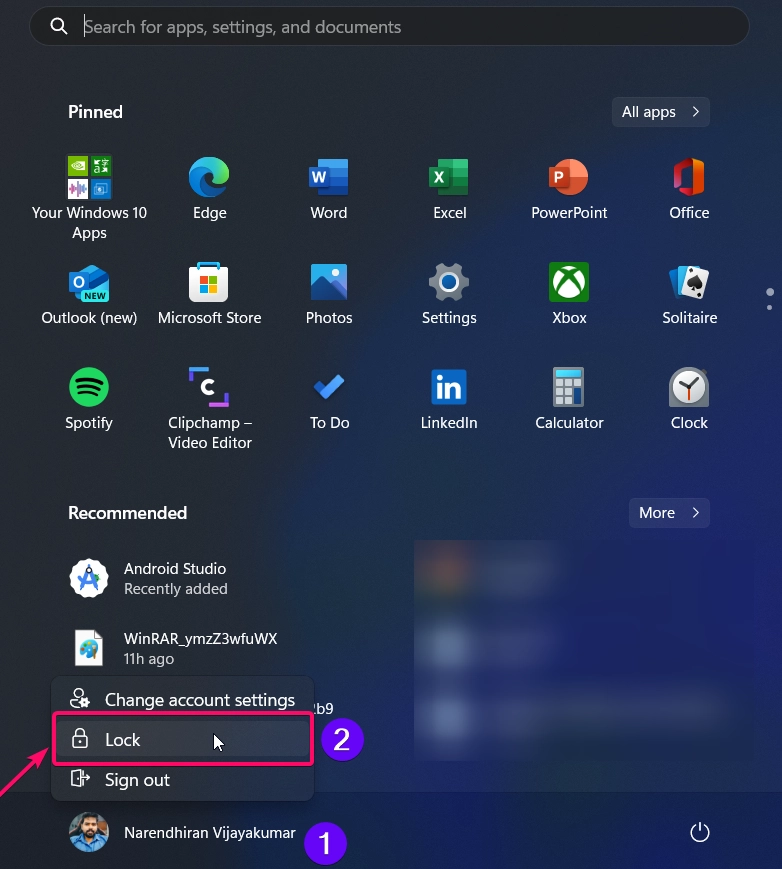
This is the fast & simple method to lock your screen. You can secured your device in just a few clicks.
Method 2: Using CTRL + ALT + Del:
This method is one of the classic ways to lock your screen. Those who are familiar with Windows XP, Vista, 7, 8, and 10 definitely know this method to lock the screen.
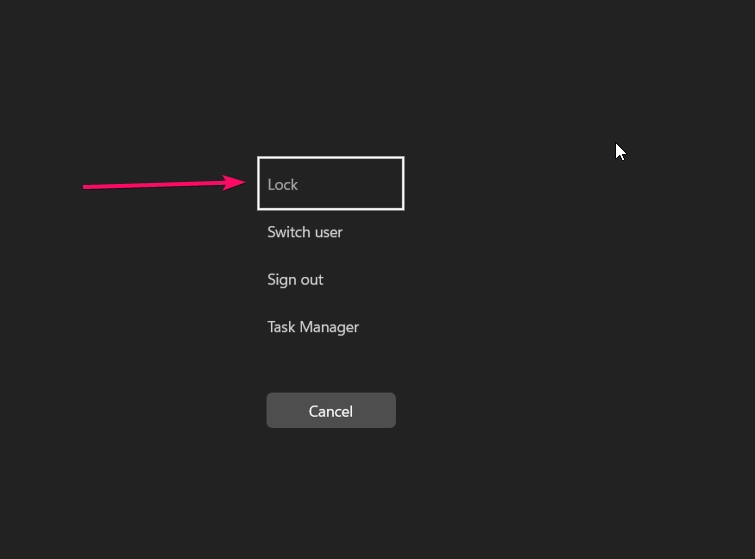
- Step 1: You need to Press
Ctrl + Alt + Deletekeys on your keyboard simultaneously. - Step 2: From the screen that appears, click on Lock, It will bring you to the lock screen.
Method 3: Using Power User Menu:
- Step 1: Firstly you need to Right click the Start button or simply use the keyboard shortcut
Winkey + X. - Step 2: In the list of options, you need to click the option Shut down or sign out >.
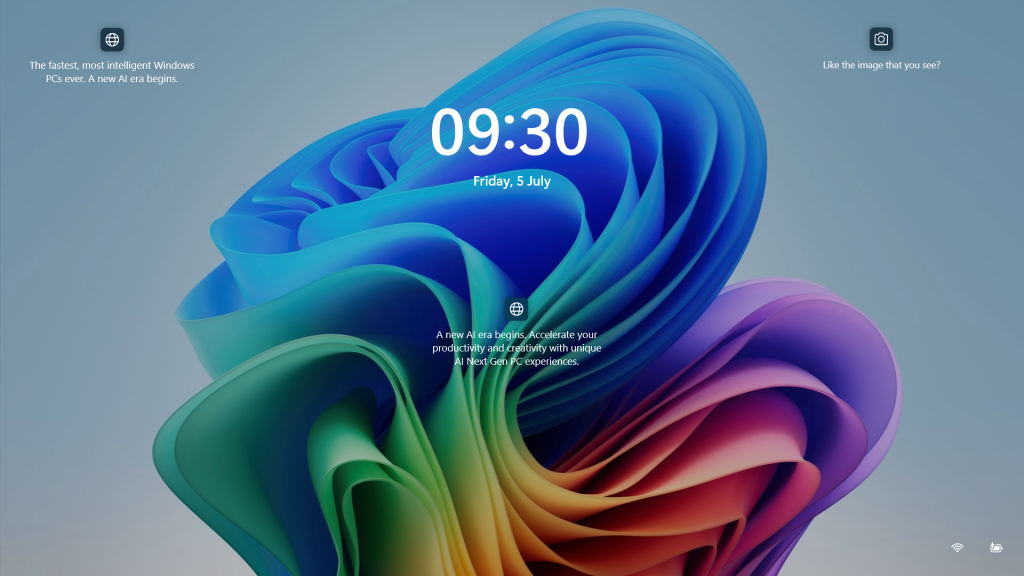
- Step 3: Now simply click the Lock button to lock your screen instantly.
Method 4: Using Run Command:
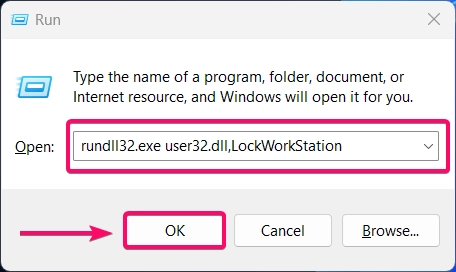
This is one of the unique method to lock your screen using Run Dialog box. This is mostly suitable for tech savvy people.
- Firstly, you need to open Run window using the keyboard shortcut
Winkey + R - Now enter the following command
rundll32.exe user32.dll,LockWorkStation - Hit the Enter button or click the OK button to lock your screen.
Method 5: Using Screensaver (Automated Lock Screen):
This is one of the unique methods, and it is a kind of automation process. All you have to do is set a screensaver and a timeout for a minute or longer.
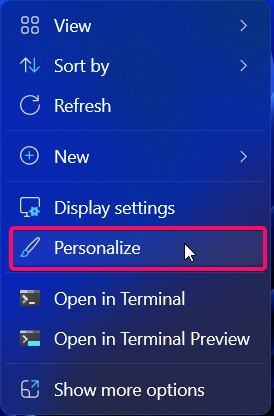
- Step 1: Firstly, you need to Right click on the desktop and choose Personalize.
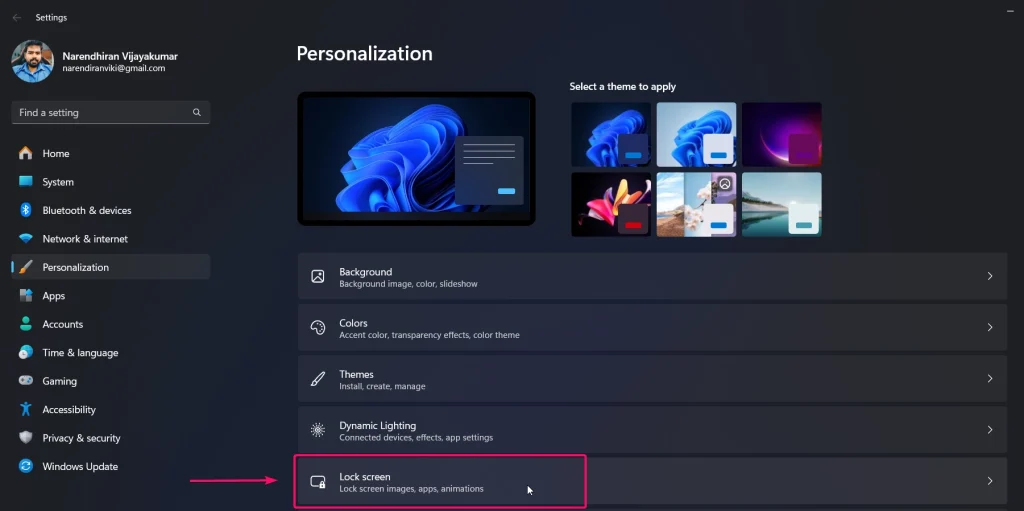
- Step 2: Now, Go to Lock screen settings.
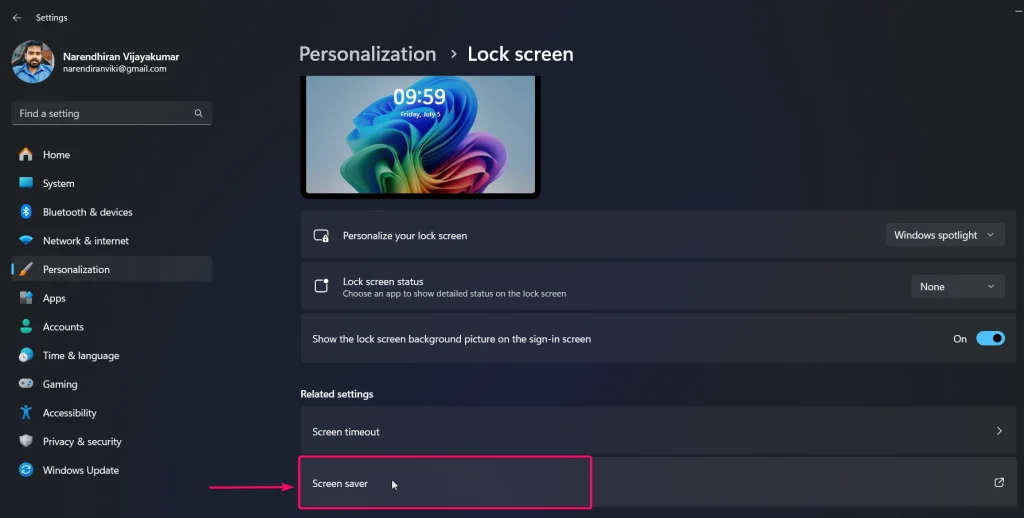
- Step 3: Scroll down and click on Screen saver settings.
- Step 4: Once you click the option, the Screensaver Settings window will be displayed on your screen.
- Step 5: Here, I choose the 3D Text option as a screensaver and set the time to 1 minute. Check the option “On resume, display logon screen” which will ask you to re-enter the login password to sign in.
- Step 6: Once you have done all the settings, click the Apply and OK buttons.
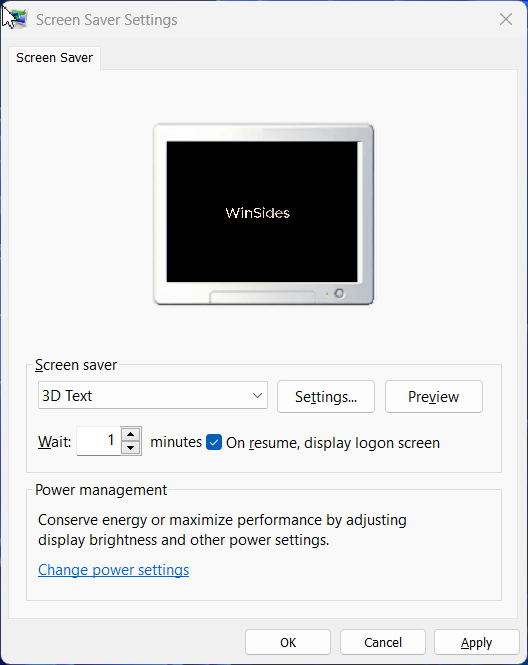
- After a minute, You computer will launch the screensaver on your device by locking your screen automatically as shown in the below image.


Take Away:
Locking my screen in Windows 11 is essential for maintaining security and privacy, especially when I need to step away from my computer. I’ve found that there are multiple ways to do this, each offering convenience and reliability. Whether I use the Start menu, the classic Ctrl + Alt + Delete method, or even set up an automatic lock through screen saver settings, I have several options to choose from. By using these methods, I can ensure that my personal information and work remain secure. Find more informative tutorials on our Blog WinSides.com
We combine expert insights with user-friendly guidance. We thoroughly research and test everything to give you reliable and simple to understand tech guides. Please take a look at our publishing process to understand why you can trust Winsides.


Very helpful, thanks
Thank You for your positive feedback, Explore more Windows 11 based tutorials on our HomePage WinSides.com