Enable TFTP Client on Windows 11 using CMD & PowerShell
Different ways to Enable Trivial File Transfer Protocol Client on Windows 11
Enable TFTP Client on Windows 11: Trivial File Transfer Protocol, or TFTP, is a simple file Transfer Protocol introduced by Karen R. Sollins at MIT in the year 1981. It operates over the User Datagram Protocol using port 69. Unlike traditional TCP protocols like FTP, TFTP is designed to be small, fast, and easy to implement, and is often used in environments where resources are limited (Low Overhead).
Windows 11 includes a built-in TFTP client, and it allows users to interact with a TFTP server using the TFTP protocol. This latest article will walk you through the detailed steps on how to enable TFTP Client on Windows 11 using Command Prompt and Windows PowerShell. Let’s get started.
Various Methods to Enable TFTP Client on Windows 11
- Using the Windows Features option in the Control Panel (GUI Method)
- Quick way to enable TFTP Client using Command Prompt (CLI Method)
- Easy Way to enable TFTP Client using Windows PowerShell (CLI Method)
TFTP Client availability on various Windows Editions
| Windows Editions | Availability |
| Windows Servers | Yes |
| Windows 11 Home | Yes |
| Windows 11 Professional | Yes |
| Windows 11 Education | Yes |
| Windows 11 Enterprise | Yes |
| Windows 11 Pro Education | Yes |
| Windows 11 SE | Yes |
| Windows 11 IoT Enterprise | Yes |
As it is focused on minimal resources, it is available in almost all the Windows Editions, including Student Edition (SE) and Internet of Things (IoT) Edition.
Difference between High Overhead & Low Overhead Protocols
| Features | High Overhead Protocols | Low Overhead Protocols |
| Example | FTP/HTTP | TFTP |
| Protocol Type | TCP (connection-oriented) | UDP (connectionless) |
| Encryption | Can use TLS/SSL | No Encryption |
| Authentication | Yes with Username & Password | Not available |
| Session Handling | Maintains sessions | No Sessions Tracking |
| Error Checking | Built-in with TCP | Manual |
While low-overhead protocols like TFTP may lack advanced features, when it comes to speed, simplicity, and minimal resource use in trusted environments such as Firmware or Configuration Transfers in Network Devices, PreBoot Execution Environment, Embedded Systems, IoT devices, Internal Networks, etc, the TFTP protocol will have the upper hand.
Enable TFTP Client on Windows 11 using Command Prompt
Warning: Enabling the TFTP Client on Windows 11 may expose your system to security risks. TFTP is an unencrypted, unauthenticated protocol that allows file transfers without access control, making it vulnerable to unauthorized access or data interception on unsecured networks. It is recommended to use this feature only in trusted, isolated environments such as controlled lab setups or internal network segments. Do not enable TFTP on systems connected to public or untrusted networks unless proper security measures, such as firewalls and network segmentation, are in place.
In this section, we will use the Command Prompt and quickly enable Trivial File Transfer Protocol on Windows 11. The following are the steps.
- We will use the DISM Tool to enable this optional feature on Windows 11.
- The DISM requires Elevated Privileges, and hence, we will have to run Command Prompt with Administrator Privileges.
- Go to the Run Command using the keyboard shortcut WinKey + R.
- Enter the following command, and press CTRL + SHIFT + ENTER.
- The user account control (UAC) will prompt for your confirmation and open Command Prompt with Administrative Privileges.
- In the Command Prompt, kindly execute the following command.
dism /online /Enable-Feature /FeatureName:TFTP /All /NoRestart
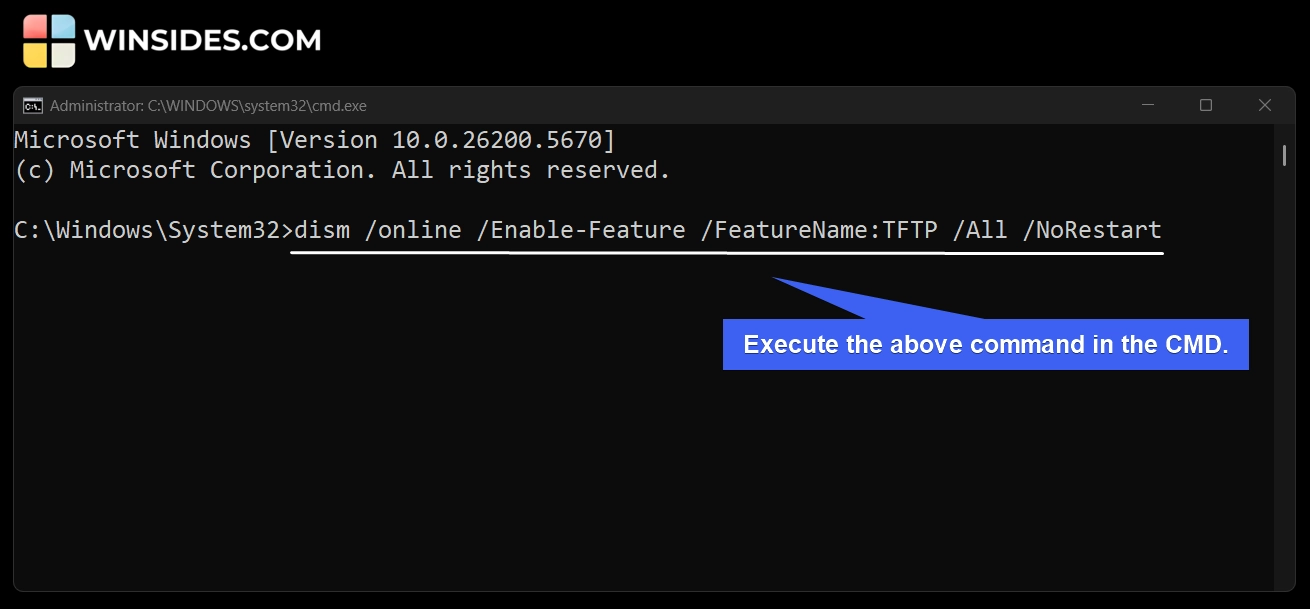
- The Deployment Image Servicing Management tool will now enable the TFTP Client on your Windows 11.
- Once the process is complete, you will receive the message “The operation completed successfully“.
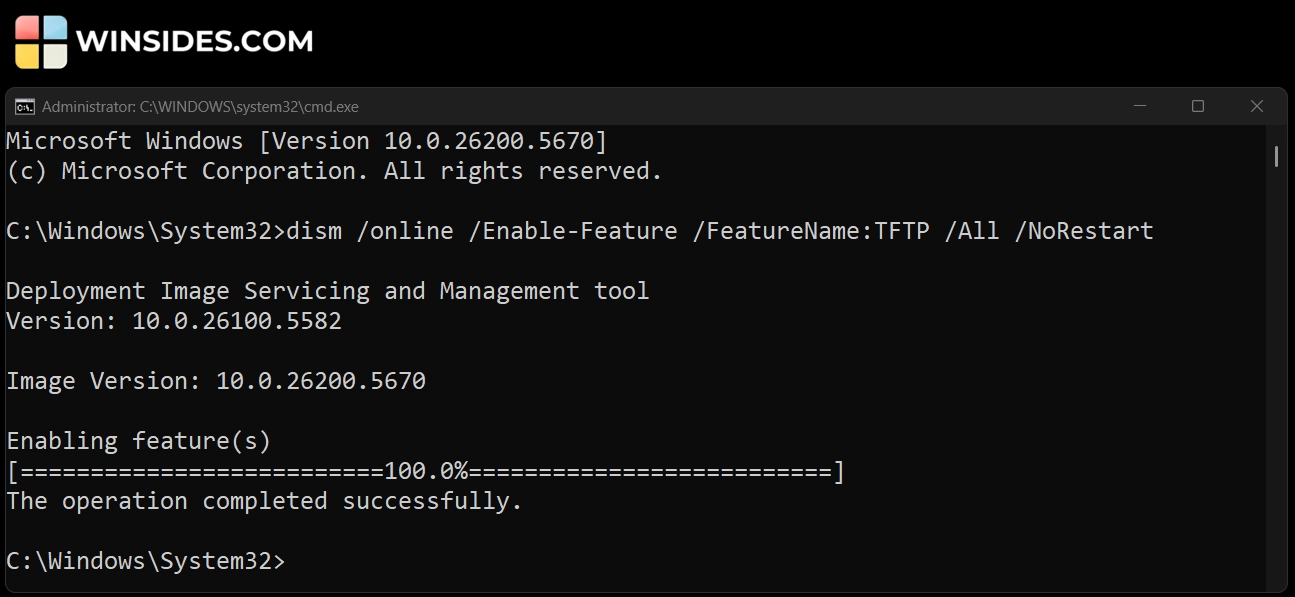
- This message marks the completion of the process. TFTP Client is enabled on Windows 11.
Check TFTP Client Status on Windows 11 using Command Prompt
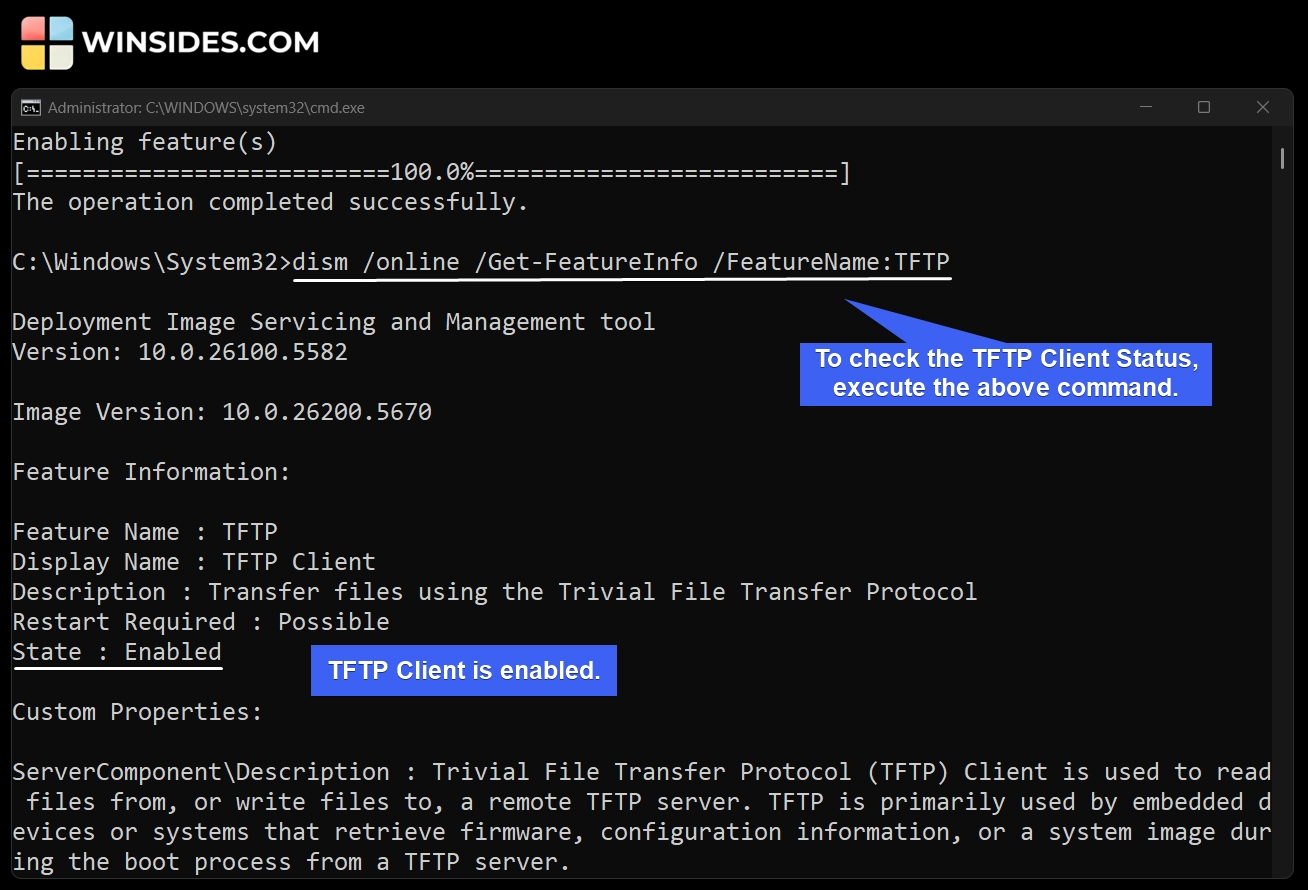
To determine whether this feature is enabled on Windows 11, kindly execute the following command in the terminal. dism /online /Get-FeatureInfo /FeatureName:TFTP
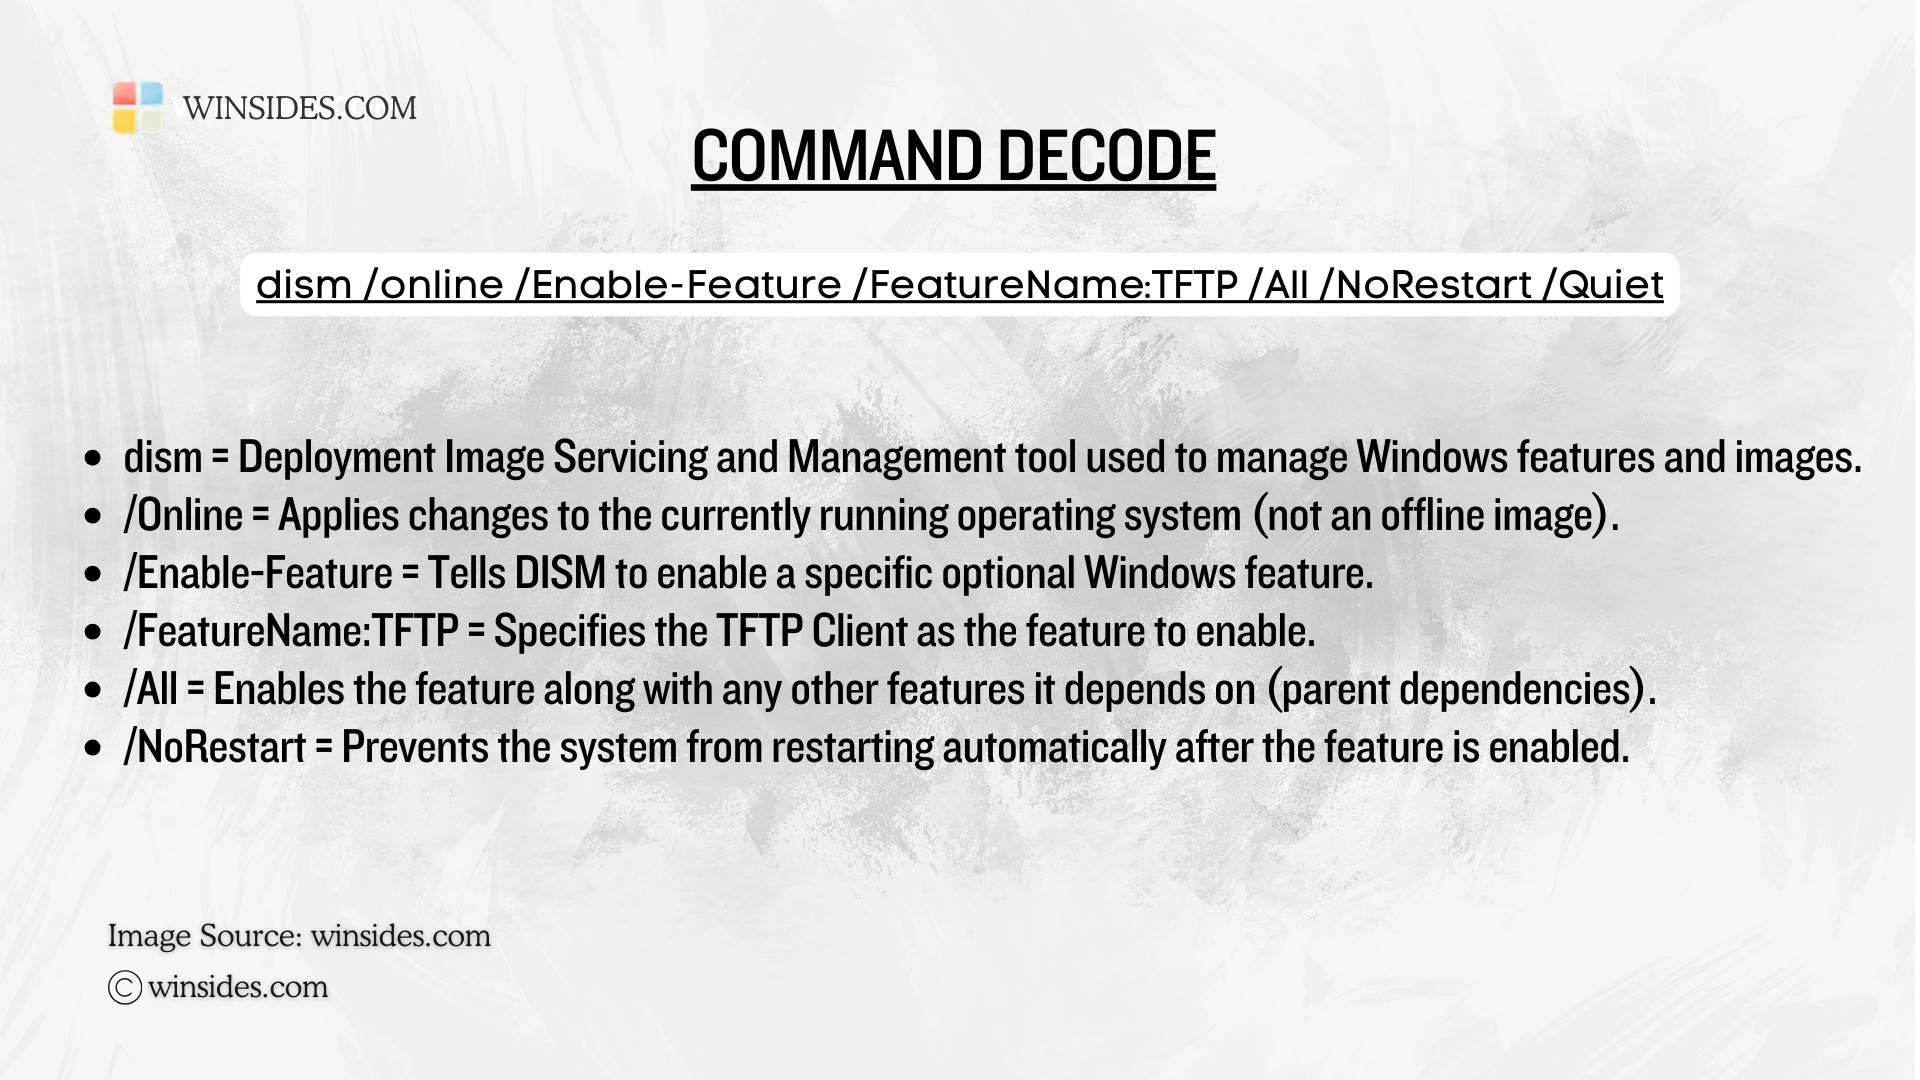
Decoding TFTP Client Enable Command on Windows 11 using CMD
Easy Way to Turn on TFTP Client on Windows 11 using Windows PowerShell
Just like the Command Prompt, we have to make sure to run Windows PowerShell with Administrative Privileges. To do so, kindly follow the steps below.
- Open the Run command using the keyboard shortcut WinKey + R.
- In the Run, execute the command
powershellby pressing CTRL + SHIFT + ENTER. - The UAC will confirm and open Windows PowerShell with Elevated Privileges.
- In PowerShell, execute the following command.
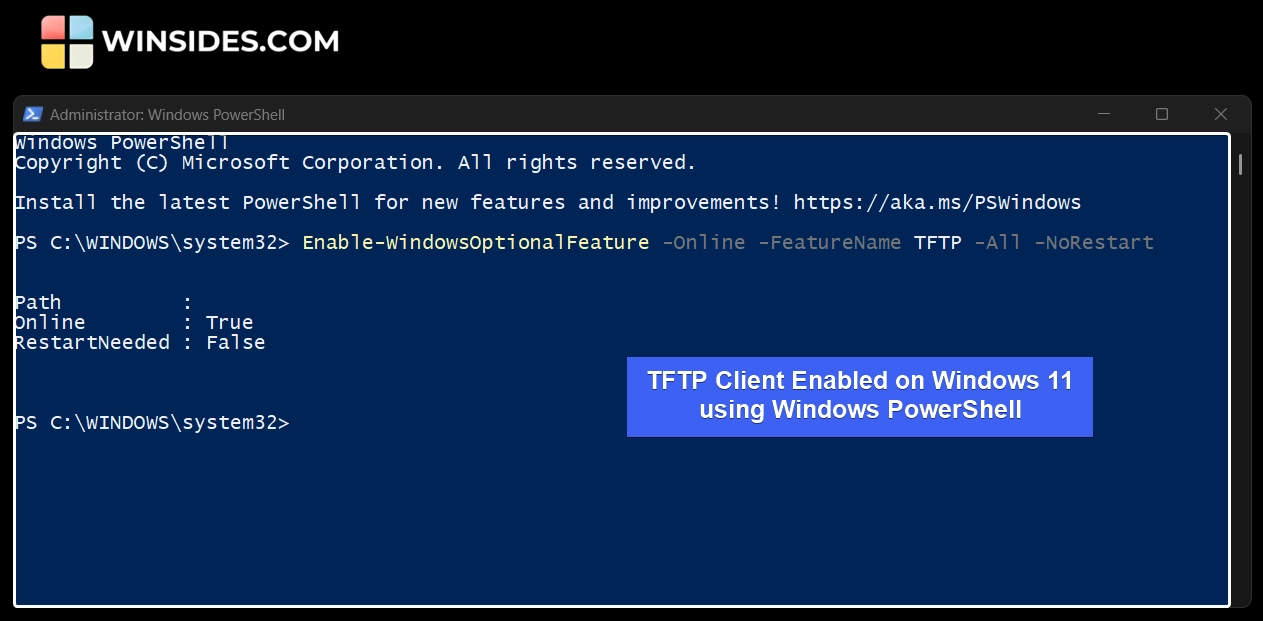
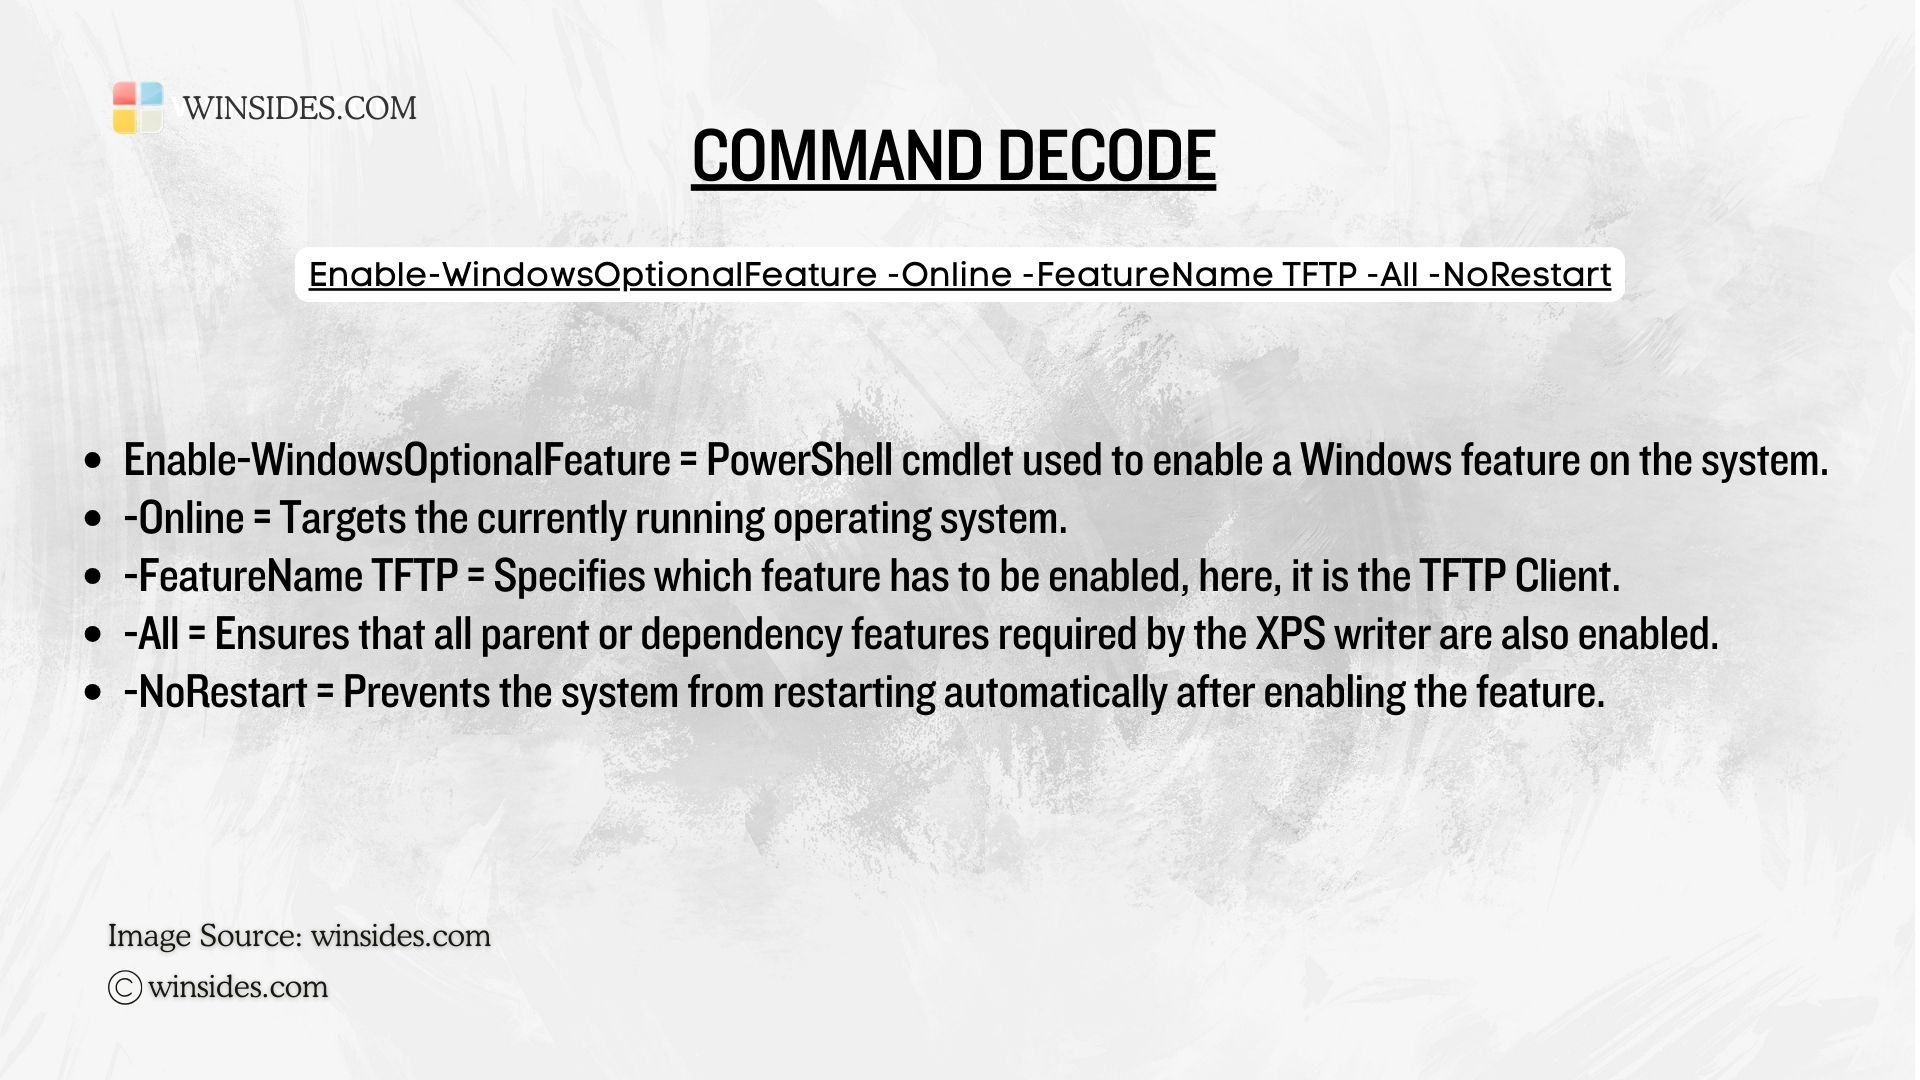
Enable-WindowsOptionalFeature -Online -FeatureName TFTP -All -NoRestart
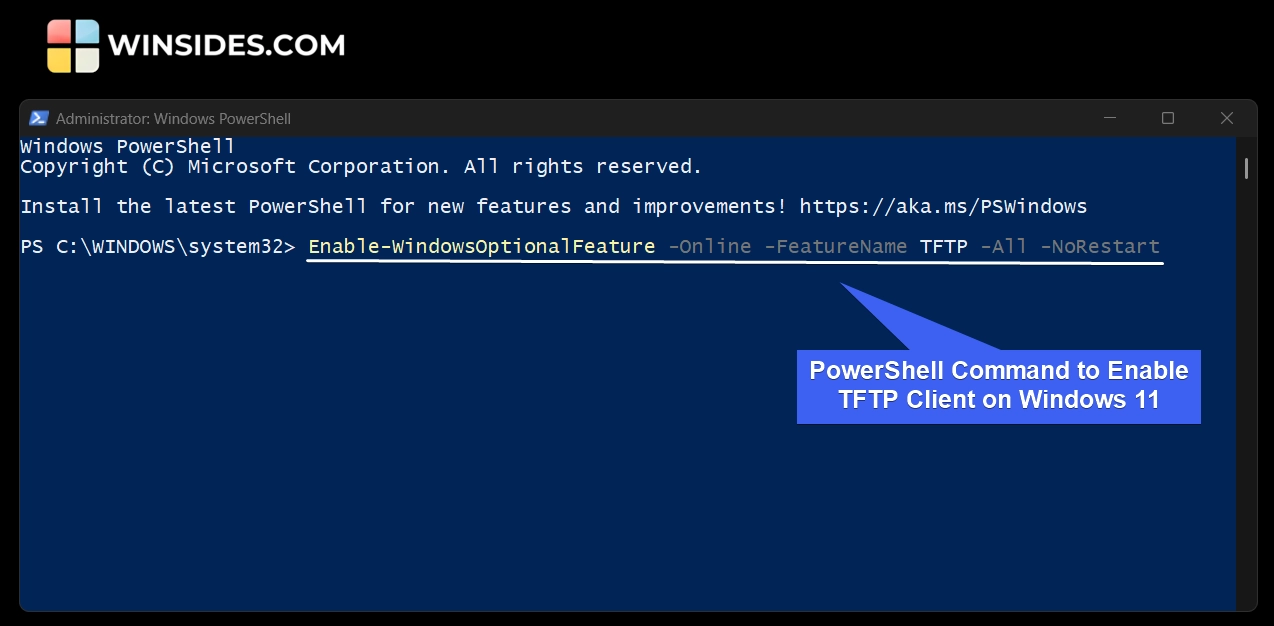
- The system will enable the TFTP Client on Windows 11. The Restart value is False, and that suggests that a restart is not required right away.
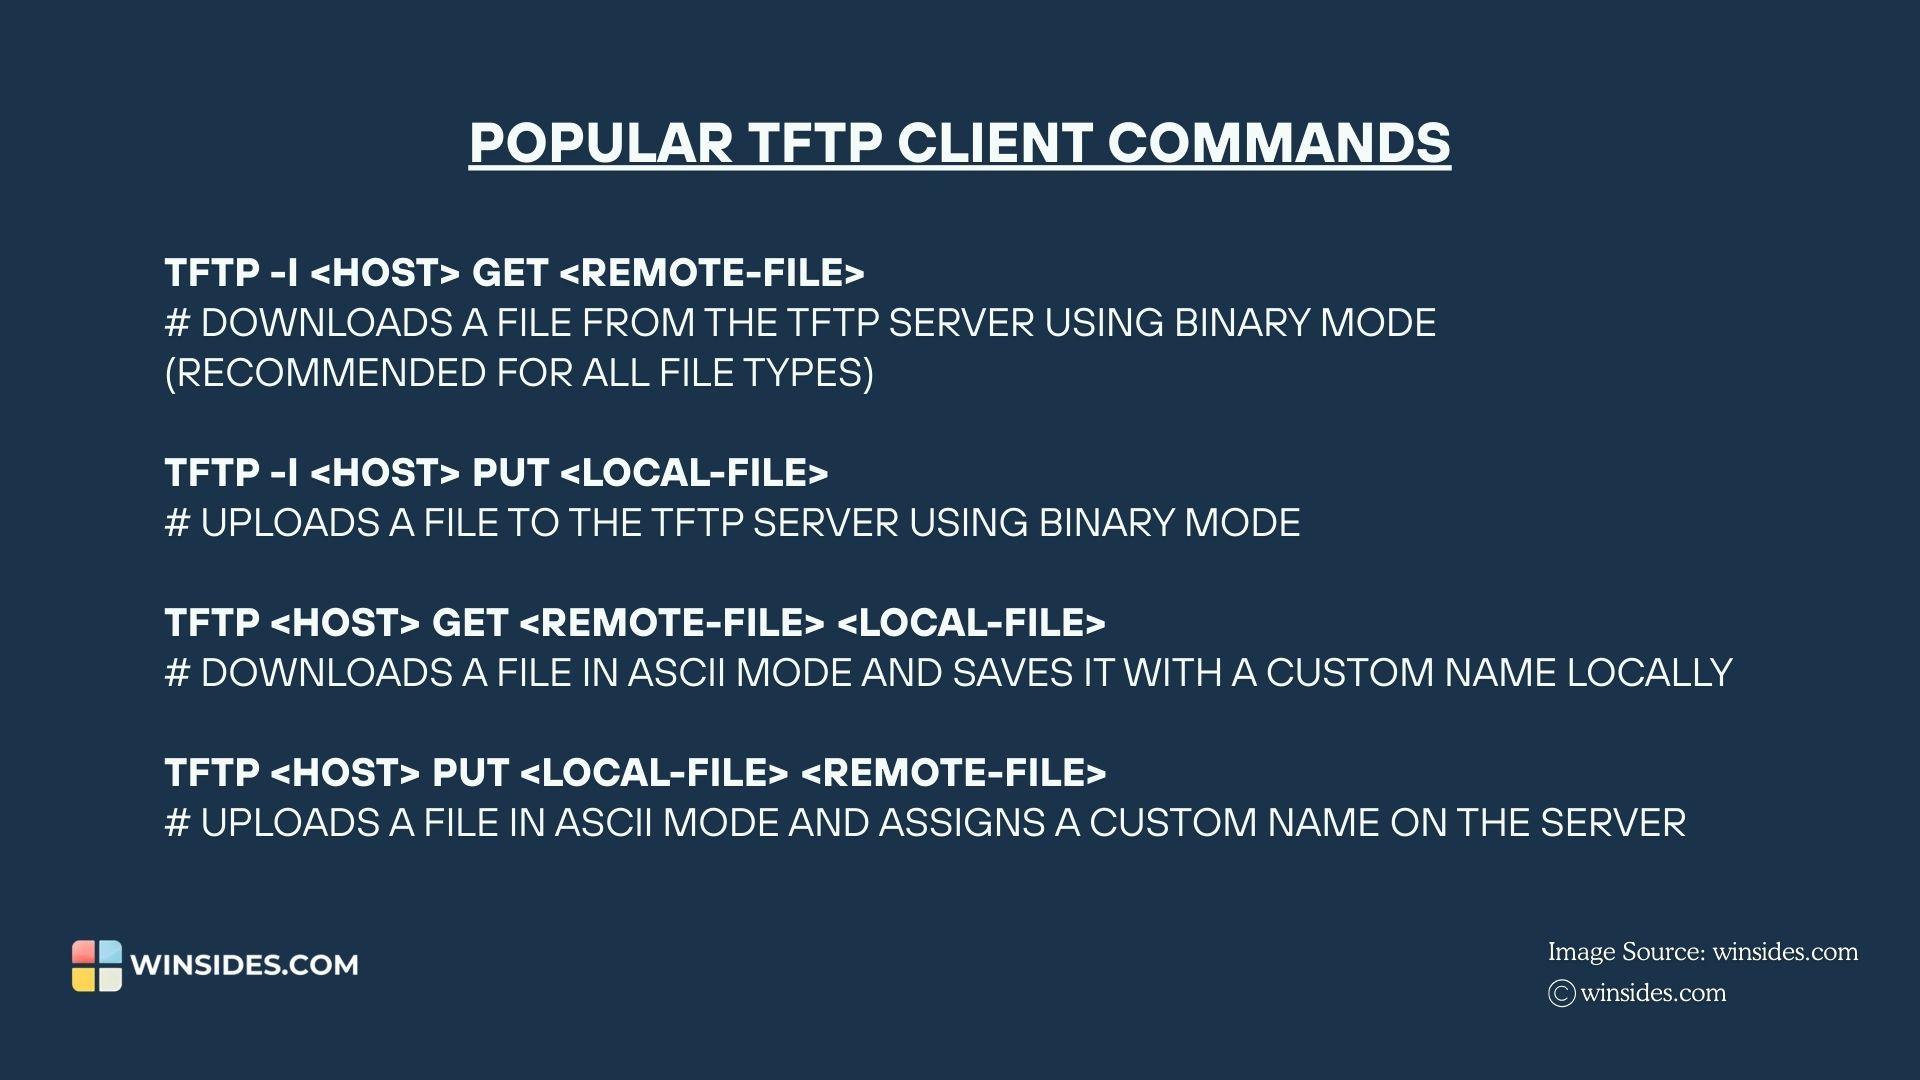
The RFC states in its abstract, “TFTP is intended to be very simple to implement. It is designed to be small and easy to use, and therefore lacks most of the features of a full FTP.“. This explains why it is named Trivial File Transfer Protocol.
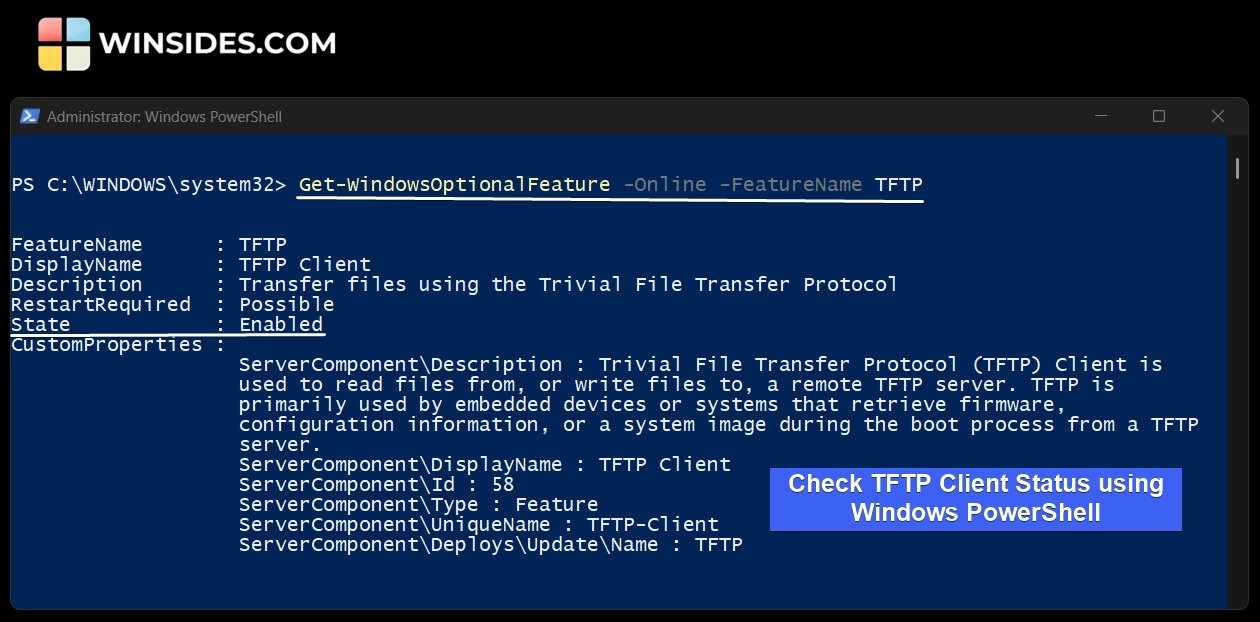
TFTP Client Status Check Using Windows PowerShell
Execute the following command on Windows PowerShell to check the status of the TFTP Client. Get-WindowsOptionalFeature -Online -FeatureName TFTP
Decoding Enable TFTP Client Command using Windows PowerShell
Take Away
We hope you are satisfied with our article on how to enable TFTP Client on Windows 11 using different methods, from the Graphical User Interface to the Command Line Interface. As interesting as it may seem, do not use TFTP Client on public and untrusted networks. If you have any queries, kindly let us know in the comments. For more interesting articles, stay tuned to Winsides.com. Happy Computing! Peace out!
We combine expert insights with user-friendly guidance. We thoroughly research and test everything to give you reliable and simple to understand tech guides. Please take a look at our publishing process to understand why you can trust Winsides.


