Enable Microsoft XPS Document Writer using CMD & PowerShell
It provides binaries on the system for creating the XPS Document Writer Print Queue
Enable Microsoft XPS Document Writer using the Command Prompt and Windows PowerShell: There are different ways to enable optional features on Windows 11. We can use the Run Command to access the optional features, or we can follow the Control Panel options to access these features on Windows 11. However, all these methods involve the Graphical User Interface. What if you wanted a Command Line Interface to enable Microsoft XPS Document Writer on Windows 11? This article is all about that. Let’s get started.
Why do we need a Command Line Interface to enable this Feature on Windows 11?
Despite its availability in the GUI, Enterprise and Administrative Environments, where Automation, Bulk Deployments, and Remote Configuration, etc., are required, CLI offers a faster, scriptable, and consistent way. You can also log the output for auditing and compliance, which is impossible with the GUI. For conventional users, using a GUI can be effective, and for IT administrators, a command-line interface can be effective.
We are discussing how to enable Microsoft XPS Document Writer on Windows 11 using the CMD and Windows PowerShell. The following methods are suitable for both normal users and IT admins.
Microsoft XPS Document Writer Availability on Various Windows Editions
| Windows Editions | Availability |
| Windows Servers | Yes |
| Windows 11 Home | Yes |
| Windows 11 Professional | Yes |
| Windows 11 Education | Yes |
| Windows 11 Enterprise | Yes |
| Windows 11 Pro Education | Yes |
| Windows 11 SE | No |
| Windows 11 IoT Enterprise | Yes |
Quick Way to Enable Microsoft XPS Document Writer on Windows 11 using the Command Prompt
To enable Microsoft XPS Document Writer on Windows 11 using CMD, we will use the DISM Tool. Kindly follow the steps below.
- DISM commands require elevated privileges for execution. Hence, we have to run the Command Prompt with Administrative Privileges. There are different ways to run CMD as Administrator on Windows 11. Here, we will use the Run Command.
- Go to the Run Command using the keyboard shortcut WinKey + R.
- In the Run Command, type the following command
cmdand press CTRL + SHIFT + ENTER.
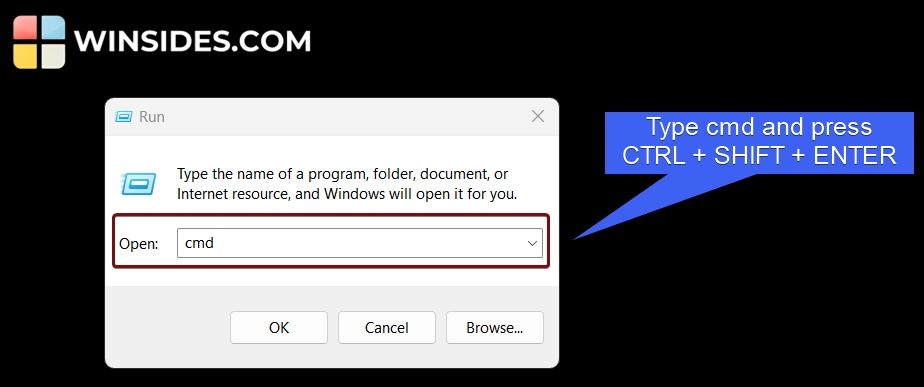
- Now, the User Account Control (UAC) will prompt for your confirmation to run the Command Prompt with elevated privileges. Click Yes to proceed further.
- The Command Prompt will open with Elevated Privileges. In the CMD, execute the following command.
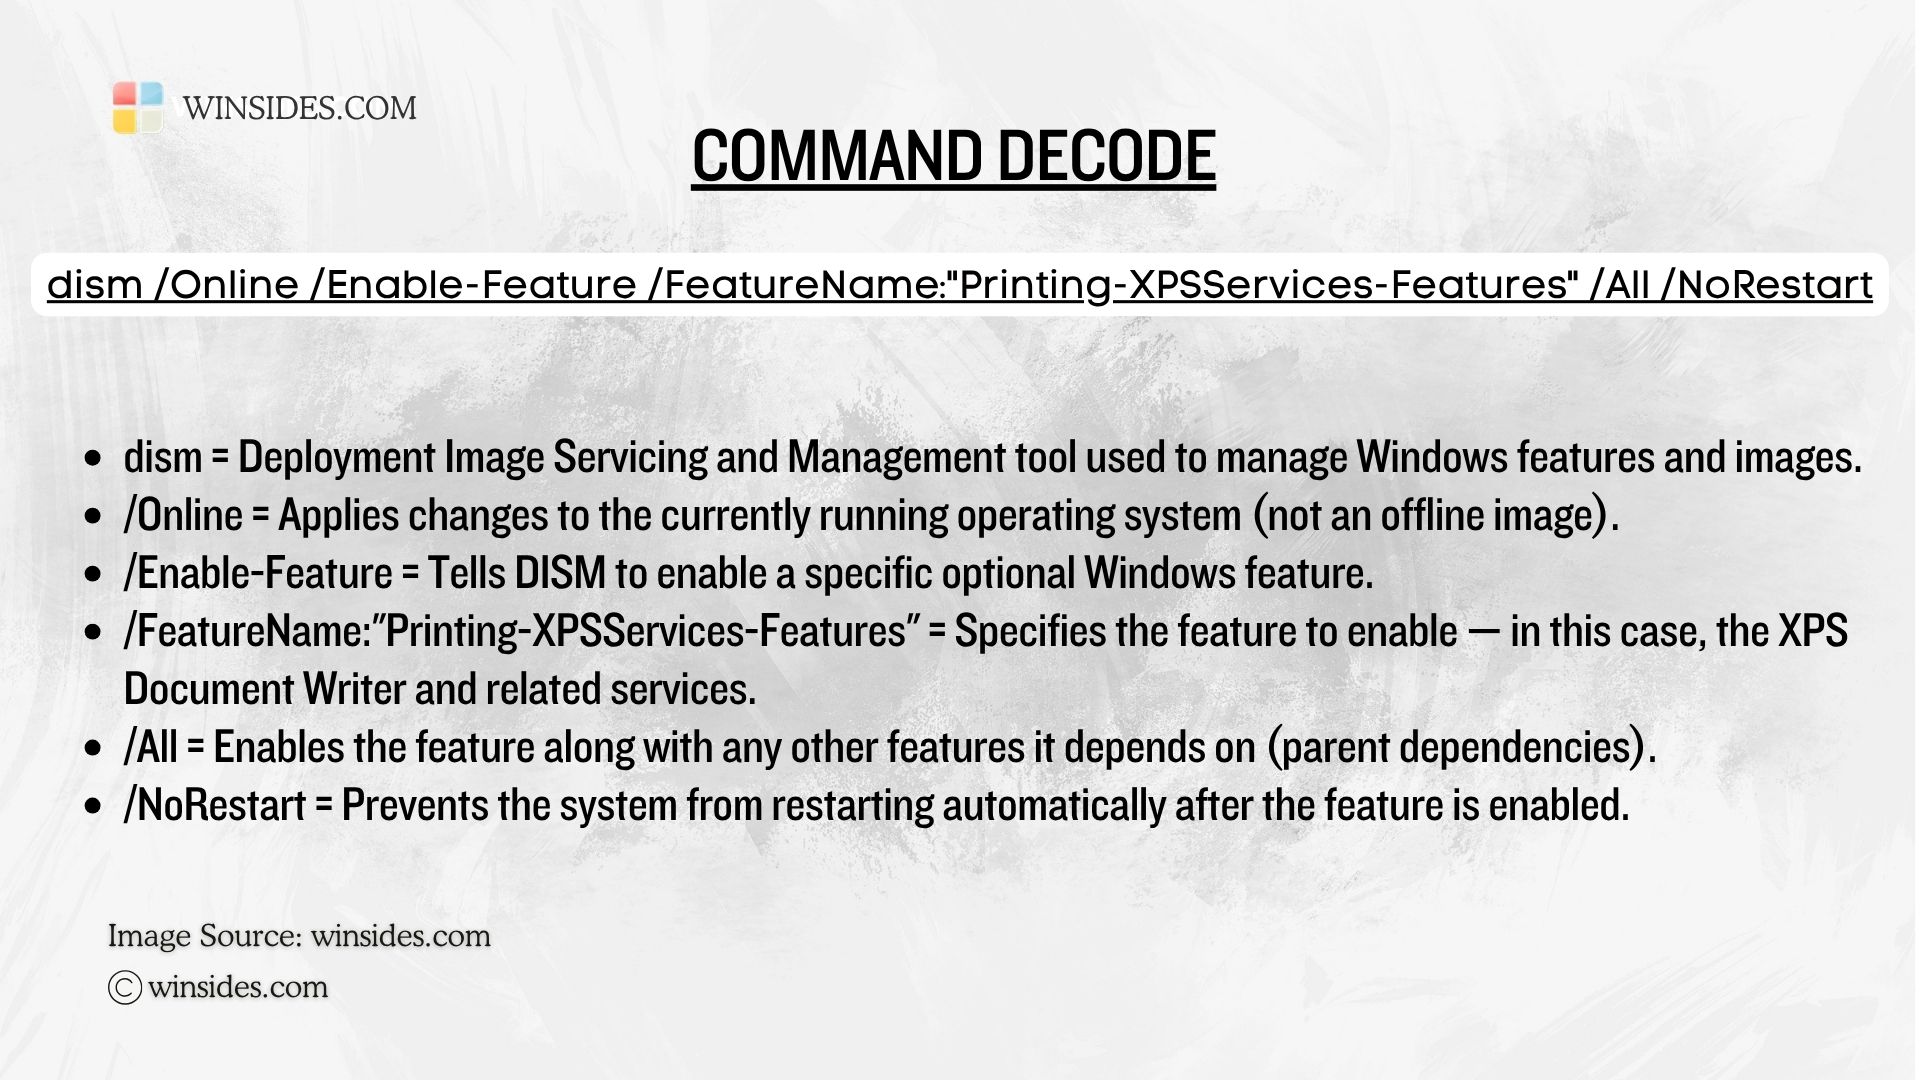
dism /Online /Enable-Feature /FeatureName:"Printing-XPSServices-Features" /All /NoRestart
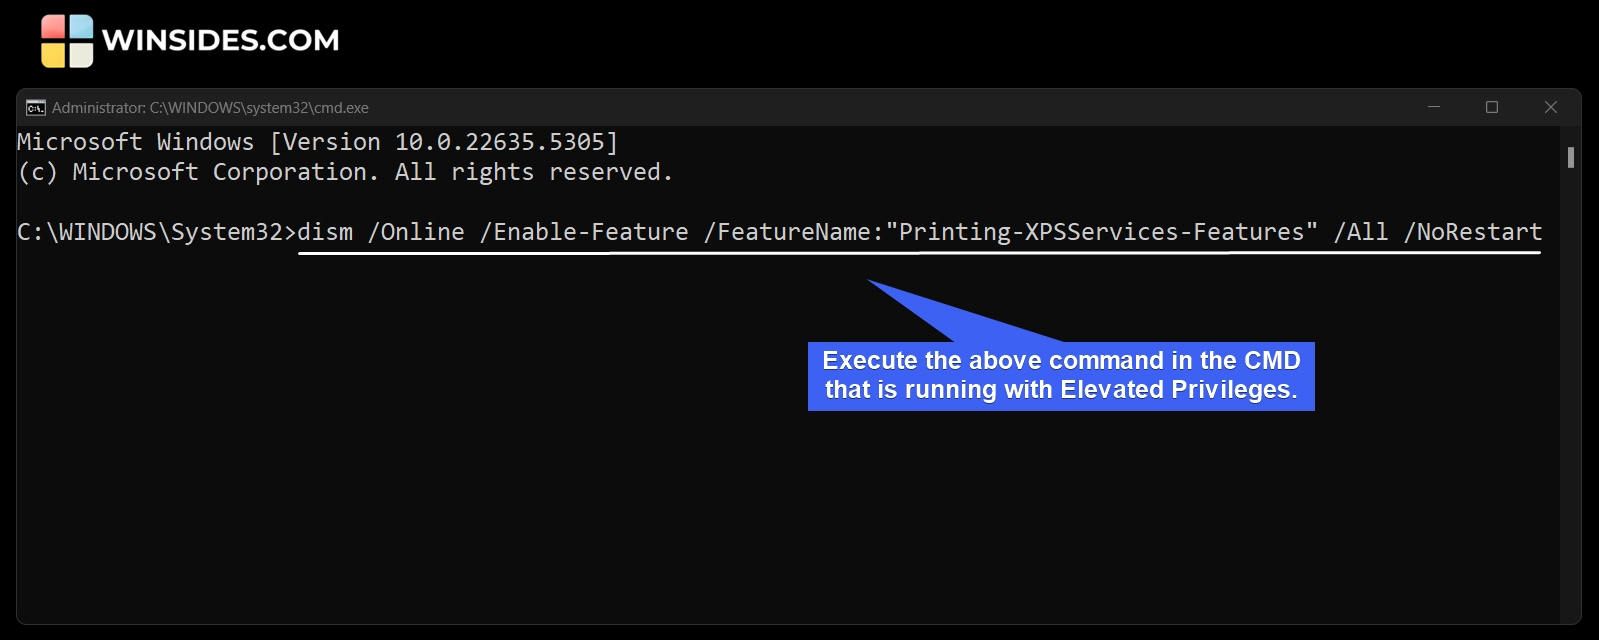
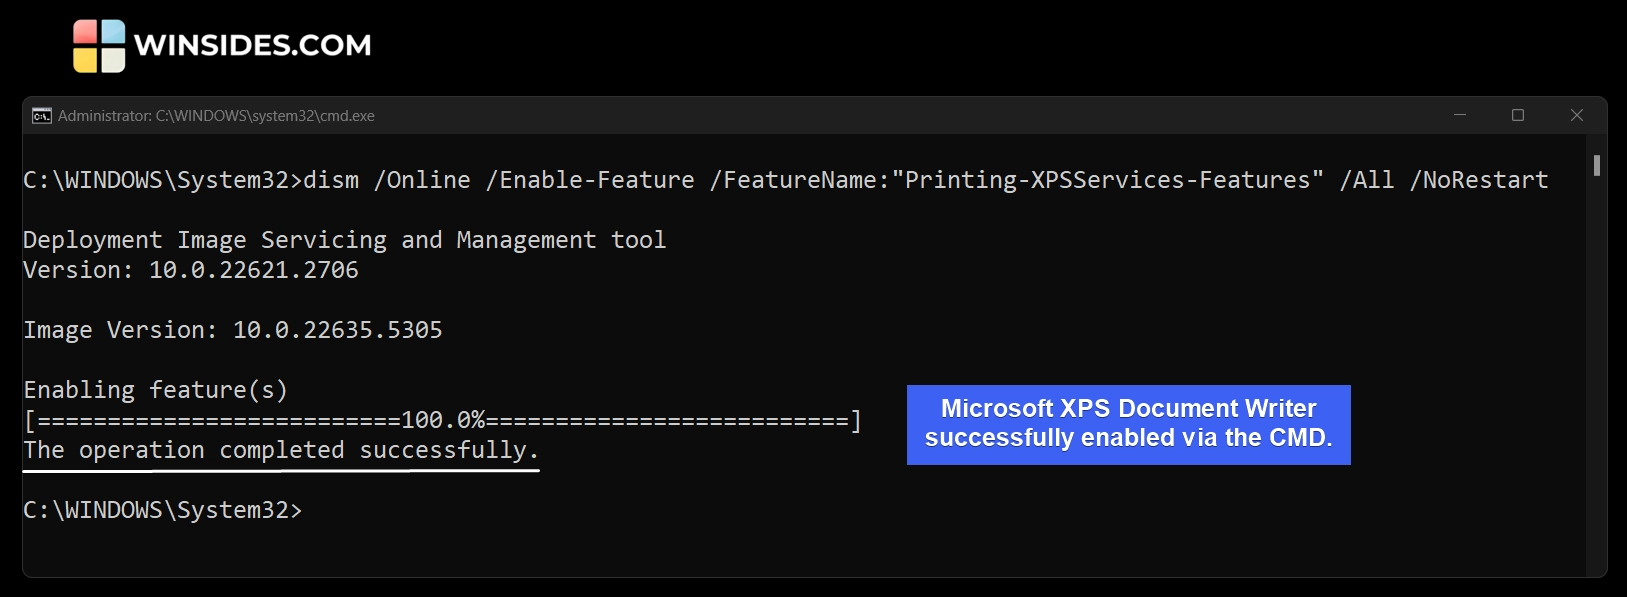
- The Deployment Image Servicing and Management Tool enables Microsoft XPS Document Writer on your Windows 11. Once you receive the message “The operation completed successfully“, then Microsoft XPS Document Writer is enabled on your Windows 11.
Decoding the Microsoft XPS Document Writer Enable Command using the CMD
How to check Microsoft XPS Document Writer Status using the Command Prompt?
If you are not sure whether this optional feature is enabled on your Windows 11, you can follow this section to get to know whether the Microsoft XPS Document Writer Feature is enabled or disabled on your Windows 11 system using the Command Prompt.
- Make sure you are running the Command Prompt with Administrative Privileges.
- In the Command Prompt, execute the following command.
dism /Online /Get-Features /Format:Table | findstr "Printing-XPSServices-Features"
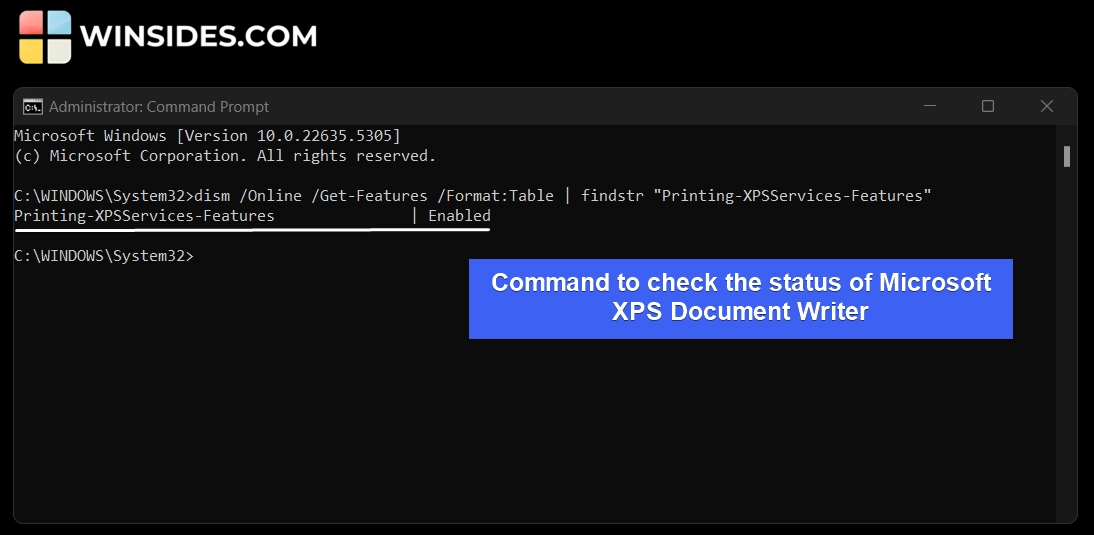
- The DISM will check the feature status and will provide the output. On my laptop, I have just enabled this feature, and hence, I get the status Enabled.
Enable Microsoft XPS Document Writer using Windows PowerShell
In this section, we will check out how to enable this optional feature using Windows PowerShell.
- Open Windows PowerShell with Administrative Privileges. To do so, go to the Run Command using the WinKey + R keyboard shortcut.
- In the Run, type the following command
powershell, and press CTRL + SHIFT + ENTER.
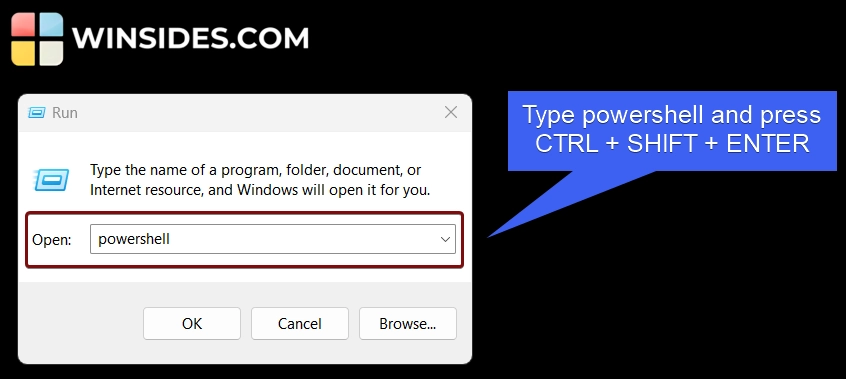
- UAC will prompt for your confirmation, and then open Windows PowerShell with Elevated Privileges.
- Once PowerShell opens, execute the following command.
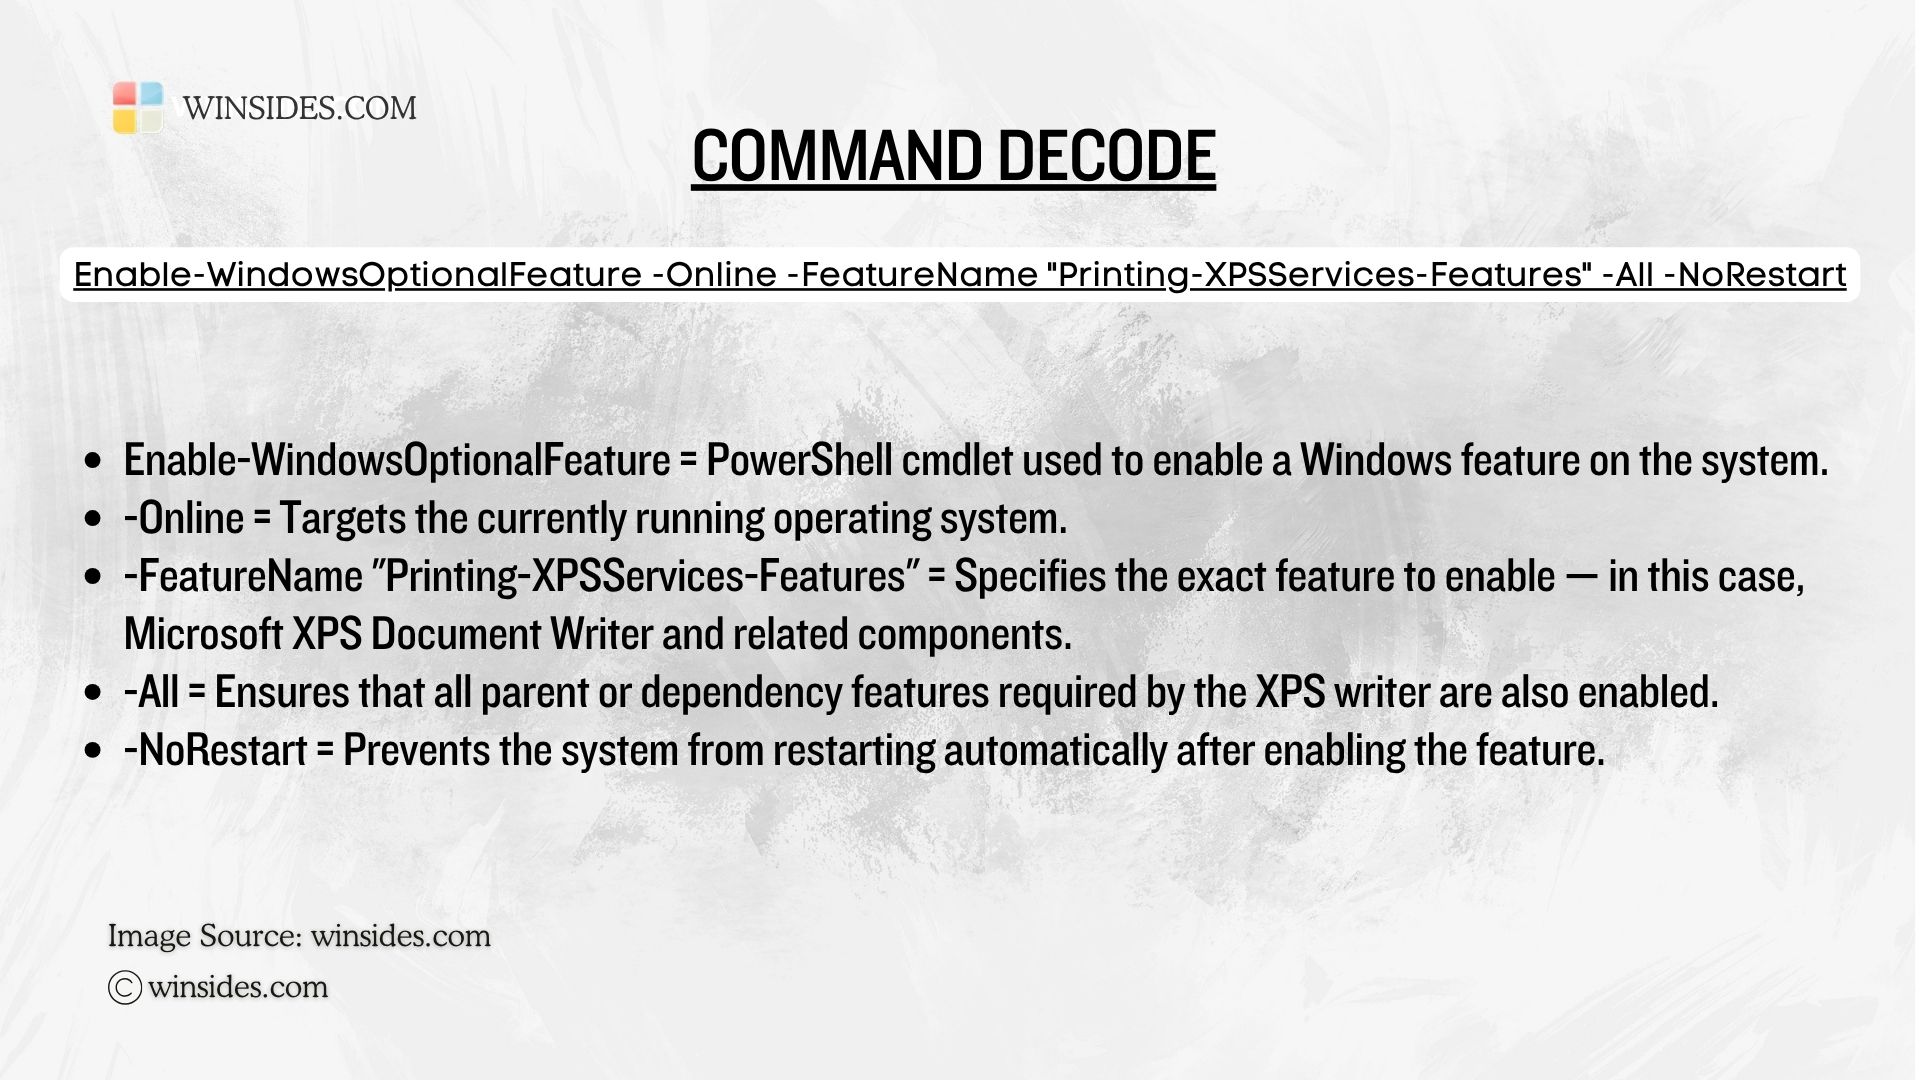
Enable-WindowsOptionalFeature -Online -FeatureName "Printing-XPSServices-Features" -All -NoRestart
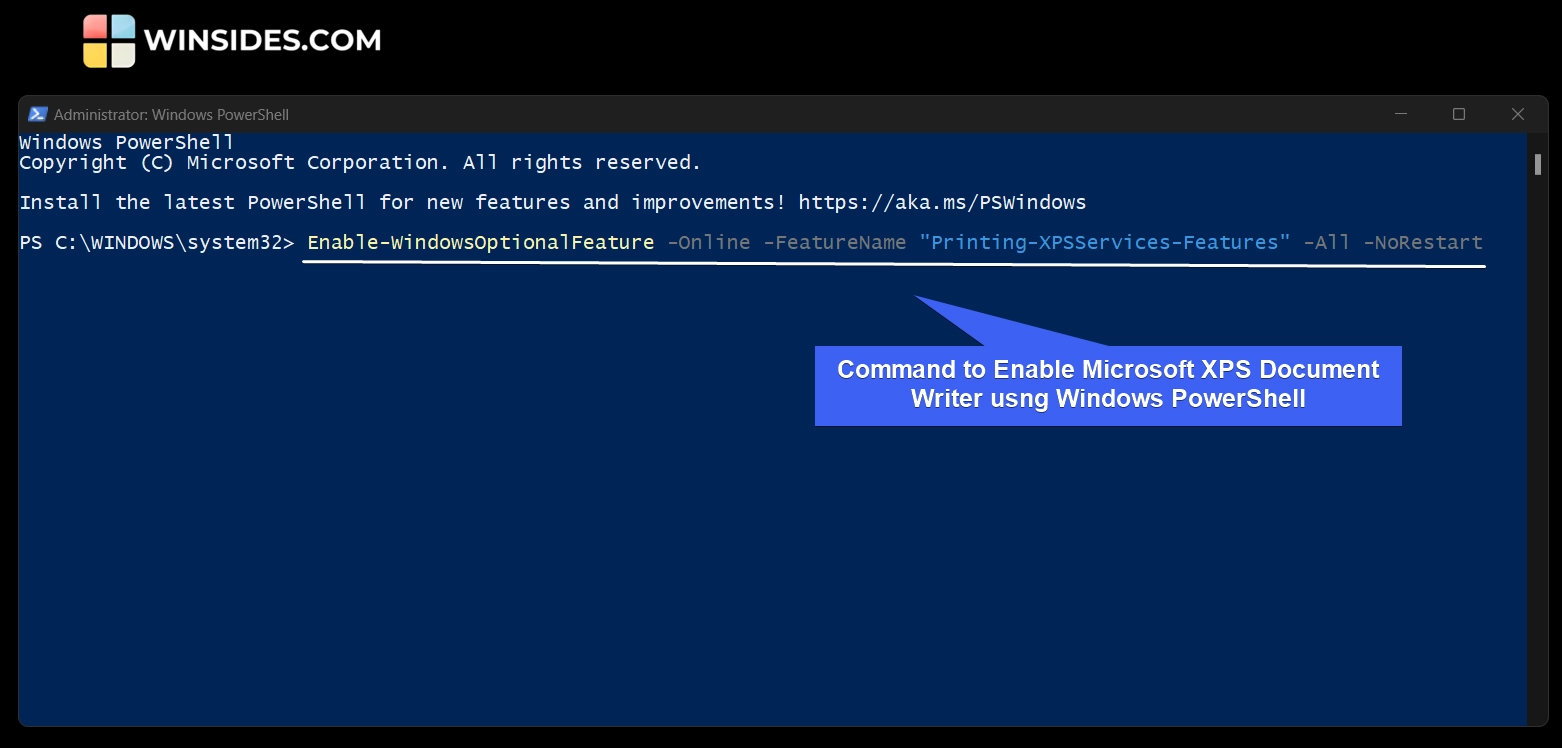
- PowerShell will now enable Microsoft XPS Document Writer on your Windows 11.
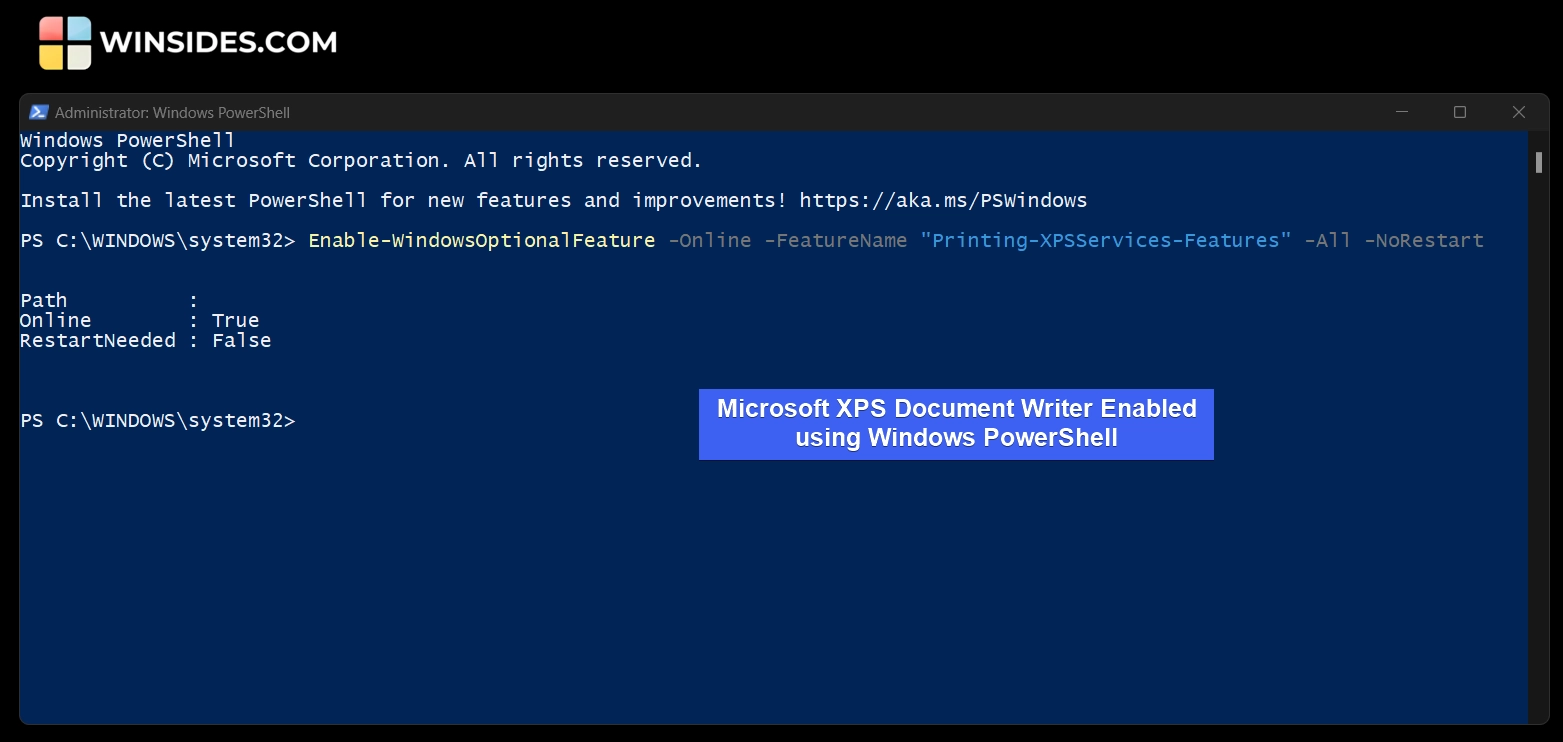
- The RestartNeeded value is False, and that means a restart is not required for the changes made to the system.
Decoding Enable Microsoft XPS Document Writer using Windows PowerShell
How to Check Microsoft XPS Document Writer State in Windows PowerShell
Let’s say you want to check whether this feature is enabled on your Windows 11 or not, however, you don’t want to enable it rather just check the state of it.
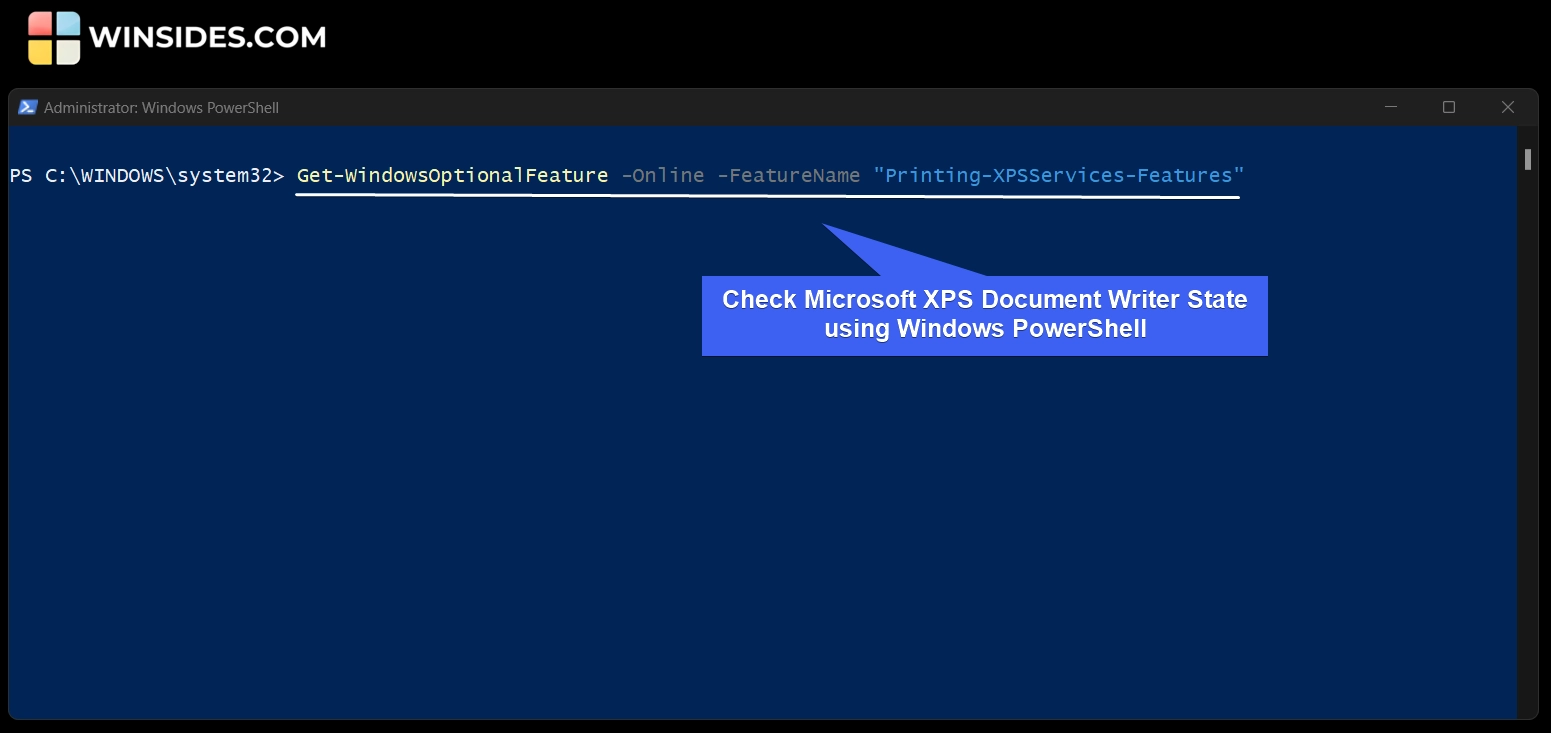
- To check the status (enabled or disabled) of this optional feature using Windows PowerShell, kindly execute the following command.
Get-WindowsOptionalFeature -Online -FeatureName "Printing-XPSServices-Features"
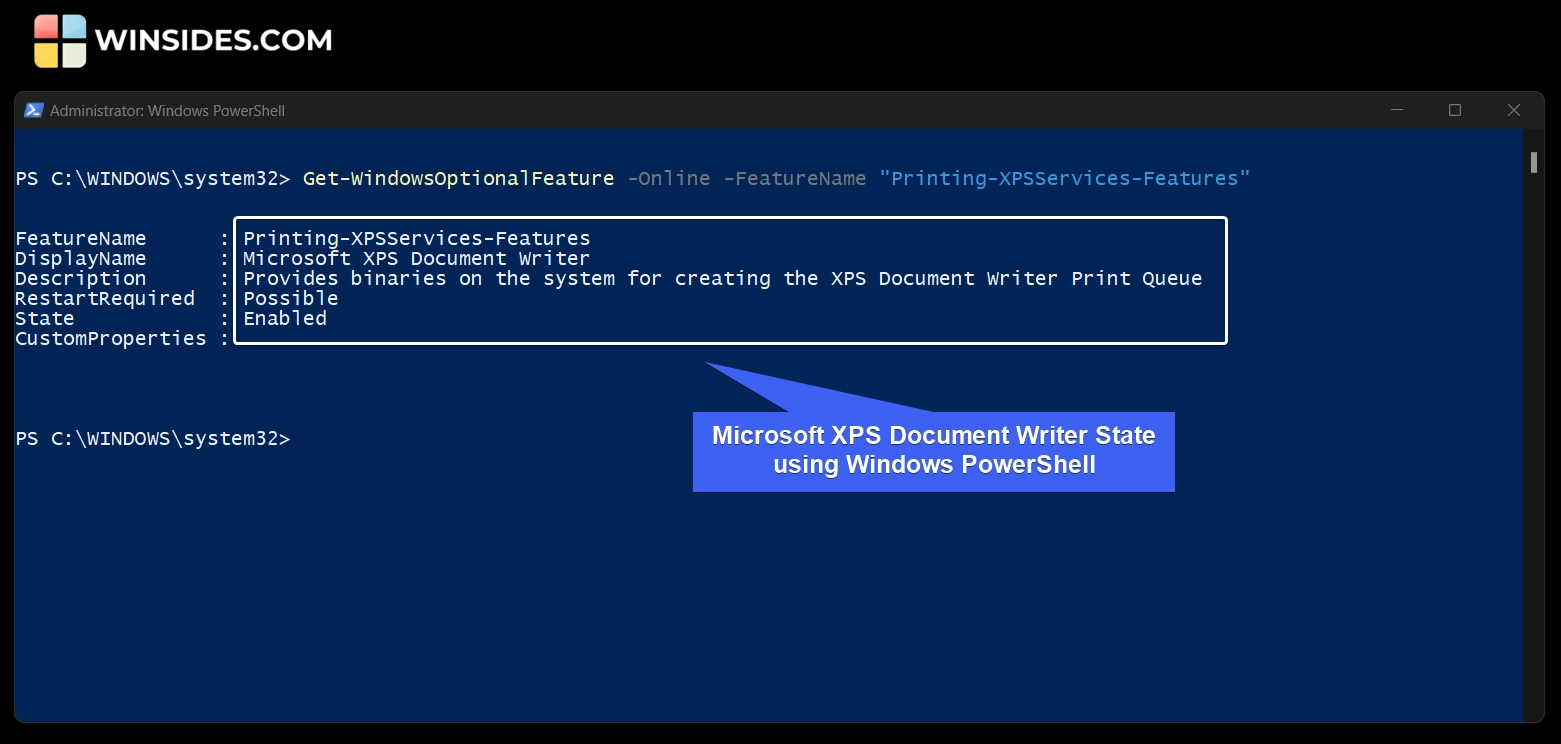
- Once we execute the above command, PowerShell will display the following information. Feature name, Display Name, Description about the Feature, State, and Custom Properties. The State field gives information on whether Microsoft XPS Document Writer is enabled or not.
Commands to Disable Microsoft XPS Document Writer on Windows 11 using CMD & Windows PowerShell
In the above sections of this article, we discussed enabling this feature using the Command Prompt and Windows PowerShell. In this section, we will check out the commands to disable Microsoft XPS Document Writer using Command Prompt, and Windows PowerShell.
- Please make sure to run the CMD or Windows PowerShell with Administrative Privileges.
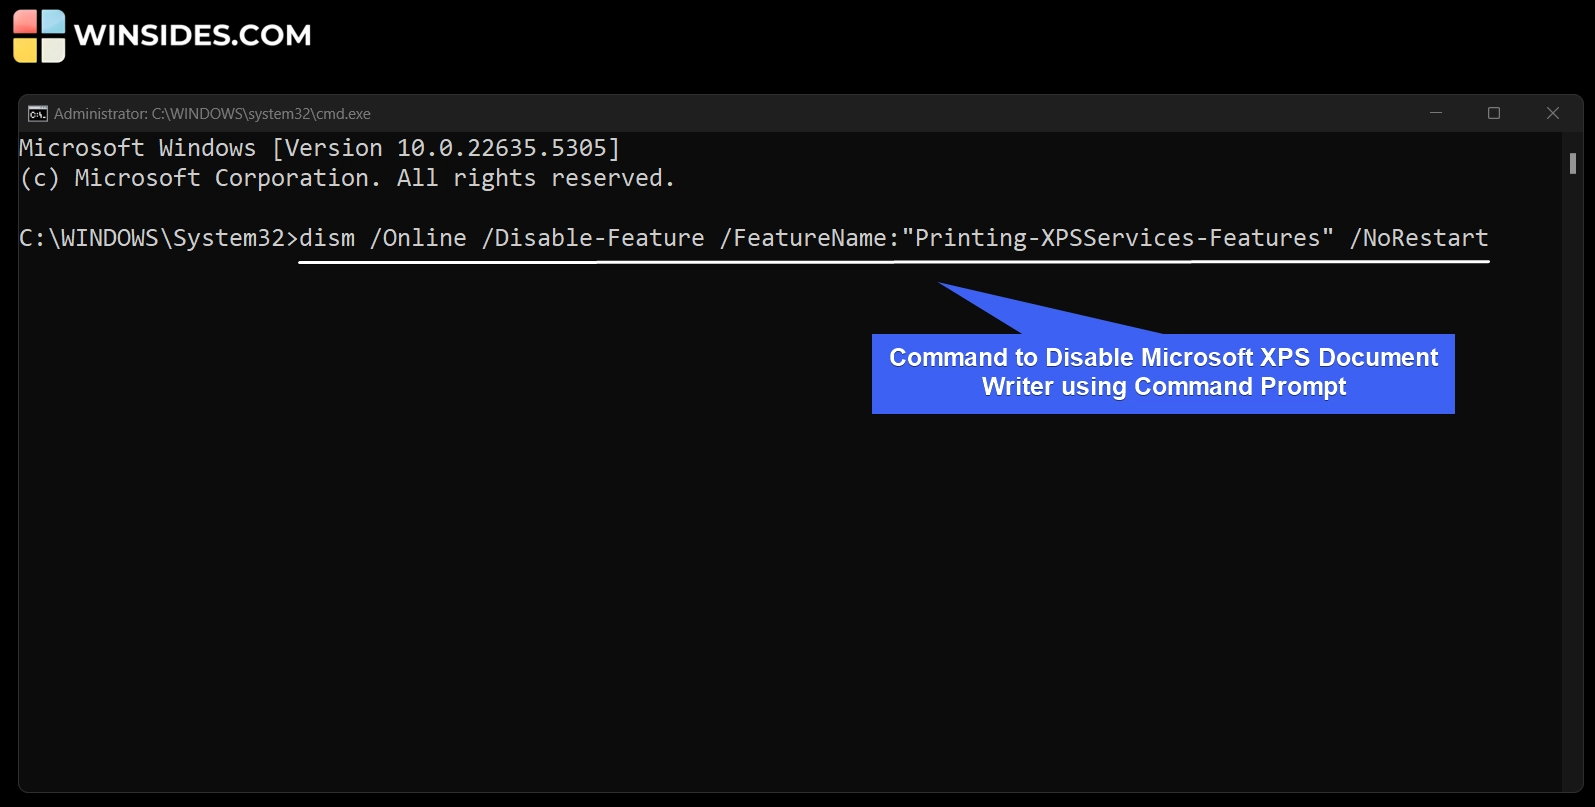
- If you using the Command Prompt, kindly execute the following command in the CMD.
dism /Online /Disable-Feature /FeatureName:"Printing-XPSServices-Features" /NoRestart
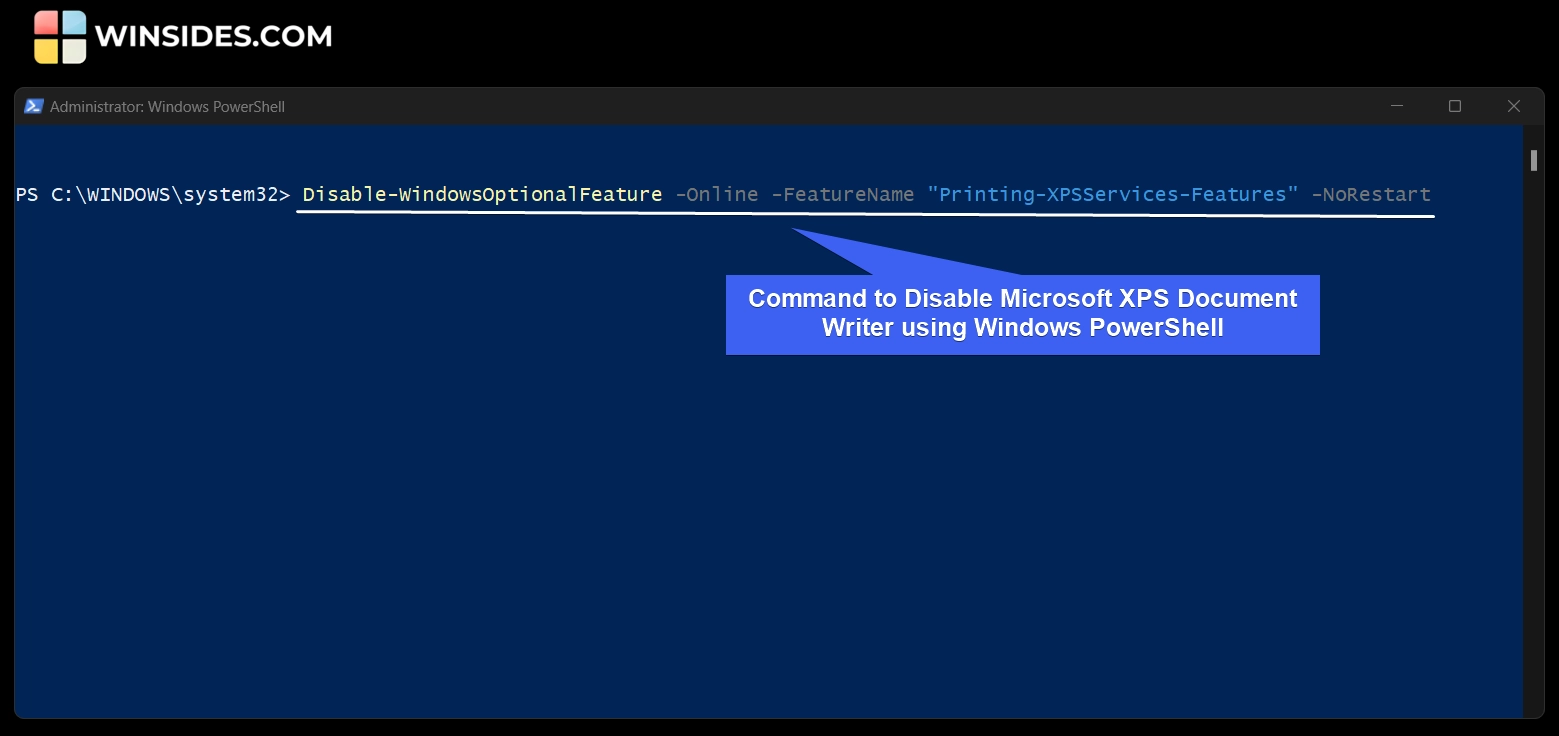
- If you are using Windows PowerShell, run the following command on Windows PowerShell.
Disable-WindowsOptionalFeature -Online -FeatureName "Printing-XPSServices-Features" -NoRestart
Take Away
While the option to enable Microsoft XPS Document Writer using GUI or CLI is completely up to the individual’s choice and their configuration, understanding these methods ensures precise control, and it can be really useful for IT Administrators for Deployment Scripts, Bulk Configurations, and Headless Systems.
Have Queries?
If you have any queries about the above article or if you find it difficult to follow the above steps, kindly let us know in the comments. For more interesting articles, stay tuned to Winsides.com. Happy Printing! Peace out!
We combine expert insights with user-friendly guidance. We thoroughly research and test everything to give you reliable and simple to understand tech guides. Please take a look at our publishing process to understand why you can trust Winsides.


