Enable Internet Information Services using Command Prompt (CMD)
Command to Enable IIS on Windows 11 & Windows Server
Enable IIS using CMD: It is a web server developed by Microsoft for hosting Websites, Applications, and Services on the Windows OS. IIS provides seamless integration with Windows Server and the broader Microsoft ecosystem. Its reliability and widespread support make it a trusted platform for enterprise environments, offering the stability and performance required for critical operations.
Recommended: Run Windows Defender Scan Via Command Prompt On Windows 11
There are several ways available to enable this feature on Windows OS, you can either Enable Internet Information Services via Windows Features (GUI) on Windows 11 OS, or you can use the Command prompt to enable this feature in the CLI interface. With a little tweak in the command, we can enable IIS on Windows Servers using CLI. This article will provide detailed steps to enable Internet Information Services using Command Prompt. Let’s get started.
Table of Contents
Internet Information Services (IIS) availability on different Windows Editions
This section provides information on the availability of this feature on different Windows Editions.
| Windows Editions | Availability |
| Windows Servers | Fully Available |
| Windows 11 Home | Yes |
| Windows 11 Professional | Yes |
| Windows 11 Education | Yes |
| Windows 11 Enterprise | Yes |
| Windows 11 Pro Education | Yes |
| Windows 11 SE | No |
| Windows 11 IoT Enterprise | Yes |
Easy way to Enable Internet Information Services using Command Prompt
- Go to the Start menu and Search for Command Prompt. Run Command Prompt as Administrator.
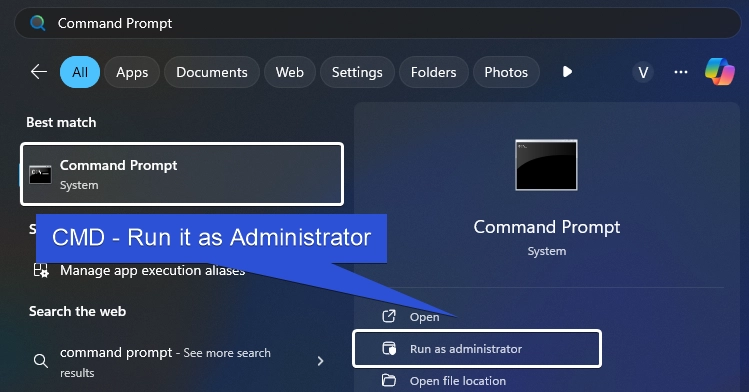
- User Account Control (UAC) will prompt for your permission to open CMD in Administrator mode. To confirm the action, click Yes.
- On the Command Prompt, execute the following command.
dism /online /enable-feature /featurename:IIS-WebServerRole /all /norestart
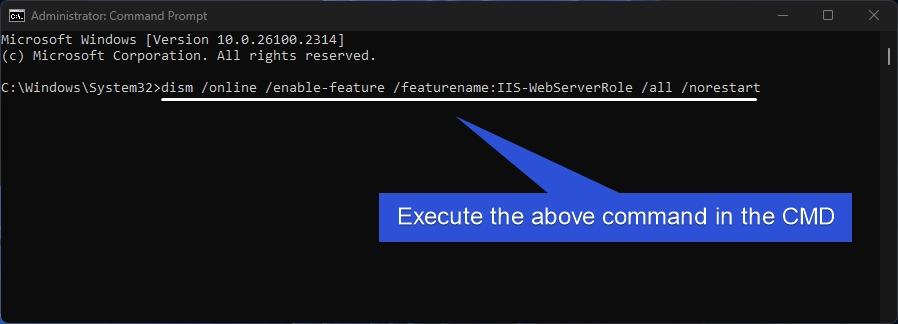
- The above command will use DISM to Enable IIS using Command Prompt. Kindly be patient when the system enables this feature.
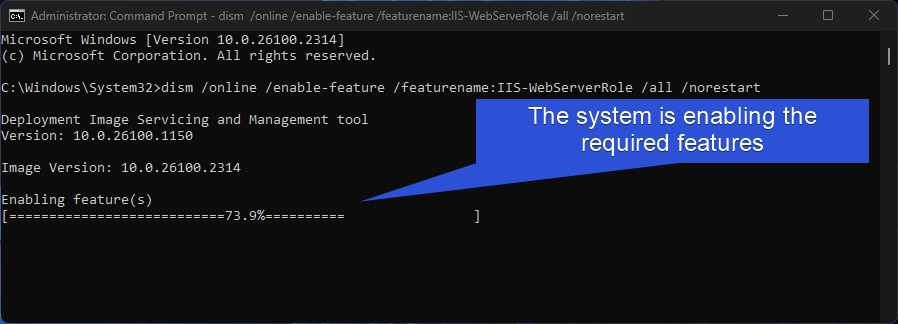
- Once the process is complete, we will get the message, “The operation completed successfully“.
- That is it. Internet Information Services is enabled via Command Prompt.
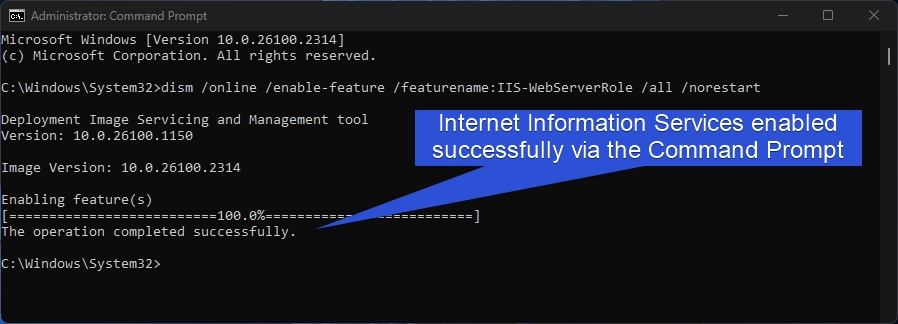
The same CMD command,
dism /online /enable-feature /featurename:IIS-WebServerRole /all, can be used to install IIS on all modern Windows Server editions, including Windows Server 2012, 2016, 2019, and 2022, as it leverages the DISM tool, which is consistent across these versions.
Let’s decode the command:

- dism: This stands for Deployment Imaging Service and Management Tool. It is a command-line tool used for managing Windows features, packages, and Windows image files (WIMs).
- /online: This flag indicates that the operation is being performed on the currently running (online) Windows installation. It is used to modify the features of the live system.
- /enable-feature: This flag tells
DISMthat you want to enable a specific feature in the operating system. - /featurename:IIS-WebServerRole: IIS-WebServerRole is the feature that installs the core IIS Web Server components. It includes necessary IIS functions like HTTP Server, configuration management, and core modules.
- /all: This flag ensures that all required dependent features (Dependicies) for the IIS Web Server are also enabled.
- /norestart: This flag prevents Windows from restarting automatically after enabling the feature. If you want the system to restart automatically once the feature is enabled, you can omit this flag.
Enable Internet Information Services using PowerShell
In this section, we will check out how to enable IIS using PowerShell. The following are the steps.
Check Out: Smb 1.0 / Cifs File Sharing Support Using Command Prompt & Windows Powershell
- Open the Start menu using the shortcut Win Key + S, search for PowerShell, and run PowerShell as an Administrator.
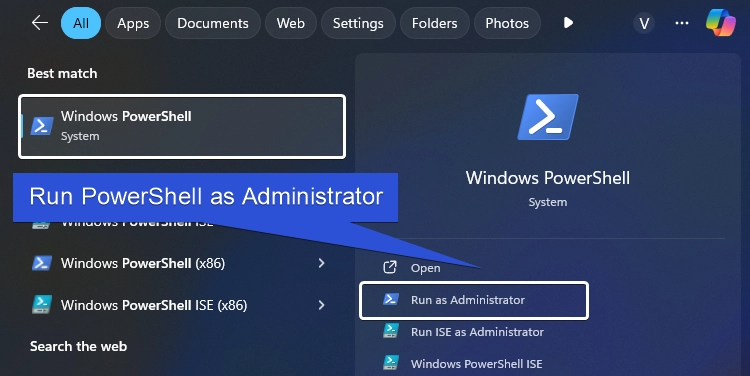
- Enter the following command in the PowerShell and click Enter.
Enable-WindowsOptionalFeature -Online -FeatureName IIS-WebServerRole -All
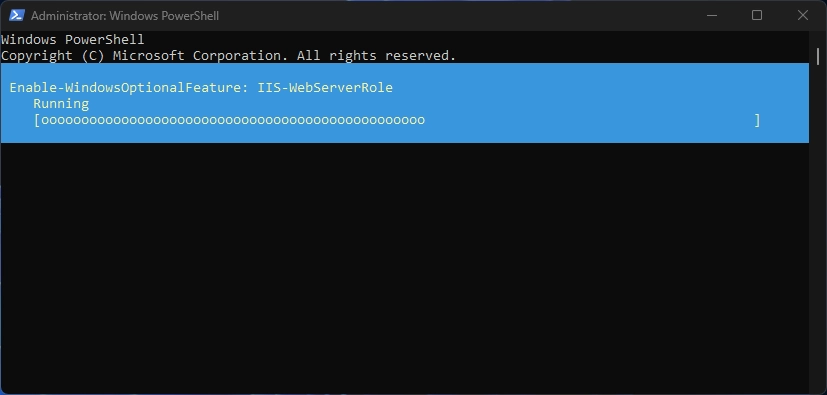
- Now, the PowerShell will install the Internet Information Services Feature and its related dependencies. Kindly be patient.
- Once the process is completed, the system will prompt you whether you want to Restart or not. Enter Y for Restart and N for Restart later.
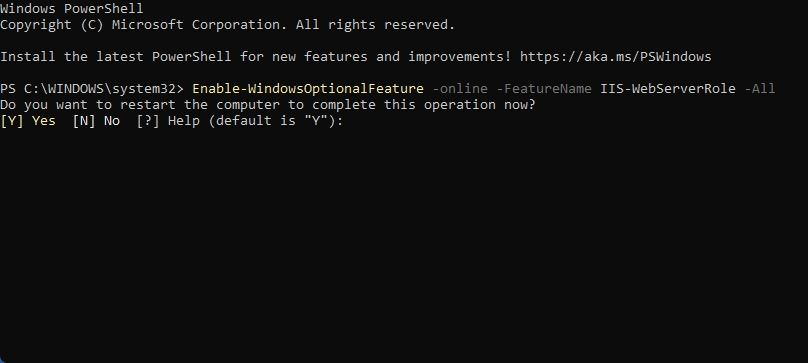
- Upon entering your desired value, the system will conclude the process by displaying the summary. If the Restart needed column is True, then the system strongly suggests that it requires a restart so that the changes made will reflect.
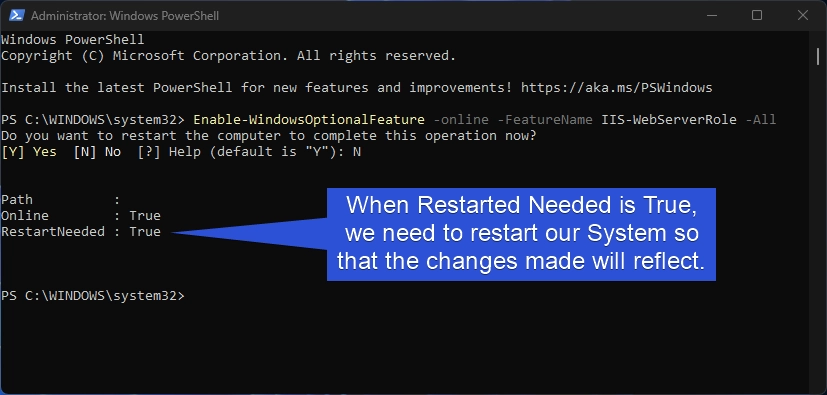
- That is it. IIS is now enabled on Windows 11 via PowerShell.
Video Walkthrough for Enabling IIS using CMD and PowerShell
Take away
This approach of enabling IIS on Windows 11 and Windows Server Editions using Command Prompt, and PowerShell is beneficial for web developers for automation, remote management, and streamlined setups. If you have any queries, kindly let us know in the comment section. For more interesting articles, stay tuned to Winsides.com. Happy Coding! Peace out!
Related Articles:
- How to Configure Touchpad Gestures on Windows 11?
- How to Auto Hide Taskbar on Windows 11?
- What is servicehost.exe on Windows 11?
We combine expert insights with user-friendly guidance. We thoroughly research and test everything to give you reliable and simple to understand tech guides. Please take a look at our publishing process to understand why you can trust Winsides.
![Enable IIS using Command Prompt and Powershell [For Windows 11 & Windows Server Editions]](https://winsides.com/wp-content/cache/flying-press/M1t9_eAtnds-maxresdefault.webp)

