Enable Work Folders Client on Windows 11 using CMD & PowerShell
It provides Offline access to Work PCs from a Corporate File Server Seamlessly
Enable Work Folders Client on Windows 11: This built-in Windows Feature is essential for enterprise environments and corporate structures. After the Pandemic, the concept of Working from Home skyrocketed. In such cases, most employees worked from their homes with their office laptops. With Work Folders Access from the company, employees can easily access and edit documents from the office file server. The changes made are seamlessly synced with the server as well.
To use Work Folders Client on a Windows 11 configuration, we need to enable it manually. It is a built-in feature, but as it is focused on enterprise environments, it is available as an optional feature on Windows 11. There are different methods to enable this optional feature on Windows 11, and let’s check out those in detail.
Different Methods to Enable Work Folders Client on Windows 11
- Use Windows Features Dialog – GUI Method
- Quick way to enable Work Folders Client using the Command Prompt – CLI Method
- Easy way to enable Work Folders Client using Windows PowerShell – CLI Method
If you are looking to use the GUI method, we have a dedicated article on how to turn on Work Folders Client on Windows 11 with step by step explanation. Kindly refer to it. In this article, we will focus on the CLI methods. Let’s get started.
Work Folders Client Availability on various Windows 11 Editions
| Windows Editions | Availability |
| Windows Servers | Yes |
| Windows 11 Home | Yes |
| Windows 11 Professional | Yes |
| Windows 11 Education | Yes |
| Windows 11 Enterprise | Yes |
| Windows 11 Pro Education | Yes |
| Windows 11 SE | No |
| Windows 11 IoT Enterprise | Yes |
Quick Way to Enable Work Folders Client on Windows 11 using Command Prompt
To enable this optional feature using CMD, we need to run Command Prompt with Administrative Privileges. Additionally, we will use the Deployment Image Servicing and Management Tool, also known as DISM, to enable this feature on Windows 11.
- Go to the Command Prompt, and make sure to run it with Elevated Privileges as DISM requires it. We have an article explaining Different methods to run Command Prompt as Administrator.
- The User Account Control will confirm and open CMD with Administrative Privileges.
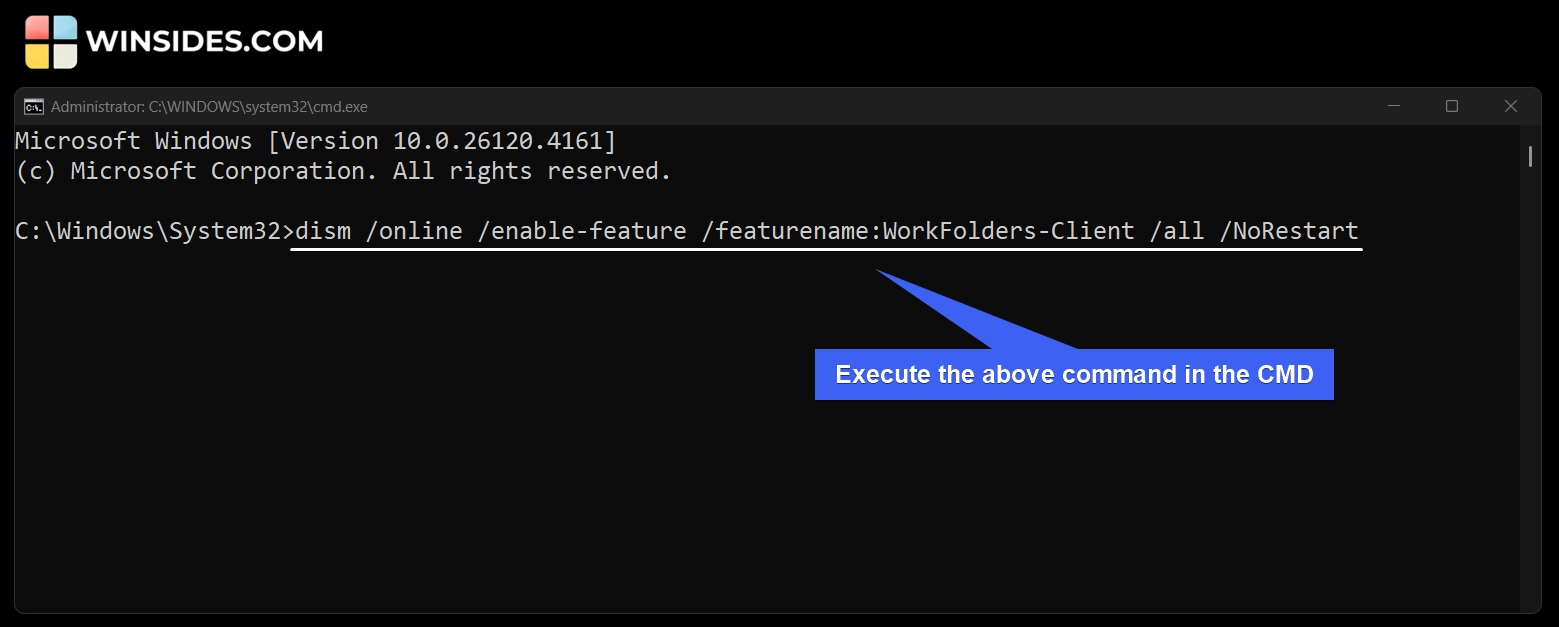
- Kindly execute the following command in the CMD.
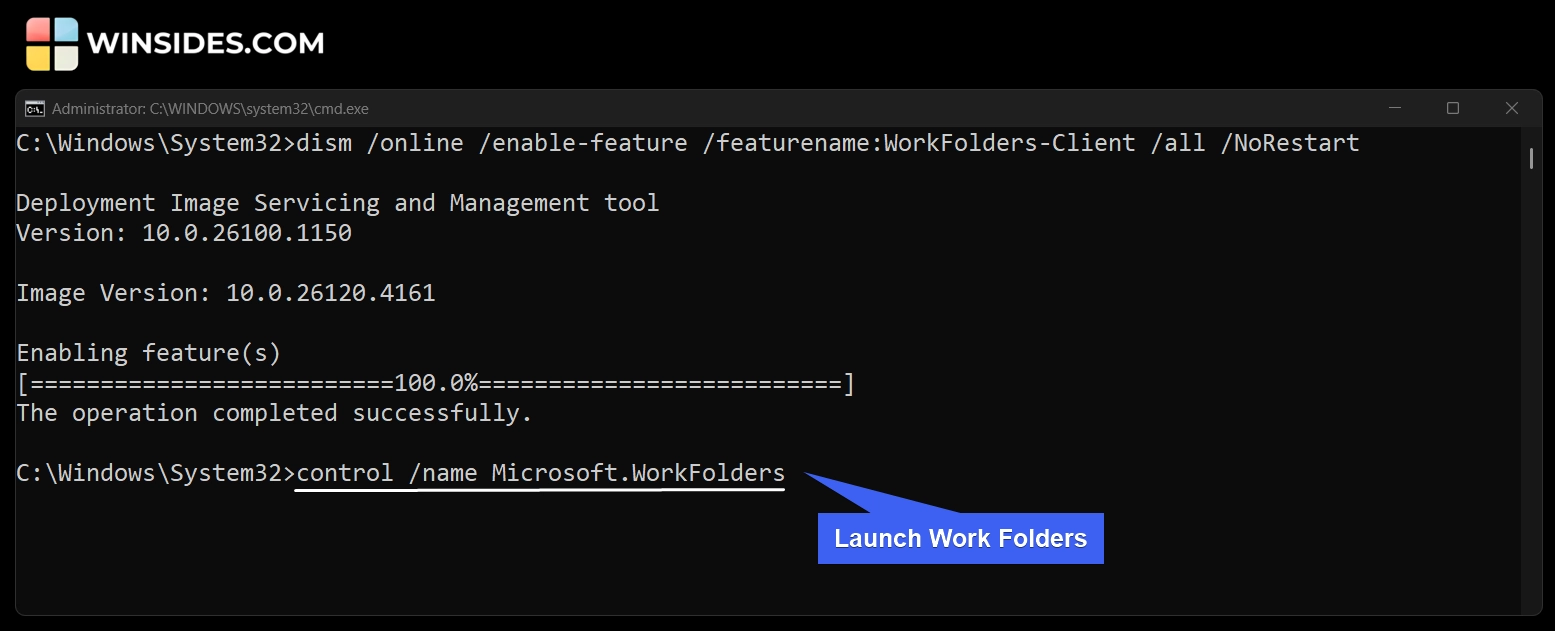
dism /online /enable-feature /featurename:WorkFolders-Client /all /NoRestart
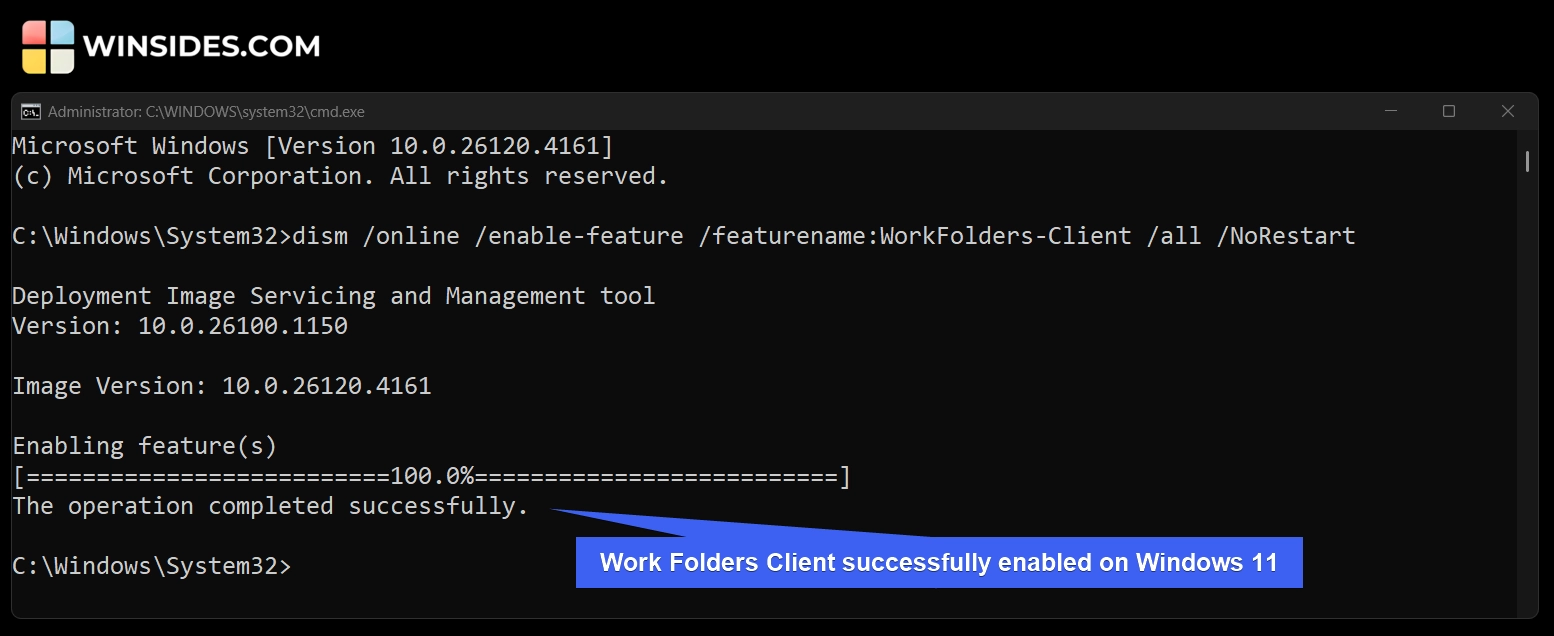
- The DISM will now enable the Work Folders Client on your Windows 11 rig. You will receive the message “The operation completed successfully“. This marks the completion of the process. Work Folders Client is successfully enabled.
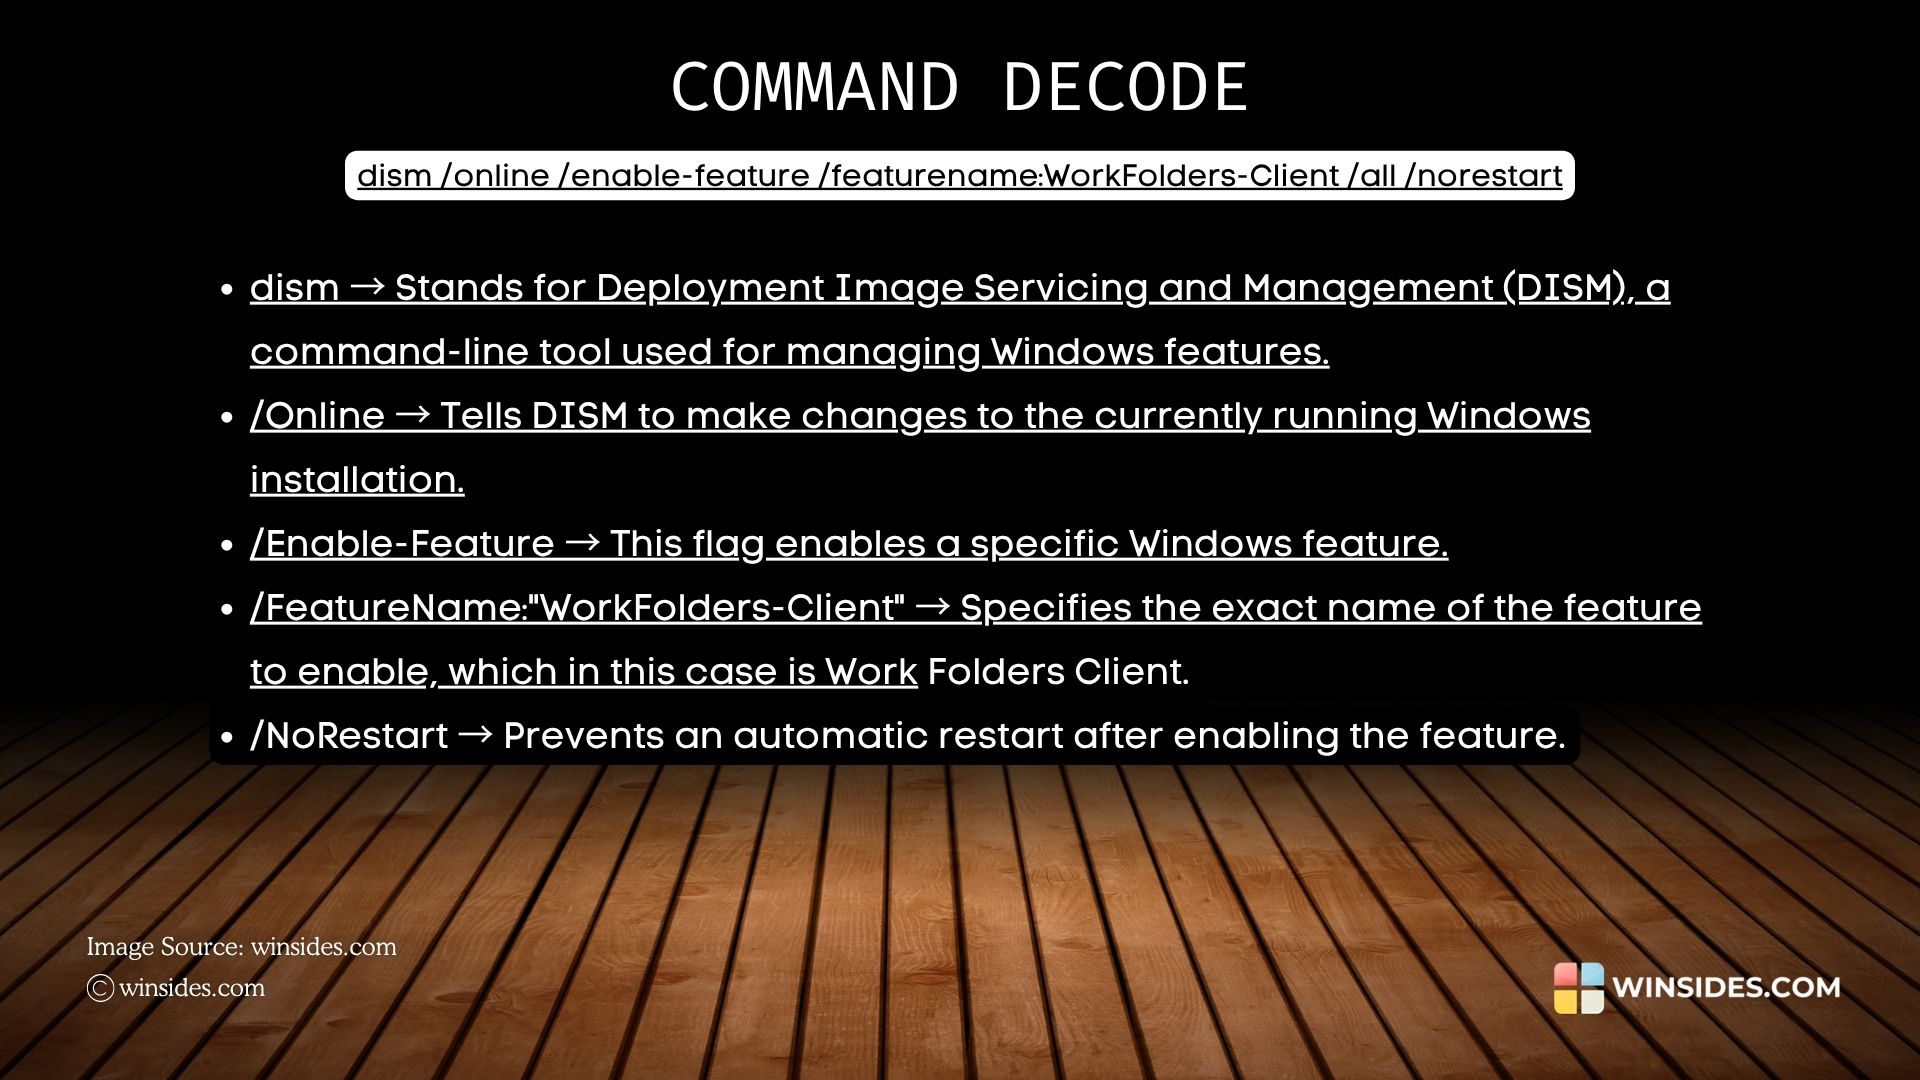
Decoding “Work Folders Client Enable Command using CMD”
Launch and Configure Work Folders Client on Windows 11
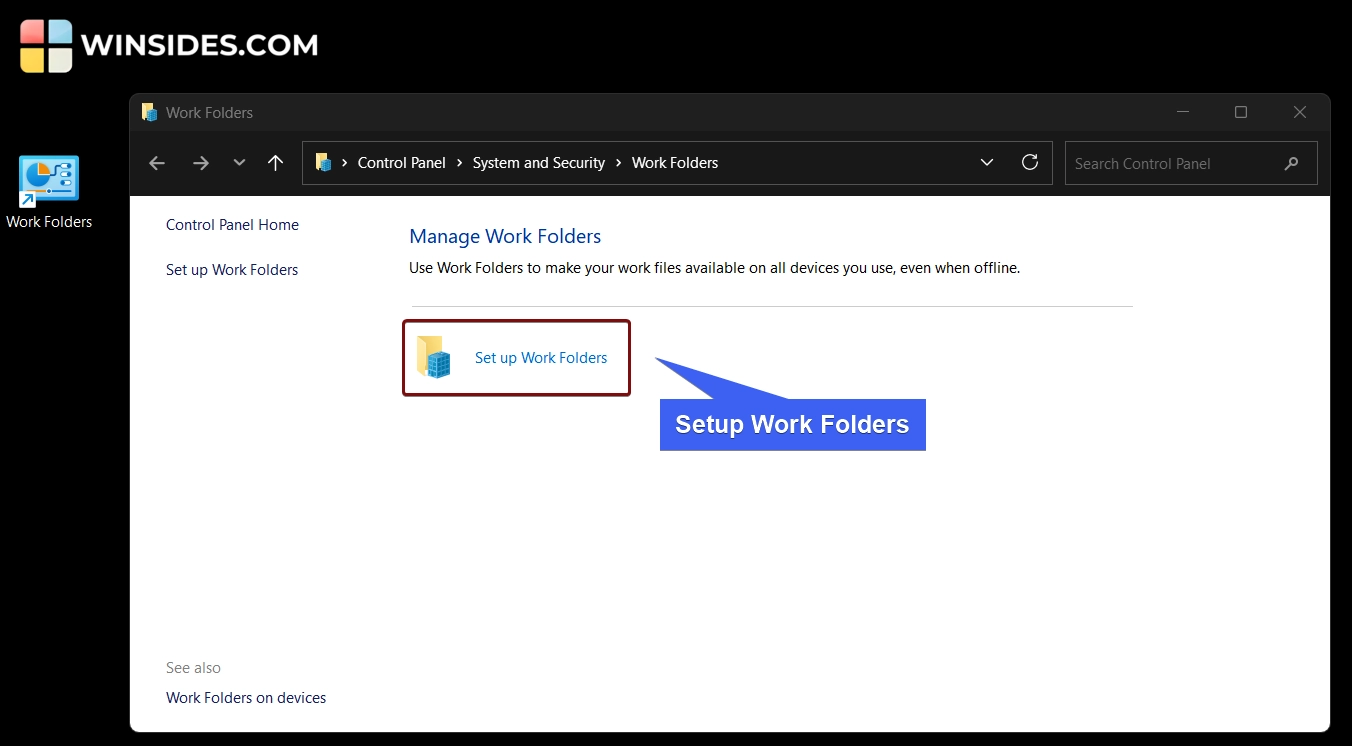
Once this optional feature is enabled on Windows 11, you can access it and configure it. You can use the Control Panel to access it via the Graphical User Interface, or you can use the CMD to quickly access it without having to surf through different Control Panel items. To launch and configure Work Folders Client on Windows 11, kindly execute the following command in the CMD.
control /name Microsoft.WorkFolders
Easy Way to Enable Work Folders Client on Windows 11 using Windows PowerShell
- Go to the Run Command using the keyboard shortcut WinKey + R.
- In the Run, type the following command
powershell, and press CTRL + SHIFT + R. This action will prompt Run to execute this command with Administrative Privileges.
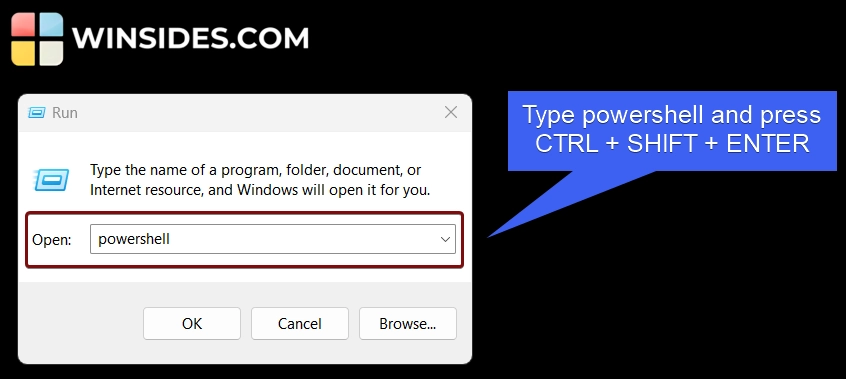
- Once you confirm with the UAC, the system will open Windows PowerShell with Elevated Privileges.
- Execute the following command in Windows PowerShell.
Enable-WindowsOptionalFeature -Online -FeatureName WorkFolders-Client -All -NoRestart
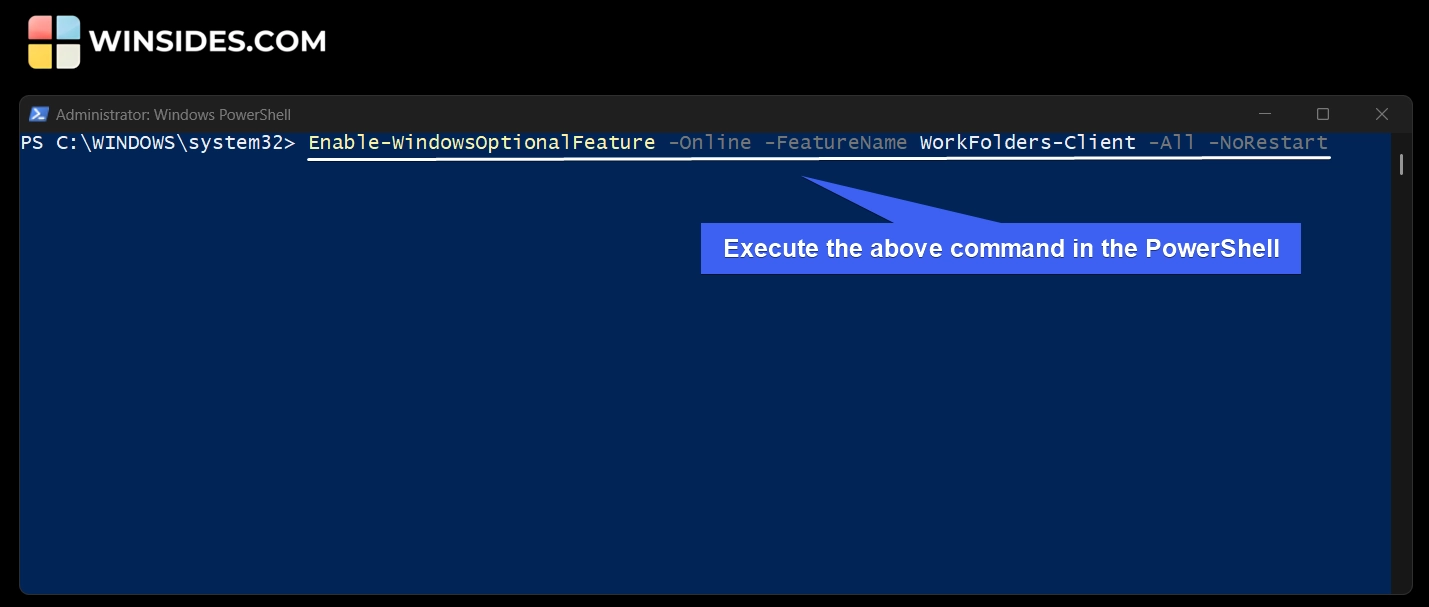
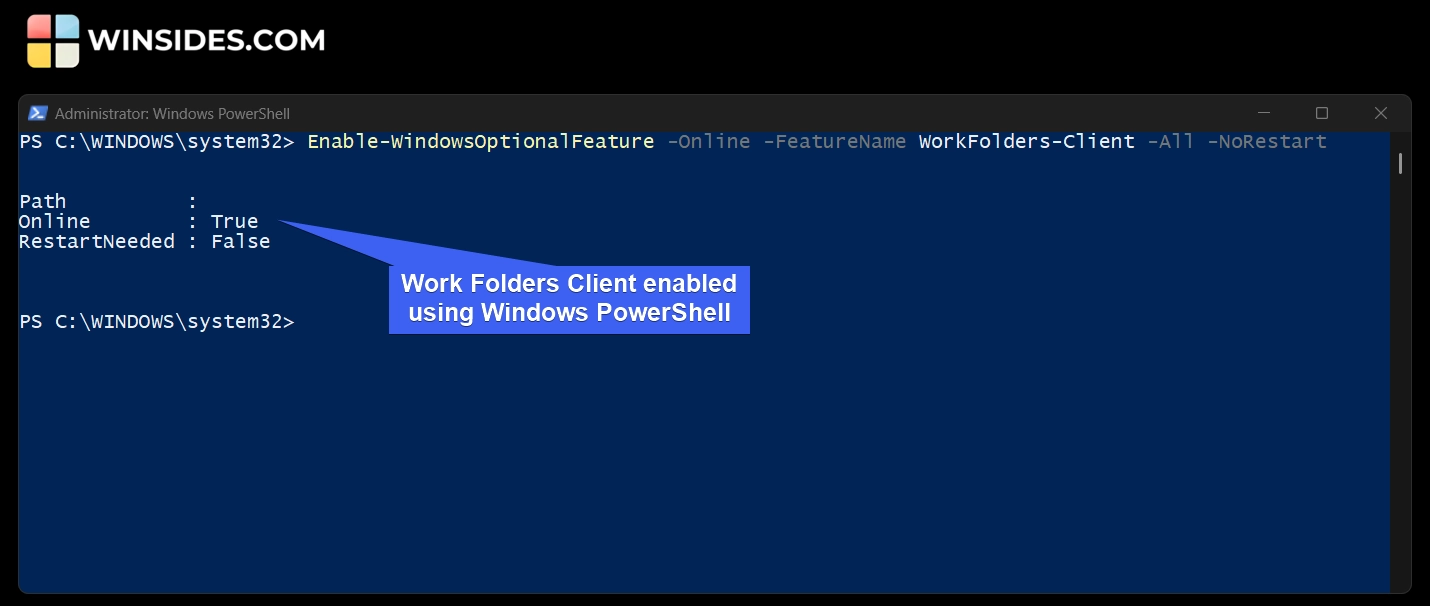
- PowerShell will now enable Work Folders Client on Windows 11.
- The RestartNeeded value is False, and that means a restart is not required for the changes made to the system.
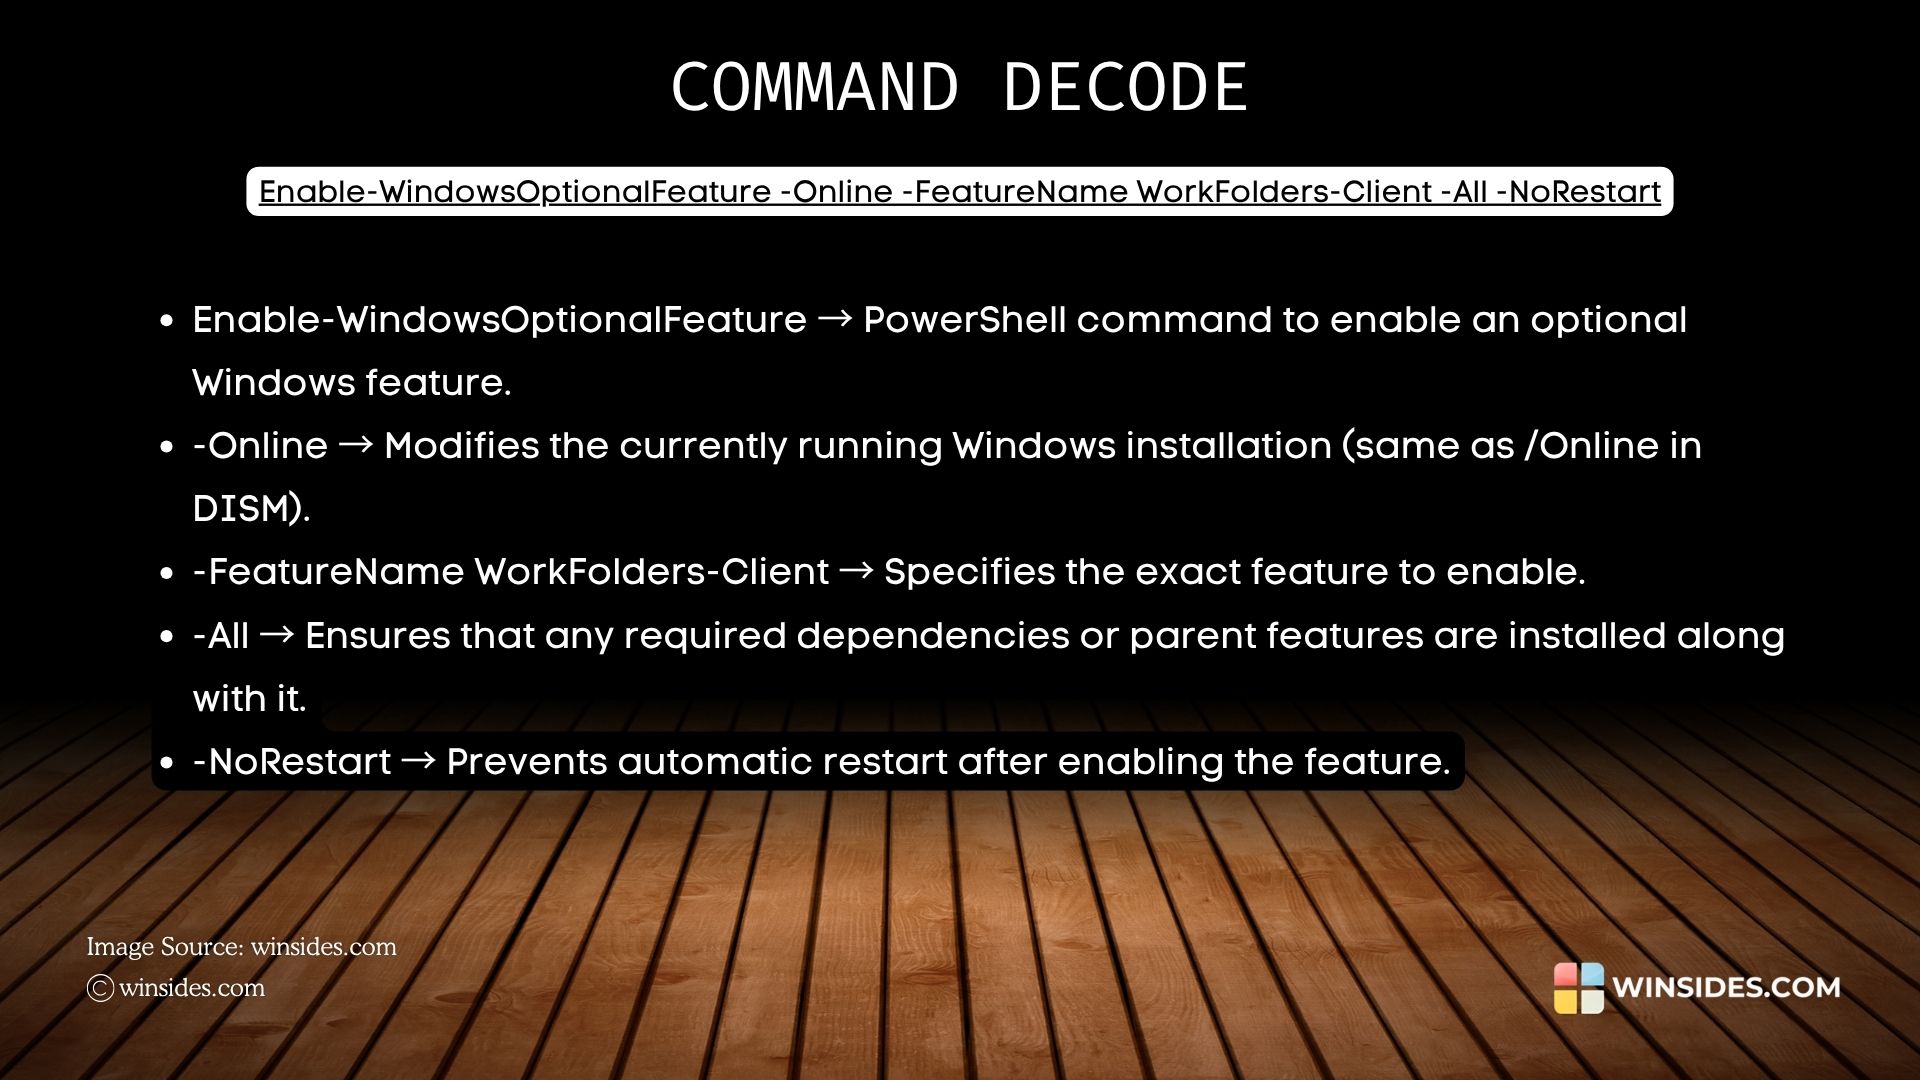
Decoding “Work Folders Client Enable Command using PowerShell”
Create a Desktop Shortcut to access the Work Folders Client on Windows 11
Once the feature is enabled on Windows 11, you can create a desktop shortcut for convenient access. You don’t have to navigate through the Control Panel or remember the CMD or use the Start menu. You can make it simpler by creating a Desktop Shortcut. Here are the steps.
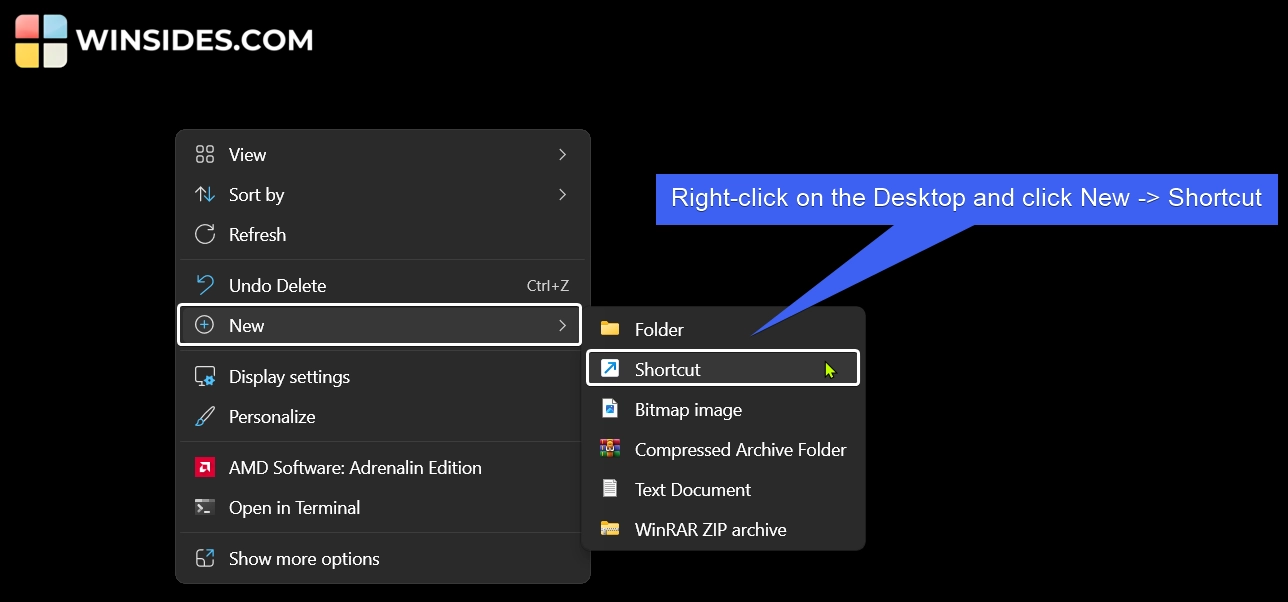
- On the empty space of the Desktop, right-click and hover on New, and then click on Shortcut.
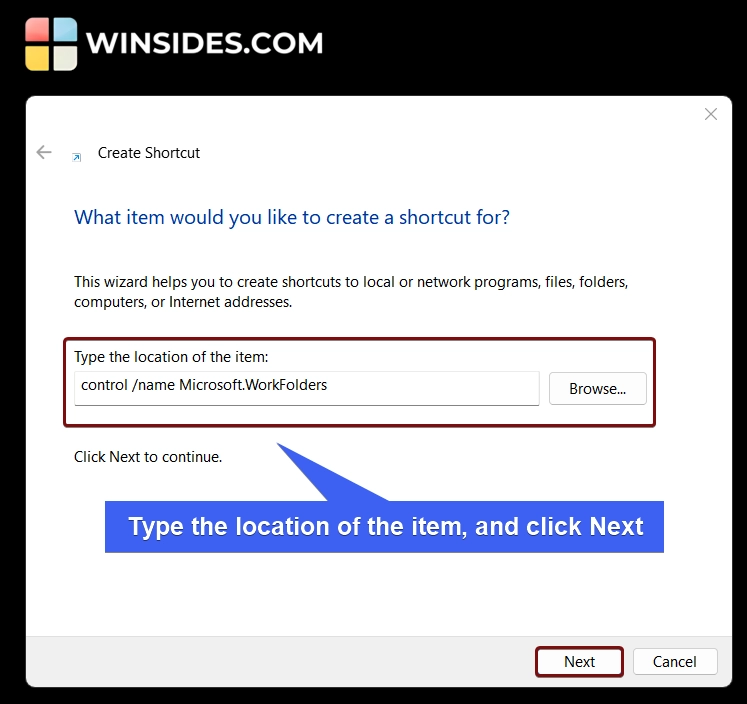
- Create Shortcut dialog box will pop up. This Wizard helps you to create shortcuts to local or network programs, files, folders, computers, or Internet addresses.
- In the “Type the location of the item” field, enter the following value. control /name Microsoft.WorkFolders
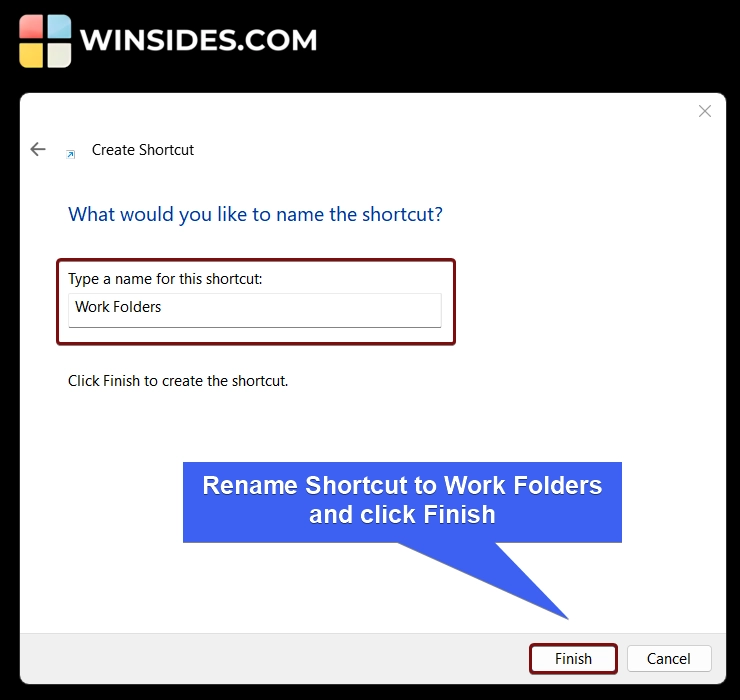
- Click Next. By default, the system will assign the shortcut name control, we can rename it as per your convenience. I am renaming it to Work Folders. Finally, click Finish.
- The Work Folders Desktop Shortcut will now be created on your Windows 11 Desktop.
Various Functions of Work Folders Client on Windows 11
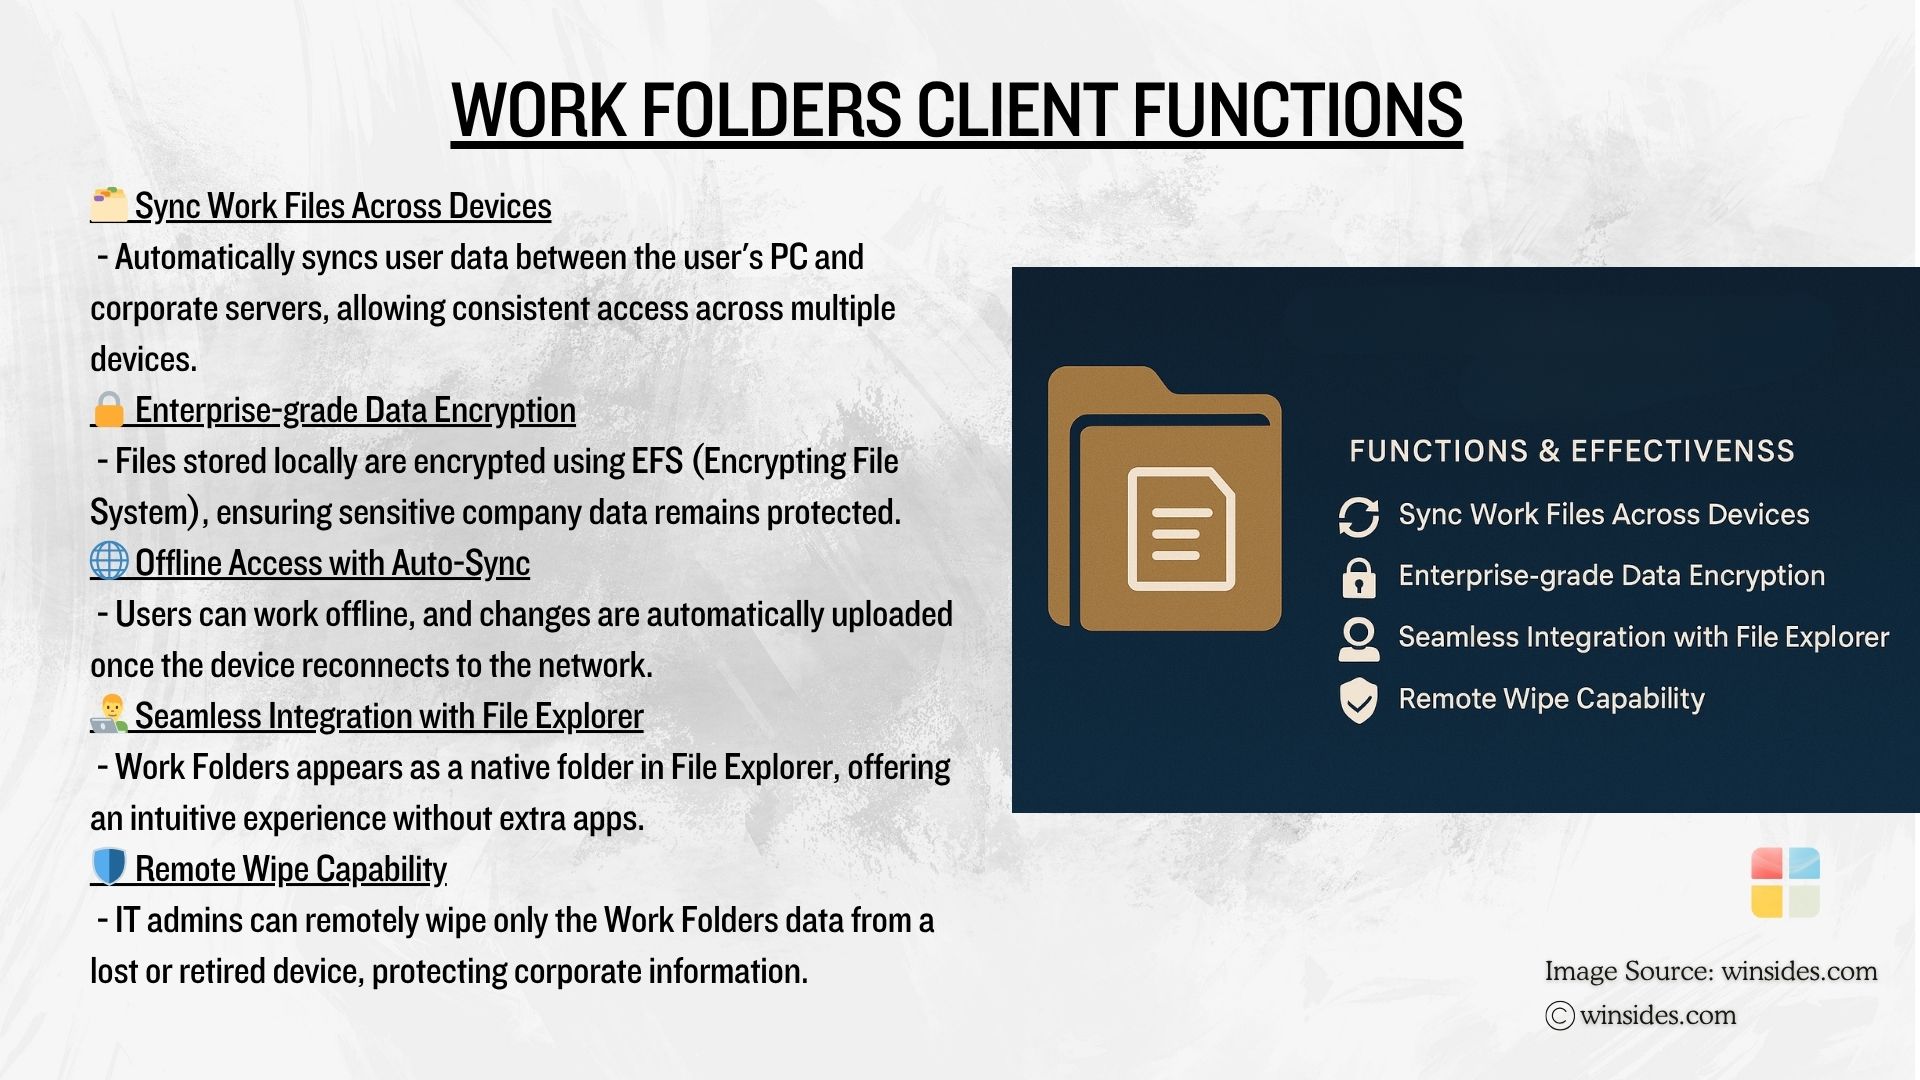
- Work Folders seamlessly syncs user files from an enterprise file server. The Changes made offline are synced when the device reconnects, and this ensures the files are always up to date.
- It uses Encrypted HTTPS connections, which enhances the security without compromising on ease of access.
- Work Folders respects existing NTFS permissions and quotas on the server, so admins don’t need to create new systems for access control. It fits seamlessly into Active Directory environments.
- Files stored on client devices can be automatically encrypted, and admins can remotely wipe the Work Folders content if a device is lost or an employee leaves the company.
Take away
We hope you are satisfied with our article on how to enable Work Folders Client on Windows 11 using Command Prompt and Windows PowerShell. If you have any queries or feedback, kindly let us know Comments section. For more interesting articles, stay tuned to Winsides.com. Happy Computing! Peace out!
We combine expert insights with user-friendly guidance. We thoroughly research and test everything to give you reliable and simple to understand tech guides. Please take a look at our publishing process to understand why you can trust Winsides.
