How to find WiFi Password in Windows 11?
Find WIFI Password in Windows 11: Gone are the days when you had to scribble down passwords on sticky notes or dig through old emails to find them. With Windows 11, you can easily access and retrieve your Wi-Fi credentials, which is a pretty straightforward process. Android offers a handy feature that allows you to share your Wi-Fi password via a QR code, in the same manner, finding WIFI in Windows 11 is also a hassle-free process. In this article, we’ll guide you through the steps to find your Wi-Fi password on a Windows 11 PC.
Different Methods to Find Wifi Password in Windows 11:
There are several methods available to find Wi-Fi passwords in Windows 11.
Find WIFI Password using Windows Settings – Quick & Convenient:
Make sure you are already connected to the WIFI network that you want to find the password. Let’s get into the steps.
- Go to Windows Settings using the shortcut Win Key + I.
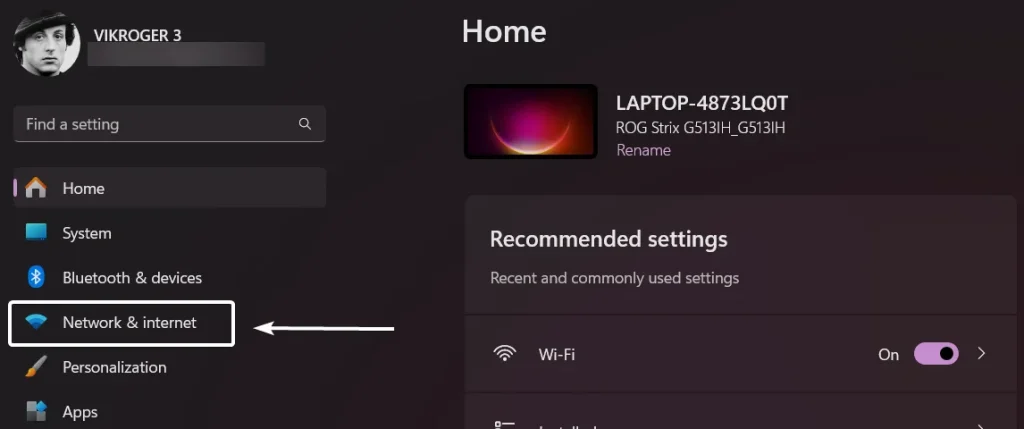
- Click on Network & Internet from the left pane.
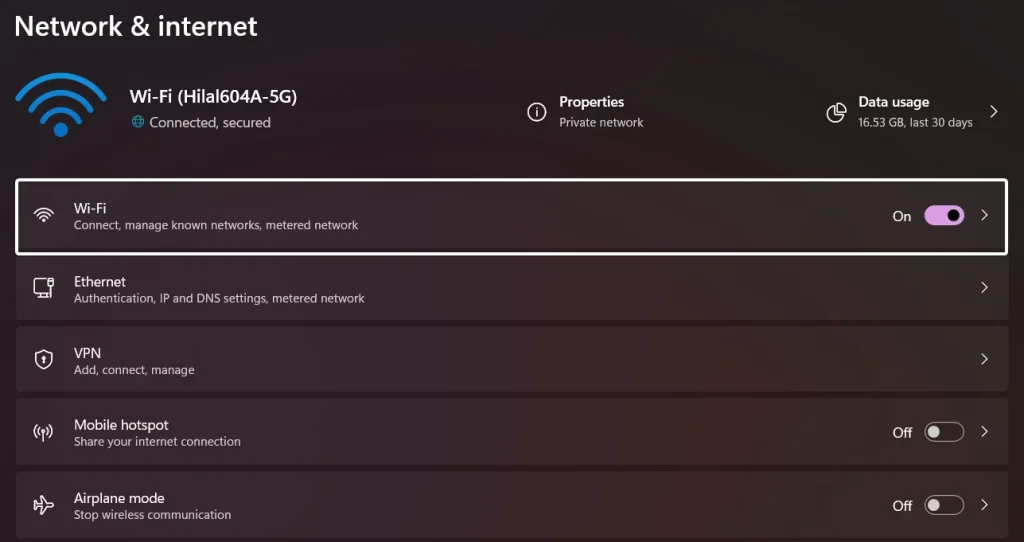
- Now, click on Wi-Fi.
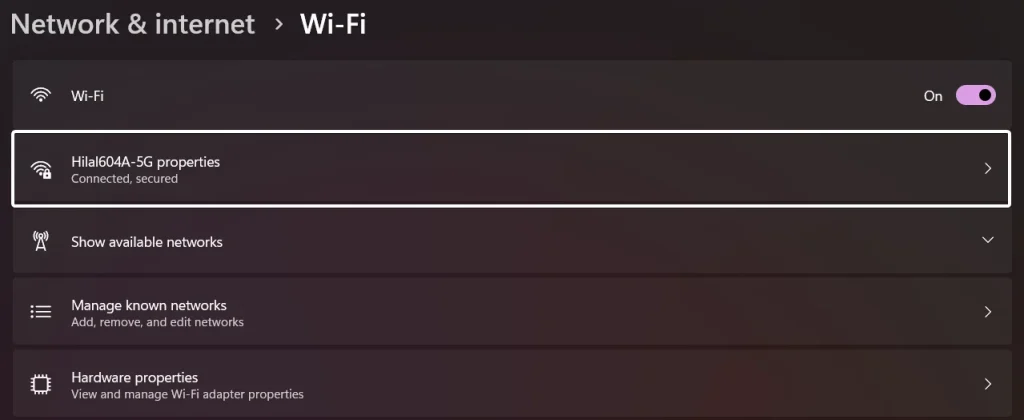
- Here, you can find the connected Wi-Fi network. Click on that.
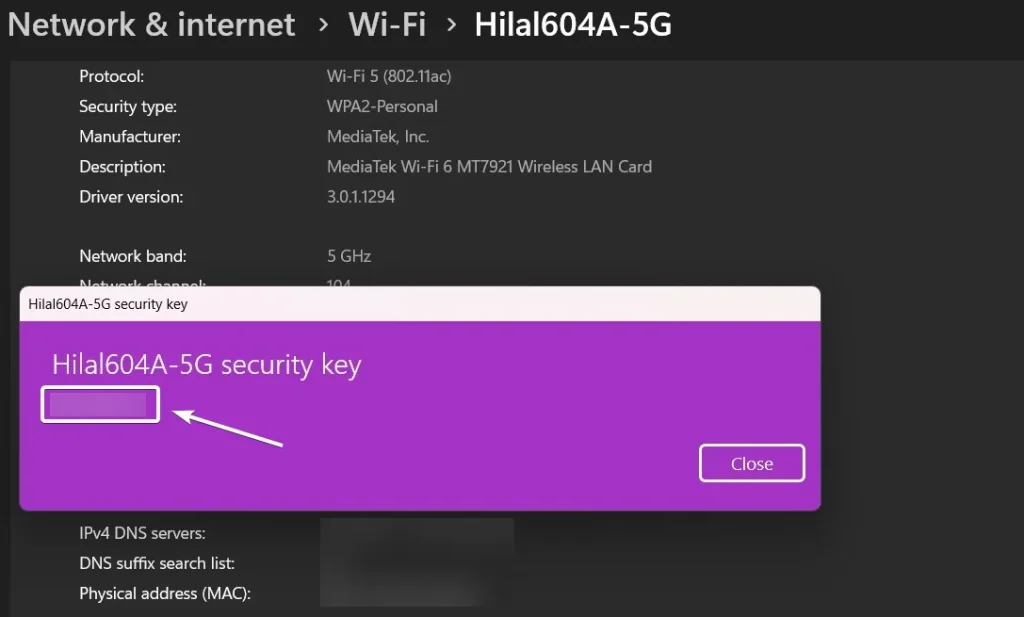
- Scroll down and click on View of “View Wi-Fi security key“.
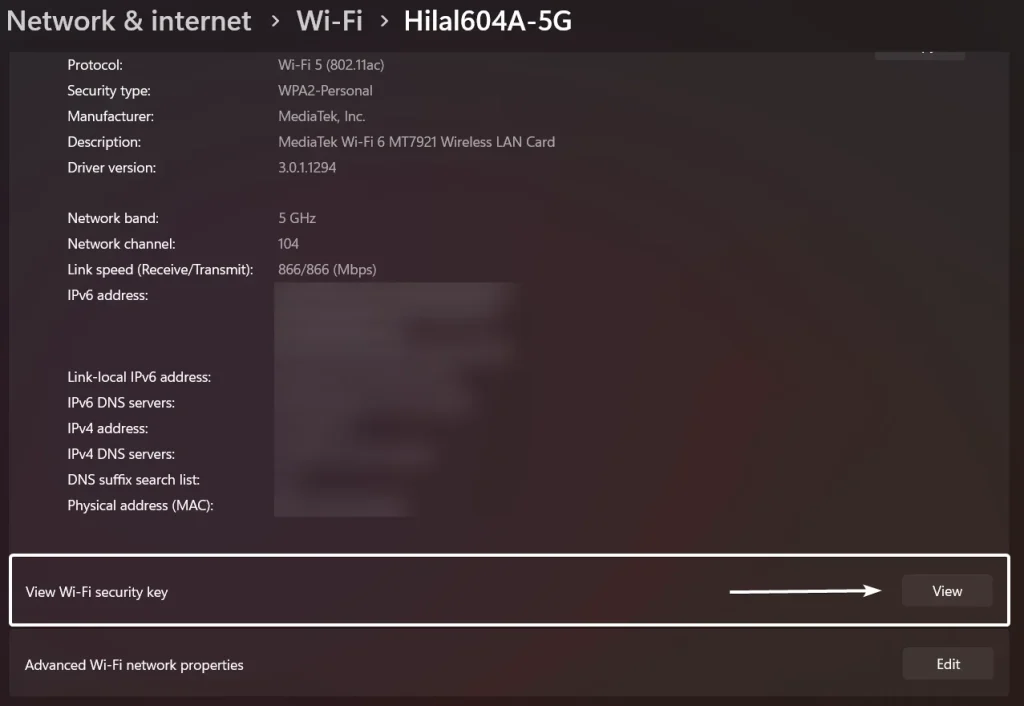
- The system will display the WiFi Password now. That is it. You can now share the password.
Find Wifi Password using Command Prompt in Windows 11 – Advanced:
If you need to retrieve passwords for multiple Wi-Fi networks, the Command Prompt can display all saved network profiles at once. This is especially useful if you’ve connected to many networks over time. This method provides more detailed information about the network configuration, which can be useful for troubleshooting or advanced network management.
Why do we need this method?
In some corporate or educational environments, access to the Settings app might be restricted. PowerShell and Command Prompt can provide a workaround to retrieve necessary information. For users who prefer a command-line interface or are working in environments where GUI access is limited, these methods offer a viable alternative.
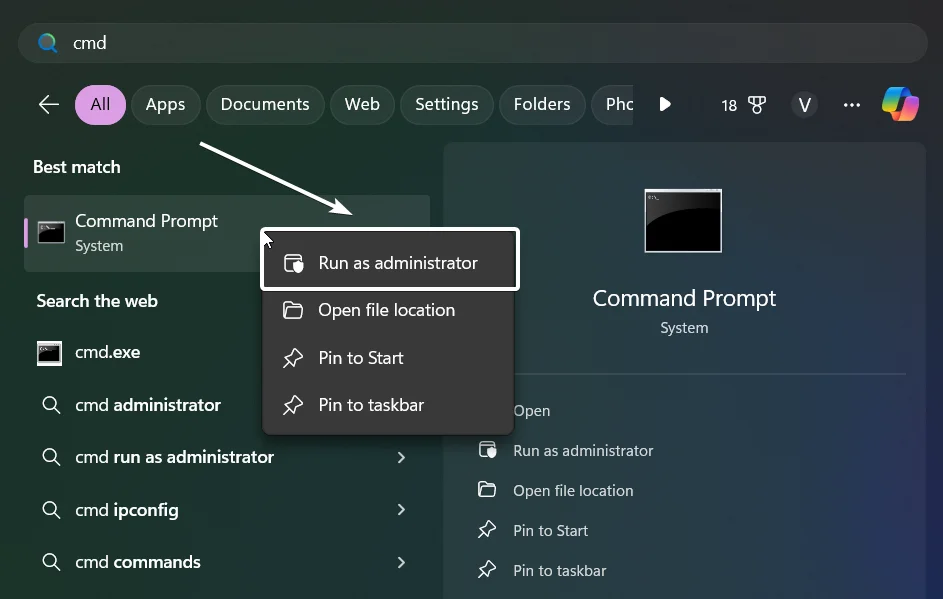
- Open Command Prompt: Press
Windows + S, type “cmd,” right-click on “Command Prompt,” and select “Run as administrator.” User Account Control will open. Click Yes.
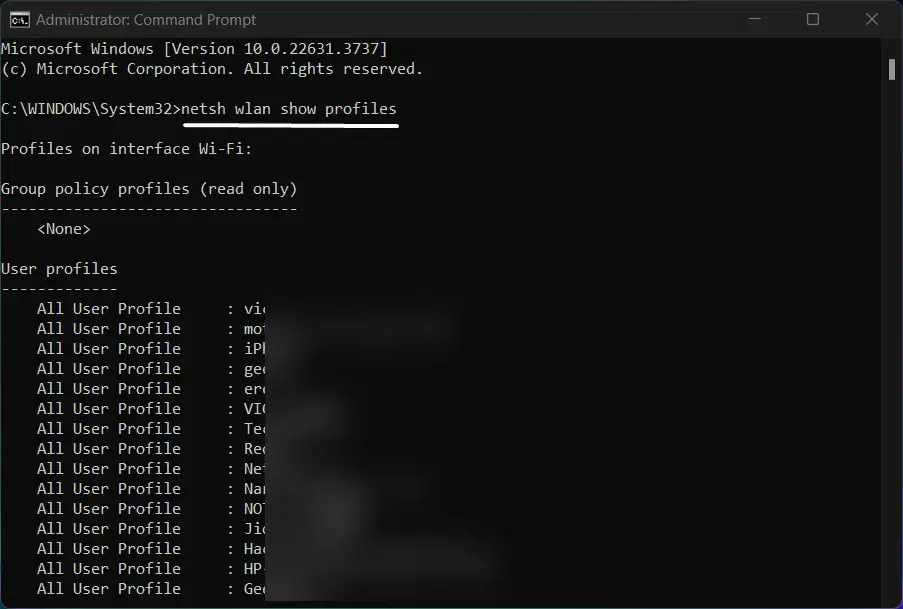
- To view the list of connected wifi profiles, execute the following command.
netsh wlan show profiles
- To see the password for a specific network, type the following command and press Enter.
netsh wlan show profile name="NETWORK_NAME" key=clear
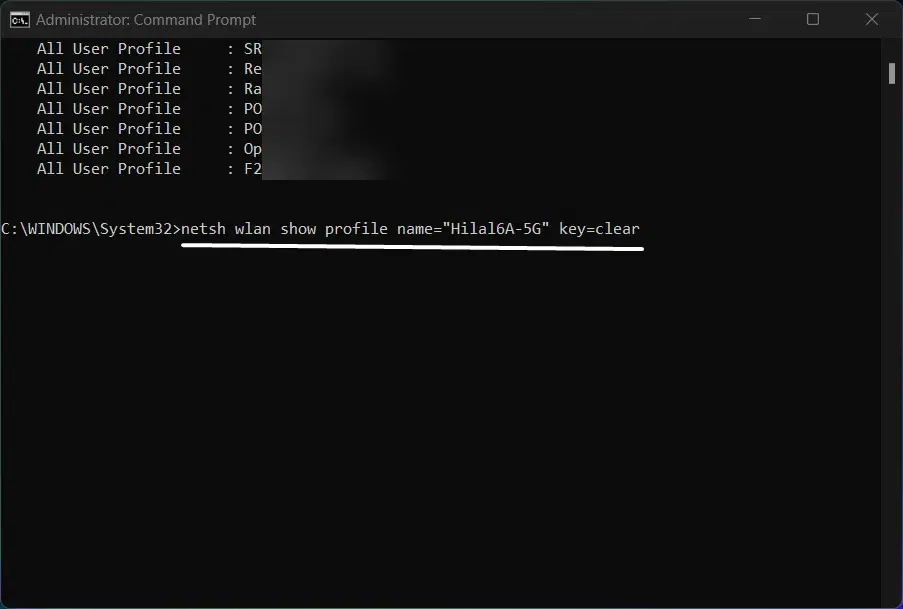
Make sure to replace the “NETWORK_NAME” with the name of the network that you want to find the password for.
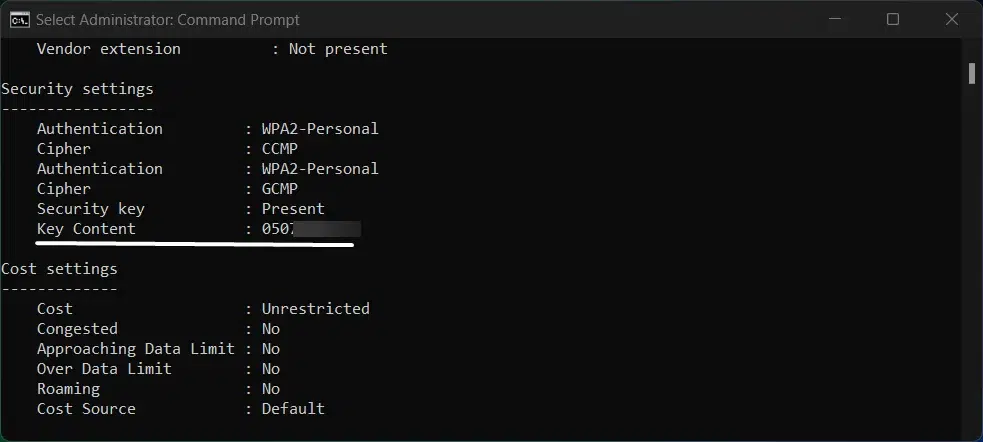
- Once the command is executed, it will provide complete information about the WiFi network. The details include Profile Information, Connectivity Settings, Security Settings, and Cost Settings. Under Security Settings, you can find “Key Content“. There you can find the Wifi Password.
Take away:
So, the next time you find yourself needing your Wi-Fi password, whether connecting a new device, sharing access with a guest, or simply reminding yourself of the network password, you’ll be equipped with the knowledge and tools to access it quickly and efficiently in Windows 11. While the Windows Settings method is straightforward and convenient, In some corporate or educational environments, access to the Settings app might be restricted. The Command Prompt method can provide a workaround to retrieve necessary information. Happy Networking! Peace out!
We combine expert insights with user-friendly guidance. We thoroughly research and test everything to give you reliable and simple to understand tech guides. Please take a look at our publishing process to understand why you can trust Winsides.


