Use Smartphone Camera as Webcam for Apps in Windows 11
Make your Smartphone Camera available to apps that use a webcam in Windows 11
Use Smartphone Camera as Webcam for Apps in Windows 11: Why buy a webcam when you can use your smartphone as your webcam? Imagine a scenario where your computer or laptop lacks a built-in webcam, or perhaps the webcam’s quality leaves much to be desired. Fret not, as Windows 11 brings a game-changing solution: using your smartphone’s camera as a webcam for various apps like Default Camera, Microsoft Teams, Zoom, Google Meet, and so on. Say goodbye to grainy video and hello to crisp, professional-grade visuals for your official meetings with the help of your Smartphone camera. I wanted to make this article because I own an ASUS ROG G Strix Gaming Laptop which does not have a webcam and hence, I wanted to explore options to use my smartphone as a camera for Windows 11. Surprisingly, Windows 11 provides a built-in feature to make Android Smartphone cameras available to apps that use a webcam, Let’s dive into the steps right away.
See Also: Enable Windows Identity Foundation 3.5 In Windows 11
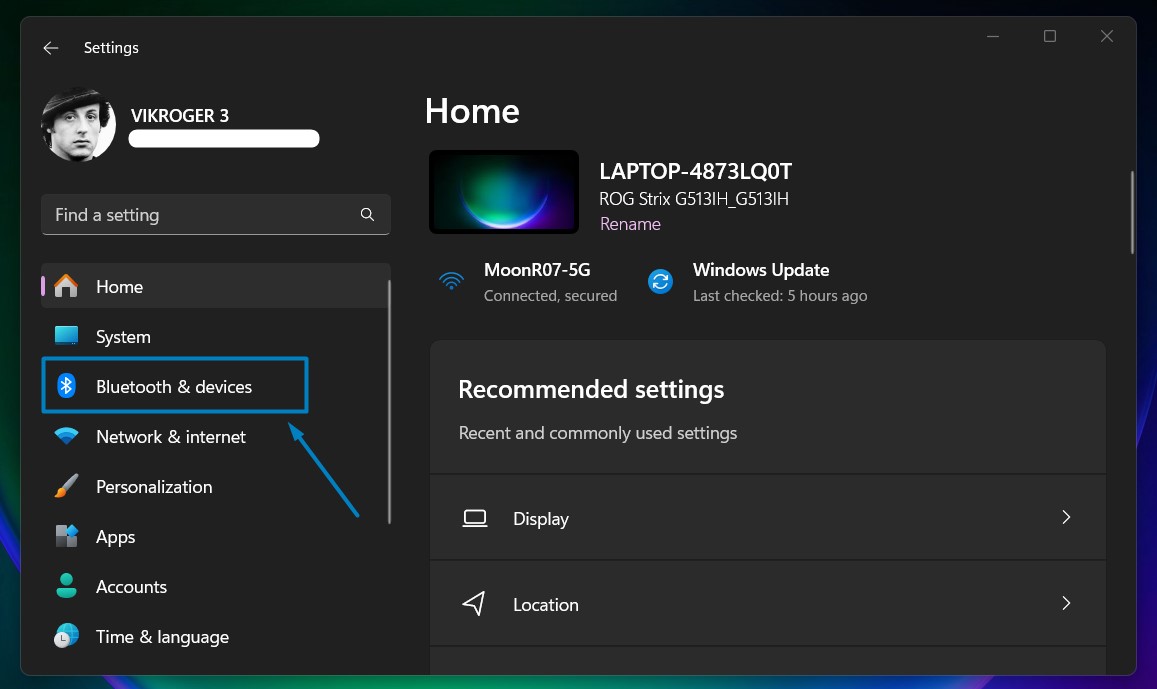
- In your Windows 11 PC, open Windows Settings using the shortcut Win Key + I.
- From the left pane, click on Bluetooth & Devices.
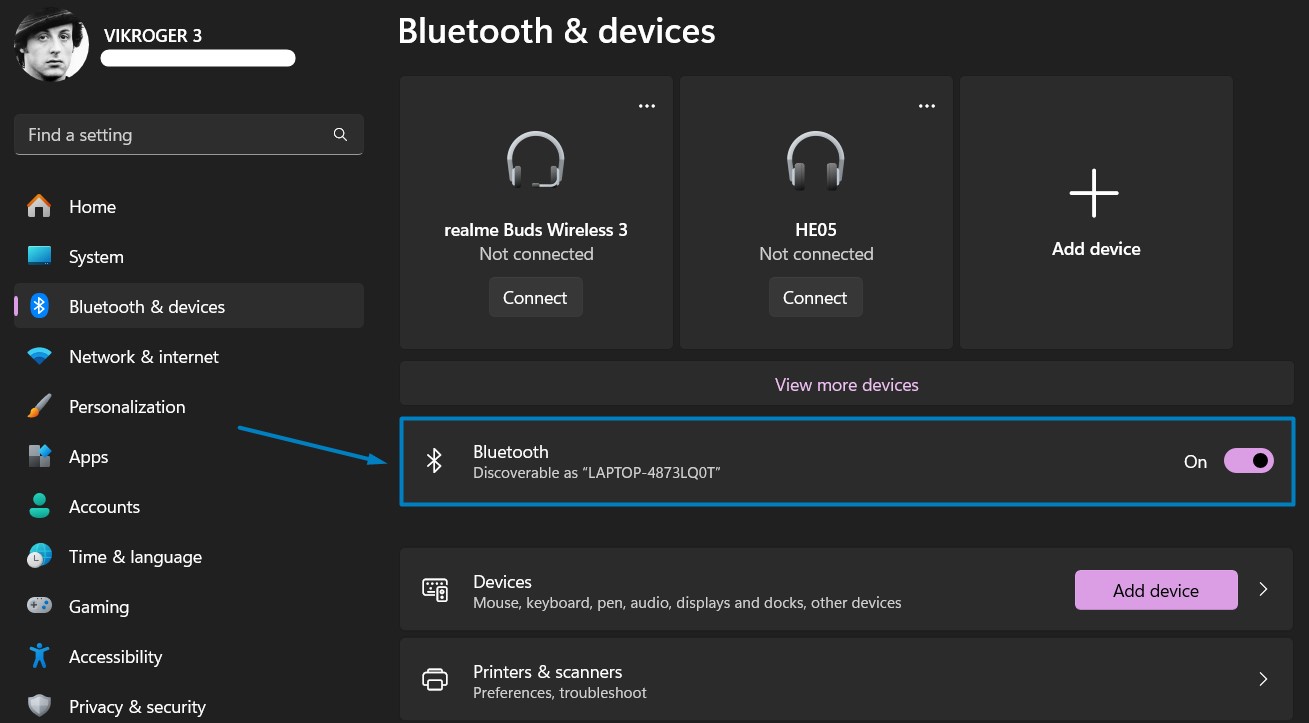
Bluetooth & Devices - Turn on Bluetooth if it is turned off.
Enable Bluetooth - Now, click on Mobile Devices.
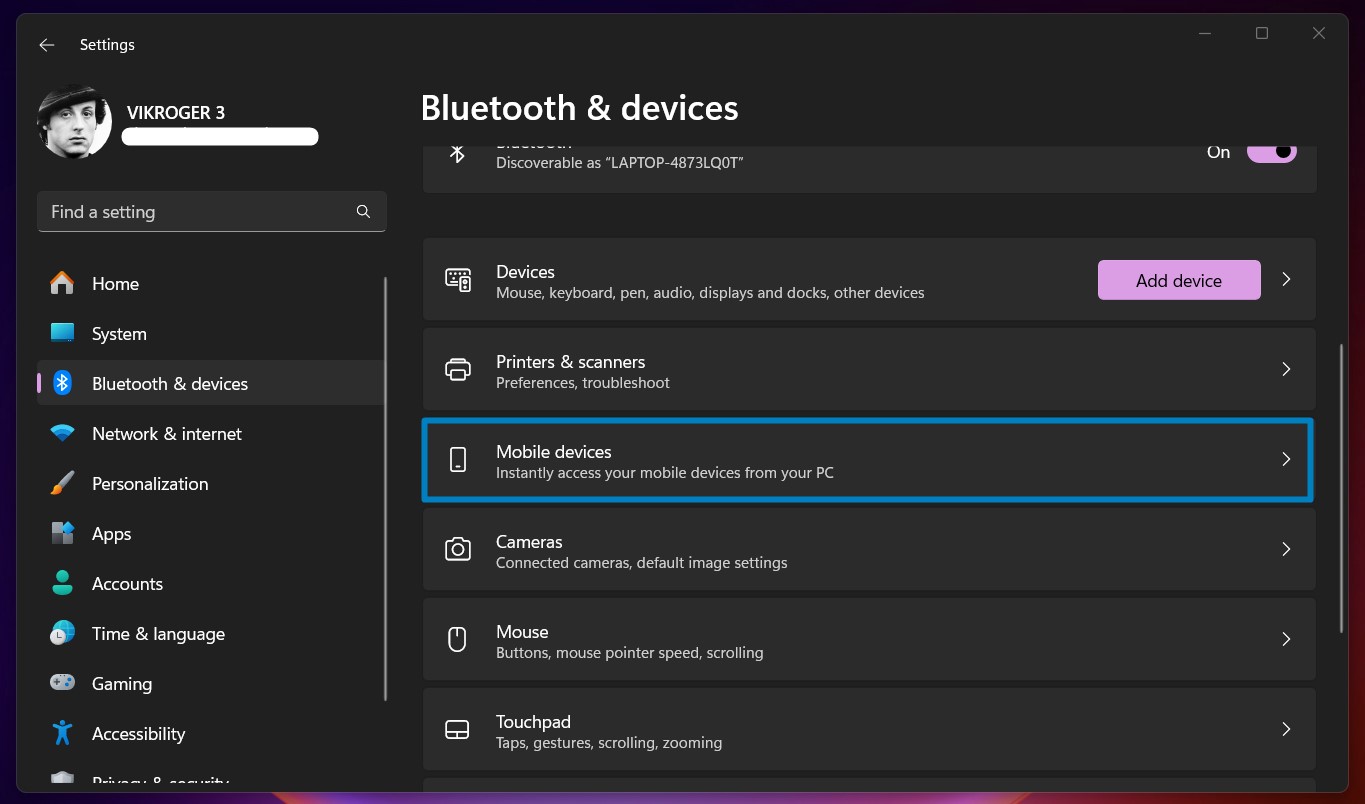
Mobile Devices - Toggle the switch of “Allow this PC to access your mobile devices” to ON.
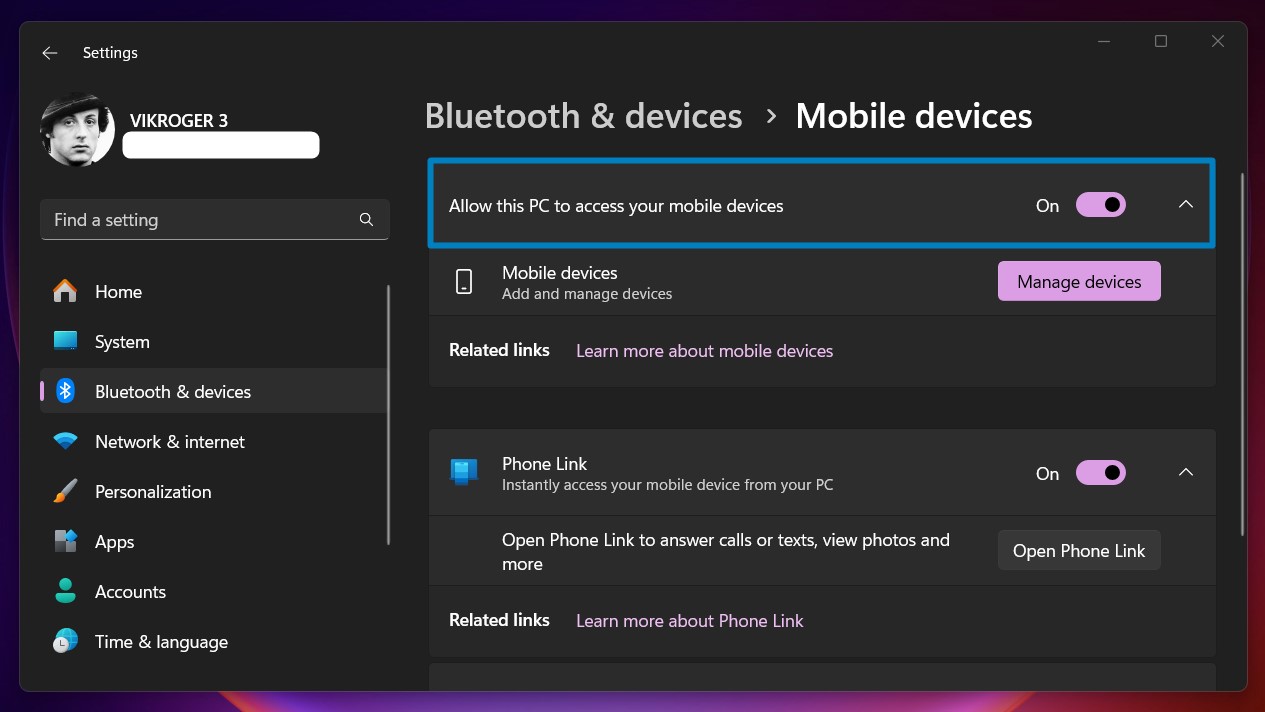
Allow this PC to access your Mobile Devices - Click on Manage Devices.
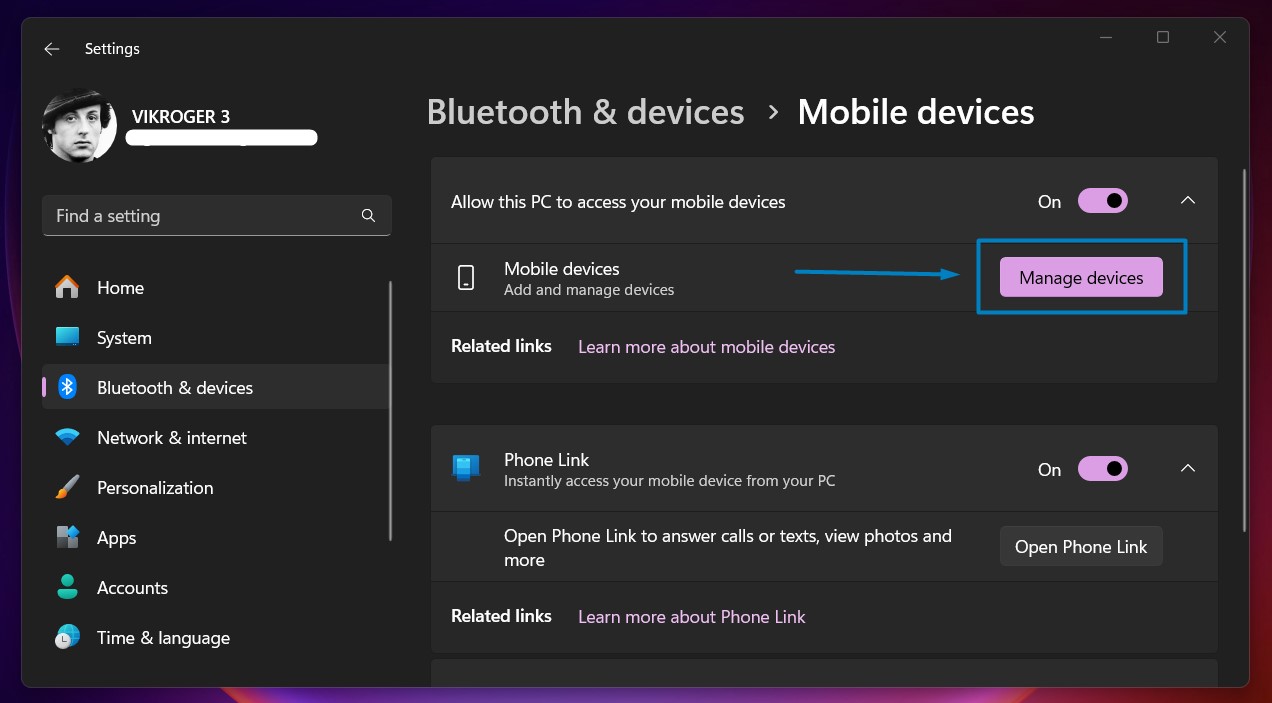
Manage Devices - Choose your Microsoft Account, just in case you want to switch your account. If you are good to go, click on Add Device.
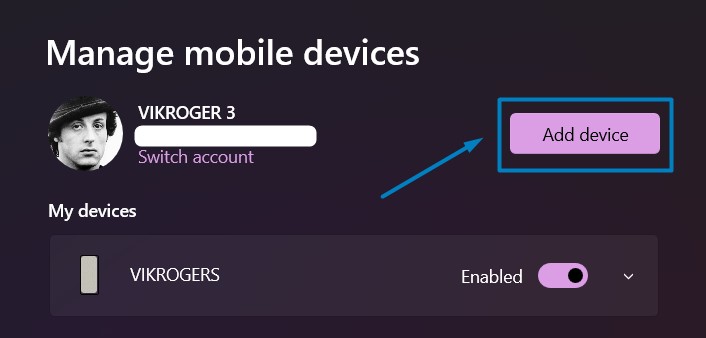
Add Device - A QR Code will now pop up. You can use this QR Code to set up seamless access to mobile content on Windows 11 PC. Scan the QR Code using your Android Smartphone.
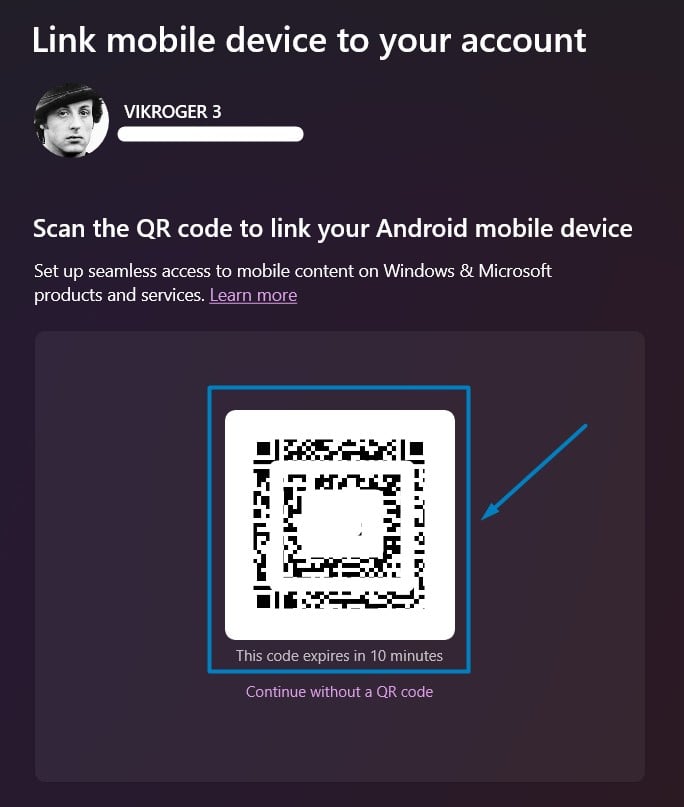
Scan the QR Code to connect to your Android Mobile Device - Upon scanning the QR Code using your smartphone, you will be prompted to install Link to Windows App. Kindly Install it on your smartphone. Allow permissions on the phone accordingly.
- If you don’t want to use the QR Code, then click on Continue without a QR Code. You will have to open the following link on your smartphone. aka.ms/linkPC.
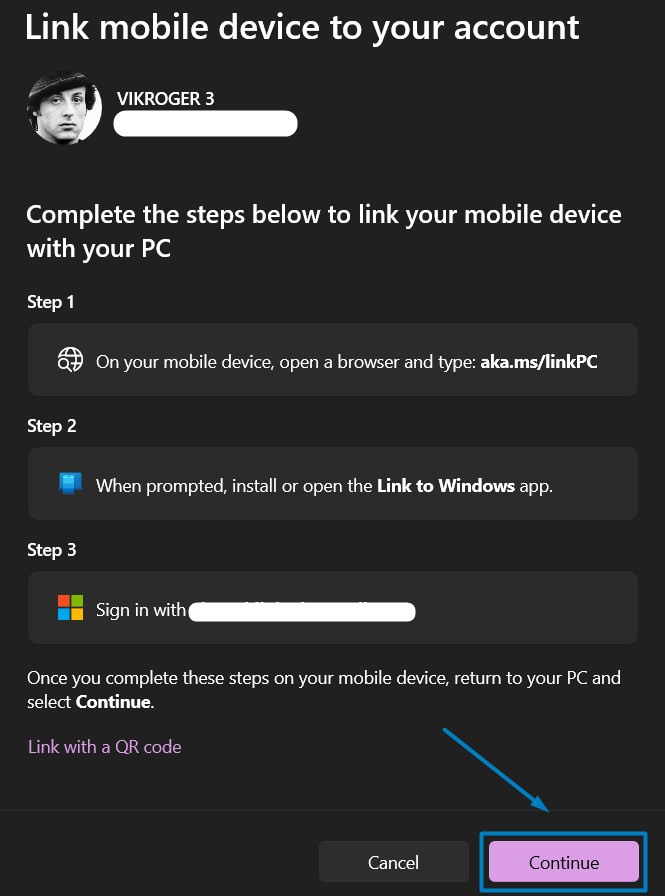
Continue without a QR Code. - You will be prompted to install the Link to Windows App. Please install it and allow the App permissions accordingly.
- In the next step, you will be asked to log in to your Microsoft Account. Login to your Microsoft Account, Make sure to log in with the same Microsoft Account that you have logged in to the PC.
- Either way, once you complete the steps on the phone, you will be asked to return to your PC for further steps.
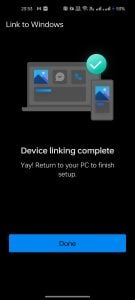
Return to your PC to finish Setup - On your PC, you can find the message “You are all Set“. Click Continue.
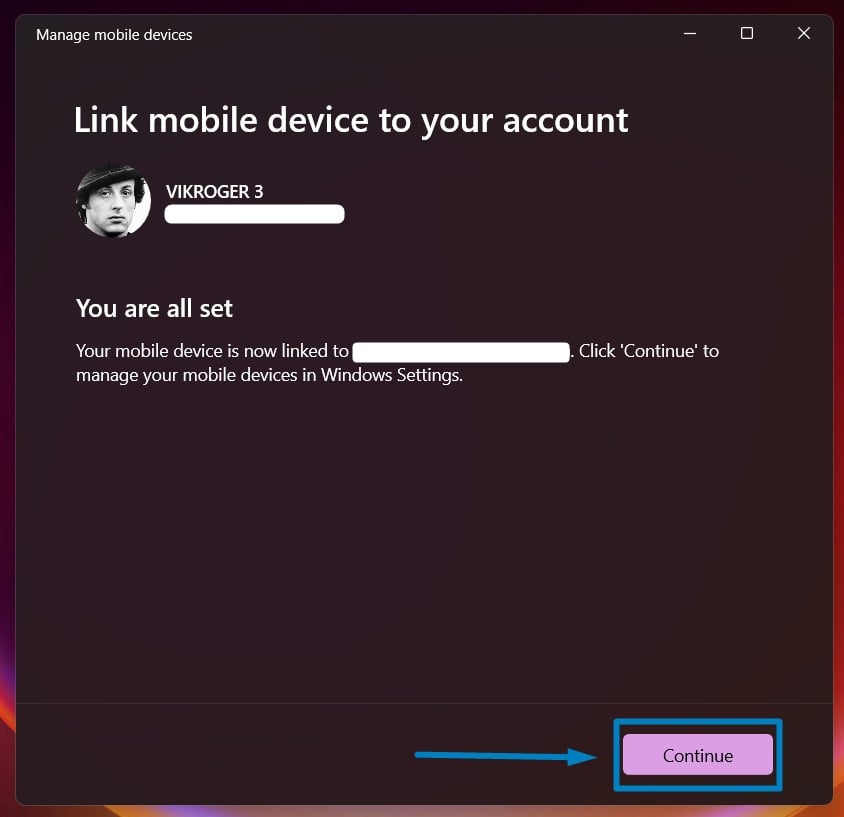
You are all set - You can find your smartphone added to “My Devices“. Toggle the switch to turn on the Device.
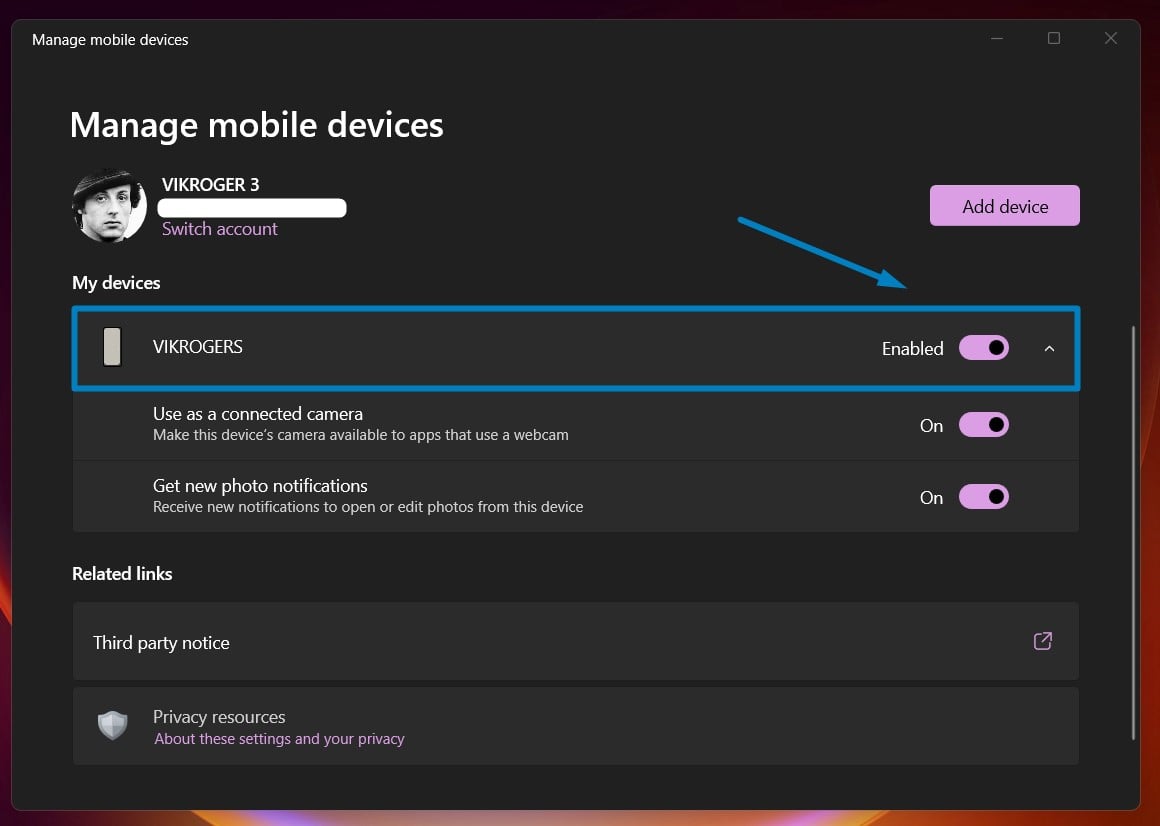
Enable your smartphone - Once you enable the device, you can find options “Use as a connected camera, and Get new photo notifications” enabled. You can customize it as per your needs.
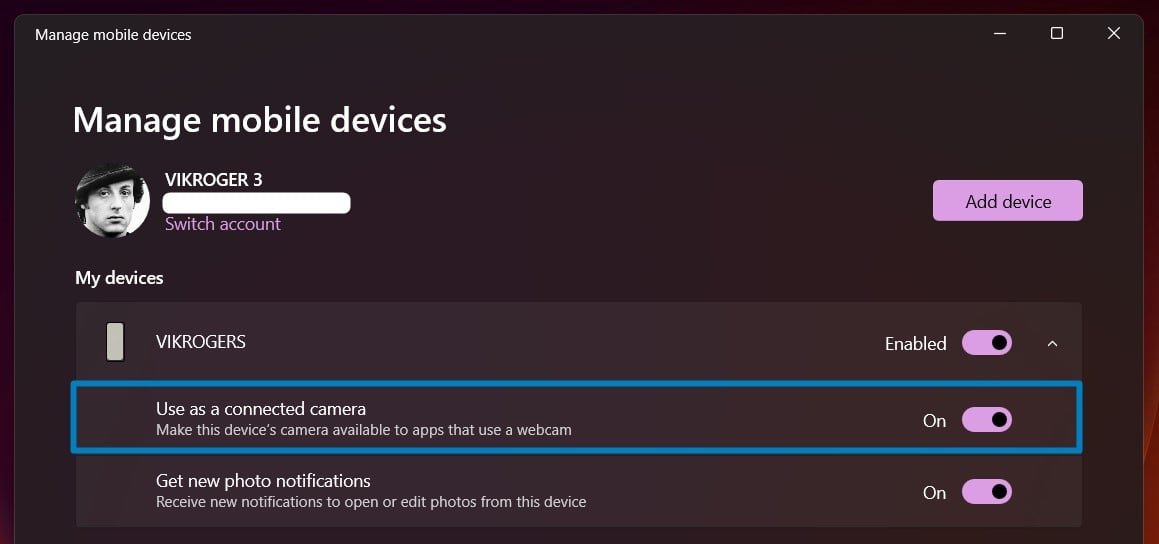
Use as a connected camera - That is it, Your Smartphone is now connected to your Windows 11 PC and is ready to be used as a connected camera(webcam).
- When you open Apps that require a webcam, say the default, camera app, you can find the option pop up in your smartphone where you can also choose whether you want to use your front camera or back camera. It also is an indication that the app on your PC is using your Smartphone camera.
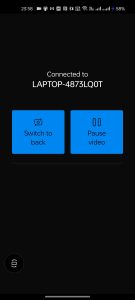
Use Front Camera or Back Camera - You can also find the notification on your Android Smartphone, “You are connected”.
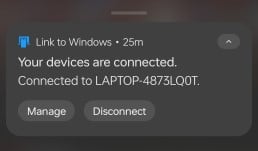
Your devices are connected - Enjoy your virtual office meetings, and video recordings and don’t worry about a webcam and enjoy using this tweak on Windows 11.
Check out the Connected Cameras in Windows 11:
You can find connected camera information in Windows 11 PC using the following settings.
- Open Windows Settings using the shortcut Win Key + I.
- Click on Bluetooth & Devices.
- Now, click on Cameras.
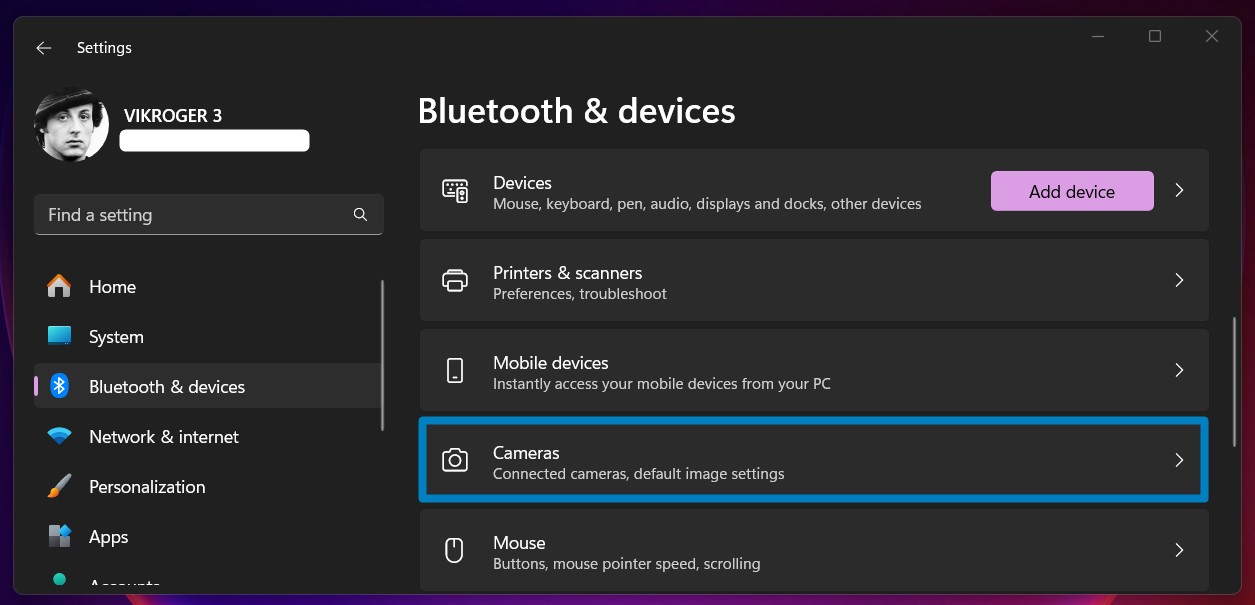
Camera - You can find the connected camera information. Click your Android Smartphone connected camera.
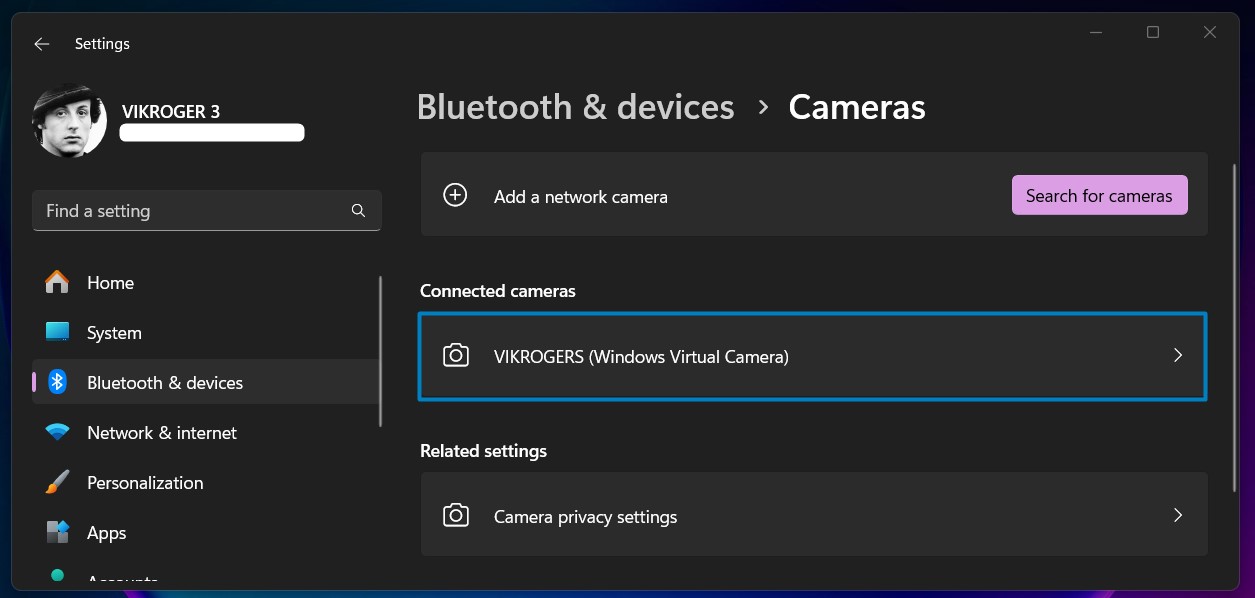
Windows Virtual Camera List - You can find your smartphone camera(Windows Virtual Camera). You can also control your camera privacy settings here.
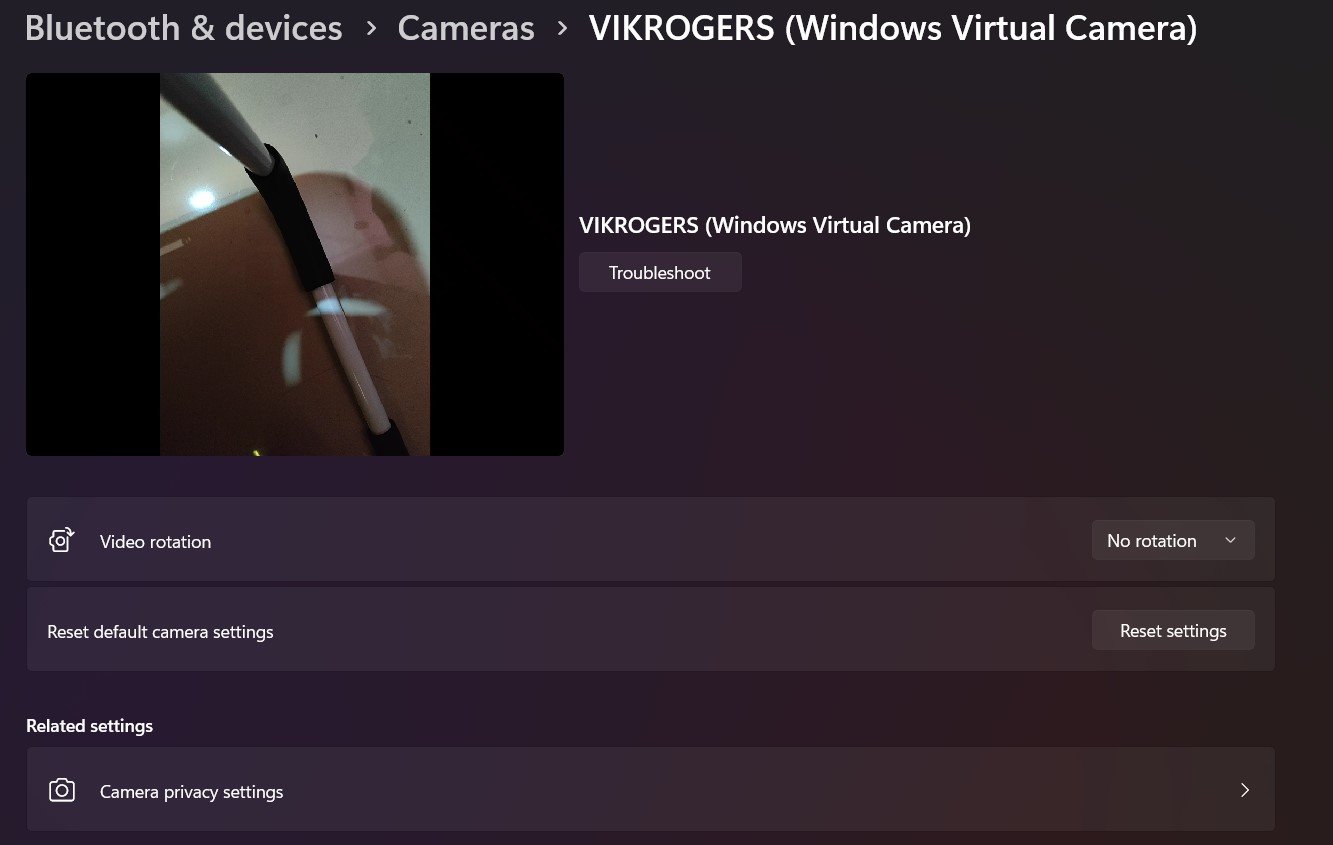
Windows Virtual Camera
Take away:
Say goodbye to webcam limitations and hello to a new era of clarity and engagement with the Windows 11 Virtual Camera Feature and connect your Android Smartphone as a webcam for Apps in Windows 11. Embrace this innovative solution to elevate your virtual experiences and stay ahead in today’s interconnected digital landscape. Happy Meeting! Peace out!
Related Articles:
- How to Configure Touchpad Gestures on Windows 11?
- How to Auto Hide Taskbar on Windows 11?
- What is servicehost.exe on Windows 11?
We combine expert insights with user-friendly guidance. We thoroughly research and test everything to give you reliable and simple to understand tech guides. Please take a look at our publishing process to understand why you can trust Winsides.
