Enable MSMQ Server using CMD & PowerShell
A Legacy Messaging Protocol from Microsoft used for Communication between Distributed Applications
Enable MSMQ Server on Windows 11: Microsoft Message Queuing, also known as MSMQ, is an old messaging protocol that is built into Windows, which allows applications running on separate servers to communicate in a loosely-coupled, asynchronous manner. However, modern applications often utilize cloud-based messaging architectures such as Azure Service Bus, RabbitMQ, and more. Hence, Microsoft includes MSMQ Server as an optional feature on Windows 11.
There are different ways to enable the MSMQ server on Windows 11. In this article, we will check out all those methods in detail. Let’s get started.
Various Ways to Enable MSMQ Server on Windows 11
- Enable MSMQ Server using Windows Features – GUI Method
- Easy way to enable MSMQ Server using Command Prompt – CLI Method
- Quick way to enable Microsoft Messaging Queue Server using Windows PowerShell – CLI Method
To enable this optional feature on Windows 11, Microsoft provides both a Graphical User Interface and a Command Line Interface, and users can choose their suitable method accordingly.
MSMQ Server feature availability on various Windows Editions
| Windows Editions | Availability |
| Windows Servers | Yes |
| Windows 11 Home | Yes |
| Windows 11 Professional | Yes |
| Windows 11 Education | Yes |
| Windows 11 Enterprise | Yes |
| Windows 11 Pro Education | Yes |
| Windows 11 SE | No |
| Windows 11 IoT Enterprise | No |
Disclaimer
Enabling Microsoft Message Queuing (MSMQ) on Windows 11 may introduce potential security vulnerabilities, especially if improperly configured or exposed to untrusted networks. While MSMQ is a legitimate and supported Windows feature, it has been the subject of past critical security advisories, including remote code execution risks. It is your responsibility to assess the necessity of MSMQ for your specific use case, ensure it is properly secured, and apply all relevant security patches.
Easy Way to Enable MSMQ Server using Command Prompt on Windows 11
In this method, we will use the DISM Tool in the Command Prompt to enable this optional feature on Windows 11. DISM requires elevated privileges, and hence, we need to run the Command Prompt with Administrative Privileges. The following are the steps.
- Open the Run Command using the keyboard shortcut WinKey + R.
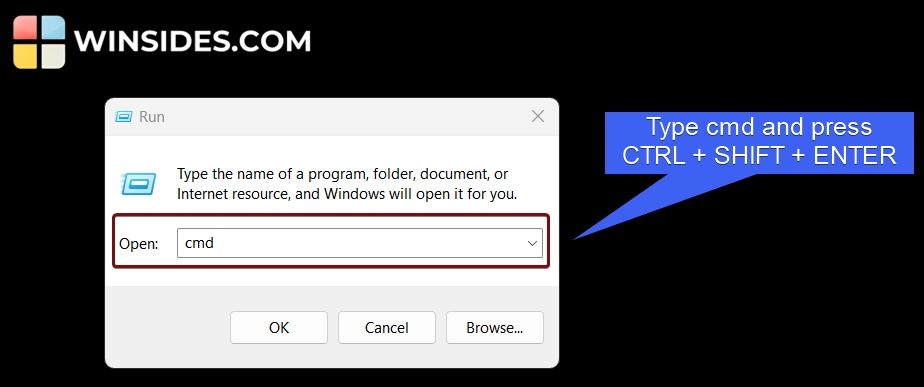
- Now, the Run will open. In the Run, type the following command, cmd, and press CTRL + SHIFT + ENTER. We have a detailed article explaining different ways to run Command Prompt as Administrator. If you are looking for other options, please refer to the article.
- This will prompt the system to execute the command with Administrative privileges. The User Account Control will confirm and run
CMDas Administrator. - We will use the Deployment Image Servicing and Management Tool to enable this optional feature on Windows 11. Kindly execute the following command in the command prompt.
dism /Online /Enable-Feature /FeatureName:MSMQ-Server /All /NoRestart
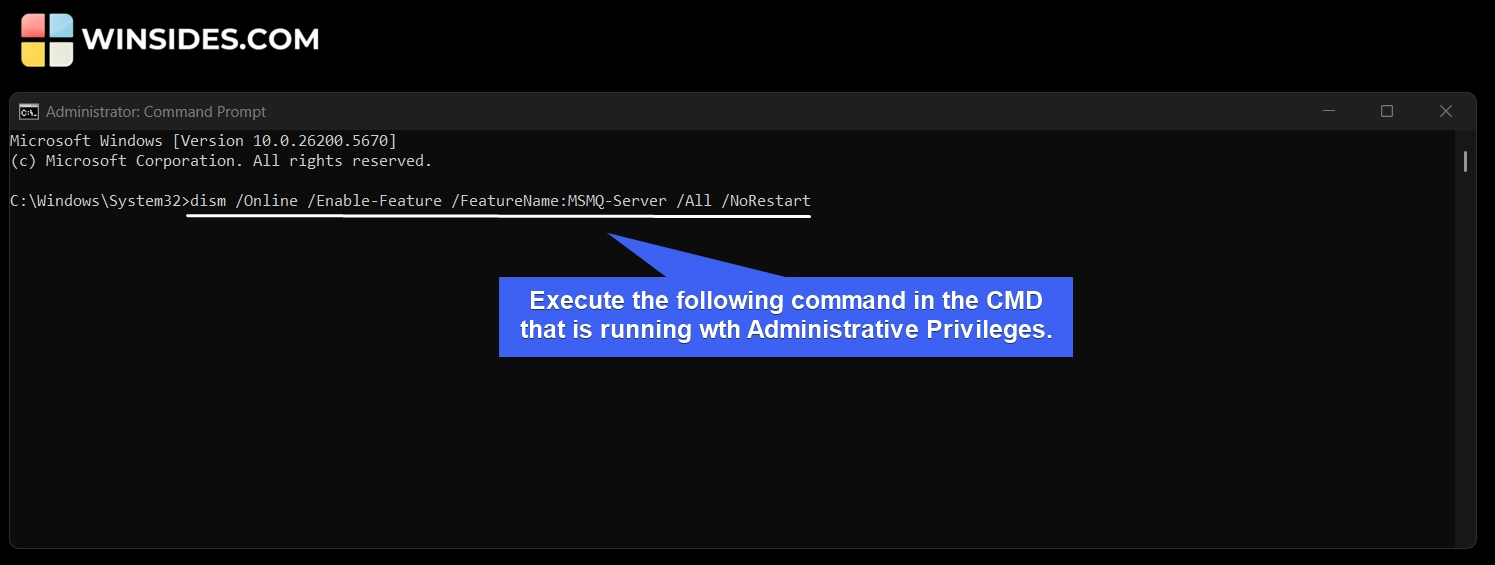
- The DISM tool will now enable MSMQ Server on Windows 11.
- Once you receive the message “The operation completed successfully“, then the Microsoft Messaging Queue is enabled on your Windows 11 rig.

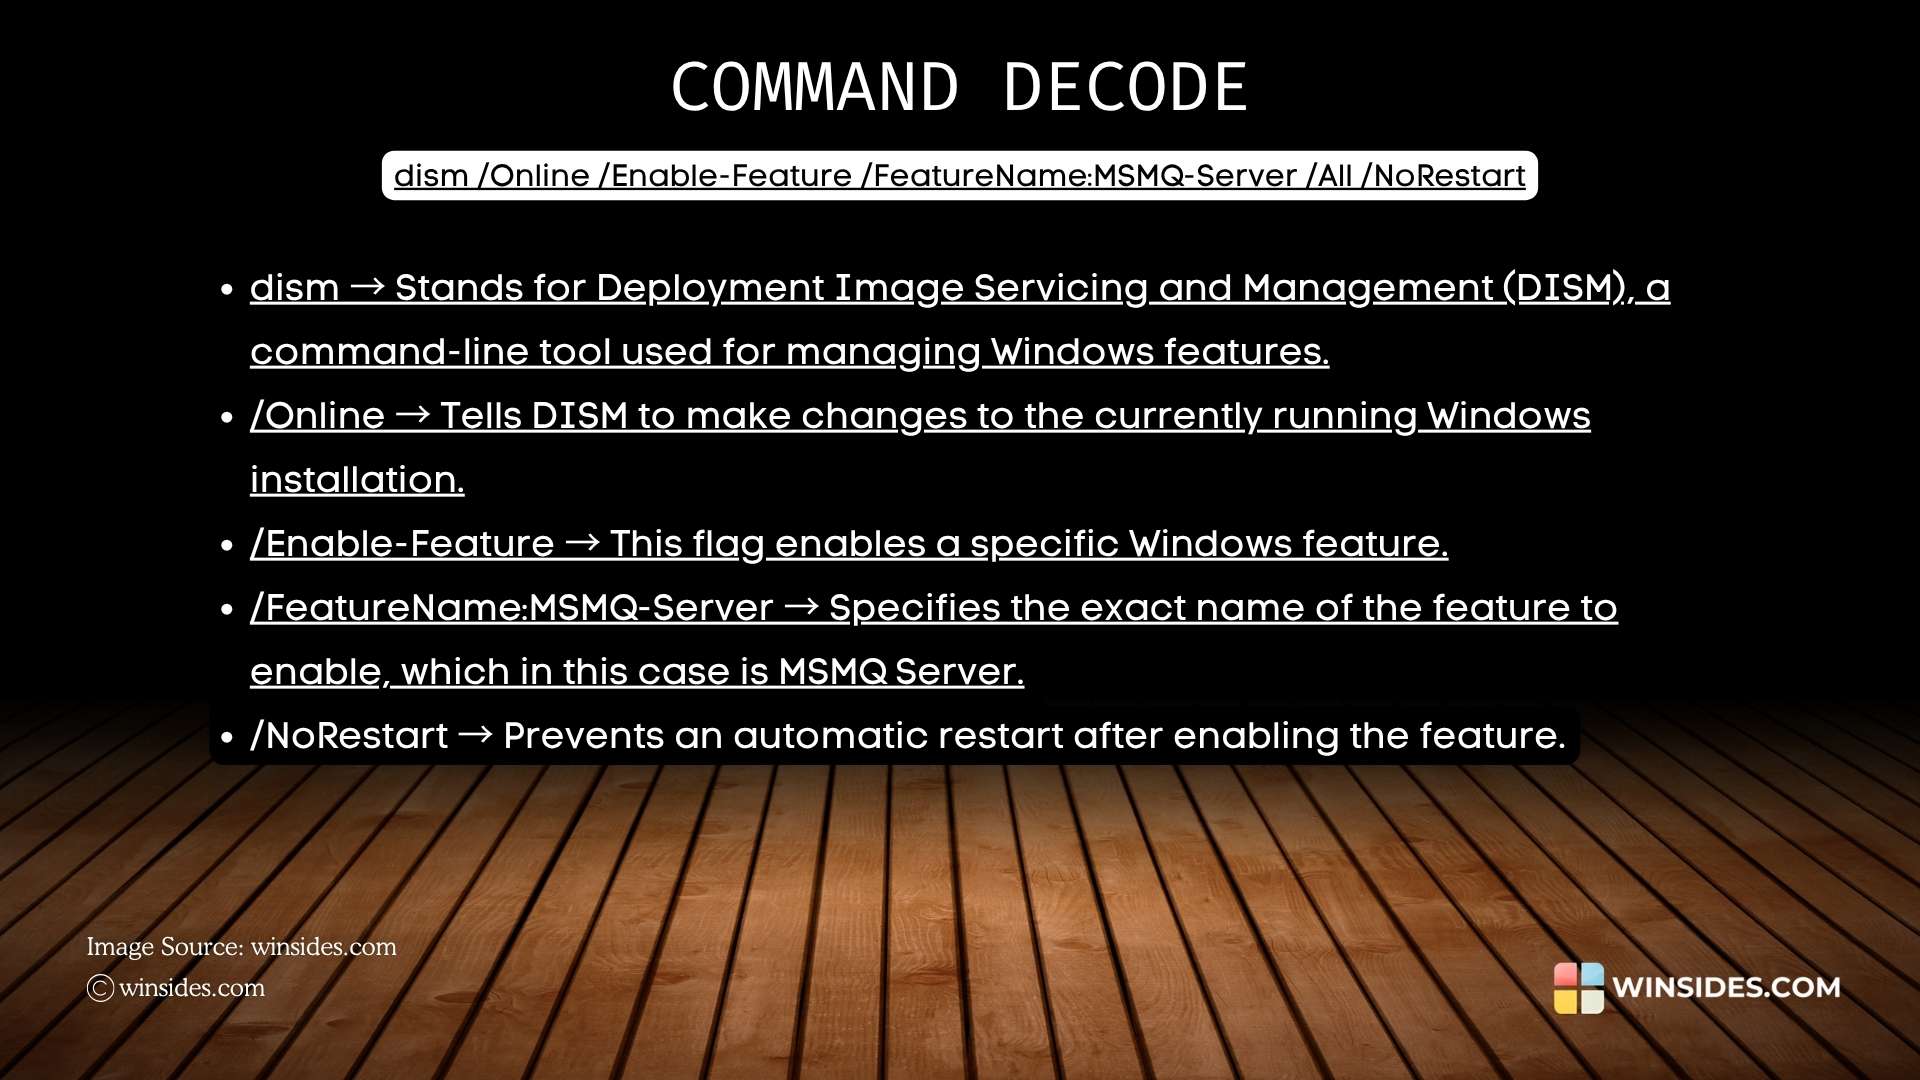
Decoding MSMQ Server Enable Command on Windows 11 using Command Prompt
Quick Way to Enable MSMQ Server on Windows 11 using Windows PowerShell
Here, we will use Windows PowerShell to enable Microsoft Messaging Queue on Windows 11. Here are the steps.
- We have to run Windows PowerShell as Administrator. To do so, kindly go to the Run Command using the keyboard shortcut WinKey + R.
- Type the following command
powershell, and press CTRL + SHIFT + ENTER. - The UAC will confirm and open PowerShell with Elevated Privileges.
- Execute the following command in Windows PowerShell.
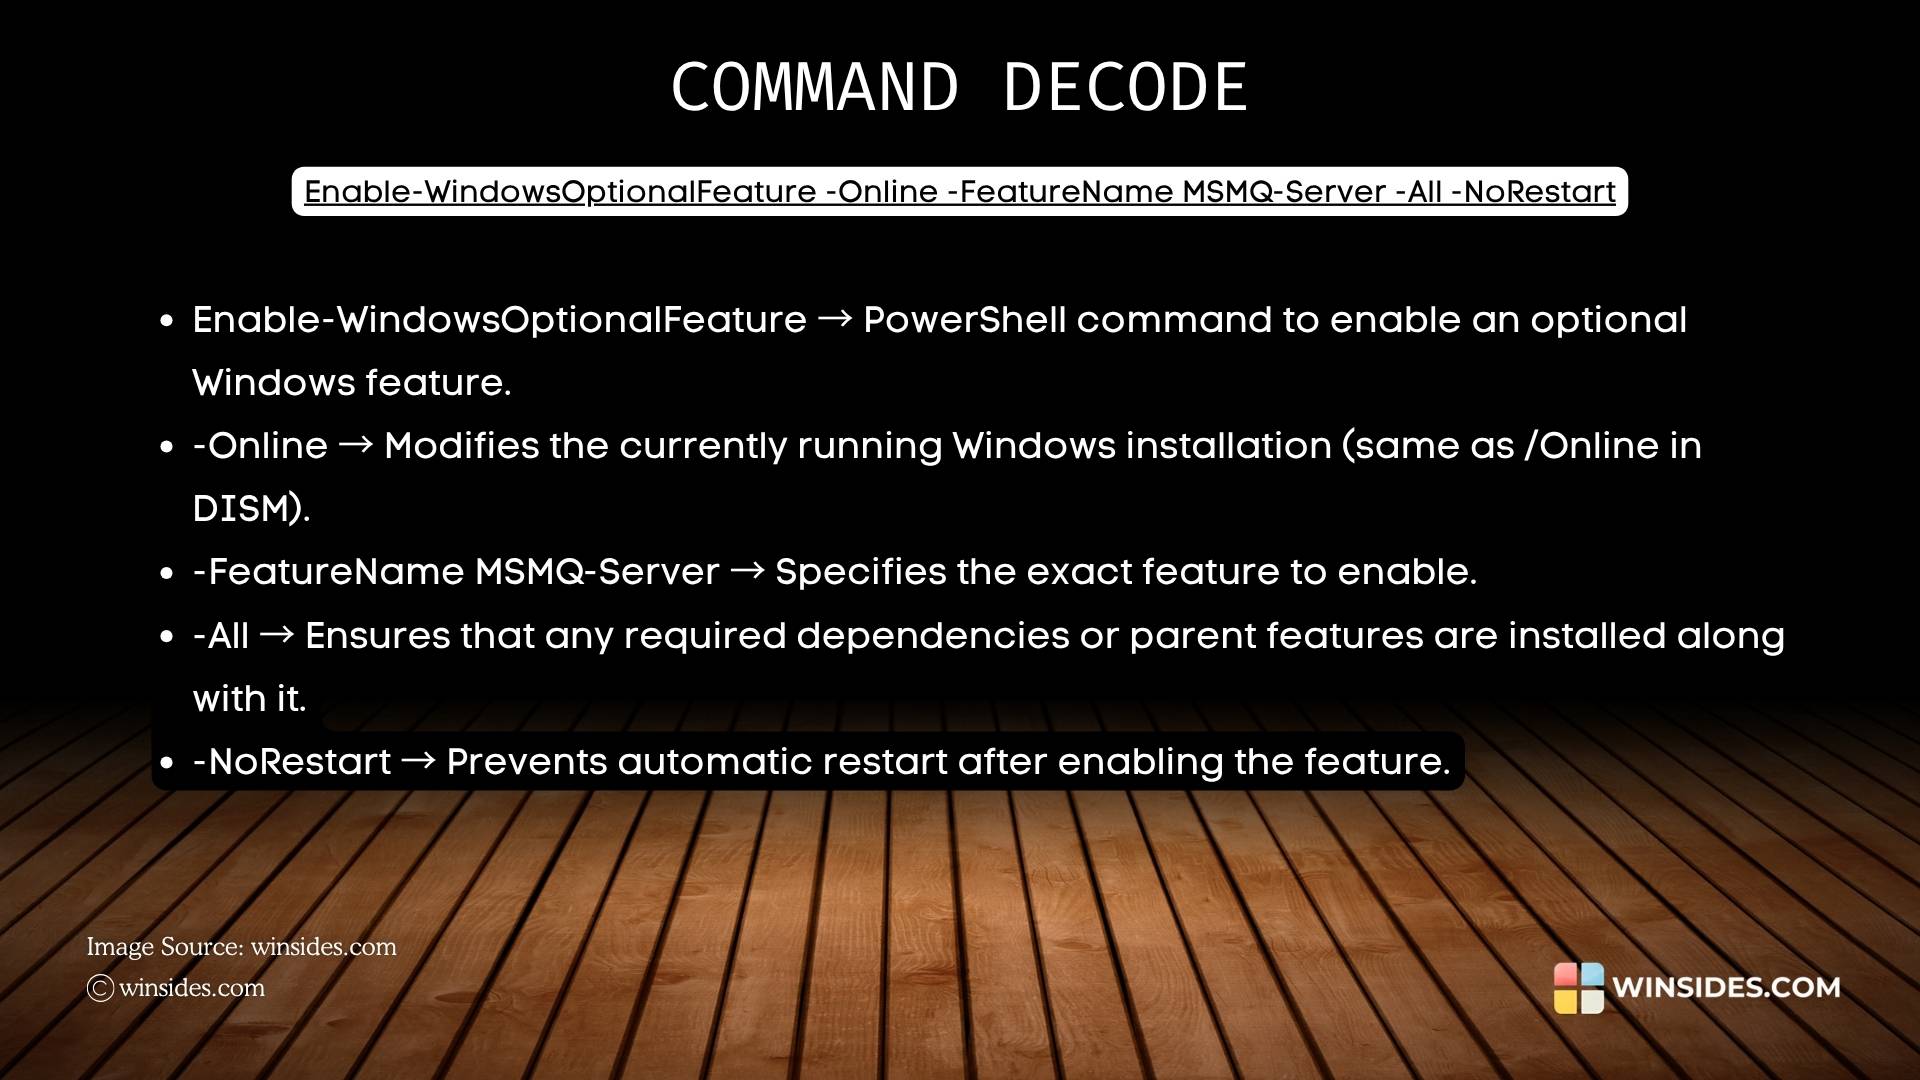
Enable-WindowsOptionalFeature -Online -FeatureName MSMQ-Server -All -NoRestart
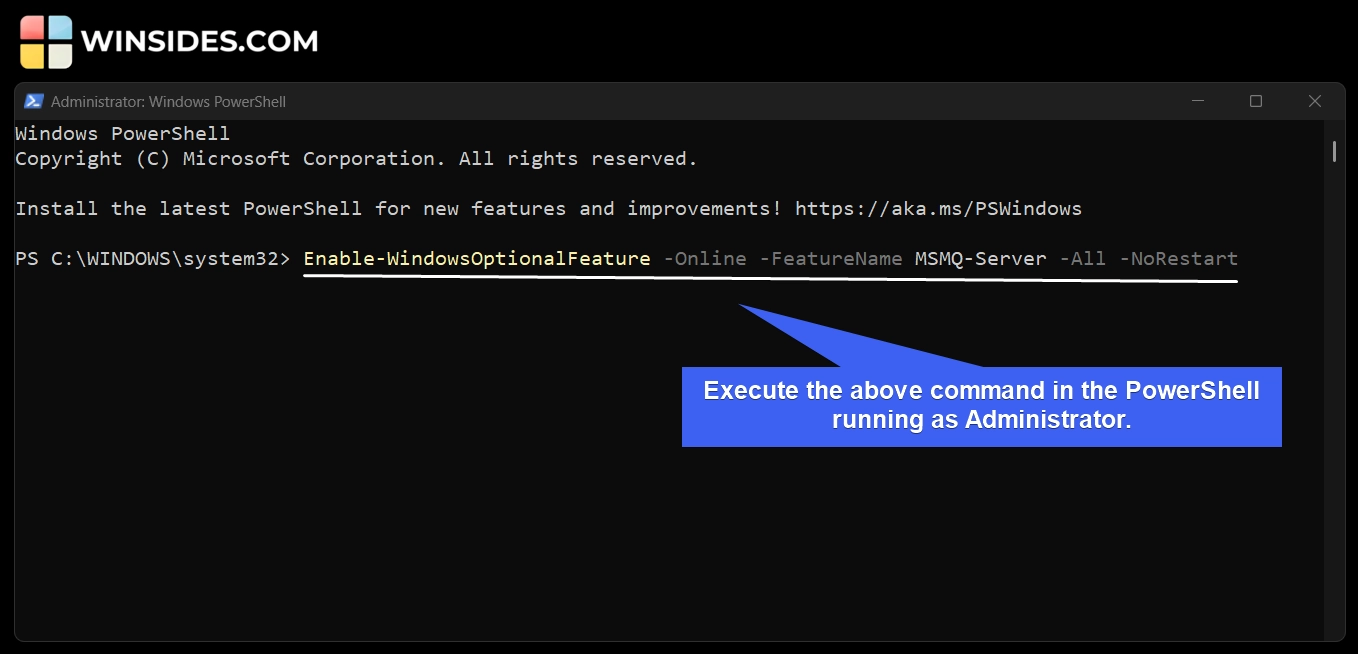
- The above command will enable MSMQ Server via Windows PowerShell. Once the operation is completed, the online status will be true.
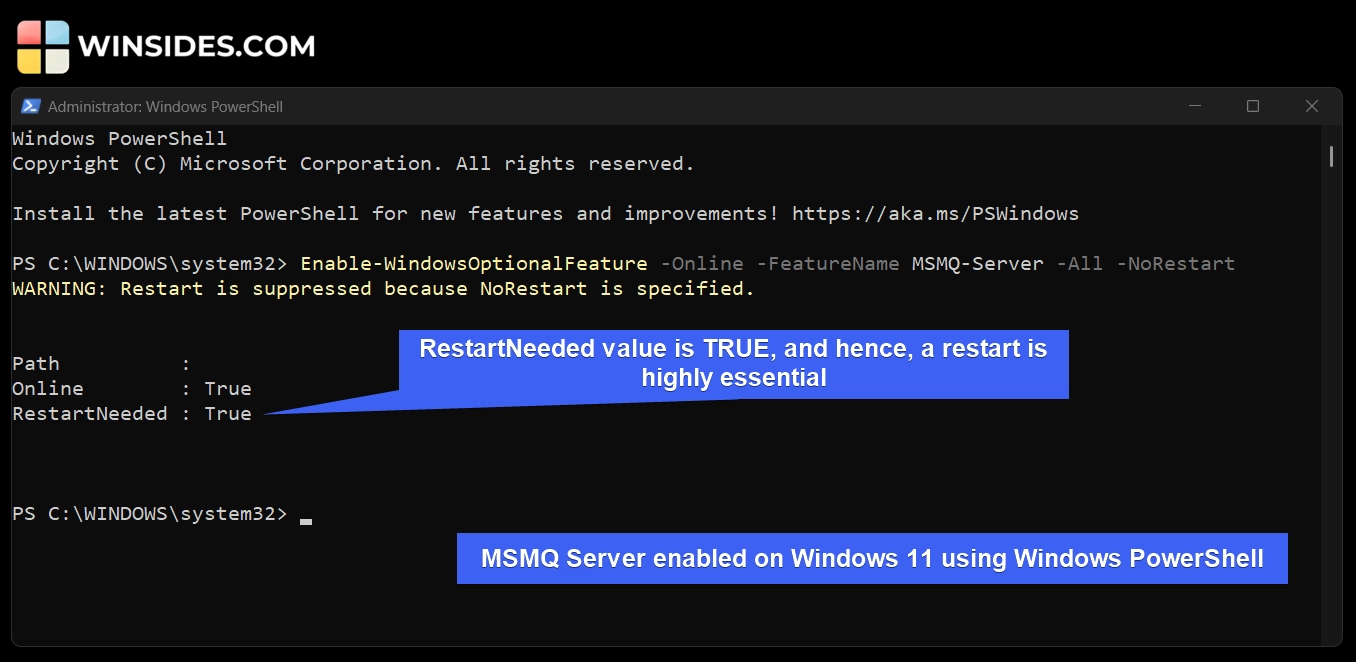
- The RestartNeeded value is True, and hence, a restart is highly essential. The restart is suppressed in the command to avoid restarting right away.
Decoding the Microsoft Messaging Queue Server enable command using Windows PowerShell
Take Away
MSMQ remains a valuable tool in Windows 11, and it reflects Microsoft’s strong commitment to background compatibility and long-term enterprise support. MSMQ is a powerful legacy messaging feature that allows reliable and asynchronous communication between distributed applications.
Have Queries?
We hope you are satisfied with our article on how to enable MSMQ Server on Windows 11 using different ways, and if you have any queries, kindly let us know in the comments. For more interesting articles, stay tuned to Winsides.com. Happy Computing! Peace out!
We combine expert insights with user-friendly guidance. We thoroughly research and test everything to give you reliable and simple to understand tech guides. Please take a look at our publishing process to understand why you can trust Winsides.


