How to Empty The Recycle Bin in Windows 11?
Different Ways to Empty the Recycle Bin on your Windows 11 PC!
I was working on my PC and had to manage many sample and temporary files for web development projects. Once the projects were completed, I would delete the temporary files and images using a batch file to free up space on my laptop. However, I later realized that the batch file didn’t delete the files permanently; instead, it sent them to the recycle bin.
Check Out: Quick Way To Enable Windows Authentication In Iis On Windows 11
The files piled up in the recycle bin without my knowledge, and suddenly, I got a notification from the storage manager saying my PC was running out of space. I then emptied all the temporary files from the recycle bin. I also found multiple ways to empty the recycle bin on my PC, and now I want to share what I learned about these different methods for Windows 11.
You can choose any of the methods mentioned below to fix the issue of being unable to empty the Recycle Bin on your Windows 11 or 10 device.
Quick Steps:
- You need to find the Recycle Bin icon from the Desktop Screen.
- Once you found it, Right click on the icon & open its context menu.
- Choose Empty Recycle Bin to remove all temporary files from your recycle bin.
Method 1: Using Disk Cleanup Method:
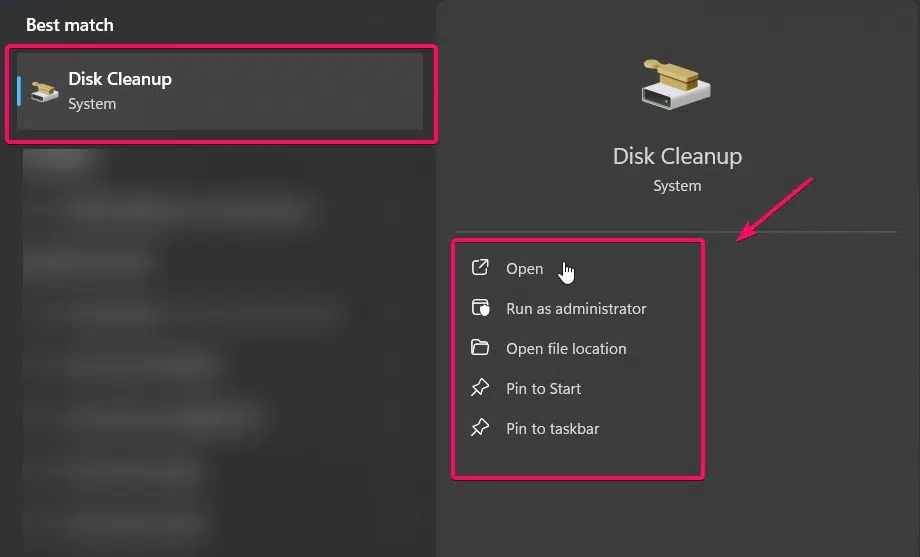
This is one of the unique method, you can use this method if you are unable to locate the recycle bin on your desktop.
- You need to use the keyboard shortcut Winkey + S and then search for Disk Cleanup tool.
- Now, you need to select your drive. By default the C Drive will be selected you can change the drive by tapping the dropdown box near the option and choose your preferred drive.
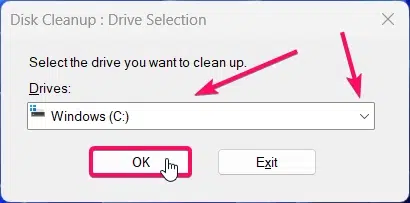
- Once you done choosing the drive, It will initiate the scanning process of your drive and will launch the Disk Cleanup Window on your screen.
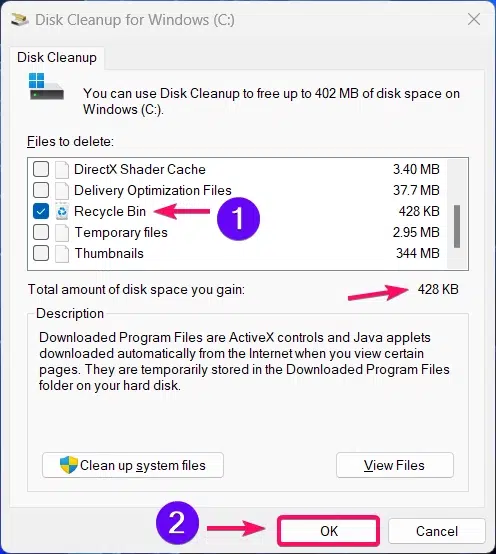
- As shown in the image above, you need to check the checkbox for the Recycle Bin option. It will show you the total amount of disk space you will gain in the option below.
- Once you’ve confirmed the selection, click the OK button to start the cleanup process.
Finally, then the files in the recycle bin will be emptied.
Method 2: Using Command Prompt:
- Click the Start Menu and search for Command Prompt
- You need to choose the “Run as Administrator” option to launch the command prompt in admin mode.
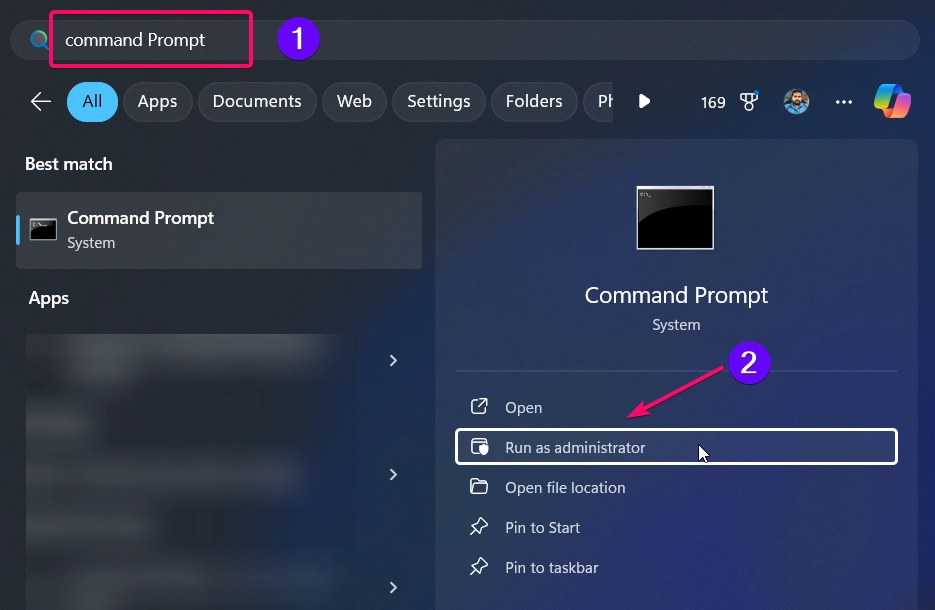
- Once the command prompt is launched, you need to execute the below command:
rd /s /q C:\$Recycle.Bin
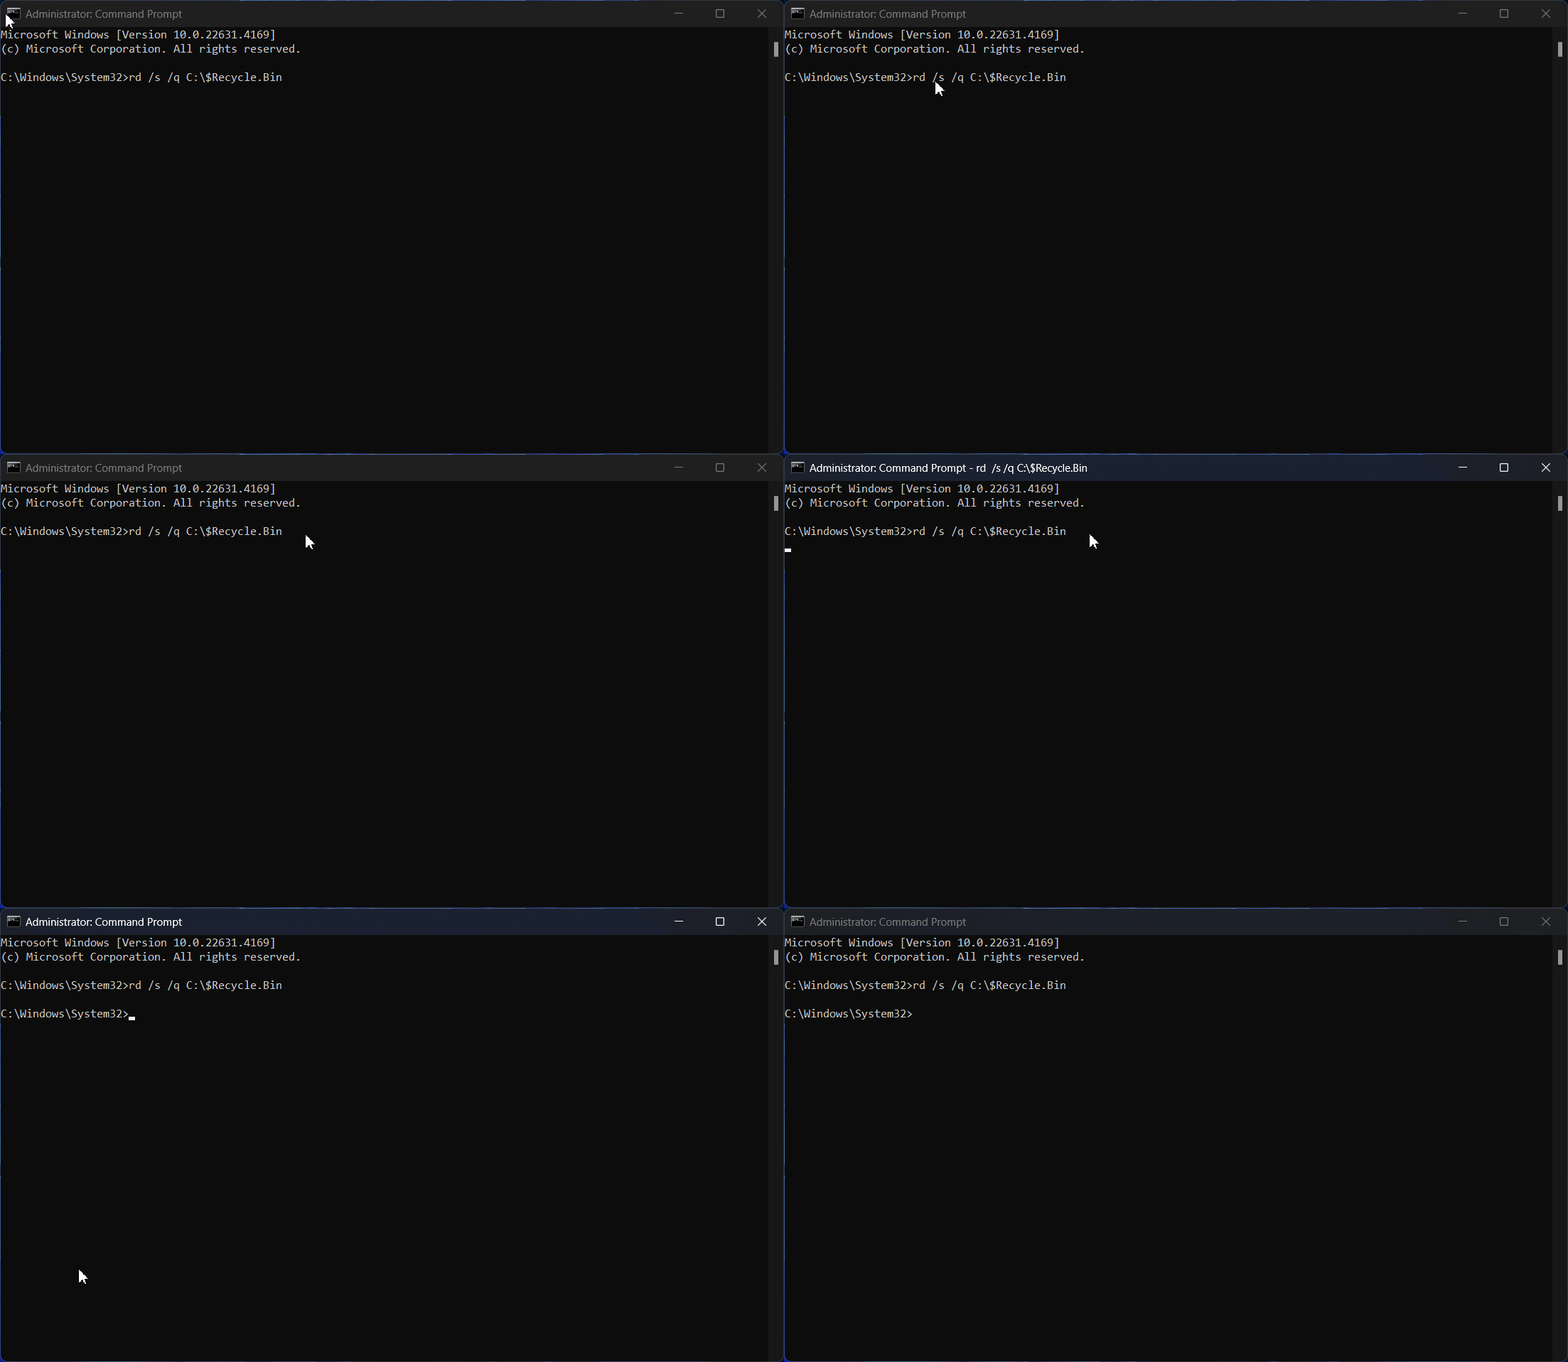
Command Explanation:
rd: This stands for Remove Directory and It is used to delete directories (folders) from the file system./s: This option tells the command to remove all contents within the specified directory and all subdirectories. Without this attribute, only an empty folder would be deleted./q: This stands for Quiet Mode and It prevents the command from asking for confirmation before deleting each directory or file. Without this flag, the command would prompt for confirmation before each deletion.C:\$Recycle.Bin: This is the path to the Recycle Bin on the C: drive and$Recycle.Binfolder contains the Recycle Bin data for all users on the system.
Method 3: Emptying From Desktop Icon:
- Firstly, you need to minimize all your windows and explore the desktop screen.
- Find the Recycle bin icon in the desktop screen.
- Once you found, right click the icon and choose Empty Recycle Bin option from the list.
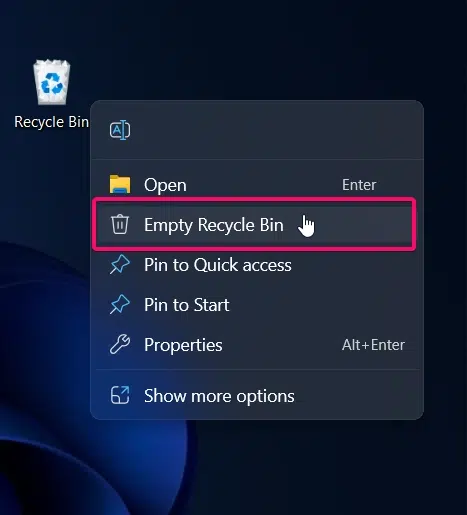
- Now all the temporary files and images files will be removed permanently from your pc.
What if You’re Unable to Empty the Recycle Bin?
If you are unable to delete or empty the contents of the Recycle Bin, I recommend following the solutions below to fix the issue.
Method 1a: Empty Recycle Bin using Settings:
- You need to open the Windows Settings option by using the keyboard shortcut Winkey + I.
- Then, you need to choose System from the left menu. It will explore all system based settings.
- From the list of the settings, you need to choose the Storage option.
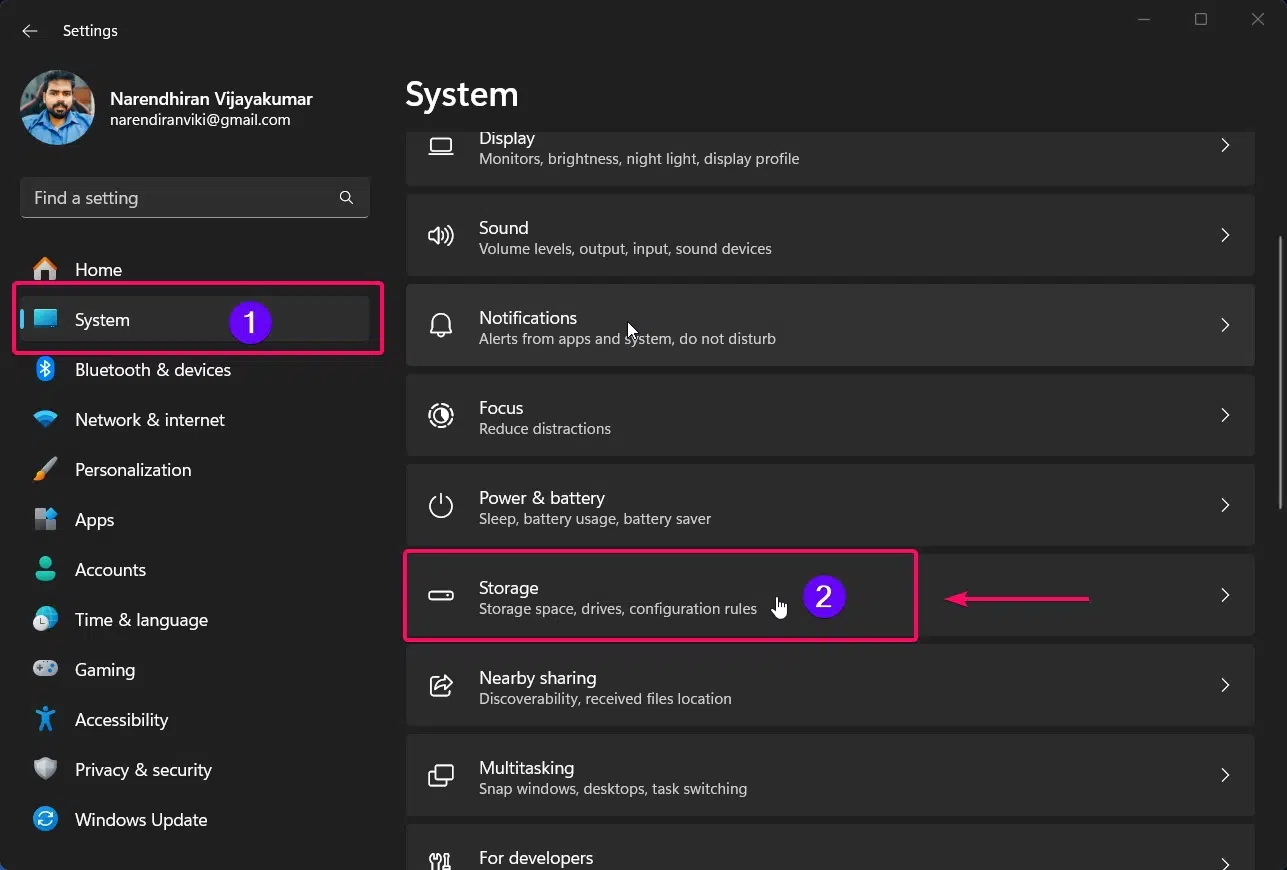
- Then in the list of storage options, you need to choose the Temporary files option.
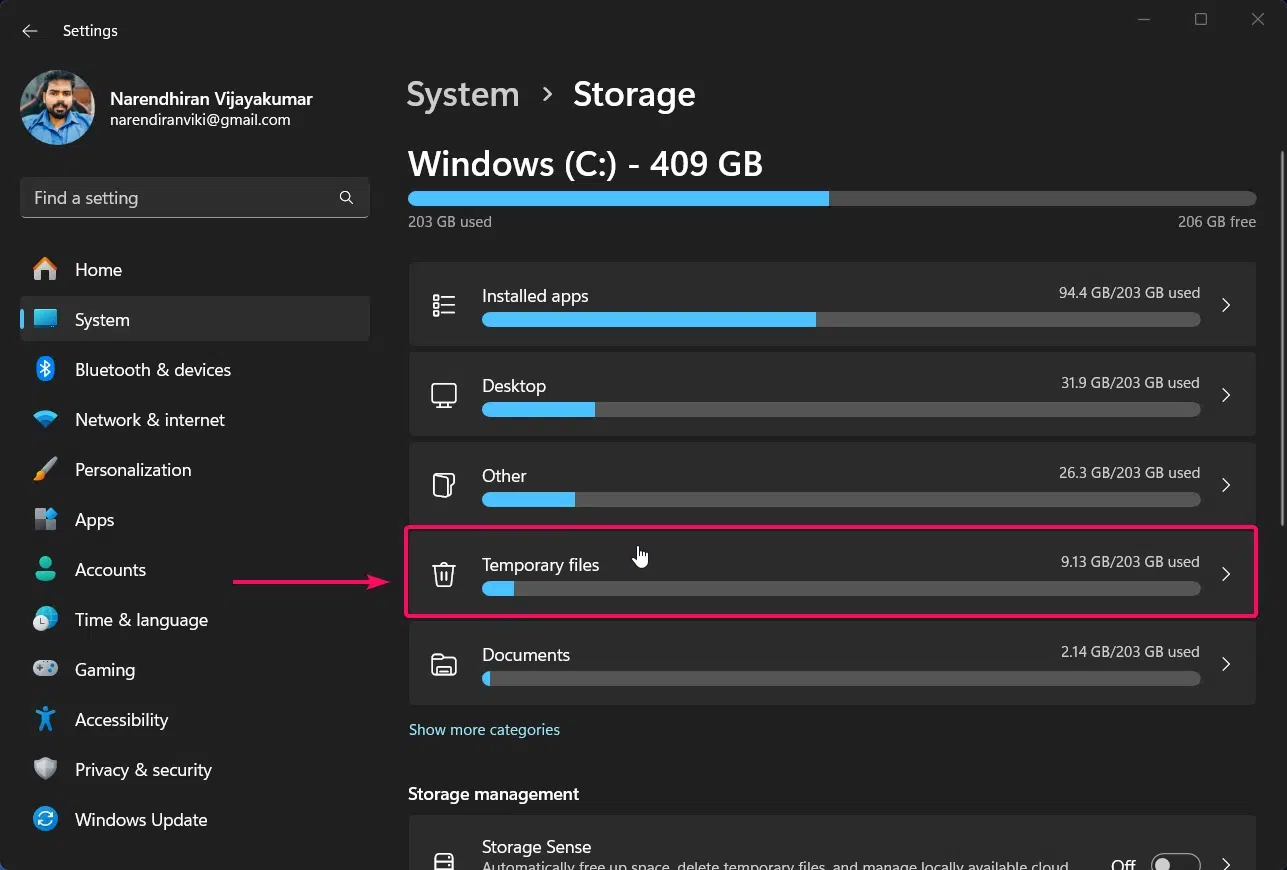
- Now, you need to tap the Remove files button to empty the Recycle bin.
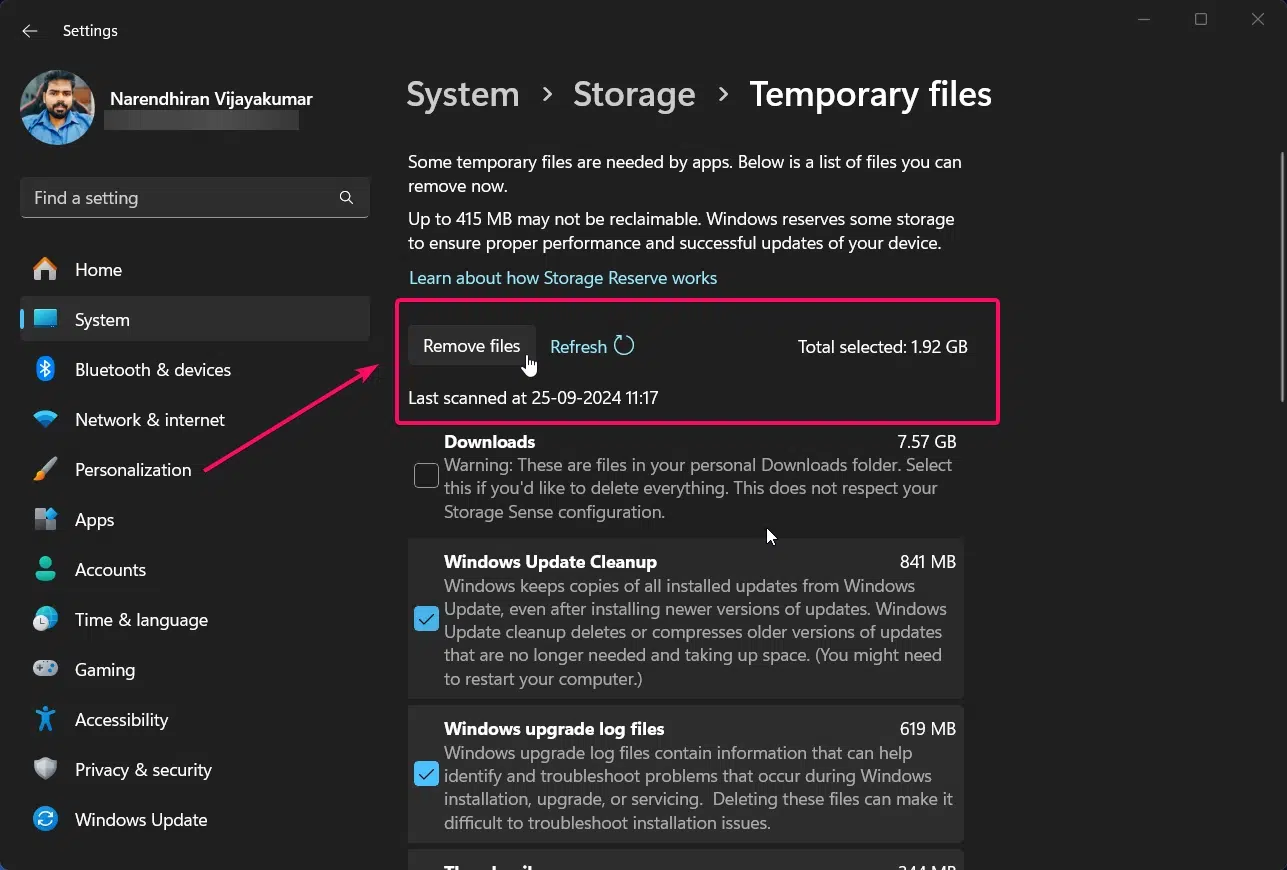
Now, the files will be removed from your recycle bin permanently.
Method 2a: Restarting File Explorer:
The issue of being unable to empty the Recycle Bin can be fixed by simply restarting File Explorer. To do this, follow the instructions below.
- You need to open Task Manager. To do this, use the keyboard shortcut CTRL + Shift + Esc or press CTRL + Alt + Del and choose Task Manager.
- From the list of menus on the left side, select the Process menu
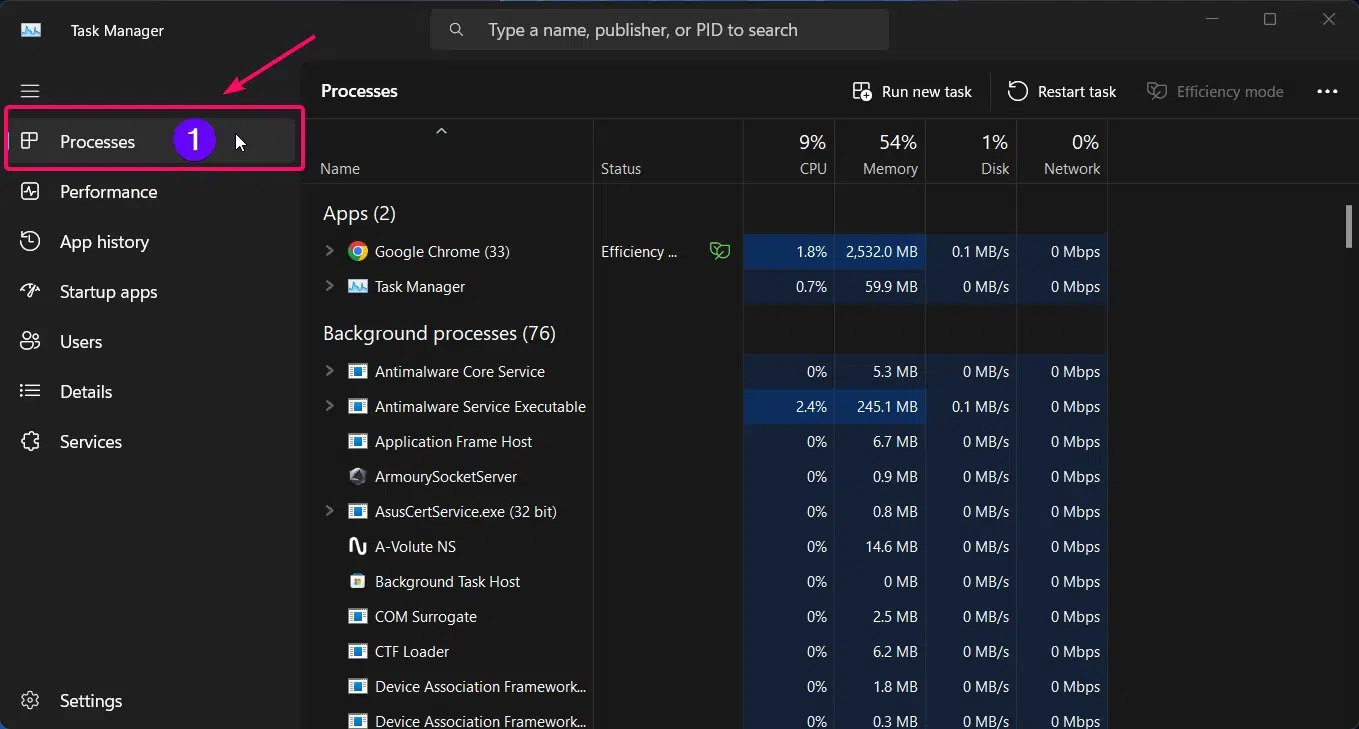
- You will see a list of active programs and background apps here.
- Scroll to find the “Windows Explorer” or “File Explorer“.
- Now, you need to right click the Windows Explorer and choose Restart option to restart your file explorer.
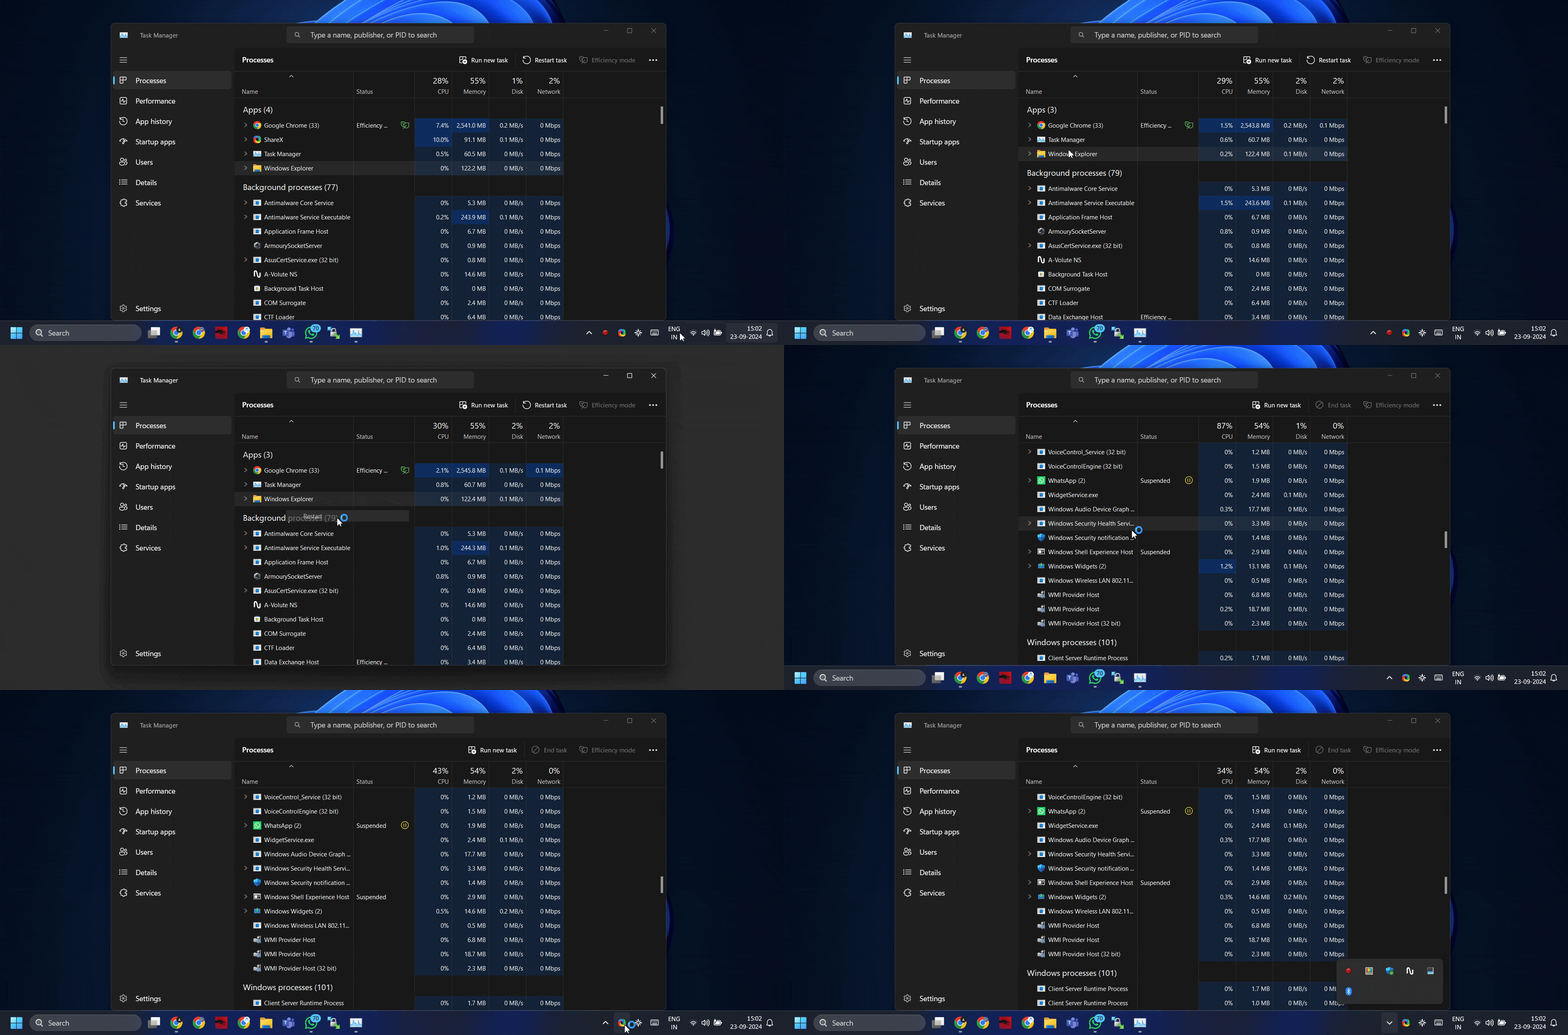
While restarting File Explorer, you will notice that the taskbar at the bottom of your screen will temporarily disappear and then reappear after a few seconds, as shown in the GIF above. Now, try Method 2 mentioned earlier, and it should fix the issue, allowing the files in the Recycle Bin to be emptied.
You can find more ways to restart your file explorer in our tutorial here: How to restart file explorer.exe file on your windows 11 pc?
Method 3a: Using PowerShell Command:
You should be very cautious when using this method. One wrong command or step could cause a system crash, so only proceed if you feel confident enough. If you’re ready, follow the instructions below carefully.
- Click the Start Menu and search for PowerShell
- You need to choose the “Run as Administrator” option to launch the powershell in admin mode.
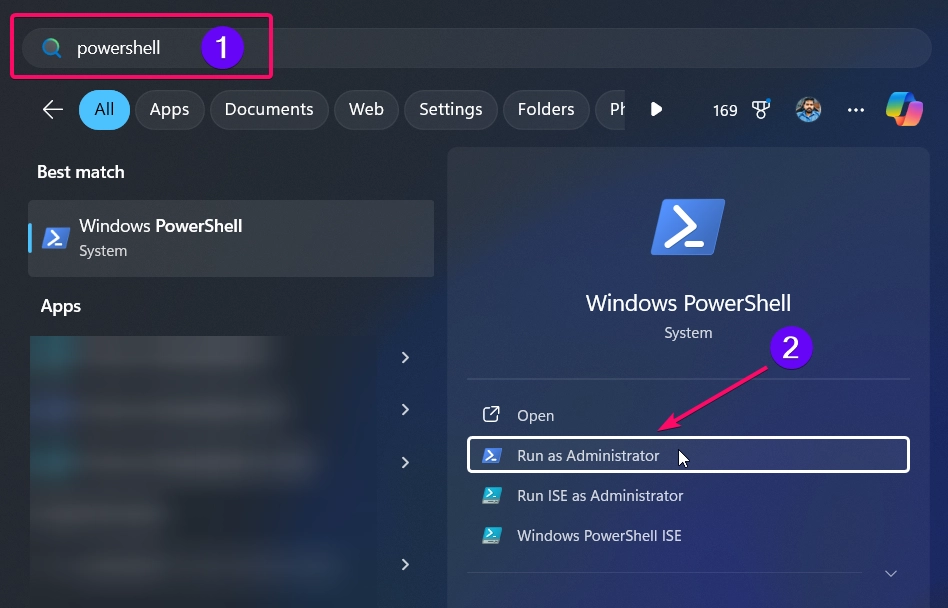
- Now you need to execute the following command:
Clear-RecycleBin -DriveLetter C -Force
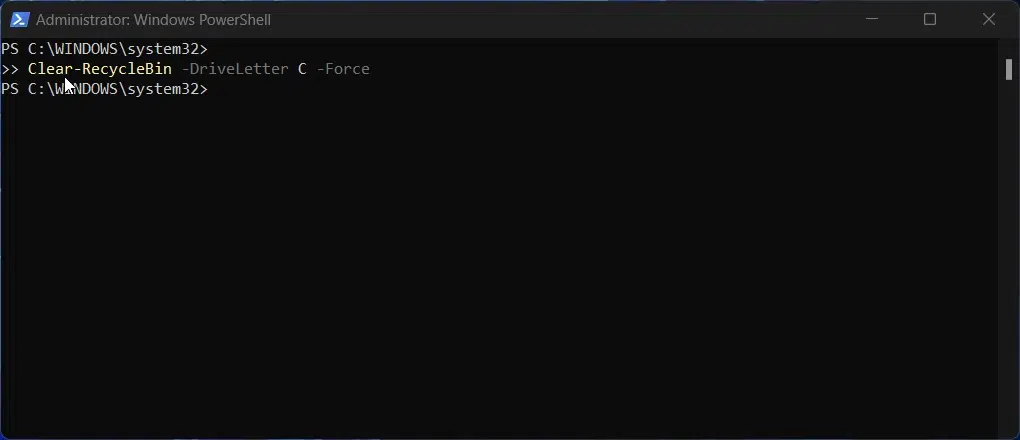
If you installed your Windows 11 OS on another drive, for example, the D drive, you will need to replace the drive letter C with your drive letter D.
Method 4a: Using Batch File to Fix the Issue:
This method is similar to the Command Prompt method. You will use the same command, but the way of executing it is different from the one mentioned above.
- Open Notepad from the Start menu
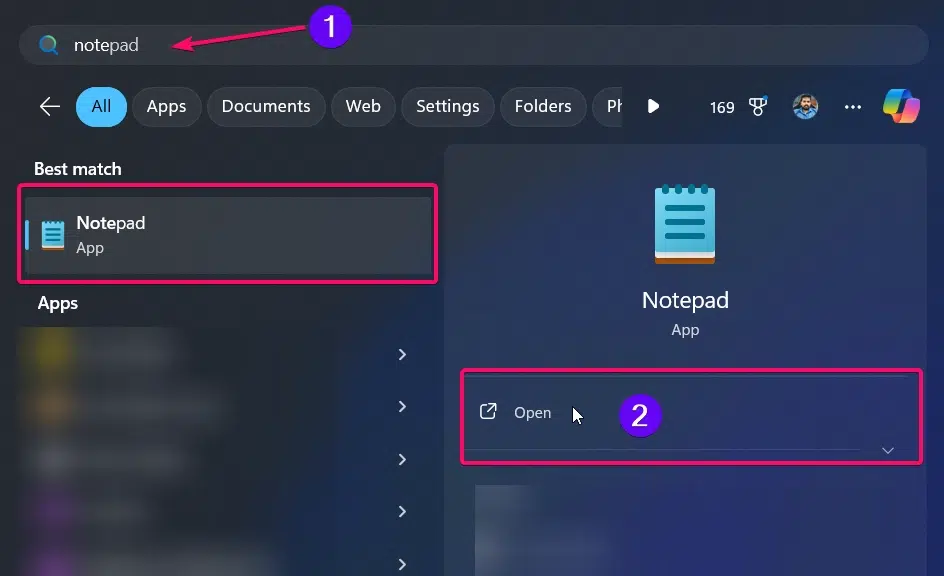
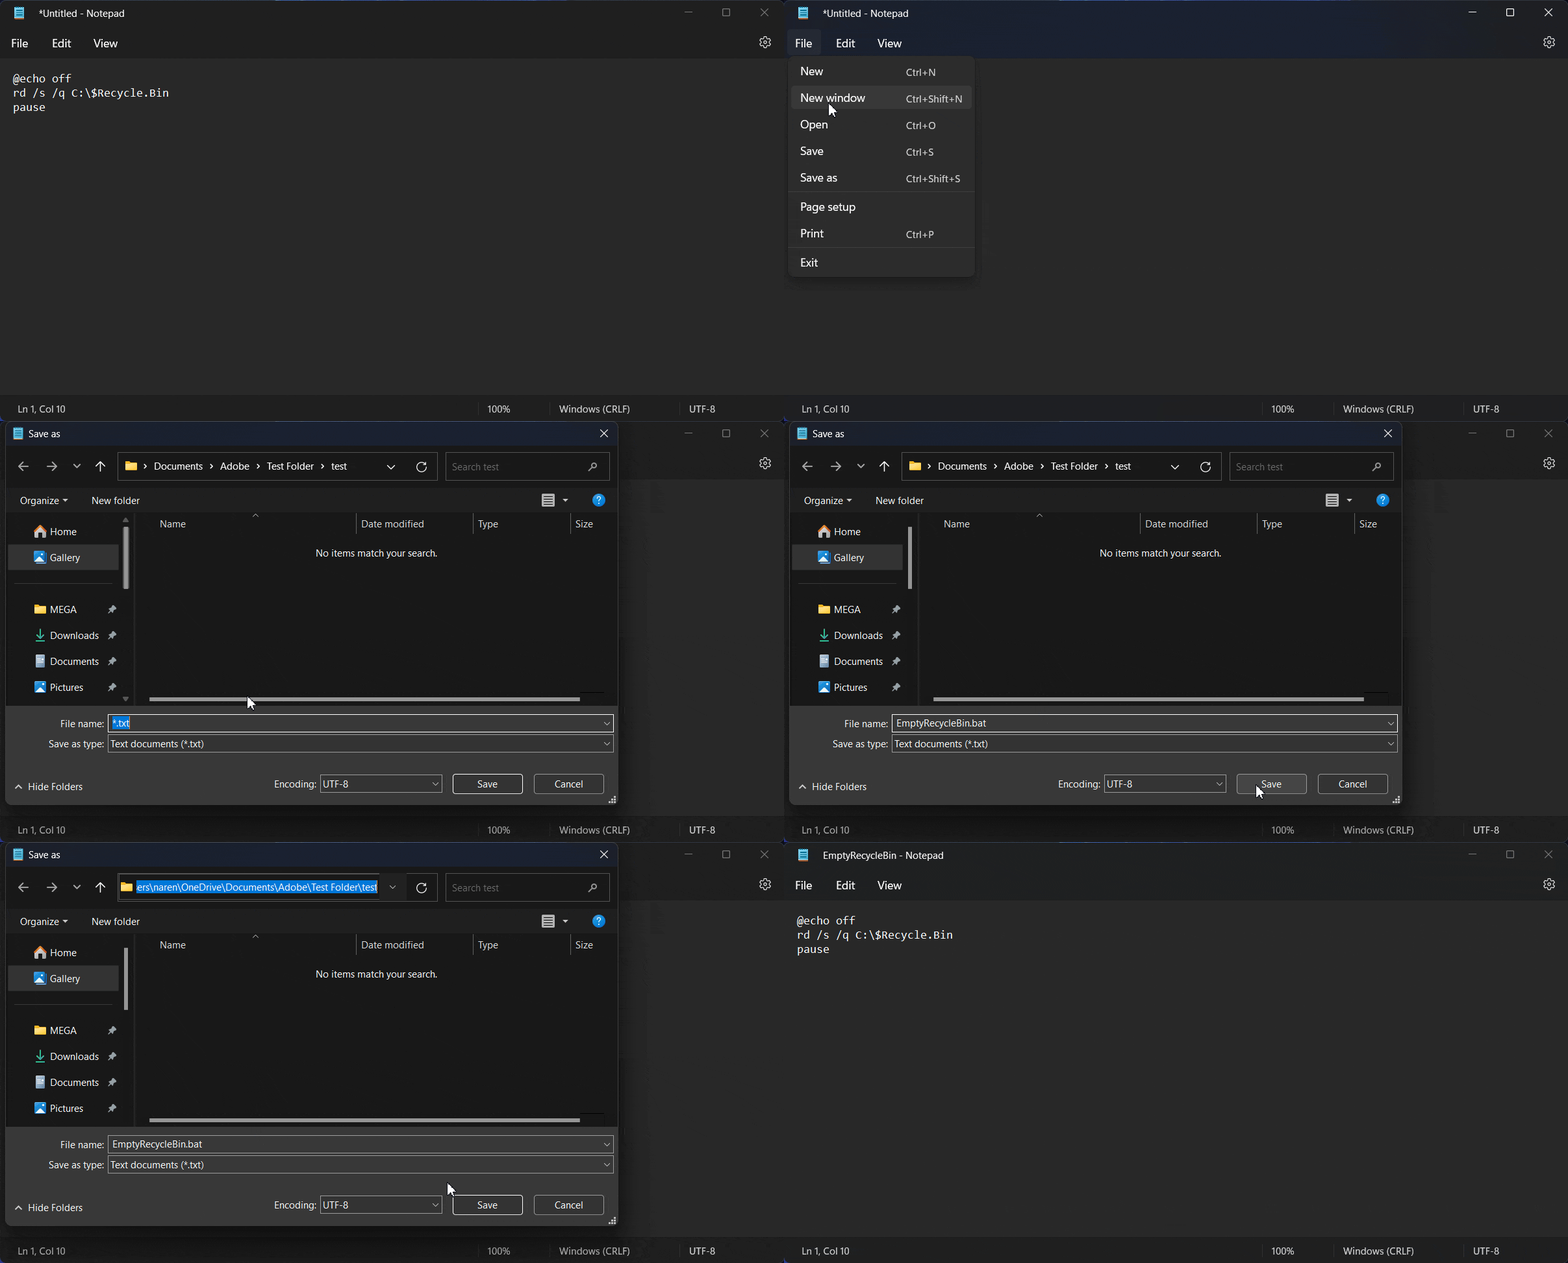
- Copy the below commands and paste in the notepad file.
- @echo off
- rd /s /q C:\$Recycle.Bin
- pause
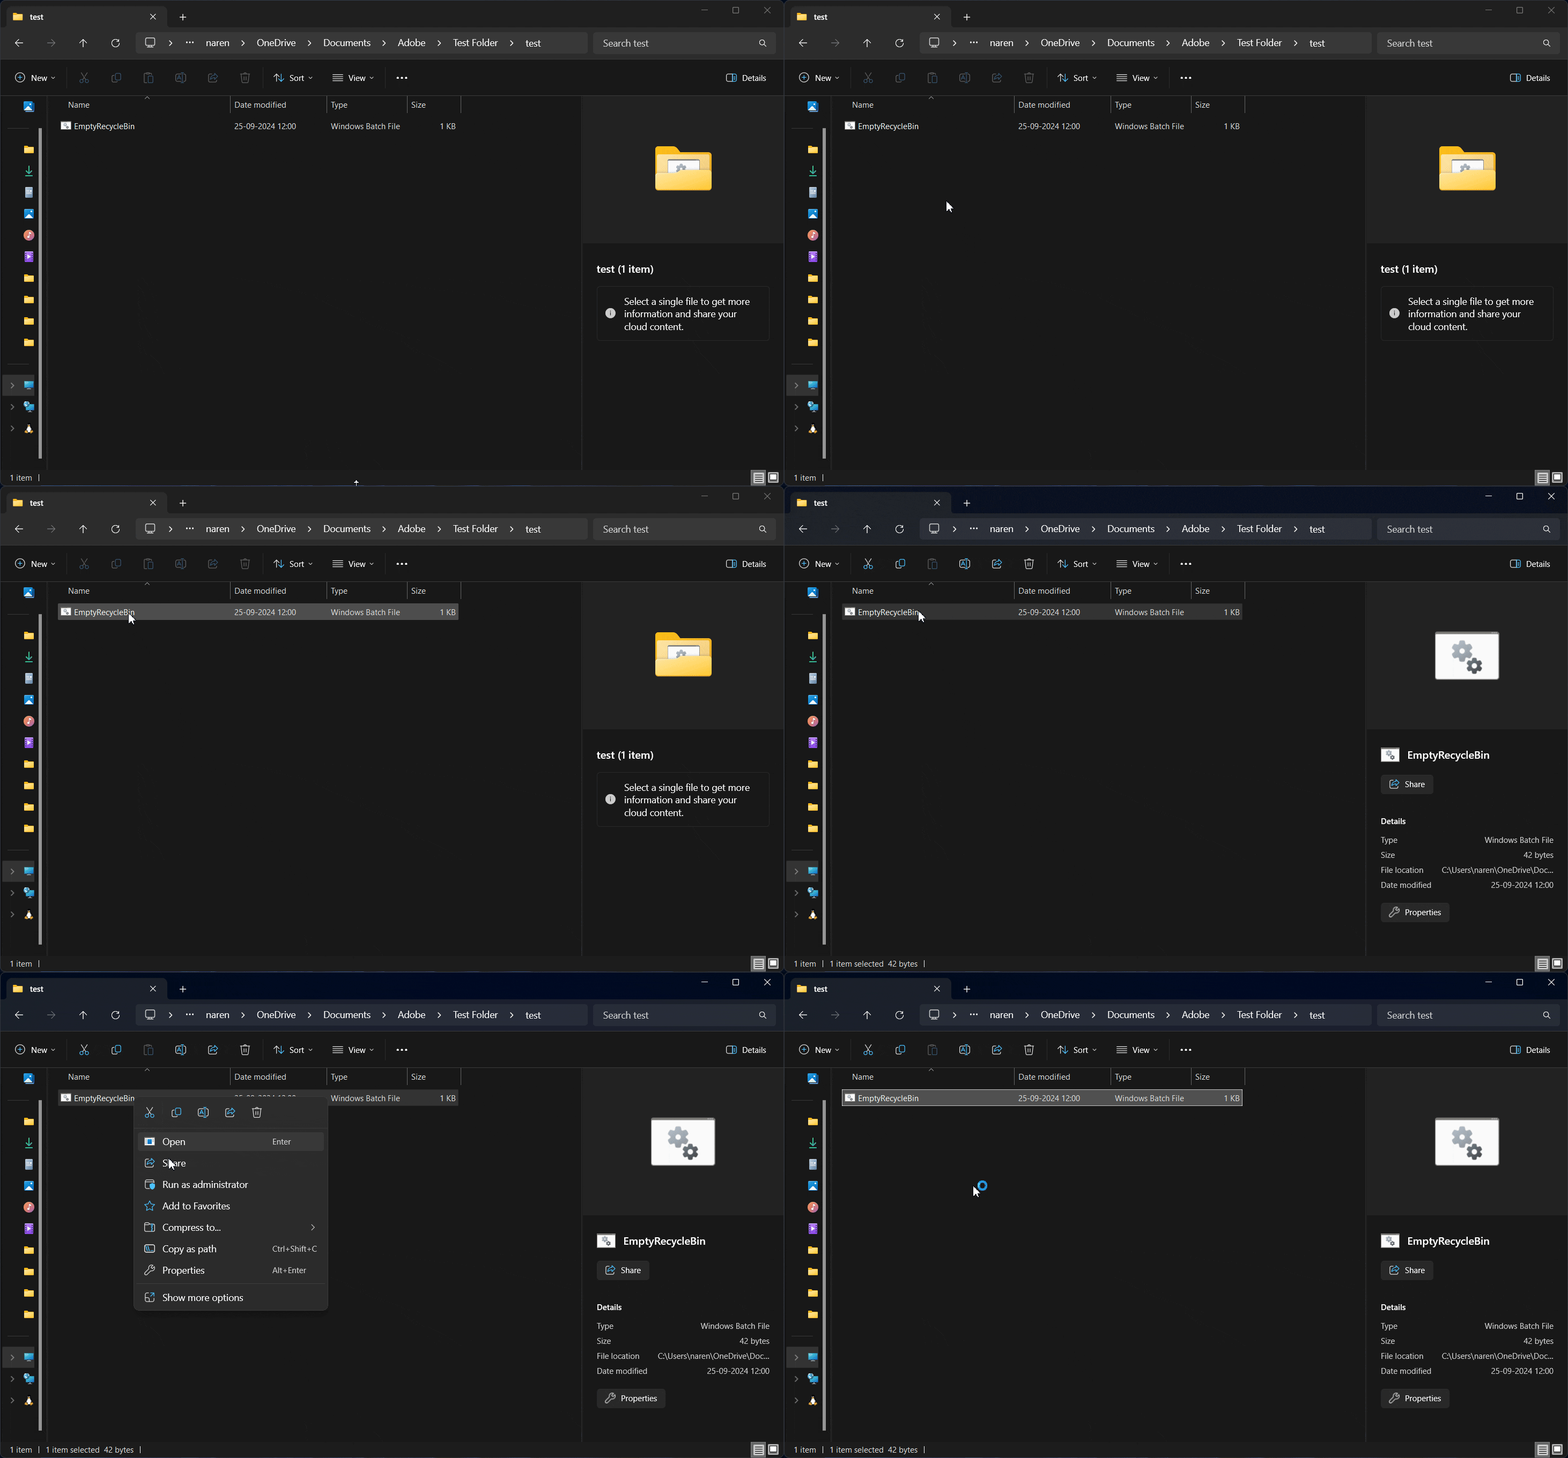
Once you have pasted the command, click on the File menu and choose the Save As option. Name the file EmptyRecycleBin.bat, then click the Save button.
- Now, you need to navigate to the folder where the file is saved, and right-click the batch file and choose the Run as Administrator option.
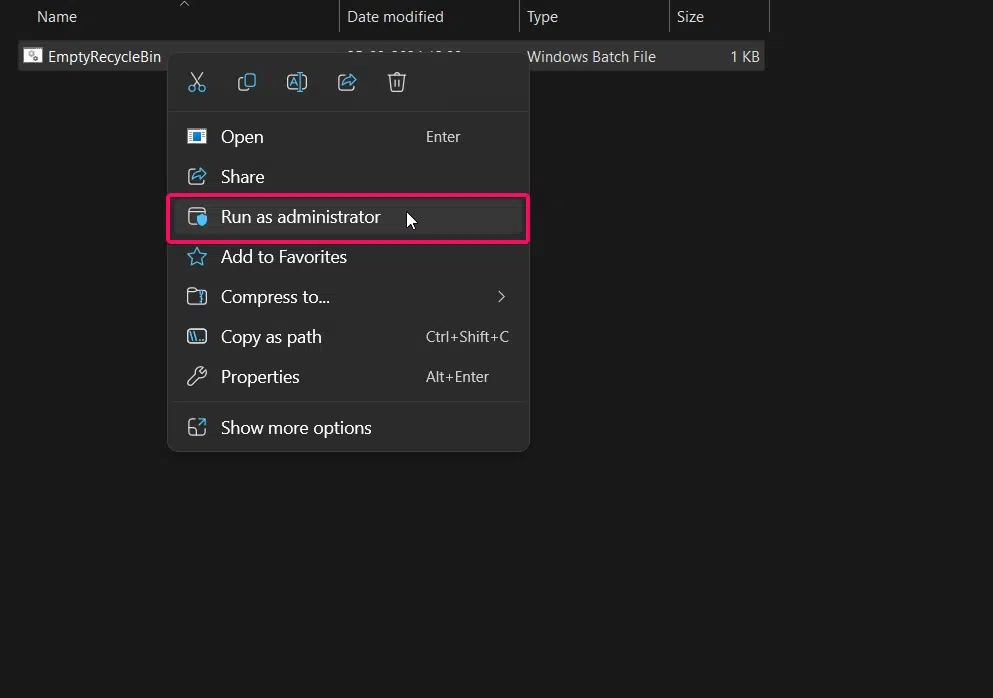
- Just running the file as administrator will execute the batch file and the batch file will restart your file explorer as shown in the below gif image.
Take away:
In conclusion, keeping your PC clean by managing temporary files is important, especially for web development projects. I used a batch file to free up space, but later found out that the files were just being moved to the Recycle Bin instead of being deleted permanently. This caused my storage to fill up without me knowing. After trying different ways, I found some good methods to empty the Recycle Bin and also fix any issues when it doesn’t empty. The methods I’ve explained can help keep your Windows 11 or 10 PC clutter free and running better.
Read More:
- Different Methods to Restart File Explorer on Windows 11 PC.
- How to Change Brightness in Windows 11 PC?
- How to Check Installed Windows 11 Edition?
Related Articles:
- What is Activity History on Windows 11?
- What are Filter Keys on Windows 11?
- How to Turn Off Sticky Keys on Windows 11?
We combine expert insights with user-friendly guidance. We thoroughly research and test everything to give you reliable and simple to understand tech guides. Please take a look at our publishing process to understand why you can trust Winsides.


