Enable Active Directory Lightweight Services Client using Command Prompt
It facilitates communication with AD LDS servers of Windows Server Editions.
Enable AD LDS Client using CMD: The Active Directory Lightweight Directory Tools for Client is a set of tools and libraries that enables a client computer to interact and manage AD LDS Instances. It provides the necessary components to connect to and utilize directory services hosted on an AD LDS server. It also supports Lightweight Directory Access Protocol (LDAP) which is essential for querying and managing directory information. This article will navigate the steps on How to Enable AD LDS Client on Windows 11 using Command Prompt and PowerShell. Check out: Enable AD LDS Client on Windows 11 using Windows Features (GUI Method)
See Also: Run Windows Defender Scan Via Command Prompt On Windows 11
Table of Contents
Active Directory Lightweight Services available on various Windows Editions
This section provides information on AD LDS availability in different Windows editions.
| Windows Editions | Availability |
| Windows Servers | Fully Available (Both Client and Server) |
| Windows 11 Home | No |
| Windows 11 Professional | Yes |
| Windows 11 Education | Yes |
| Windows 11 Enterprise | Yes |
| Windows 11 Pro Education | Yes |
| Windows 11 SE | No |
| Windows 11 IoT Enterprise | No |
A quick way to enable Active Directory Lightweight Services using CMD
- Open the Start menu, and search for Command Prompt. Run Command Prompt as Administrator.
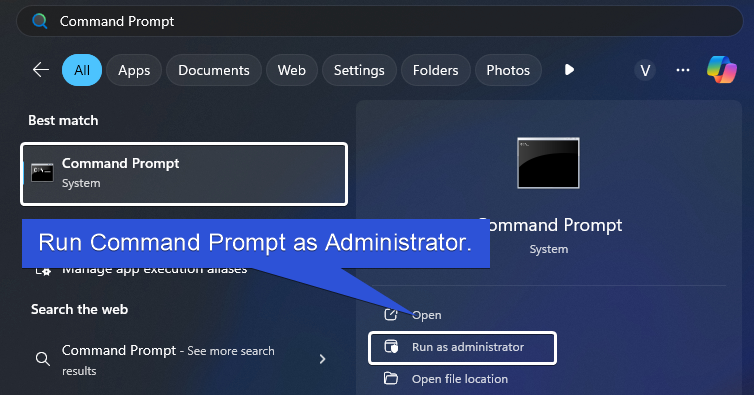
- The User Account Control (UAC) will prompt you to confirm that you want to open Command Prompt as an Administrator. To confirm, click Yes.
- On the CMD, enter the following command.
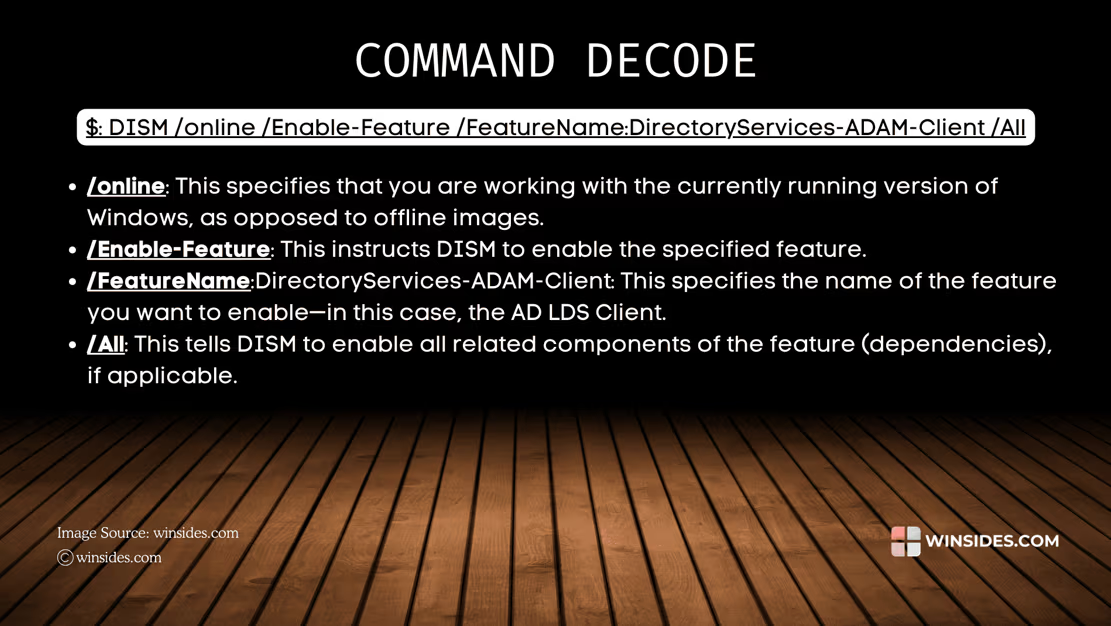
DISM /online /Enable-Feature /FeatureName:DirectoryServices-ADAM-Client /All
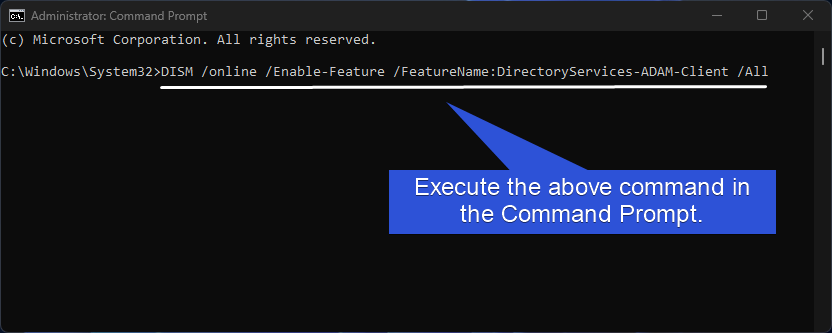
- This command will use the Deployment Image Servicing and Management Tool to enable the Active Directory Lightweight Services via the Command Prompt.
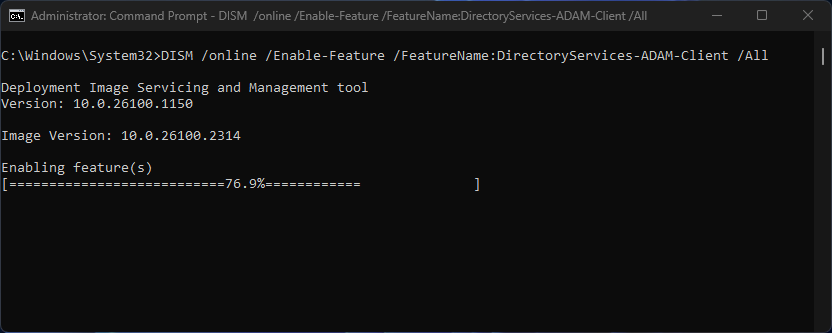
- Once, it completes the activation, you will get the message “The operation completed successfully“.
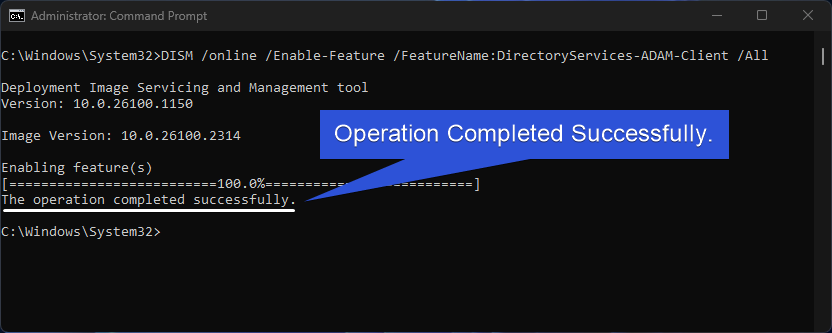
- That is it. Active Directory Lightweight Services Client is now enabled on your Windows 11 using Command Prompt.
Decoding AD LDS Client CMD Command:
How to Enable AD LDS Client on Windows 11 using Windows PowerShell
To Enable this feature on Windows 11 using PowerShell, kindly follow the below steps.
Recommended: Smb 1.0 / Cifs File Sharing Support Using Command Prompt & Windows Powershell
- Open the Start menu and search for PowerShell.
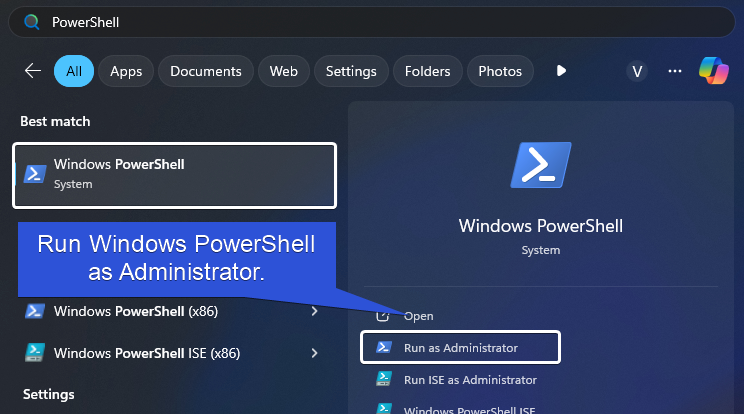
- Run PowerShell as Administrator.
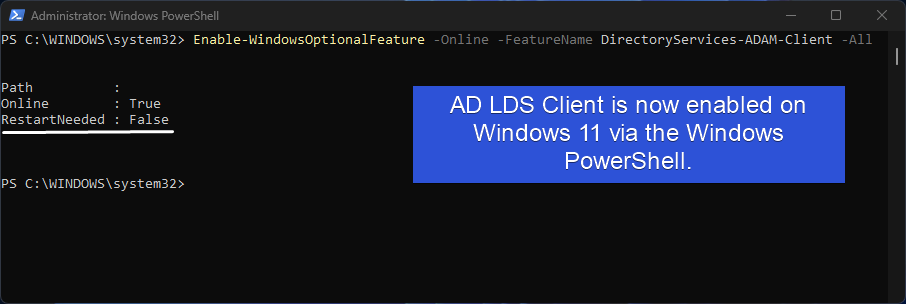
- In the PowerShell, type the following command and click Enter.
Enable-WindowsOptionalFeature -Online -FeatureName DirectoryServices-ADAM-Client -All
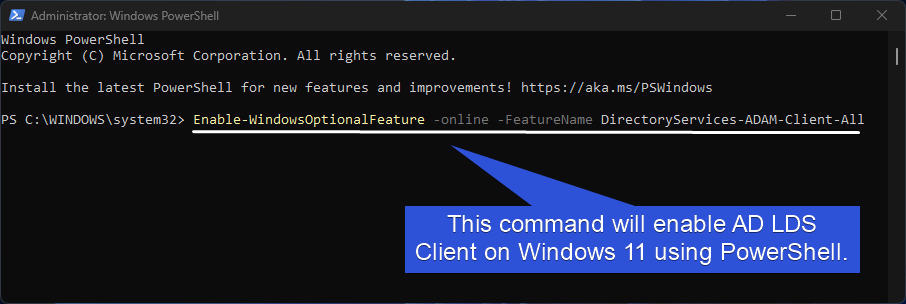
- The above command will enable Active Directory Lightweight Services Client using the Windows PowerShell.
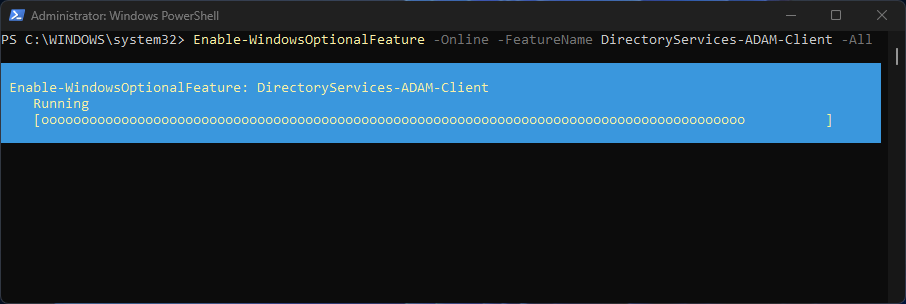
- Once, the process is complete, you will get the status column “Online“. It represents that the AD LDS Client is now enabled. Under Restart Needed, the value is False, which means a restart now is recommended in general however, It is not immediately required for the crucial operation of this feature.
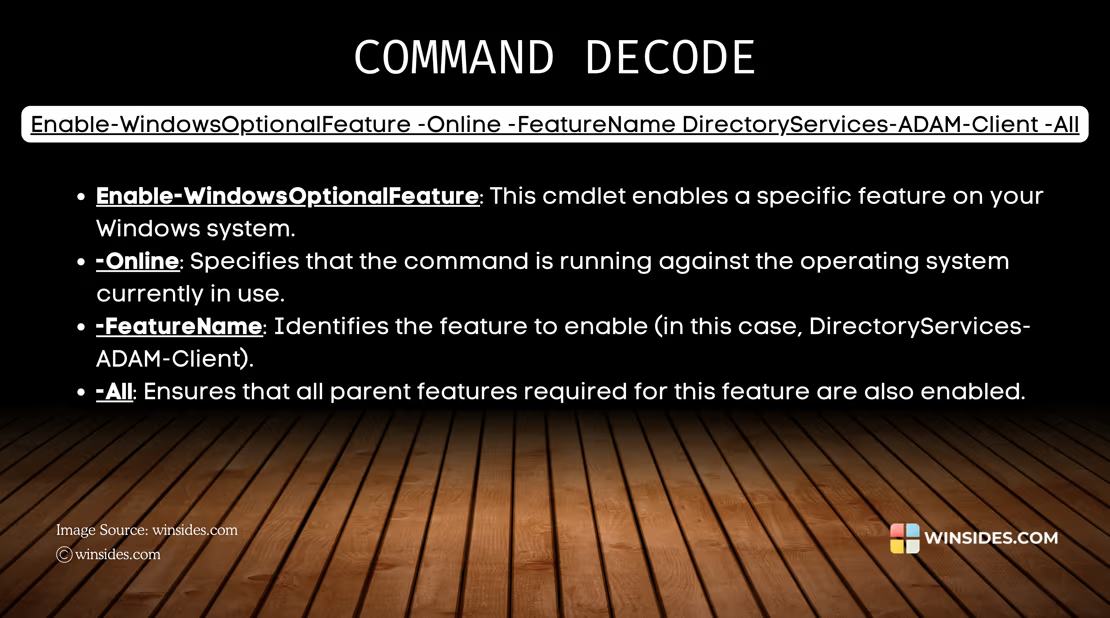
Decoding Active Directory Lightweight Services Client Windows PowerShell Command
Take away
For IT professionals who are managing enterprise systems, or for Developers who are working with the Directory Services, enabling AD LDS Client will allow you to access AD LDS Servers effectively on various Windows Editions, and Windows Server Editions. If you have any queries, kindly let us know in the comment section. For more interesting articles, stay tuned to Winsides.com. Happy Connecting! Peace out!
Related Articles:
- How to Check PC Specs without Logging into Windows 11?
- Microsoft’s Majorana 1 Chip – The Future of Quantum Computing?
- How to Change Font Size on Windows 11?
We combine expert insights with user-friendly guidance. We thoroughly research and test everything to give you reliable and simple to understand tech guides. Please take a look at our publishing process to understand why you can trust Winsides.
