Quick way to Enable Internet Printing Client on Windows 11
Enable Internet Printing Client on Windows 11: An optional feature available on Windows 11 allows your computer to print documents over the network using Internet Printing Protocol (IPP). For example, Alice works in a company with offices in multiple cities. Alice is in the New York City office but wants to print a document for a colleague in the London office. She can then configure the remote printing using the URL of the London office Printer. Once the connection is successful, she can just print documents for her colleague from the New York office itself. This article will walk you through the steps on How to Enable Internet Printing Client on Windows 11 using simple steps. Let’s get started. Check out: Enable SMB 1.0/CIFS File Sharing Support on Windows 11
Table of Contents
Key Steps:
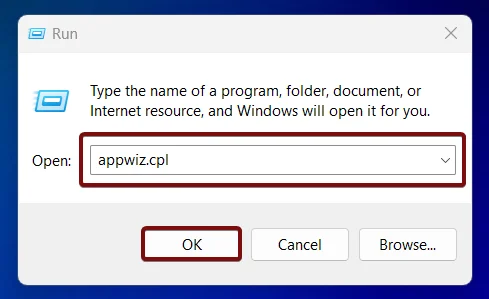
- Open Programs and Features using the run command
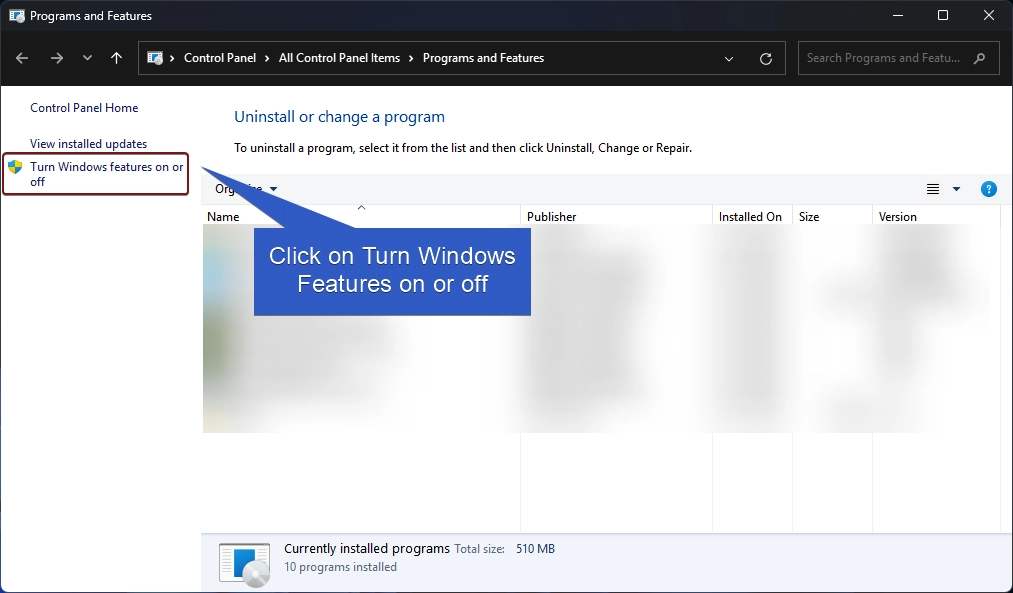
appwiz.cpl- Click on Turn Windows Features on or off.
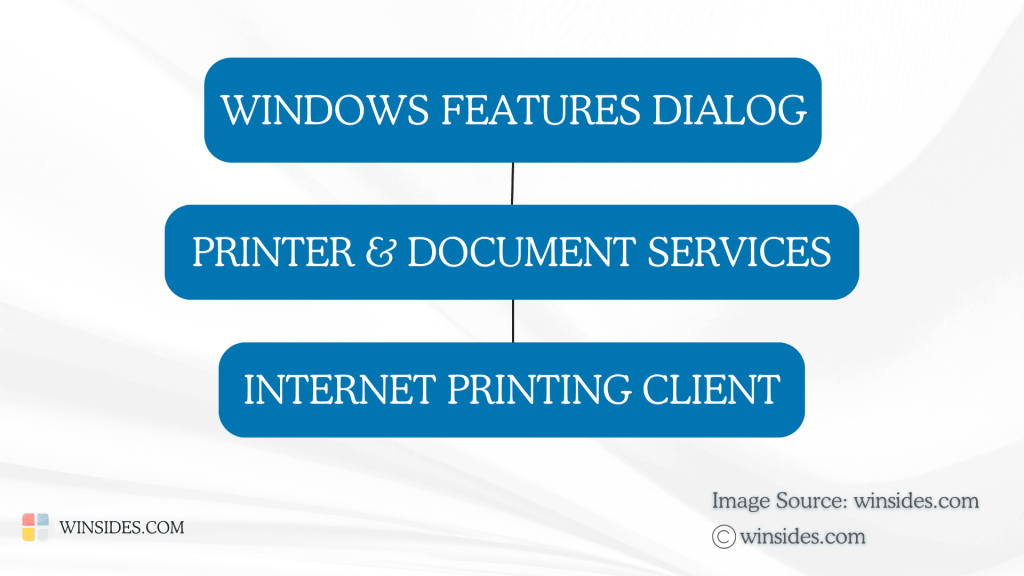
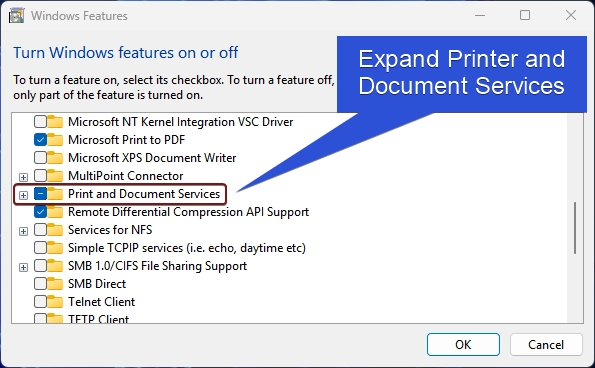
- Expand Printer and Document Services tree.
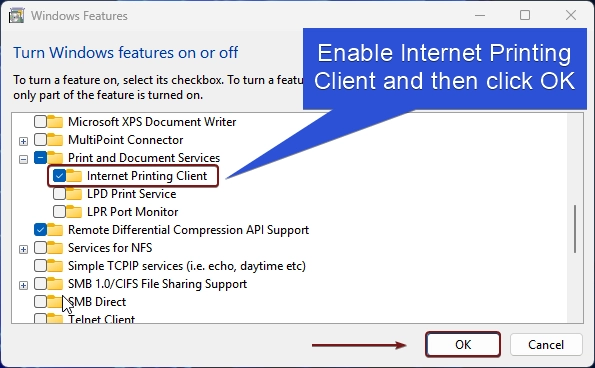
- Here, you can find Internet Printing Client. Click on the checkbox next to it and enable it.
- Finally, click OK.
- That is Internet Printing Client is now enabled on Windows 11.
Directions to reach Internet Printing Client on Windows 11
- Open Run Command and execute the following command.
appwiz.cpl
- From the left pane, click on Turn Windows Features on or off.
- Search and Locate Print and Document Services from the list of features available. Expand the Node.
- Now, you can find Internet Printing Client. Click on the checkbox next to it, and click OK.
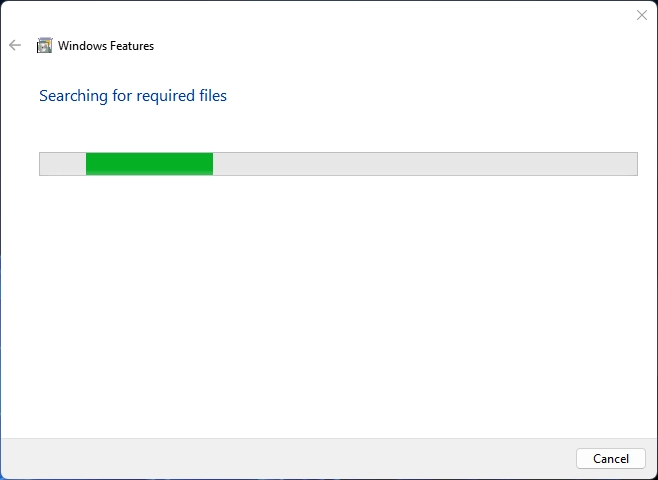
- Windows will search for the required files.
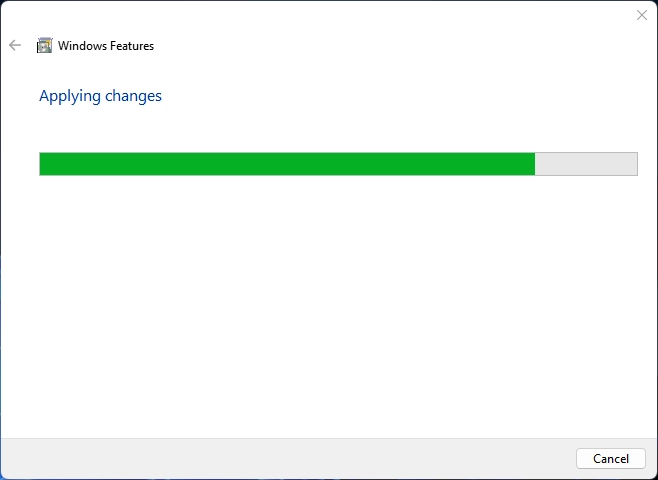
- The system will apply the necessary changes.
- Click Restart now. It is highly recommended to do a restart right away.
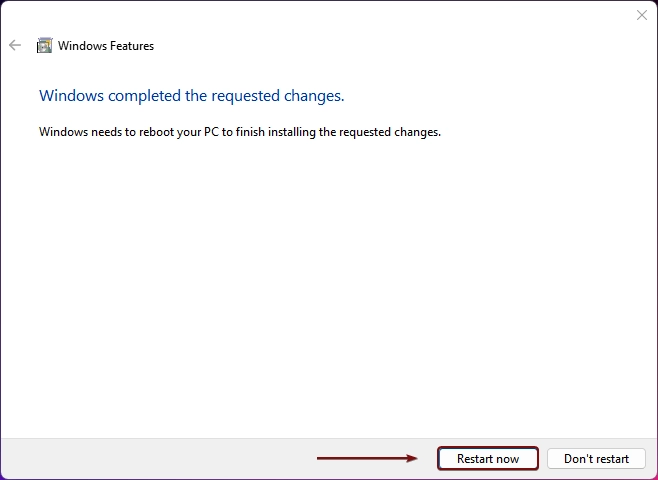
- That is it. Internet Printing Client is now enabled in Windows 11.
Internet Printing Client – Feature availability on various Windows Editions
This section provides information about the availability of this feature on different Windows Editions.
| Windows Editions | Availability |
| Windows 11 Home | Yes |
| Windows 11 Professional | Yes |
| Windows 11 Education | Yes |
| Windows 11 Enterprise | Yes |
| Windows 11 Pro Education | Yes |
| Windows 11 SE | No |
| Windows 11 IoT Enterprise | Yes |
How to use Internet Printing Client on Windows 11 for Printing Documents Remotely?
To use this feature and print documents remotely, the first step is to connect to an Internet Printer. To do so, kindly follow the below steps.
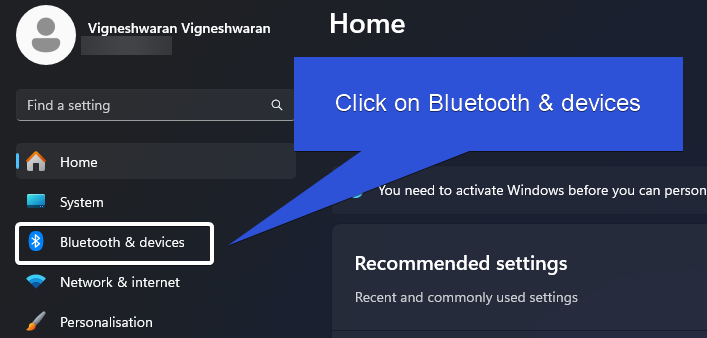
- Open Windows Settings using the keyboard combination Win Key + I. Click on Bluetooth & Devices.
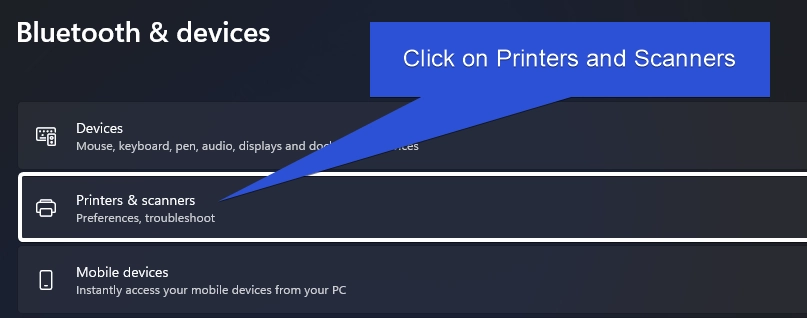
- Under Bluetooth & Devices, click on Printers and Scanners.
- Now, click on Add a Device of Printers and Scanners.

- Wait for the system to search for the nearby printers and then, you will get the option “That Printer that I want isn’t listed”. Click Add a new device manually.

- The Add Printer dialog box will pop up now.
- Choose Select a Shared Printer by name and then enter the URL of the shared Printer. Sample URL:
http://[IP Address]/printers/[PrinterName]/.printer
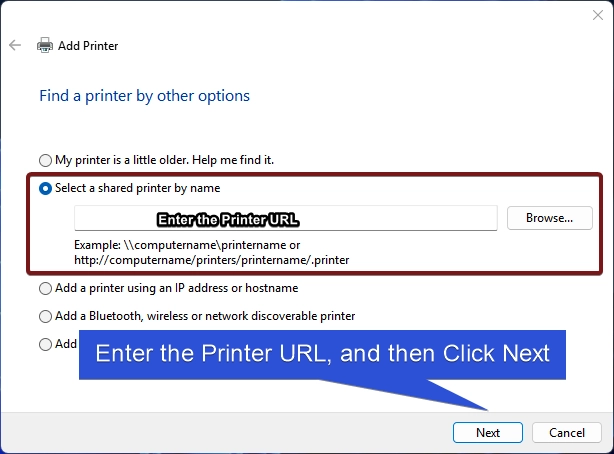
- Click Next.
- Finally, complete the onscreen setup process to finish the step of the printer.
- Windows will install the necessary drivers manually. You can print a test page to make sure that the connection is successful.
- Now, the Document can travel over the Internet using the Internet Printing Protocol and the documents can be printed remotely.
How to Disable or Turn Off Internet Printing Client on Windows 11?
If you are aware of enabling this feature on Windows 11, then disabling this process is hassle-free. You can also remove the added Shared Printer by removing it via the Windows Settings.
- To Turn off the Internet Printing Client on Windows 11, run the command
appwiz.cpl. - On the Programs and Features window, click on Turn Windows Features on or off.
- Windows Features dialog will open now.
- Here locate Printer and Document Services and expand it.
- Uncheck Internet Printing Client and then click OK.
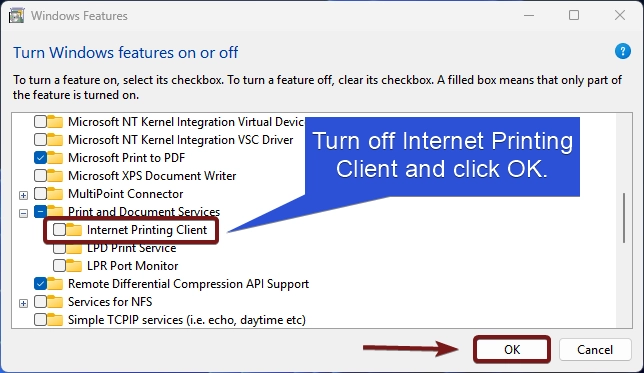
- Internet Printing Client will now be disabled on your Windows 11 PC.
If you are not using this feature, then disabling it will improve the system security and free up system resources.
Frequently Asked Questions
Do I need the Internet Printing Client for local network printers?
Can I use the Internet Printing Client on a public network?
While it is technically possible, it is not recommended to use public networks for printing via the Internet Printing Client without additional security measures.
What are the security considerations when using the Internet Printing Client?
Always connect to trusted printer servers with secure URLs (https://). Avoid enabling file sharing and network discovery on public networks. Use encryption (e.g., VPN) when printing over the internet.
Take away
While enabling Internet Printing Client on Windows 11 can be particularly useful in distributed work environments or cloud-based workflows, it may not be necessary for all users, and at the same time, it is a valuable feature for enabling remote printing through the Internet Printing Protocol (IPP). I would suggest you use it whenever you need it and then disable it to ensure the system’s safety. If you have any queries, kindly let us know in the comment section. For more interesting articles, stay tuned to Winsides.com. Happy Coding! Peace out!
We combine expert insights with user-friendly guidance. We thoroughly research and test everything to give you reliable and simple to understand tech guides. Please take a look at our publishing process to understand why you can trust Winsides.
