How to Enable No GUI Boot in Windows 11?
This is one of the interesting features available in Windows operating systems. However, I want to caution you while using this No GUI Boot in Windows 11. It is primarily useful for users who want a faster and simpler boot experience. When this option is enabled, instead of seeing the familiar Windows logo and animation as the operating system starts, you’ll see a simple text-based screen that displays boot progress information. Speaking of Boot Experience, we also have an article that discusses Unbranded Boot in Windows 11 Enterprise Editions. Nowadays, most computers are using SSD significantly improving the OS loading time. This feature may be relatively beneficial for users who are using HDD as their primary storage. Here in this article, we will check out How to Enable No GUI Boot in Windows 11 using simple steps. Check out: How to Enable Safe Boot in Windows 11?
Key Steps:
- To Enable No GUI Boot in Windows 11, we will use Run Command.
- Let’s open Run command using the keyboard shortcut Win Key + R.
- Run command will pop up now. Enter the following command in the Run command box and execute it.
msconfig. Click OK.- Now, System Configuration will open now. You can find several tabs with different options. Click on Boot tab.
- Under Boot options, you can find No GUI Boot. Click on the checkbox next to it and click Apply.
- Finally Restart your System. You can see that system will load with No GUI Boot.
Why do we need NO GUI Boot in Windows 11?
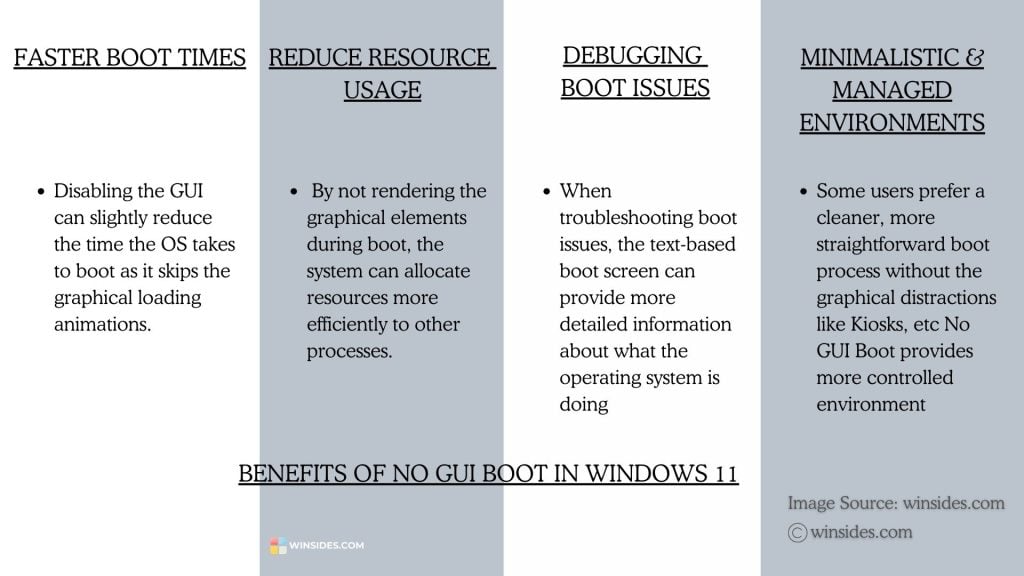
- One important reason for enabling No GUI Boot in Windows 11 is to increase and reduce boot time. This may not be significant for SSD Drives as they load very fast. However, with Hard Disk Dives, disabling this feature does improve the boot time slightly.
- This feature can especially be beneficial while troubleshooting boot issues, as the text-based boot screen provides more information about what the operating system is doing. You can find this kind of text-based boot screen while using Linux operating systems.
- Some people may be looking for a simple and minimalistic experience. Enabling this feature in Windows 11 may improve functionality where aesthetics is not primary. One example is Kiosks, where a no GUI boot can help create a more controlled environment, focusing on functionality without unnecessary graphical elements.
A little caution before enabling No GUI Boot in Windows 11:
When No GUI Boot is enabled, you lose the graphical feedback that usually indicates the system is loading properly. If there are boot issues or failures, the text-based interface may not provide clear indications of what’s happening, making troubleshooting more challenging. You may have to rely on less informative error messages or logs. For users who are not familiar with the text-based boot process, it can be confusing or alarming if they see unexpected messages or delays. So, before you choose to enable No GUI Boot in Windows 11, please make sure you are okay with the above processes.
Let’s get started with the steps for enabling this feature in Windows 11.
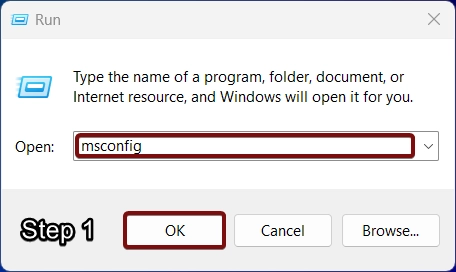
- Go to the Start menu and open the Run command.
- On the Run command, execute the following command.
msconfig
- Now, System Configuration will open. Click on the Boot tab. It is the second tab.
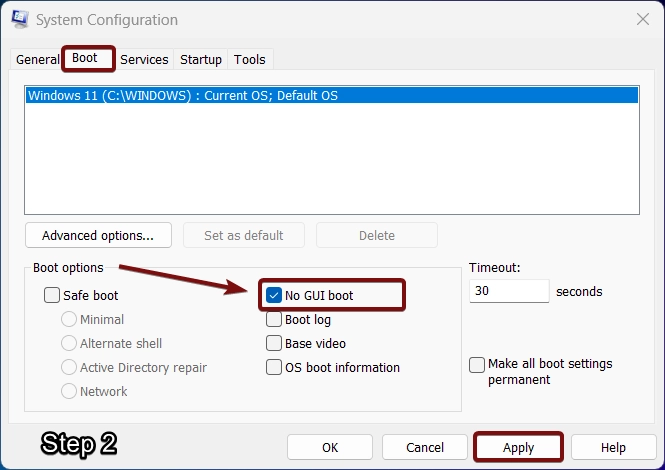
- Under Boot options, you can click on the checkbox of No GUI Boot to enable it.
- Finally, click Apply. That is it. NO GUI Boot is now enabled in your Windows 11 OS.
Is NO GUI Boot safe?
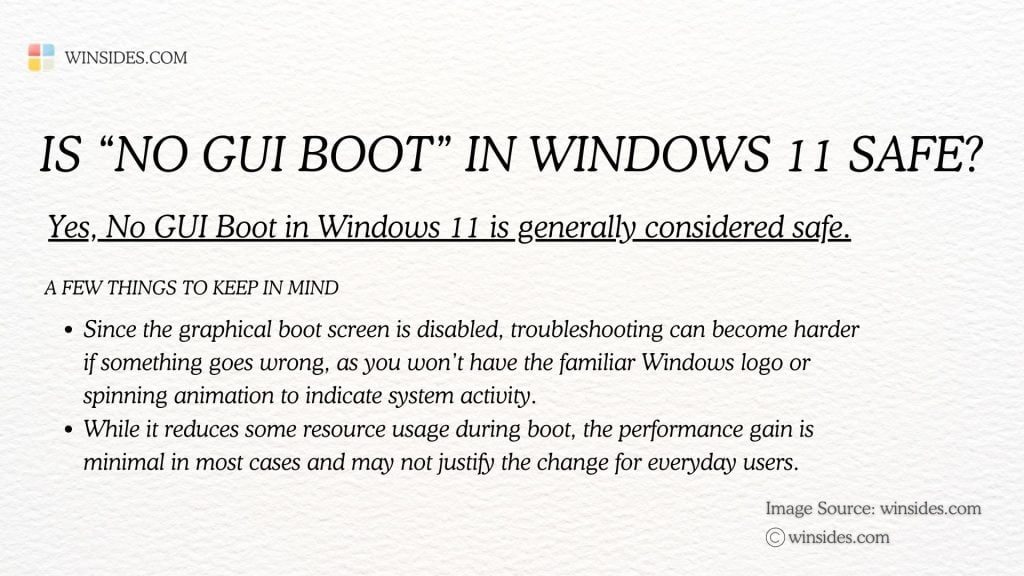
No GUI Boot option Windows 11 is generally considered a safe process, however, if something goes wrong during the boot process, it may be difficult to troubleshoot especially when identifying boot failures. Having said that, enabling this feature does not alter core system files or configurations. The process is also reversible, and hence, if you don’t like the experience, you can always disable No GUI Boot in Windows 11. This feature makes more sense for controlled environments like Kiosk systems and servers, where performance optimization is a priority.
How to Disable No GUI Boot in Windows 11?
If you are aware of the enabling process, then disabling No GUI Boot in Windows 11 is a hassle-free process. The following are the steps.
- Go to the Run Command box and enter msconfig.
- Click on the Boot Tab of System Configuration.
- Under Boot options, uncheck the checkbox next to the NO GUI Boot and click Apply.
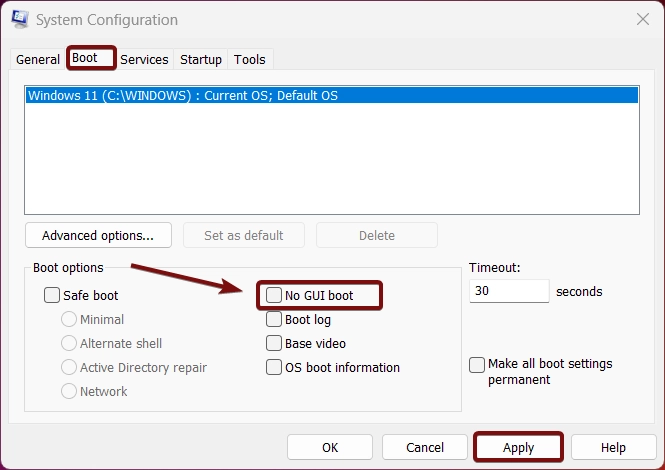
- That is it. No GUI Boot is now disabled in Windows 11. Kindly do a system restart.
Take away:
While NO GUI Boot Windows 11 reduces some resource usage during boot, the performance gain is minimal in most cases and may not justify the change for everyday users. If you like this article, kindly give us a review. If you have queries, do let us know in the comment section. For more interesting articles, stay tuned to winsides.com
We combine expert insights with user-friendly guidance. We thoroughly research and test everything to give you reliable and simple to understand tech guides. Please take a look at our publishing process to understand why you can trust Winsides.
![Enable Server Side Includes [SSI] in Windows 11 2 Server Side Includes in Windows 11](https://winsides.com/wp-content/uploads/2024/08/Server-Side-Includes-in-Windows-11-390x220.jpg)
