How to Enable Real-time Protection in Windows 11?
Locates & Stops Malware from installing or running on your device.
Real-time Protection in Windows 11: This feature of Windows Security (formerly Windows Defender) in Windows 11 continuously scans your device for malware, spyware, and other potentially harmful software. This feature ensures that threats are detected and removed in real time, providing ongoing protection against emerging threats. Real-Time Protection helps safeguard your system by automatically scanning downloaded files and apps, monitoring system activities, and detecting suspicious behavior, thus preventing malicious software from infecting your device. This feature is enabled by default in Windows 11 OS. When you set up your device, Windows Security is configured to automatically allow Real-Time Protection of Windows 11.
When to Enable and Disable Real-time Protection?
- Troubleshooting software conflicts: Some legitimate software might conflict with Real-Time Protection, and disabling it temporarily can help diagnose and resolve these issues.
- Installing certain applications: Occasionally, you may need to install software that Windows Security mistakenly identifies as a threat.
This article focuses on How to Enable Real-time Protection in Windows 11 for the above purposes. However, winsides.com strongly advises you to keep this feature turned on always to protect yourself from vulnerabilities. The following are the steps.
- Open Windows Settings using Win Key + I
- Click on Privacy and Security.
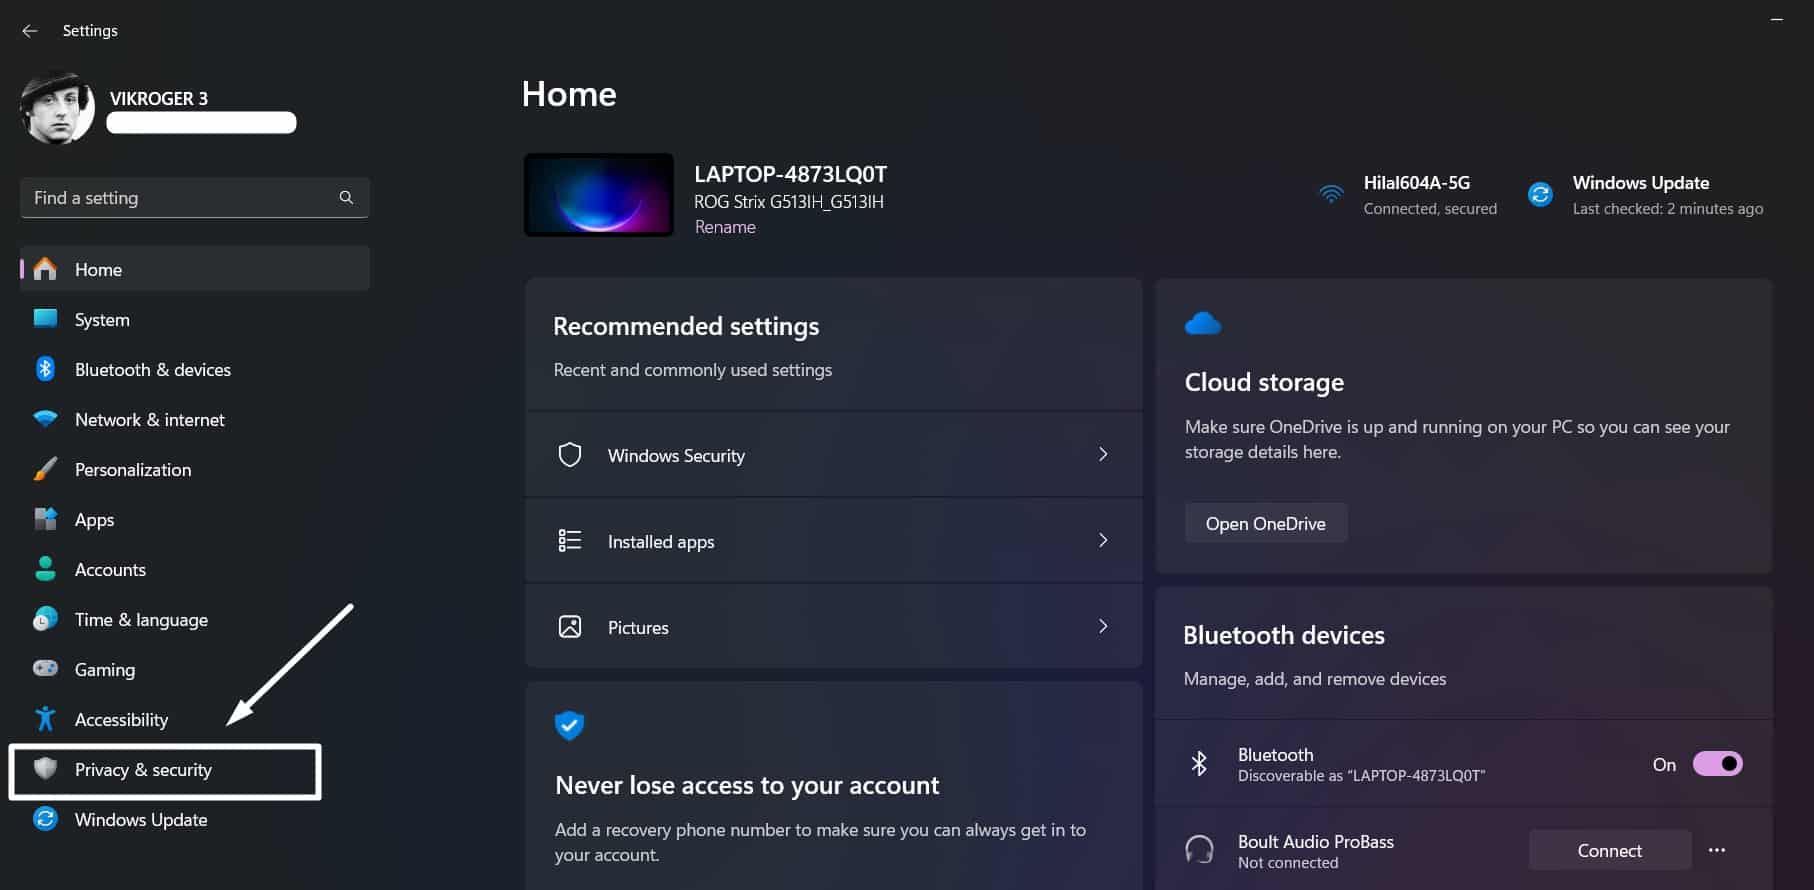
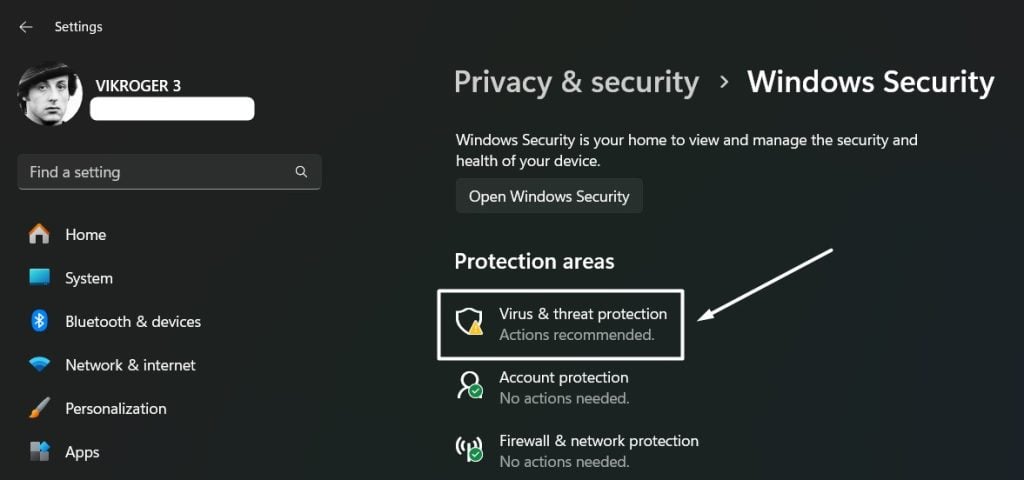
- Now, click on Windows Security.

- Then, navigate to Virus & Threat Protection.
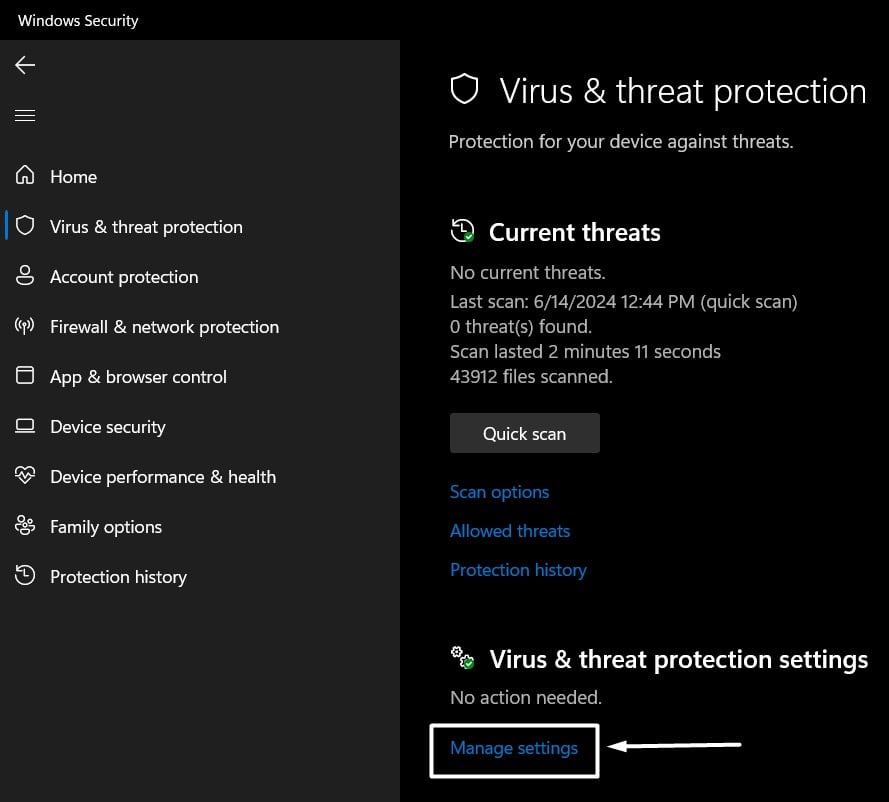
- Windows Security will open now. Click on Manage Settings under Virus & Threat Protection settings.
- Toggle the Real-time protection switch to ON. Windows 11 will enable Real-Time Protection now.
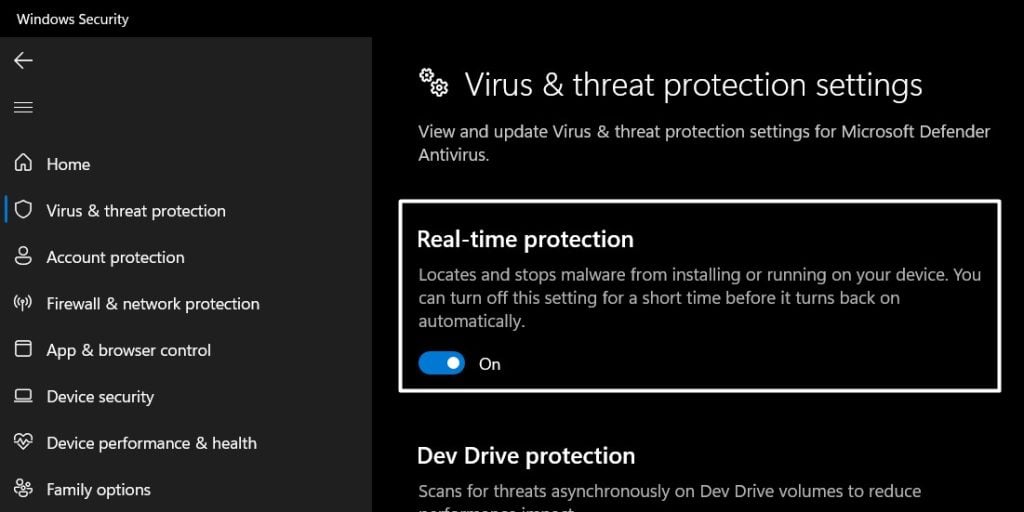
Note: By default, this feature will be ON. This section is for informative purposes only.
Disable Real-Time Protection in Windows 11- What happens?

If you disable Real-Time Protection Windows 11, it should only be a temporary measure for specific troubleshooting or software installation needs. Always re-enable Real Time Protection as soon as possible to protect your device. By understanding the following risks, you can make an informed decision about temporarily disabling Real-Time Protection. Your device’s security is extremely important, so proceed with caution and ensure your protection is reactivated promptly.
- Increased Vulnerability: Your device will be more susceptible to malware, viruses, and other security threats.
- Potential Data Loss: Disabling this feature increases the risk of data breaches and loss.
- Temporary Measure: Plan to re-enable Real Time Protection as soon as your specific task is complete.
- Consider Alternatives: If necessary, use alternative security measures such as third-party antivirus software during the period Real-Time Protection is disabled.
To Disable Real-Time Protection in Windows 11, go to Virus & Threat Protection Settings. Toggle the Real-Time Protection Switch to OFF to disable this security feature in Windows 11.
Take away:
Real-time protection in Windows 11 is a vital feature that continuously shields your device from various security threats, ensuring a safer computing environment. While it is enabled by default to provide ongoing protection, knowing how to manage this feature is crucial for specific scenarios that may require temporary disabling. Happy Coding! Peace out! Find more tutorials at our homepage: Winsides.com
We combine expert insights with user-friendly guidance. We thoroughly research and test everything to give you reliable and simple to understand tech guides. Please take a look at our publishing process to understand why you can trust Winsides.

