How to Enable Task View in Windows 11? 4 Best Methods!
4 Working ways to Enable Task View in Windows 11!
As a web app developer myself, I always work with multiple windows and tabs on my PC. I often need to switch between tabs based on my requirements. Recently, I upgraded from Windows 10 to Windows 11, and the experience was totally new for me. I had to complete my work on time, but the new interfaces and experiences slowed me down. It would be very useful to know how to switch between multiple tasks efficiently. After some research, I found several ways to switch tasks and enable Task View on my Windows 11 PC.
I believe this will be useful to everyone, so I’m here to share my knowledge with those who need Task View to stay productive. In this article, I’m going to share more than three methods to enable Task View in Windows 11 PC.
Key Points:
- Keyboard Shortcut: Press
Win + Tabto open Task View directly, even if the Task View button is not visible on the taskbar.
Multiple Ways to Enable Task View in Your Windows PC!
Actually, there are 4 working methods available. I’m going to list all the methods, but I personally recommend using the keyboard shortcuts method, which is easy and time-saving, especially if you are a developer.
Method 1: Using the Settings App:
- Click the
Win + Ikeys on your keyboard, or click the Start button and select the Settings gear icon.
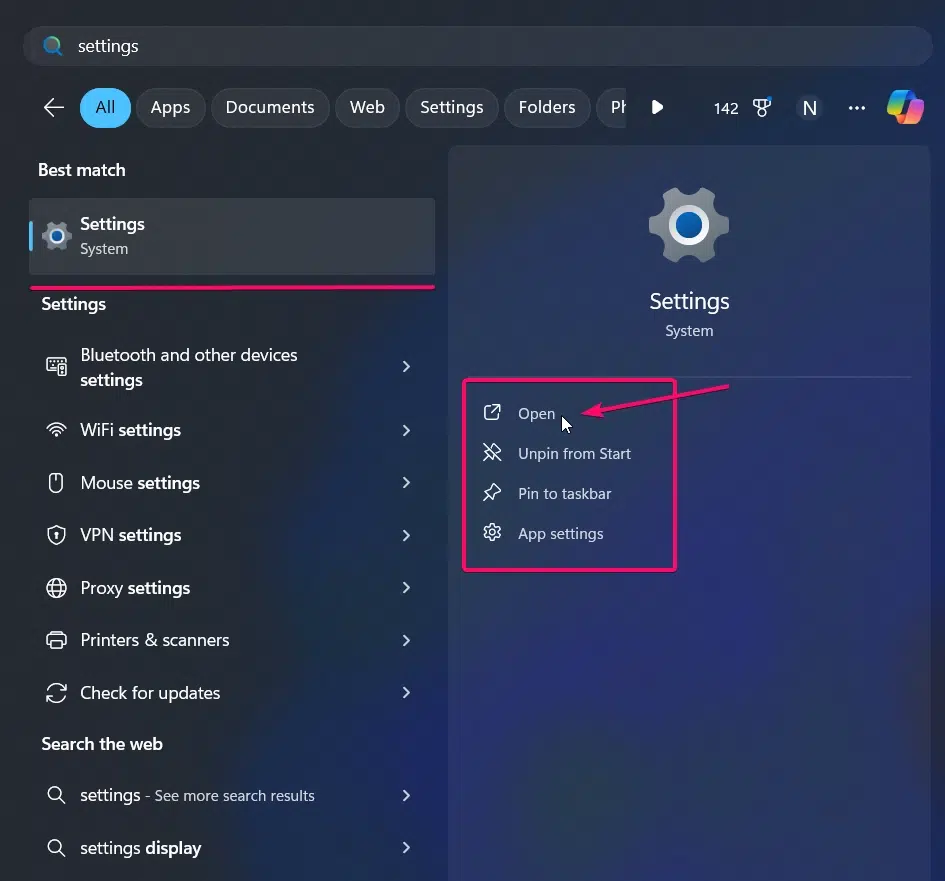
- In the Settings window, click on Personalization from the left-hand menu.

- Scroll down within the Personalization settings and click on Taskbar.
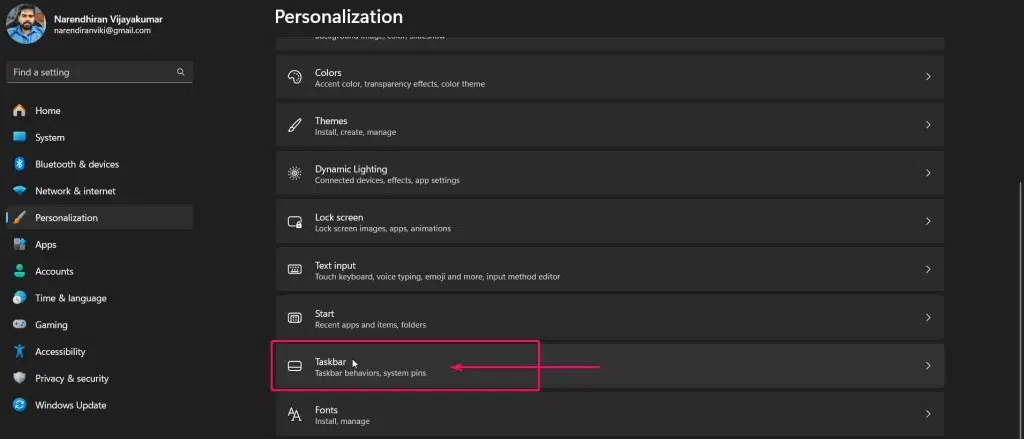
- Under the Taskbar items section, find the Task View toggle switch.

- Click or Toggle the switch to the On position to enable Task View on your taskbar.

Method 1: Using the Taskbar Context Menu:
- you need to right click on an empty space on the taskbar to open the context menu.
- From the context menu, you need to click on Taskbar settings.
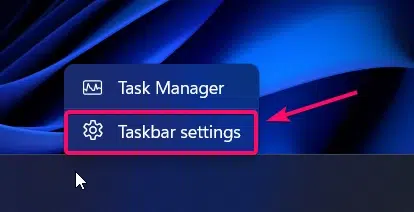
- Under the Taskbar items section, find the Task View toggle switch.

- Click or Toggle the switch to the On position to enable Task View on your taskbar.

Method 3: Using the Keyboard Shortcut:
- Click the Winkey + Tab on your keyboard to open the Task View interface directly, allowing you to manage your open applications and virtual desktops.
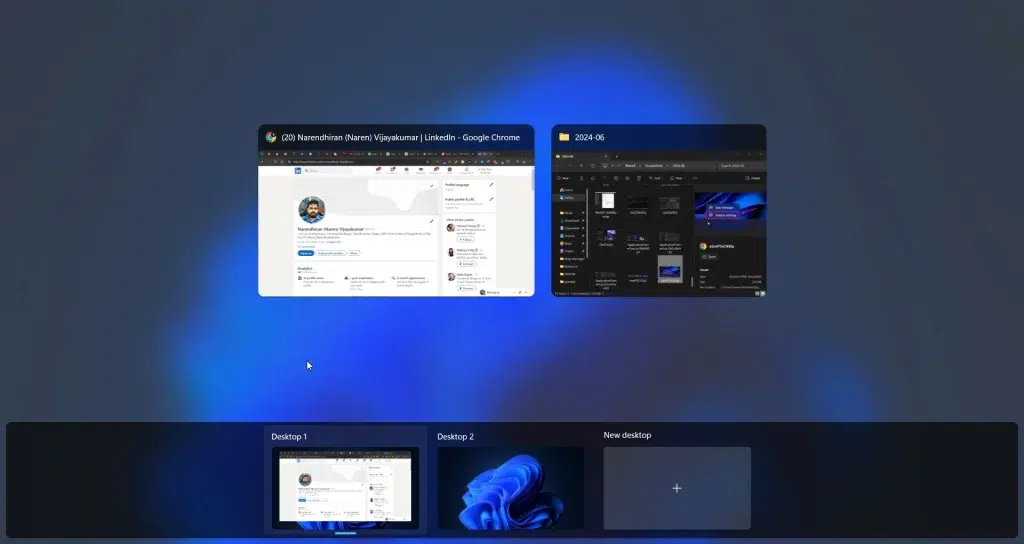
The above 3 methods may not require any advanced knowledge, but the one below may require a good understanding of the Registry Editor.
Method 4: Using Registry Editor (Advanced Method):
This method may end up disabling or enabling the Task View permanently on your Windows PC. Therefore, I recommend using the above three methods. If you are ready to take the risk, follow the steps below.
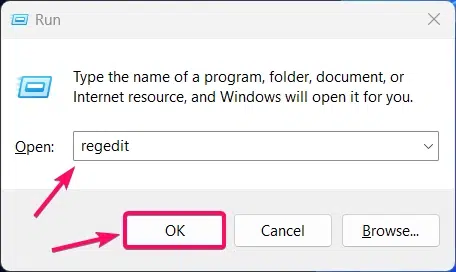
- You need to open the Run window using the shortcut WinKey + R on your keyboard.
- You need to enter the command
regeditand hit the okay button to launch the Registry Editor window.
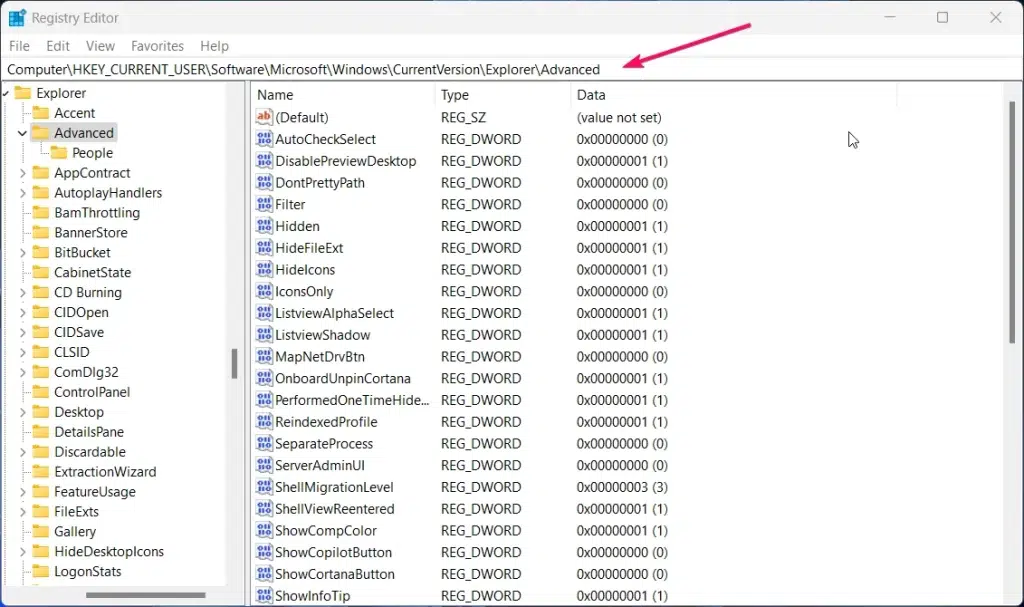
- In the address bar, you need to paste the following address
HKEY_CURRENT_USER\Software\Microsoft\Windows\CurrentVersion\Explorer\Advancedand hit the Enter button to navigate to the directory.
- Scroll down the list and find the entry of ShowTaskViewButton and click to explore the additional values.
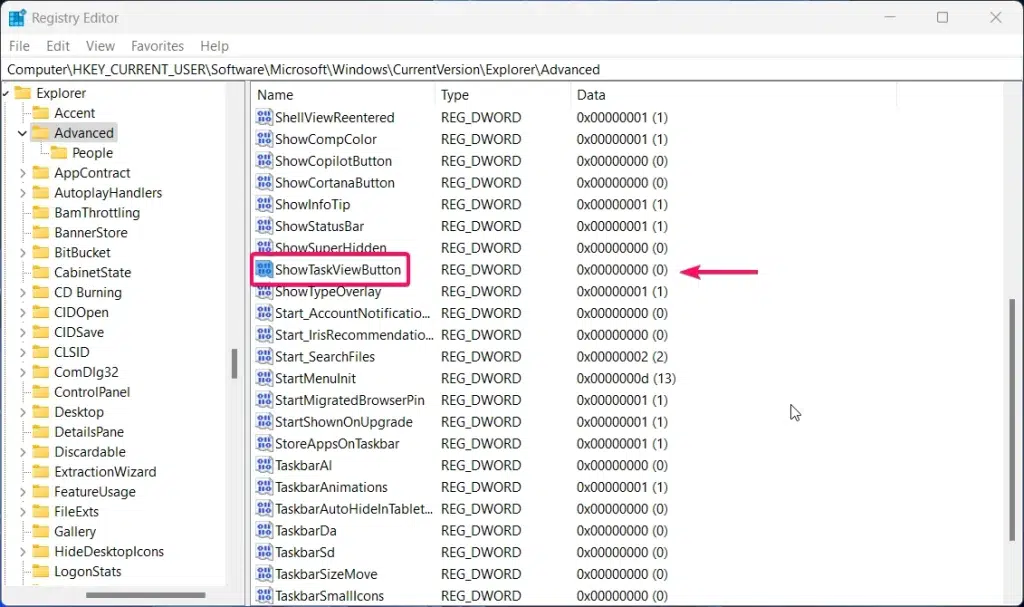
- If the value does not exist, create a new DWORD (32-bit) Value named ShowTaskViewButton.
- Double click the ShowTaskViewButton value and set its data to 1 to enable Task View or 0 to disable it.
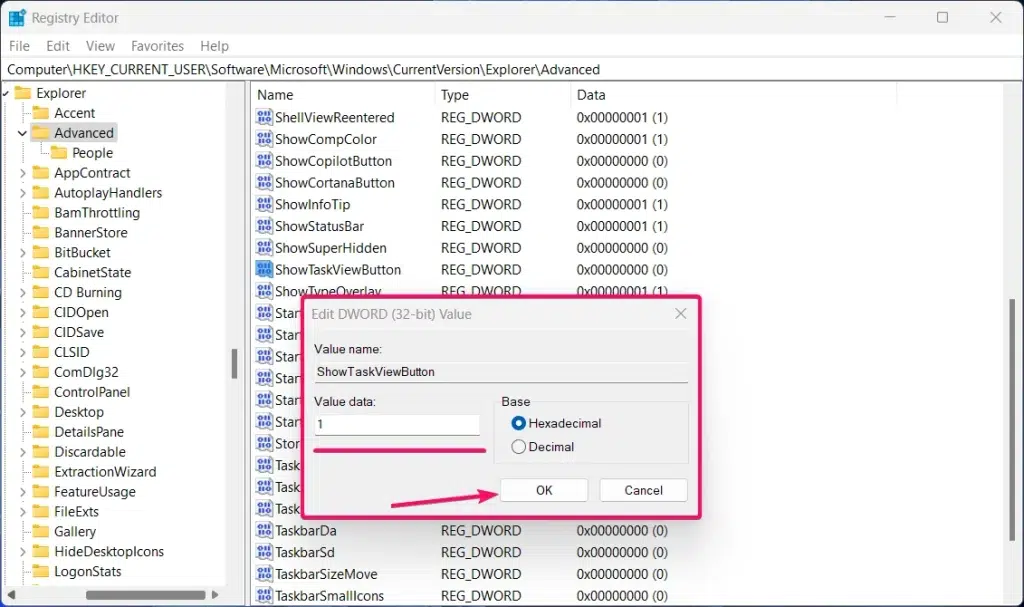
- Once, you switched the value from 0 to 1, and save the DWORD 32-bit value and hit the okay button. You need to restart the Windows Explorer.
- To do this, use the shortcut
CTRL + ALT + Deleteto open the Task Manager. Scroll down the list to find the Windows Explorer. - Right click on it and click the Restart option, now your taskbar will be disabled for a second and it will enable back again, you can find that the task view option is enabled in the taskbar.
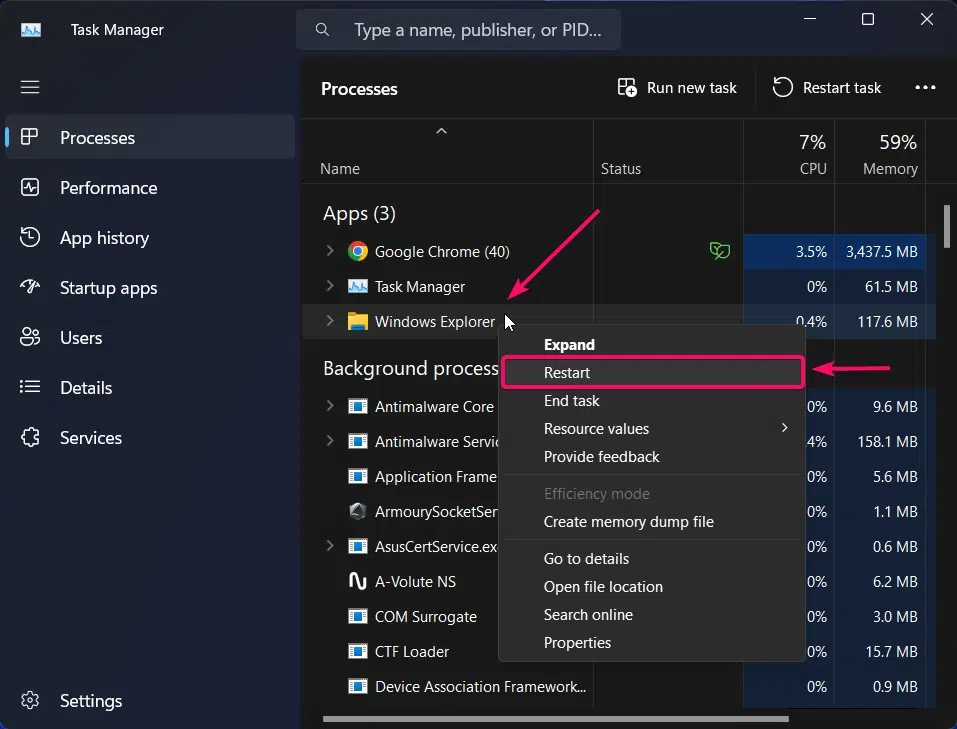
- Now, the Task View will be enabled on your taskbar as shown in the below image.

Conclusion:
In conclusion, having multiple methods to enable Task View on your Windows 11 PC can significantly enhance your productivity, especially if you frequently switch between tasks like I do as a web app developer. While the first three methods are straightforward and user friendly, the fourth method requires a bit more advanced knowledge and should be approached with caution. Understanding these different techniques ensures you can navigate the new Windows 11 interface efficiently, helping you stay on top of your work without unnecessary delays. I hope these methods prove to be as useful to you as they have been for me. Happy multitasking! For more articles kindly visit Winsides.com.
We combine expert insights with user-friendly guidance. We thoroughly research and test everything to give you reliable and simple to understand tech guides. Please take a look at our publishing process to understand why you can trust Winsides.


Thank you for sharing!
Thank you so much for your feedback!
A great post without any doubt.
Thank you for you positive feedback!