

Introduction to the PFN List Corrupt Error
Encountering a blue screen of death (BSOD) on Windows 11 is never a pleasant experience, and among the various error codes, “PFN List Corrupt” stands out as particularly vexing. This critical system failure often appears abruptly, halting your work and potentially causing data loss if not addressed promptly. It signals a fundamental issue within your computer’s memory management, specifically concerning how Windows tracks physical memory pages. For additional context, see PFN_LIST_CORRUPT bug check, System File Checker (SFC) command, Deployment Image Servicing and Management (DISM) tool, and MemTest86 for memory diagnostics.
The PFN List Corrupt on Windows 11 error indicates that the operating system’s internal list, which maps physical memory pages to their virtual addresses, has become compromised. This corruption can stem from a multitude of sources, ranging from faulty hardware to incompatible software or even malicious infections. When this list is damaged, Windows loses its ability to properly manage system resources, leading to instability and eventual crashes.
Understanding the root cause and implementing the correct troubleshooting steps is crucial for resolving this persistent problem and restoring your system’s stability. This comprehensive guide will walk you through the technical intricacies of the PFN list, explore common culprits behind its corruption, and provide a detailed, step-by-step approach to diagnose and fix the “PFN List Corrupt” error on your Windows 11 machine. Our goal is to equip you with the knowledge and tools to confidently tackle this challenging issue.
Table of contents
Key Takeaways
- The “PFN List Corrupt” error signifies a critical issue with Windows 11’s memory management, often leading to a Blue Screen of Death (BSOD).
- Common causes include faulty device drivers, corrupted system files, issues with RAM, or malware infections.
- Initial troubleshooting should always begin with a simple restart and checking for pending Windows updates to rule out minor glitches.
- Tools like System File Checker (SFC) and Deployment Image Servicing and Management (DISM) are essential for repairing corrupted system files.
- Diagnosing and addressing memory (RAM) problems using built-in or third-party tools is a critical step in resolving this error.
- Performing a clean boot can help identify software conflicts, while a system restore or fresh installation serves as a last resort for persistent issues.
- Proactive measures, such as regular updates and system monitoring, are key to preventing future occurrences of the PFN List Corrupt on Windows 11 error.
Understanding the PFN List and Its Corruption
To effectively troubleshoot the “PFN List Corrupt” error, it’s essential to grasp what the PFN list is and why its integrity is so vital to your system’s operation. This foundational understanding will help you better interpret the symptoms and apply the appropriate fixes.
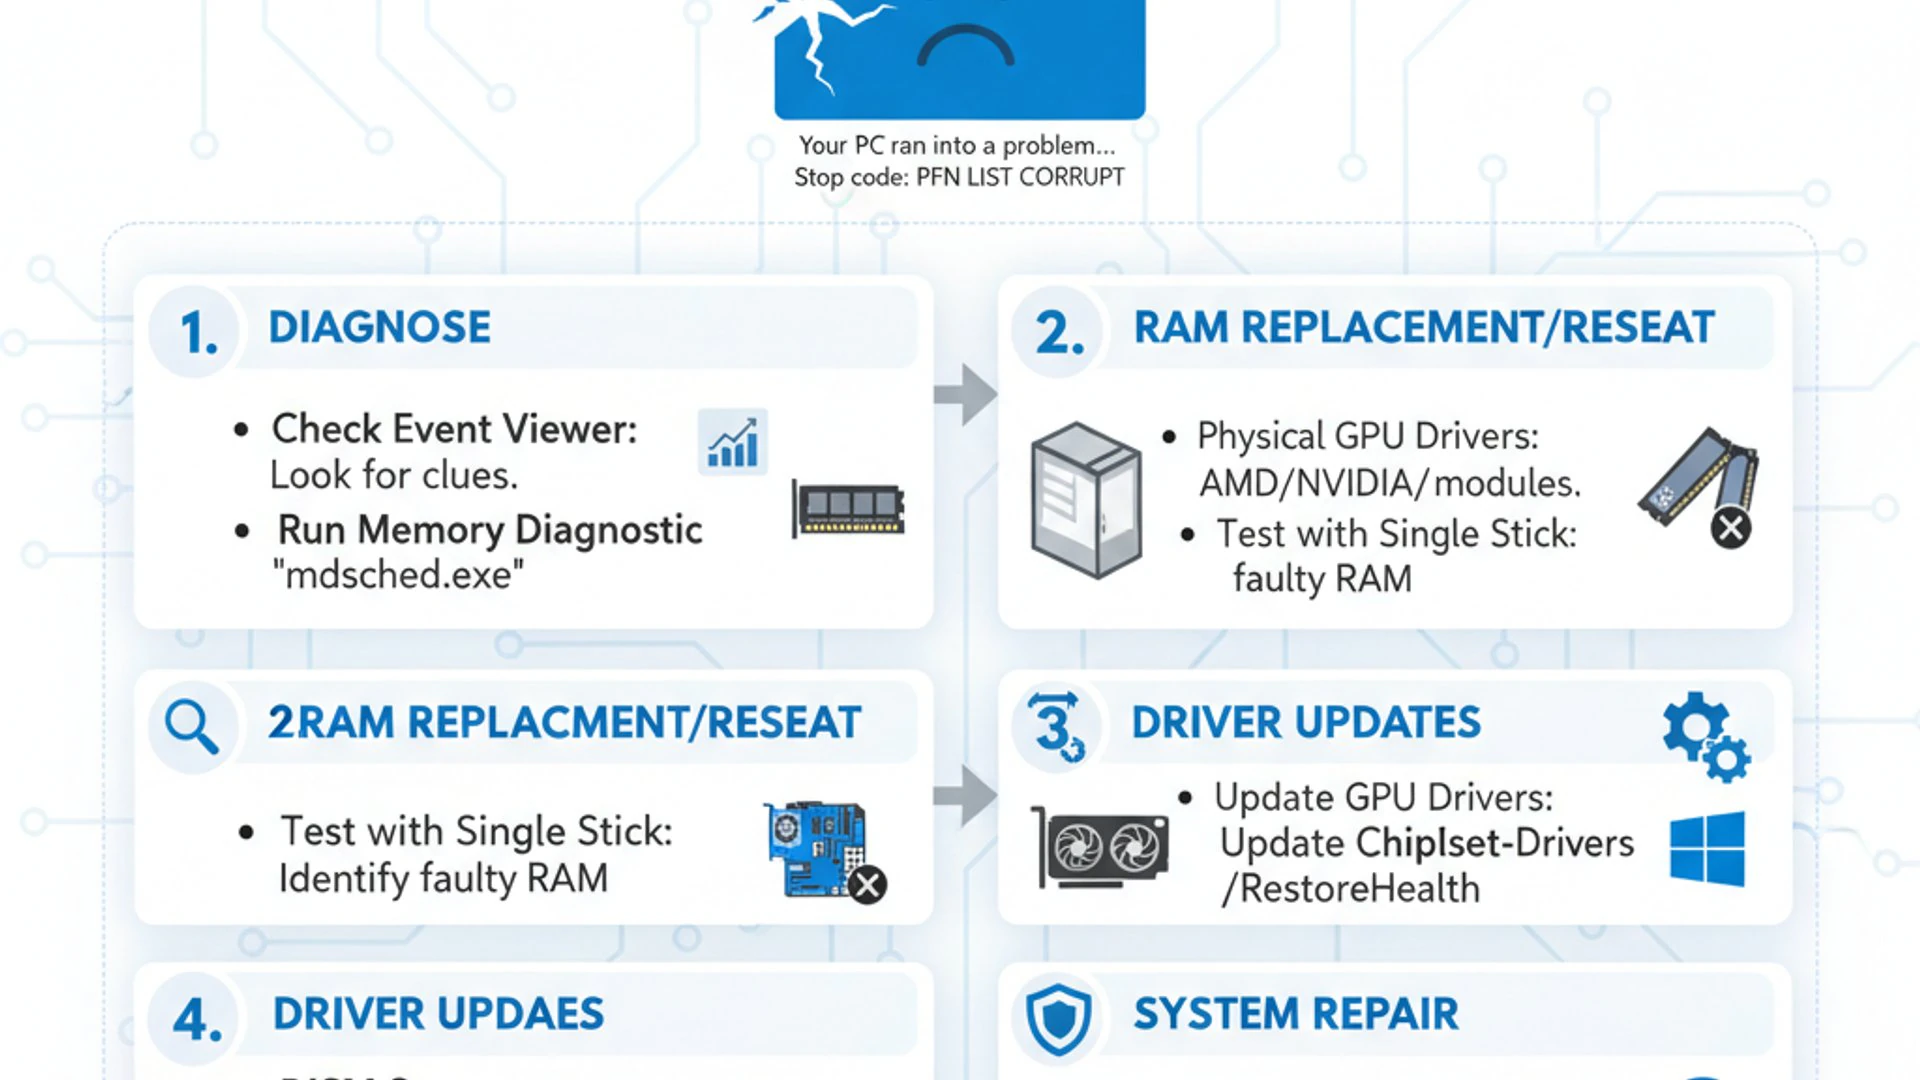
What is the PFN (Page Frame Number) List?
The Page Frame Number (PFN) list is a critical internal data structure maintained by the Windows operating system kernel. Its primary function is to keep track of every physical page of memory (RAM) available in your system. Think of it as a comprehensive directory that maps each physical memory page to its corresponding virtual memory address.
Whenever an application or the operating system itself needs to access data, it does so using virtual memory addresses. The PFN list acts as a translator, allowing the system to locate the actual physical location of that data in your RAM. This intricate mapping is fundamental for efficient memory management, enabling features like virtual memory, memory paging, and sharing memory between processes.
Without a coherent and accurate PFN list, Windows cannot reliably manage its memory resources. If this list becomes corrupted, the system loses its ability to correctly identify and access memory pages, leading to severe instability, data corruption, and ultimately, the dreaded PFN List Corrupt on Windows 11 blue screen error.
Common Causes of PFN List Corruption
The corruption of the PFN list can be triggered by various factors, often involving hardware malfunctions, software conflicts, or system file integrity issues. Pinpointing the exact cause can sometimes be challenging, but understanding the common culprits helps narrow down the troubleshooting process.
These issues can range from recently installed hardware or software to underlying problems that have been developing over time. Addressing these potential sources systematically is the most effective way to resolve the “PFN List Corrupt” error and restore your Windows 11 system to a stable state.
Driver Incompatibility or Corruption
One of the most frequent causes of the PFN List Corrupt on Windows 11 error is issues with device drivers. Drivers are essential software components that allow your operating system to communicate with your hardware. If a driver is outdated, corrupted, or incompatible with your Windows 11 version, it can mismanage memory, leading to PFN list corruption.
For instance, a faulty graphics card driver might incorrectly request or release memory pages, causing conflicts within the PFN list. Similarly, network adapter drivers, chipset drivers, or even drivers for peripherals can introduce instability. Recently updated drivers that are buggy or drivers for older hardware that lack proper Windows 11 support are particularly suspect.
Memory (RAM) Issues
Problems with your system’s Random Access Memory (RAM) are another significant contributor to the “PFN List Corrupt” error. If your RAM modules are physically faulty, improperly seated, or experiencing intermittent errors, they can return incorrect data or fail to store data reliably. This directly impacts the integrity of memory operations that the PFN list tracks.
Even minor errors in RAM can lead to inconsistencies in the PFN list, as the operating system relies on the physical memory to be perfectly functional. Overheating RAM, manufacturing defects, or even simple wear and tear can manifest as memory errors. These issues can be particularly difficult to diagnose without specialized tools, as they might not always cause immediate crashes but rather intermittent instability.
Initial Troubleshooting Steps Before Deeper Fixes
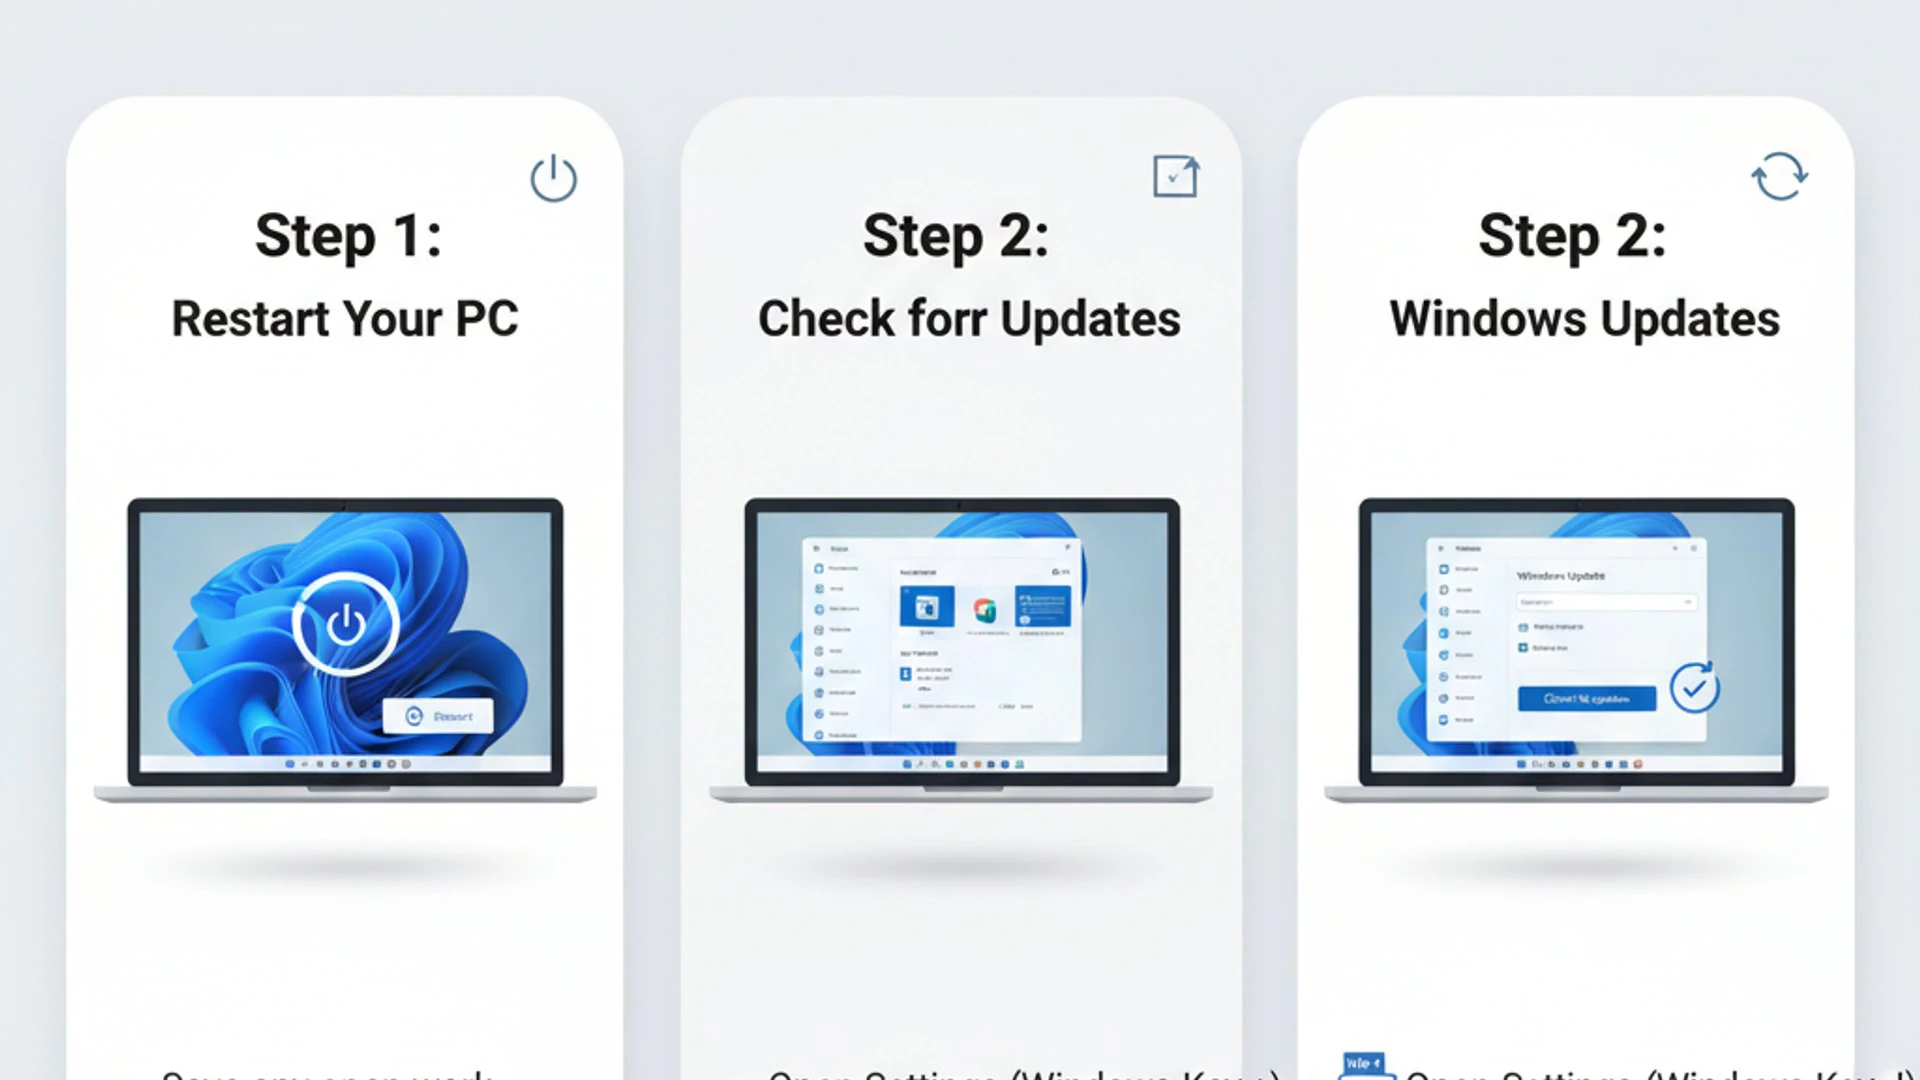
Before diving into more complex solutions, it’s always wise to start with a few simple, non-invasive troubleshooting steps. These can often resolve temporary glitches or address common issues that might be contributing to the PFN List Corrupt on Windows 11 error without requiring extensive technical knowledge.
These initial steps are quick to perform and can save you a lot of time and effort if the problem isn’t deeply rooted. Don’t underestimate the power of a fresh start or ensuring your system is up-to-date.
Restart Your Windows 11 PC
It might sound overly simplistic, but a good old-fashioned restart can often resolve a myriad of temporary system glitches, including those that might lead to a PFN List Corrupt error. A restart clears your system’s RAM, resets temporary processes, and reinitializes hardware components.
This can effectively clear any transient memory errors or software conflicts that have accumulated during an extended uptime. If the error was a one-off occurrence due to a minor software hiccup, a restart might be all that’s needed to restore stability. Always try this first before proceeding to more involved solutions.
Check for Windows Updates
Microsoft frequently releases updates for Windows 11 that include bug fixes, security patches, and performance improvements. An outdated operating system can sometimes harbor known issues that lead to errors like PFN List Corrupt on Windows 11. Ensuring your system is fully updated can resolve these underlying problems.
Updates often include revised drivers for core system components or patches that address memory management bugs. Therefore, checking for and installing any pending Windows updates is a crucial step. It ensures your system is running with the latest stable software environment designed to prevent such critical errors.
- Press Windows key + I to open Settings.
- Navigate to Windows Update in the left-hand pane.
- Click on the Check for updates button.
- If updates are available, download and install them, then restart your PC as prompted.
Method 1: Running System File Checker (SFC) and DISM
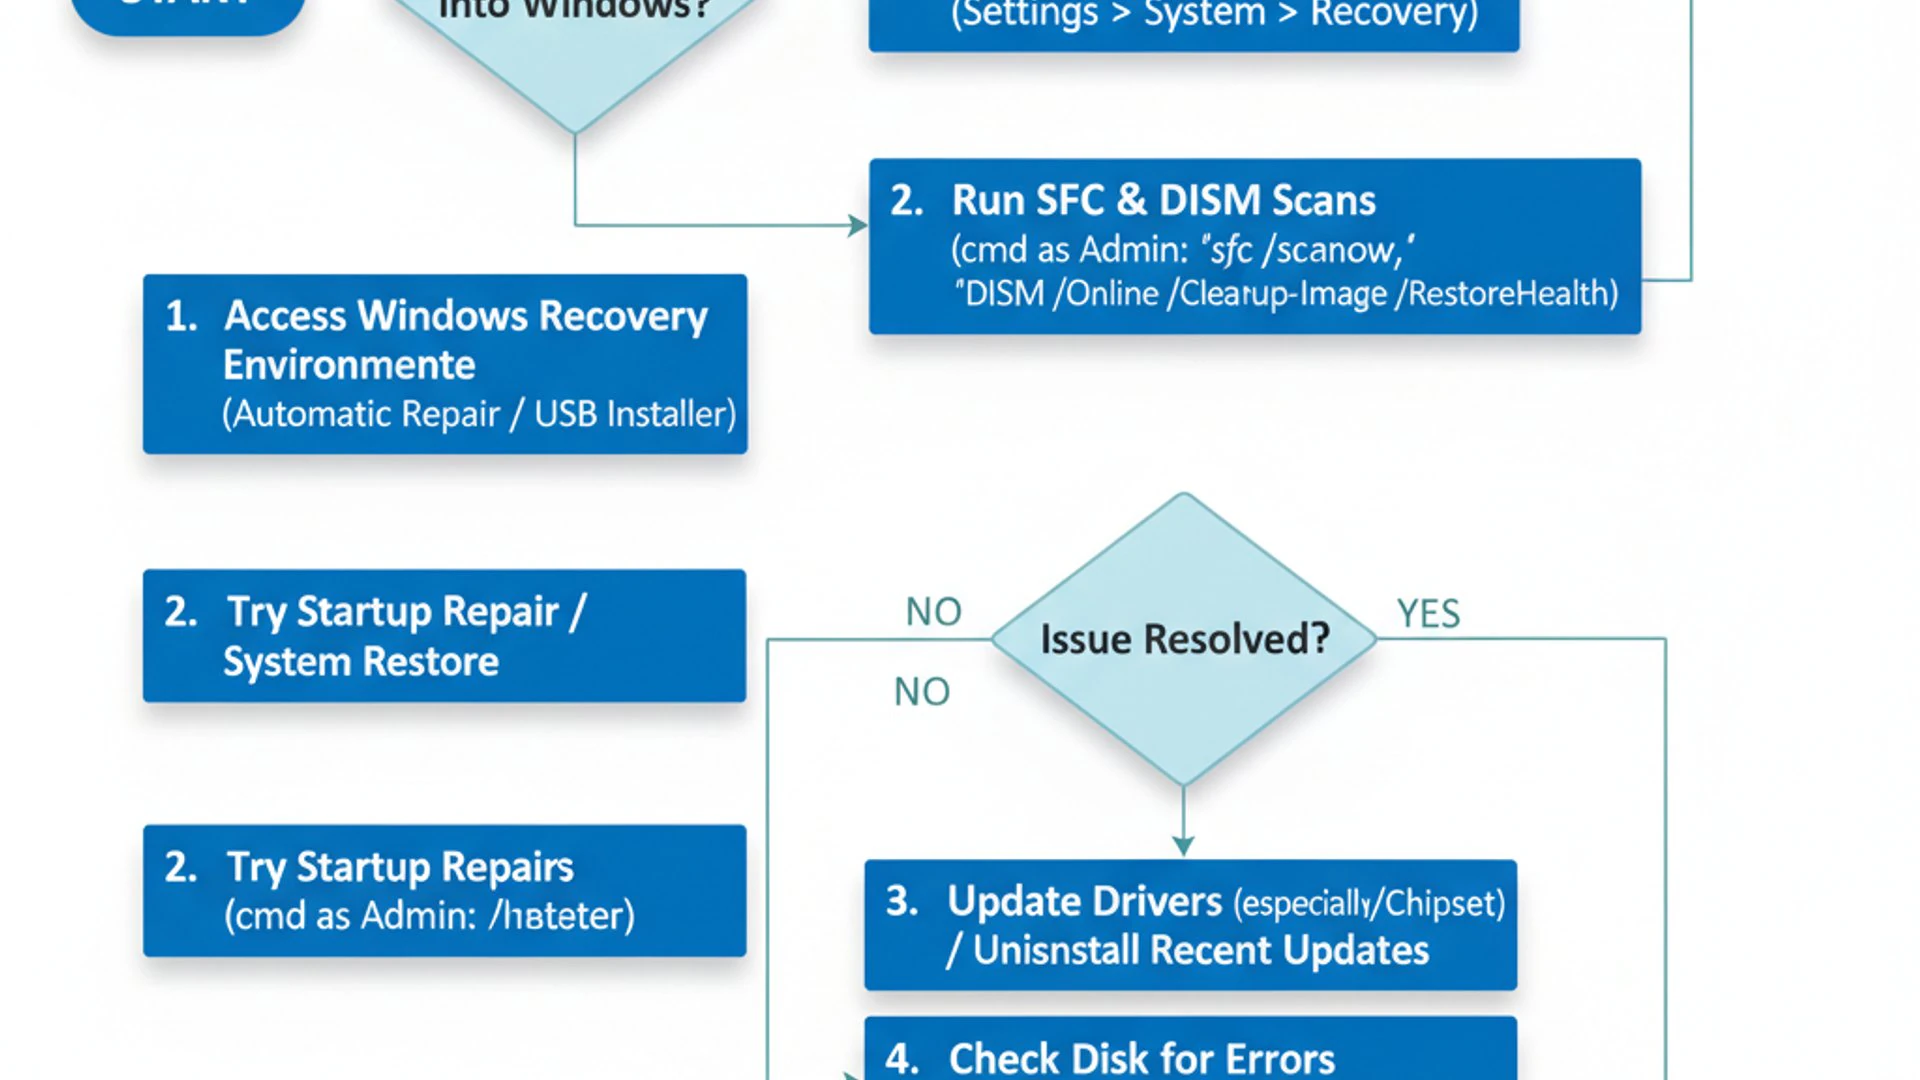
Corrupted system files are a common culprit behind various Windows errors, including the PFN List Corrupt on Windows 11 blue screen. Windows provides powerful built-in tools, the System File Checker (SFC) and Deployment Image Servicing and Management (DISM), specifically designed to scan for and repair these integrity issues.
These utilities work by comparing your current system files against known good versions, replacing any that are found to be damaged or missing. Running both SFC and DISM in conjunction provides a comprehensive approach to ensuring your operating system’s core files are intact and functioning correctly.
Utilizing the SFC Scan
The System File Checker (SFC) tool is designed to scan for and repair corrupted Windows system files. When you run an SFC scan, it checks the integrity of all protected operating system files and replaces incorrect, corrupted, changed, or damaged versions with the correct versions.
This process is vital because a single corrupted system file, especially one related to memory management, can trigger the PFN List Corrupt on Windows 11 error. Running SFC is a relatively quick and safe procedure that should be among your first lines of defense against system instability.
- Press Windows key + S, type “cmd”, right-click on Command Prompt, and select Run as administrator.
- In the Command Prompt window, type
sfc /scannowand press Enter. - Allow the scan to complete. This may take some time.
- Once finished, you will receive a message indicating whether any integrity violations were found and repaired.
- Restart your computer after the scan is complete, regardless of the outcome.
Deploying DISM Commands for System Health
While SFC focuses on repairing system files, the Deployment Image Servicing and Management (DISM) tool goes a step further. DISM is used to service a Windows image or prepare a Windows Preinstallation Environment (Windows PE) image. For troubleshooting, it can repair the underlying Windows image that SFC uses for its repairs.
If SFC fails to fix the issue or reports that it couldn’t perform the requested operation, DISM is often the next logical step. It can repair the component store, which is the source of the files SFC uses. A healthy component store ensures that SFC has access to uncorrupted files for its repair operations, making DISM a powerful precursor or companion to SFC.
- Open Command Prompt as administrator, just like for SFC.
- Execute the following commands one by one, pressing Enter after each:
DISM /Online /Cleanup-Image /CheckHealth(Checks for corruption)DISM /Online /Cleanup-Image /ScanHealth(Performs a more thorough scan for corruption)DISM /Online /Cleanup-Image /RestoreHealth(Repairs detected corruption using Windows Update as a source for files)
- Each command may take several minutes to complete.
- After all DISM commands have finished, run the
sfc /scannowcommand again to ensure all system files are now correctly repaired. - Finally, restart your Windows 11 PC.
Important Tip: Always run DISM’s RestoreHealth command before SFC if you suspect deep-seated corruption, as DISM can fix the source files SFC relies upon.
Method 2: Updating or Reinstalling Device Drivers
As previously mentioned, faulty or outdated device drivers are a primary cause of the PFN List Corrupt on Windows 11 error. Drivers are the crucial interface between your hardware and the operating system. When this interface is compromised, it can lead to memory management errors and system instability.
Addressing driver issues involves a systematic approach: identifying potentially problematic drivers, attempting to update them to the latest compatible versions, or, if necessary, rolling back to a previous stable version or completely reinstalling them. This section will guide you through these essential steps to ensure your hardware communicates flawlessly with Windows 11.
Identifying Problematic Drivers
Pinpointing the specific driver causing the PFN List Corrupt on Windows 11 error can be challenging, but there are several clues. Often, the error occurs after installing new hardware, updating a driver, or installing a major Windows update. The Event Viewer can provide valuable insights.
Look for critical errors or warnings around the time the BSOD occurred. Additionally, if the error happens consistently when using a particular peripheral (e.g., a printer, external drive) or during a specific activity (e.g., gaming, video editing), the driver for that component or related hardware (like a graphics card) is a strong suspect.
Updating Drivers via Device Manager
The Device Manager is your primary tool for managing drivers in Windows 11. It allows you to check the status of your devices, update drivers, roll back drivers, or uninstall them. Regularly updating drivers, especially for critical components like graphics cards, network adapters, and chipsets, is a good preventative measure.
However, sometimes the latest driver from Windows Update might not be the most stable or compatible. In such cases, visiting the manufacturer’s website (e.g., NVIDIA, AMD, Intel, Realtek) for your specific hardware model is often the best approach to find the most up-to-date and reliable drivers.
- Press Windows key + X and select Device Manager.
- Expand categories like “Display adapters,” “Network adapters,” or “Sound, video and game controllers.”
- Right-click on a device and select Update driver.
- Choose Search automatically for drivers. If Windows finds a newer driver, it will install it.
- If Windows doesn’t find one, visit the hardware manufacturer’s website to download the latest driver for your specific model and Windows 11.
- Install the downloaded driver, following the manufacturer’s instructions.
- Repeat this process for any other potentially problematic drivers.
Reinstalling Drivers
If updating doesn’t resolve the issue, or if you suspect a driver is deeply corrupted, a complete reinstallation might be necessary. This involves uninstalling the current driver and then installing a fresh copy, either from Windows Update or the manufacturer’s website. This process ensures that no remnants of the old, corrupted driver interfere with the new installation.
Sometimes, rolling back to a previous driver version can also be effective if the error started after a recent driver update. Device Manager offers this option, allowing you to revert to the driver that was installed before the most recent update, potentially restoring system stability.
- Open Device Manager.
- Right-click on the problematic device and select Uninstall device.
- Check the box that says Attempt to remove the driver for this device if available, then click Uninstall.
- Restart your PC. Windows will often reinstall a generic driver automatically.
- After restarting, either let Windows Update find a suitable driver or manually install the latest driver downloaded from the manufacturer’s website.
- If you suspect a recent update caused the issue, right-click the device, select Properties, go to the Driver tab, and click Roll Back Driver if the option is available.
Method 3: Checking for Memory (RAM) Issues
Faulty RAM is a very common and often overlooked cause of the PFN List Corrupt on Windows 11 error. Because the PFN list directly manages physical memory pages, any instability or error within the RAM modules themselves can lead to corruption of this critical system structure. Diagnosing RAM issues is paramount to resolving persistent BSODs.
Windows 11 includes a built-in diagnostic tool that can perform basic checks, but for more thorough analysis, third-party utilities are often recommended. It’s important to test your RAM rigorously to rule it out as the source of your problems.
Using Windows Memory Diagnostic Tool
Windows 11 comes with a built-in utility called Windows Memory Diagnostic, which can perform a basic check of your system’s RAM for errors. While not as comprehensive as some third-party tools, it’s a good starting point and can often identify significant memory problems that contribute to the PFN List Corrupt on Windows 11 error.
This tool requires a restart to run its tests, as it needs exclusive access to the memory. It will run before Windows fully loads, performing a series of tests to detect inconsistencies or failures in your RAM modules. If errors are found, it’s a strong indication that your RAM might be the culprit.
- Press Windows key + R, type
mdsched.exe, and press Enter. - You will be prompted to choose between two options: Restart now and check for problems (recommended) or Check for problems the next time I start my computer. Choose the recommended option.
- Your computer will restart and run the memory diagnostic tool. This process can take several minutes.
- Once complete, your PC will restart again. The results of the diagnostic will usually appear in a notification after you log back into Windows. If not, you can find them in the Event Viewer under Windows Logs > System, looking for “MemoryDiagnostic” entries.
Advanced Memory Testing with MemTest86
For a more thorough and in-depth analysis of your RAM, MemTest86 is widely considered the gold standard. Unlike the Windows Memory Diagnostic, MemTest86 runs independently of the operating system, booting directly from a USB drive or CD. This allows it to perform more rigorous and extensive tests on your RAM without any interference from Windows.
MemTest86 can detect even subtle memory errors that the built-in tool might miss. Running it for several passes (ideally overnight) is recommended for comprehensive testing. If MemTest86 reports errors, it’s a definitive sign of faulty RAM, and replacement of the affected module(s) will likely be necessary to fix the PFN List Corrupt on Windows 11 problem.
- Download the free version of MemTest86 from its official website (www.memtest86.com).
- Create a bootable USB drive using the provided instructions (usually involves an image writer like Rufus).
- Restart your computer and boot from the USB drive (you might need to adjust your BIOS/UEFI settings to change the boot order).
- MemTest86 will automatically start testing your RAM. Allow it to run for at least 4-8 passes, or even overnight, for a thorough check.
- If any errors are detected, they will be displayed on the screen. Note the error codes and locations.
- If errors are found, consider removing and reseating your RAM modules. If errors persist, one or more RAM sticks are likely faulty and need to be replaced.
Method 4: Scanning for Malware and Viruses
Malicious software, including viruses, spyware, and rootkits, can severely compromise your system’s stability and integrity. Some advanced forms of malware can interfere with core operating system functions, including memory management, potentially leading to the PFN List Corrupt on Windows 11 error. They might corrupt system files, inject malicious code into legitimate processes, or consume excessive resources, all of which can destabilize the PFN list.
Therefore, performing a comprehensive scan for malware is a crucial troubleshooting step. Even if you have an antivirus program installed, it’s worth running a full system scan, and potentially a second opinion scan with a different tool, to ensure no hidden threats are lurking.
Performing a Full System Scan with Windows Security
Windows 11 comes with a robust built-in antivirus solution called Windows Security (formerly Windows Defender). It provides real-time protection and can perform various types of scans to detect and remove malware. A full system scan is recommended to thoroughly check all files and running processes for any malicious activity that might be causing the PFN List Corrupt on Windows 11 error.
Ensure that Windows Security is up-to-date before running the scan, as new malware definitions are released frequently. This will give you the best chance of detecting the latest threats. Even if you use a third-party antivirus, it’s good practice to occasionally run a Windows Security scan as a secondary check.
- Press Windows key + I to open Settings.
- Go to Privacy & security > Windows Security.
- Click on Open Windows Security.
- Select Virus & threat protection.
- Under “Virus & threat protection settings,” click on Scan options.
- Choose Full scan and then click Scan now.
- Allow the scan to complete. This can take a significant amount of time.
- Follow any prompts to remove or quarantine detected threats.
- Restart your PC after the scan and cleanup.
Considering Third-Party Antivirus Solutions
While Windows Security offers excellent protection, sometimes a second opinion from a reputable third-party antivirus or anti-malware tool can be beneficial. Different security products use different detection engines and databases, meaning one might catch something another missed. This is particularly true for deeply embedded or sophisticated malware that might be causing the PFN List Corrupt on Windows 11 issue.
Tools like Malwarebytes, Bitdefender, or Kaspersky are highly regarded for their detection capabilities. If Windows Security doesn’t find anything, but the PFN List Corrupt error persists, running a scan with one of these tools (preferably their free trial or free version for a one-time scan) can provide an additional layer of assurance.
- Download and install a reputable third-party anti-malware tool (e.g., Malwarebytes Free).
- Ensure the software is fully updated with the latest definitions.
- Perform a full system scan using the third-party tool.
- Review the scan results and remove or quarantine any detected threats.
- It’s often recommended to uninstall the third-party tool after the scan if you prefer to stick with Windows Security, to avoid potential conflicts or performance issues.
- Restart your computer.
Method 5: Performing a Clean Boot
Software conflicts are another common source of system instability, including the PFN List Corrupt on Windows 11 error. A newly installed application, a background service, or even an existing program that has become corrupted can interfere with Windows’ core functions, leading to memory management issues. Identifying the specific conflicting software can be like finding a needle in a haystack, but a “clean boot” can significantly simplify this process.
A clean boot starts Windows with a minimal set of drivers and startup programs. By systematically re-enabling services and startup items, you can isolate the problematic application or service that is causing the PFN List Corrupt error. This method requires patience but is highly effective for diagnosing software-related conflicts.
How to Configure a Clean Boot Environment
Configuring a clean boot involves disabling all non-Microsoft services and startup items. This ensures that only essential Windows processes are running when your system starts. If the PFN List Corrupt on Windows 11 error does not occur in a clean boot environment, it strongly suggests that one of the disabled items is the cause.
The process is managed through the System Configuration utility and Task Manager. Remember to document any changes you make so you can easily revert them or re-enable items one by one during the isolation process.
- Press Windows key + R, type
msconfig, and press Enter to open System Configuration. - Go to the Services tab.
- Check the box for Hide all Microsoft services. This is crucial to avoid disabling essential Windows functions.
- Click Disable all, then click Apply.
- Go to the Startup tab and click Open Task Manager.
- In Task Manager, go to the Startup tab. Disable each startup item by right-clicking on it and selecting Disable.
- Close Task Manager, then click OK in the System Configuration window.
- You will be prompted to restart your computer. Click Restart.
Identifying Conflicting Software or Services
Once your computer restarts in a clean boot state, use it normally for a period to see if the PFN List Corrupt on Windows 11 error reappears. If the error does not occur, you can be confident that a third-party application or service is the culprit.
The next step is to systematically re-enable services and startup items to pinpoint the exact cause. This is a process of elimination:
- Restart your computer in clean boot mode.
- Open System Configuration (
msconfig) again. - Go to the Services tab (with “Hide all Microsoft services” still checked).
- Enable roughly half of the disabled services, then click Apply and restart.
- If the error reappears, the problematic service is among the ones you just enabled. If not, it’s among the remaining disabled services.
- Continue this binary search method, enabling smaller groups of services or individual services, and restarting each time, until you identify the specific service causing the error.
- Repeat a similar process for the startup items in Task Manager.
- Once identified, you can choose to uninstall the problematic software, look for an update, or keep it disabled if it’s not critical.
- After troubleshooting, remember to revert your system to a normal startup by going back to
msconfig, selecting Normal startup on the General tab, and re-enabling all services/startup items.
Method 6: System Restore or Reinstallation
When all other troubleshooting methods fail to resolve the persistent PFN List Corrupt on Windows 11 error, more drastic measures may be necessary. These options involve reverting your system to a previous stable state or, as a last resort, performing a complete reinstallation of Windows 11. While these steps are more time-consuming and can potentially lead to data loss if not handled carefully, they often provide a definitive solution when software corruption is deeply entrenched.
Before proceeding with either of these methods, it is absolutely critical to back up all your important data. This ensures that even if something goes wrong, your personal files remain safe and recoverable.
Restoring Your System to a Previous Point
System Restore is a Windows feature that allows you to revert your computer’s system files, installed applications, Windows Registry, and system settings to an earlier point in time, known as a restore point. This can be incredibly useful if the PFN List Corrupt on Windows 11 error began occurring after a specific software installation, driver update, or system change.
System Restore does not affect your personal files, such as documents, emails, or photos, but it will uninstall any programs or drivers installed after the chosen restore point. It’s a powerful tool for undoing system-level changes that might have introduced instability.
- Press Windows key + R, type
rstrui.exe, and press Enter. This opens the System Restore wizard. - Click Next.
- You will see a list of available restore points. Choose a restore point created before you started experiencing the “PFN List Corrupt” error. If you don’t see any, check the box for Show more restore points.
- Click Next, then Finish to confirm your choice.
- Your computer will restart and begin the restoration process. Do not interrupt this process.
- Once complete, Windows will boot up, and you’ll receive a notification about the success or failure of the restore.
For more comprehensive backup strategies, consider exploring options like System Image Backup on Windows 11: Comprehensive Guide, which can save your entire system state.
Considering a Fresh Windows 11 Installation
If all other troubleshooting steps, including System Restore, fail to resolve the PFN List Corrupt on Windows 11 error, a clean installation of Windows 11 might be the only remaining solution. This is a drastic step as it will erase everything on your primary drive, including all your personal files, installed programs, and settings.
However, a fresh installation guarantees a completely clean slate, free from any lingering software conflicts, deeply embedded malware, or corrupted system files that might be causing the error. It’s the ultimate reset and often the most effective way to eliminate persistent, unresolvable system issues.
- Back up all your important data to an external drive or cloud storage. This is non-negotiable.
- Create a Windows 11 installation media (USB drive or DVD) using the Media Creation Tool from Microsoft’s website.
- Boot your computer from the installation media (you may need to adjust BIOS/UEFI settings).
- Follow the on-screen prompts to install Windows 11. When given the option, choose Custom: Install Windows only (advanced).
- Delete all existing partitions on your primary drive (the one where Windows was installed) and then select the unallocated space to install Windows.
- Complete the installation process, set up your user account, and then reinstall your necessary applications and restore your backed-up data.
Preventing Future PFN List Corrupt Errors
Resolving the PFN List Corrupt on Windows 11 error is a significant achievement, but the best approach is to prevent it from happening again. Proactive system maintenance and adherence to best practices can significantly reduce the likelihood of encountering this, or many other, critical system errors. A stable and healthy Windows 11 environment requires ongoing attention and care.
By implementing a routine of regular updates, careful driver management, and system monitoring, you can create a resilient computing experience. These preventative measures are not just about avoiding BSODs but also about ensuring optimal performance and longevity for your Windows 11 PC.
Best Practices for System Maintenance
Maintaining your Windows 11 system involves several key practices that contribute to overall stability and prevent issues like PFN list corruption. These habits help keep your operating system and hardware in sync and free from common problems.
Regular maintenance ensures that your system files remain intact, drivers are up-to-date, and potential conflicts are addressed before they escalate into critical errors. It’s an investment in your computer’s long-term health and reliability.
- Keep Windows Updated: Regularly check for and install Windows Updates. These often include critical bug fixes, security patches, and driver updates that improve system stability.
- Update Drivers Prudently: While keeping drivers updated is important, always download them from official manufacturer websites. Avoid generic driver update utilities that can sometimes install incompatible or buggy drivers.
- Install Software Carefully: Be cautious about what software you install, especially from unknown sources. Always download applications from official websites or the Microsoft Store.
- Regular Malware Scans: Schedule regular full system scans with Windows Security or your preferred antivirus software to catch and eliminate threats before they can cause damage.
- Manage Startup Programs: Use Task Manager to disable unnecessary startup programs. Too many programs launching at boot can consume resources and potentially lead to conflicts.
- Keep Your System Cool: Ensure your PC has adequate ventilation and that fans are clean. Overheating components, especially RAM, can lead to instability and errors.
Monitoring System Health
Proactive monitoring of your system’s health can help you detect potential issues before they manifest as a PFN List Corrupt on Windows 11 error. Windows 11 provides several tools that allow you to keep an eye on performance and error logs, offering early warning signs.
Regularly reviewing these logs and performance metrics can provide insights into recurring problems, resource bottlenecks, or hardware degradation. This allows you to take corrective action before a minor issue becomes a major system crash.
- Event Viewer: Periodically check the Event Viewer (Windows Logs > System and Application) for recurring errors or warnings. Look for entries related to memory, drivers, or critical system failures.
- Reliability Monitor: This tool provides a graphical history of your system’s stability. Access it by searching for “Reliability Monitor” in the Start menu. It can highlight patterns of crashes or software failures.
- Task Manager: Use Task Manager to monitor CPU, RAM, disk, and network usage. High or unusual resource consumption by specific processes can indicate a problem.
- Disk Health: Regularly check the health of your hard drives using tools like
chkdskor third-party utilities. Bad sectors can lead to file corruption. - Backup Your Data: Implement a regular backup strategy for your important files. While not a preventative measure for the error itself, it’s the ultimate safeguard against data loss if the error leads to an unrecoverable state. Consider using System Image Backup on Windows 11 for full system protection.
Conclusion
The “PFN List Corrupt” error on Windows 11 is undoubtedly one of the more frustrating Blue Screen of Death messages, signaling a fundamental breakdown in your system’s memory management. However, as this comprehensive guide has demonstrated, it is far from an insurmountable problem. By understanding the underlying mechanisms of the PFN list and systematically applying the detailed troubleshooting steps, you can effectively diagnose and resolve this critical issue.
From initial checks like restarting and updating Windows, to more in-depth solutions involving SFC/DISM scans, driver management, and rigorous memory testing, each method plays a crucial role in restoring your system’s stability. Identifying and eliminating malware, isolating software conflicts through a clean boot, and utilizing System Restore or even a fresh installation are powerful tools in your arsenal when faced with persistent corruption.
Ultimately, preventing future occurrences of the PFN List Corrupt on Windows 11 error hinges on adopting best practices for system maintenance and proactive monitoring. Keeping your operating system and drivers updated, scanning for malware, and regularly checking system health are not just reactive fixes but essential components of a robust and reliable Windows 11 experience. By following these guidelines, you can ensure your PC remains stable, secure, and free from the disruption of critical system errors.
For more interesting articles, stay tuned to Winsides.com!









Community
Comments (0)