Enable SMB 1.0/CIFS File Sharing Support in Windows 11
Support for the SMB 1.0/CIFS file sharing Protocol, and the Computer Browser Protocol
Enable SMB 1.0/CIFS File Sharing Support in Windows 11: It refers to the ability of the operating system to interact with network shares using the SMB 1.0 protocol. SMB(Server Message Block) is a network file-sharing protocol that allows computers to communicate and share files, printers, and other resources over a network. SMB 1.0/CIFS is an older version of the SMB protocol(Learn How to Enable SMB 1.0/CIFS Automatic Removal), and in Windows 11, it provides compatibility with legacy devices and systems that may still rely on this protocol for file sharing. This includes devices such as older NAS (Network-Attached Storage) devices, printers, and some older operating systems. Check out: How to Enable SMB 1 / CIFS Protocol using Command Prompt & Windows PowerShell
Related: Smb 1.0 / Cifs File Sharing Support Using Command Prompt & Windows Powershell
Key Steps:
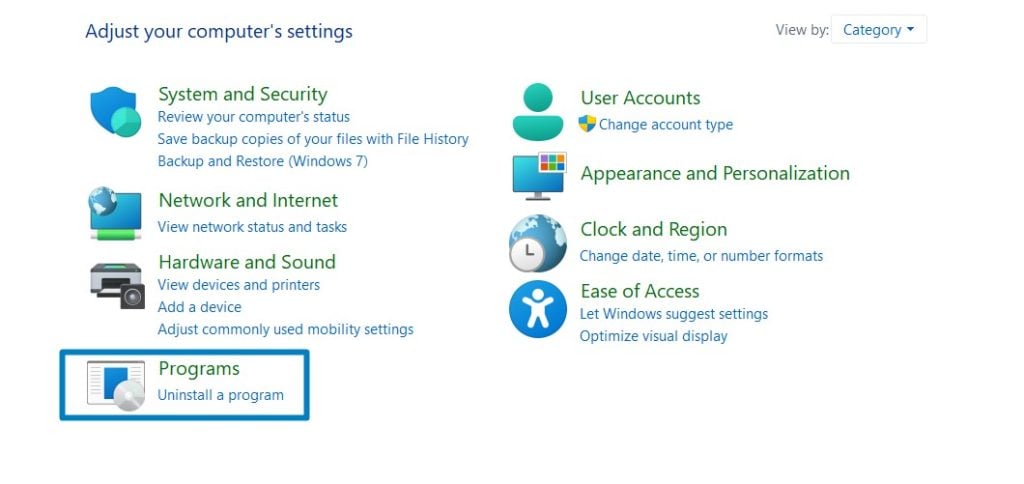
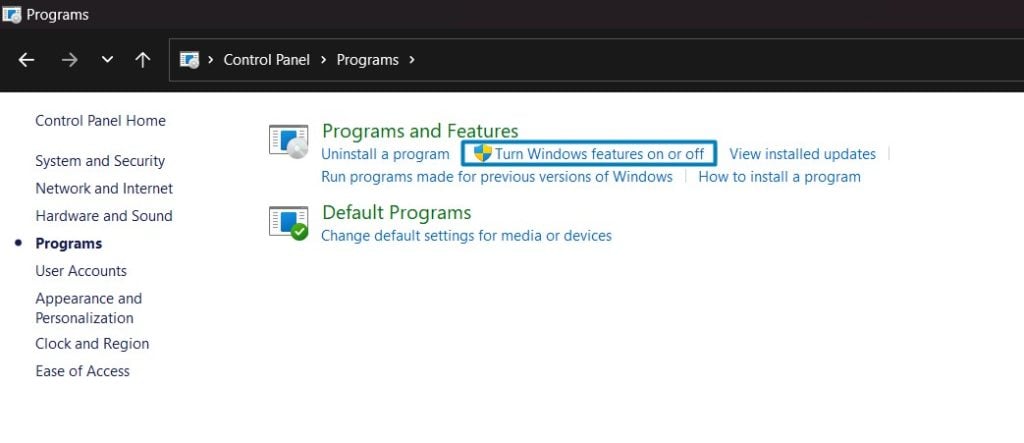
- Go to Windows Features via Control panel.
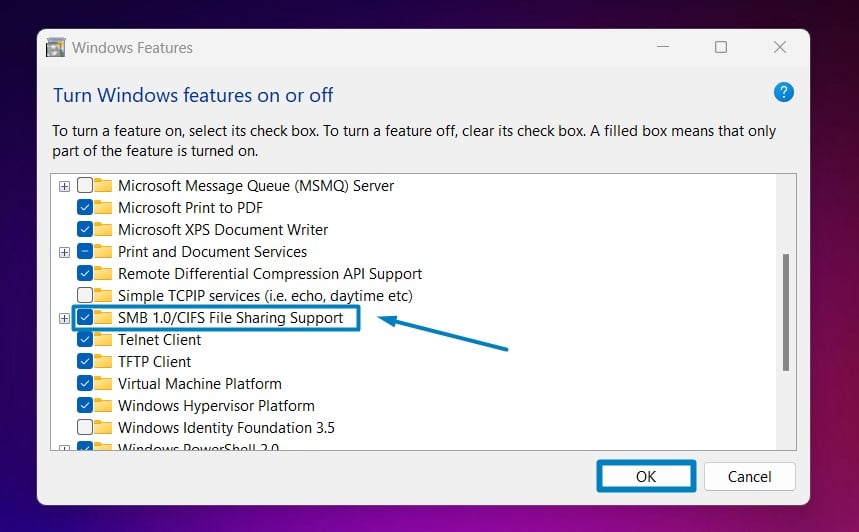
- Locate SMB 1.0/CIFS File Sharing Support and Enable it.
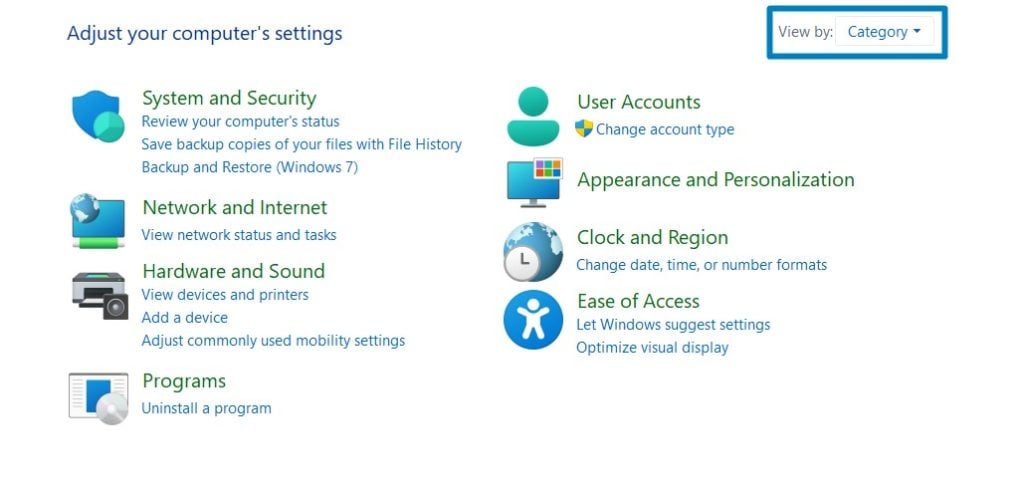
- Click on the Start Menu and open the Control Panel.
- Switch the Control Panel view to Category.
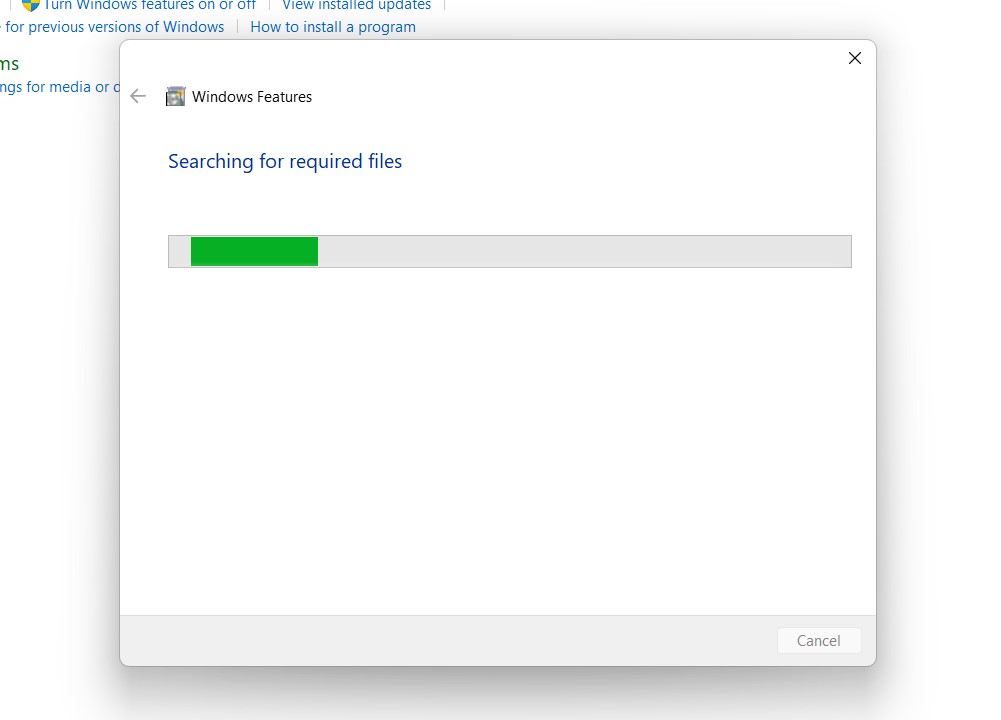
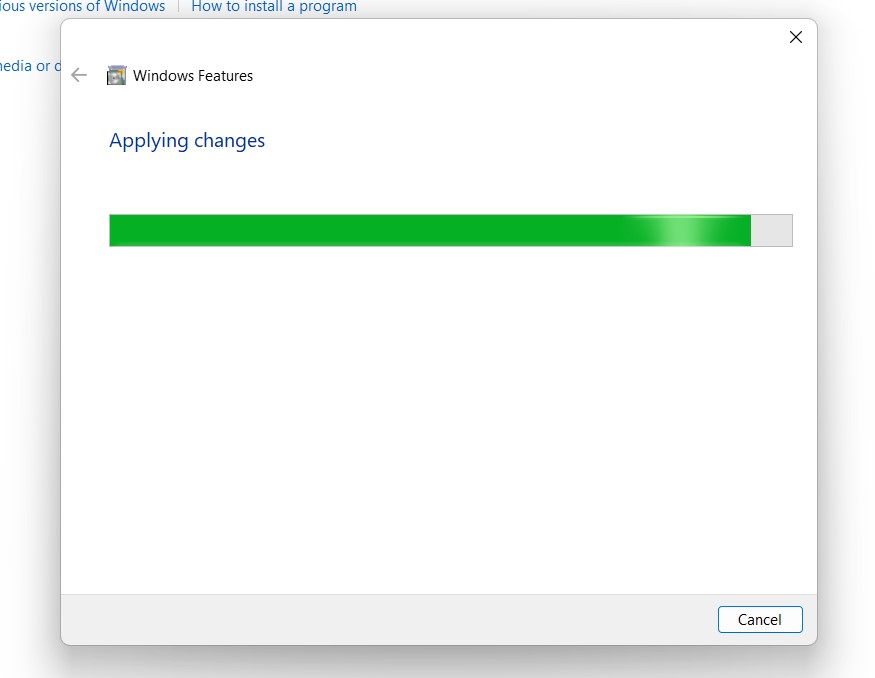
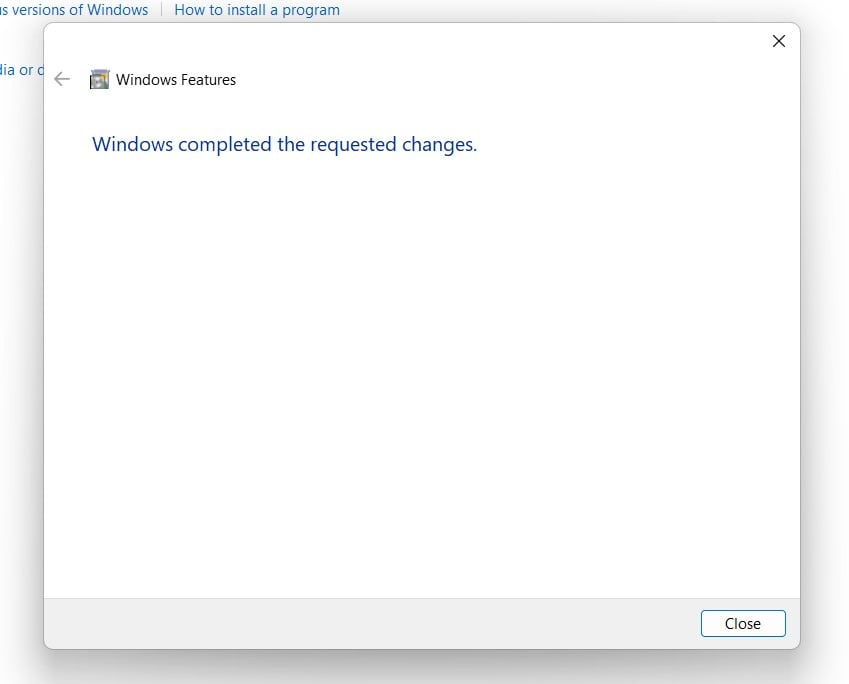
How to Disable SMB 1.0/CIFS File Sharing Support in Windows 11?
SMB 1.0/CIFS is an older protocol that lacks many of the security features present in newer versions like SMB 2.0 and SMB 3.0. It’s more susceptible to security vulnerabilities and exploits, making it a potential target for cyberattacks and it can be exploited by ransomware and other malware to spread across networks. Many cybersecurity experts and organizations recommend disabling SMB 1.0/CIFS File Sharing Support if not required for specific compatibility reasons. It aligns with best practices for securing networked environments and reduces the likelihood of security incidents related to outdated protocols. The following are the steps to do so.
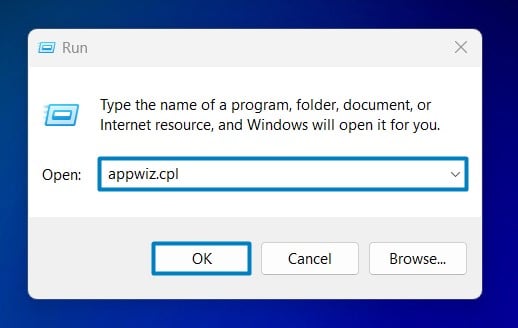
- Open Windows Features directly by running the command
appwiz.cplin the Run command box.
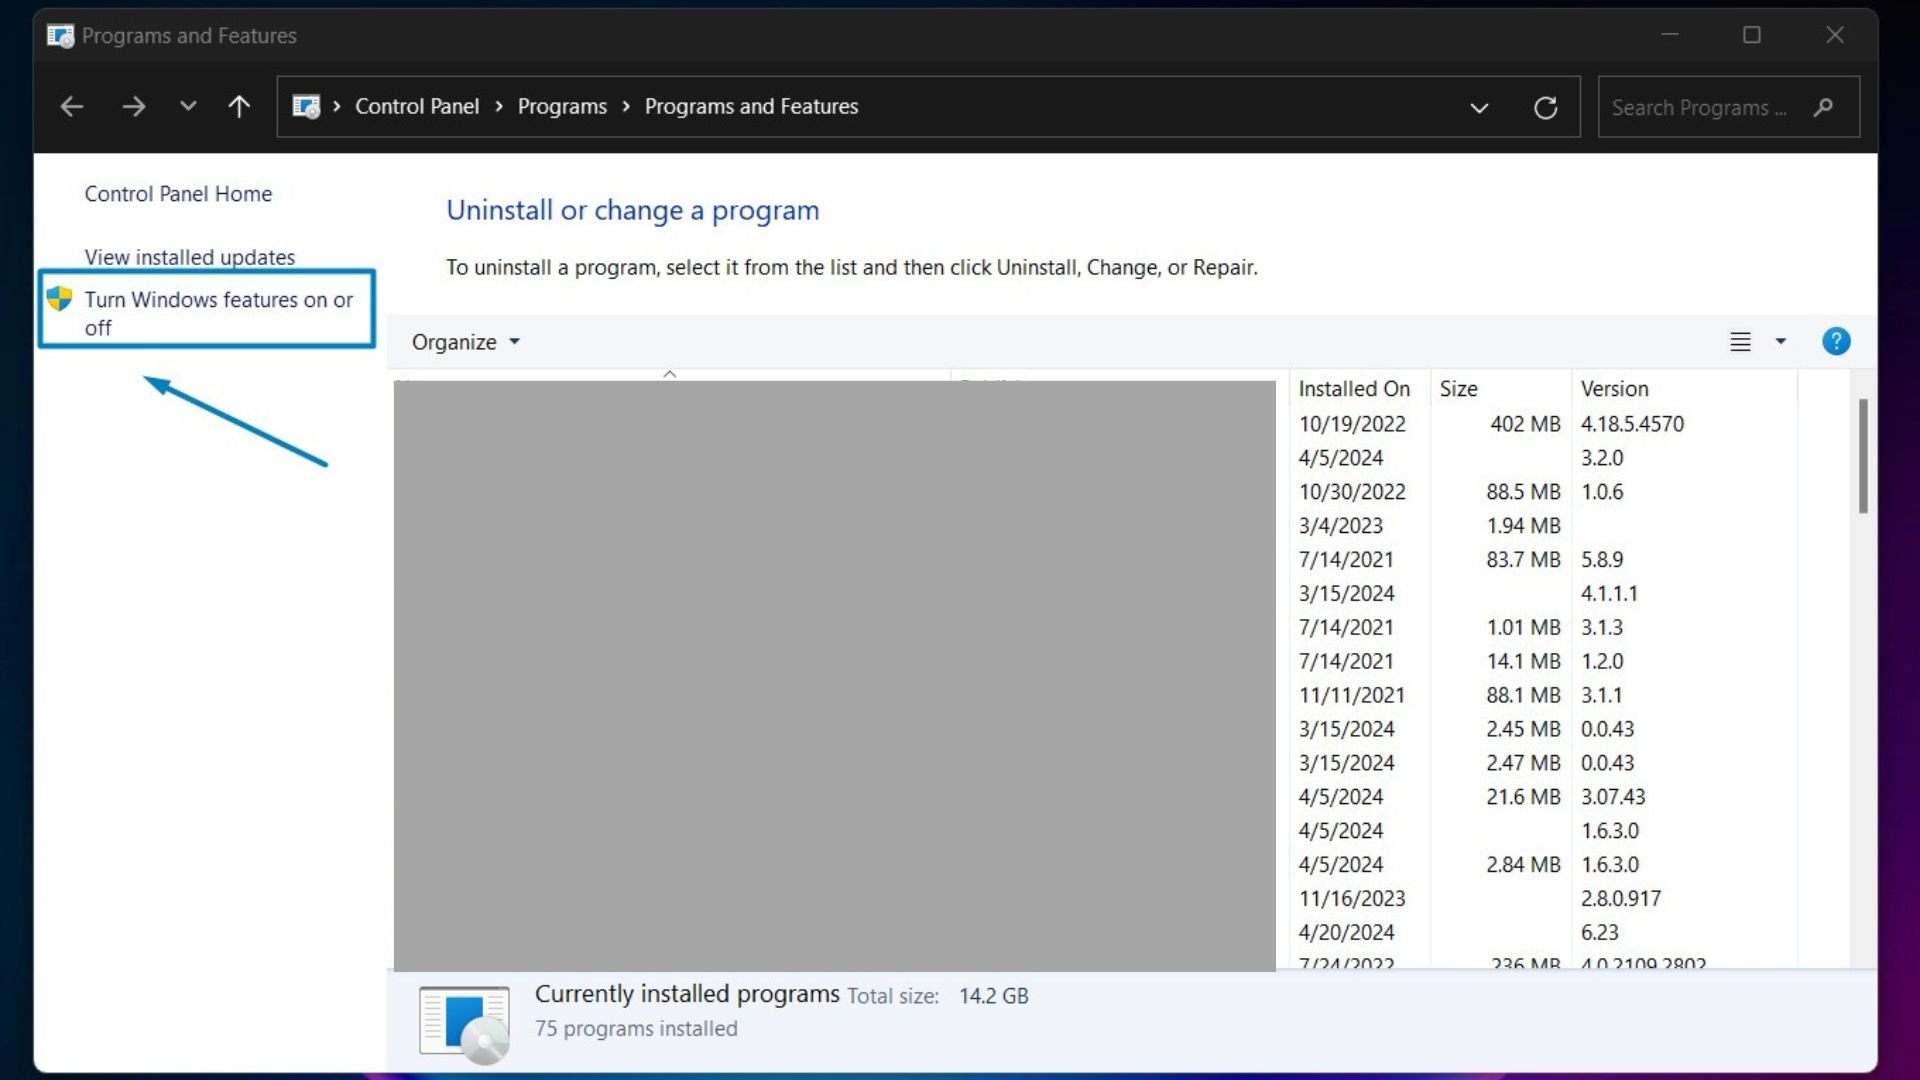
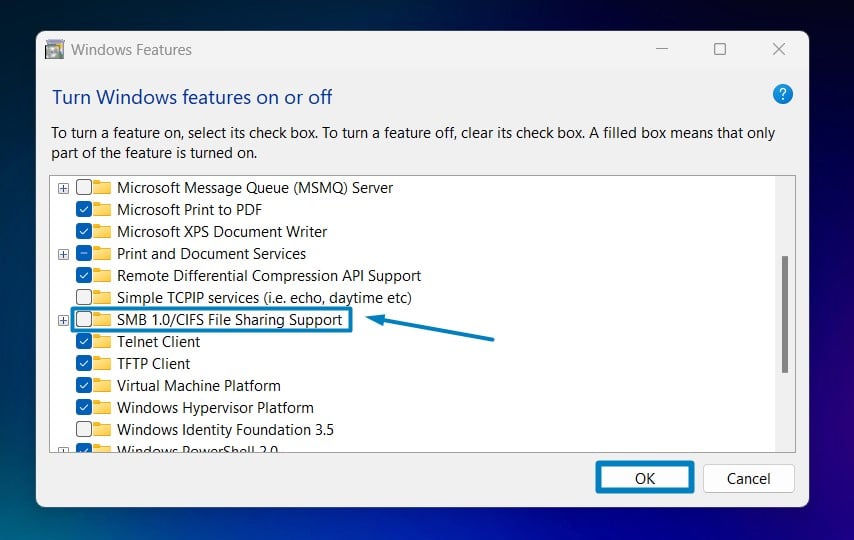
Older protocols like SMB 1.0/CIFS may become deprecated or unsupported by software vendors and hardware manufacturers as technology evolves. Disabling this feature helps future-proof your network infrastructure and encourages the adoption of modern, secure protocols.
YT Shorts Video Tutorial:
Take away:
The inclusion of SMB 1.0/CIFS support in Windows 11 ensures backward compatibility with older network infrastructure and devices that may not support newer versions of the SMB protocol. It allows Windows 11 systems to communicate and share files with these legacy devices seamlessly. Happy Coding! Peace out!
Read This: Enable Smb 1.0/cifs Automatic Removal In Windows 11
Related Articles:
- How to Check PC Specs without Logging into Windows 11?
- Microsoft’s Majorana 1 Chip – The Future of Quantum Computing?
- How to Change Font Size on Windows 11?
We combine expert insights with user-friendly guidance. We thoroughly research and test everything to give you reliable and simple to understand tech guides. Please take a look at our publishing process to understand why you can trust Winsides.


Hi Vigneshwaran,
My problem is quite similar but with Windows 10. I hope this is not an issue posting my question in a windows 11 tutorial.
I’m experimenting with Rasberry Pi5 and OpenMediaVault, I’ve set up a NAS with 4 X 4TB SSD drives. The SSD drives are combined in one (snapraid) pool. I have multiple laptops and desktops all on the Windows 10 operating system. The machines running Windows 10 full version have no problem accessing the network drive. But on the machines running Windows 10 Tiny 21H2 the network drive is visible but access is denied. All the machines are visible to each other and can access each other’s drive. On the machines running on Windows 10 Tiny I’m logged in with a local account, not with my Microsoft account.
Logging in with my Microsoft account instead of my local account didn’t make any difference.
I hope you can solve my problem,
Kind regards,
Erdinç
Hi Mr. Erdinc Hocalar,
Thank you for reaching out! It’s absolutely okay to share your issue related to Windows 10 here, and we truly appreciate you taking the time to explain your situation. We’re here to help with all Windows-related concerns, whether it’s Windows 10 or Windows 11, so you’re in the right place!
We understand that you’re experiencing an issue where your NAS setup is accessible on full Windows 10 devices but not on those running Windows 10 Tiny 21H2, despite the network drive being visible.
Possible Causes:
Possible Solutions:
Check Local Security Policies: Windows 10 Tiny might have stricter local security policies. You can adjust these by opening the Local Security Policy editor (secpol.msc), where you can review and modify settings that might be blocking access to the NAS.
Adjust Security Settings: The security settings on Windows 10 Tiny might be more restrictive, leading to access issues. Ensure that network discovery and file sharing are enabled in Control Panel > Network and Sharing Center > Advanced sharing settings. If password-protected sharing is on, make sure your NAS credentials are correctly configured.
Manage Credentials: Credentials might not be properly handled by Windows 10 Tiny. Open the Credential Manager and manually add your NAS credentials. This ensures that the correct username and password are used when accessing the NAS.
Check for Missing Network Components: Since Windows 10 Tiny is a minimal version, it might be missing certain networking features that are necessary for proper NAS access. These could include things like file sharing services or network protocols that are usually present in the full version.
To check for missing components, you may need to compare the installed features on your Windows 10 Tiny device with those on a full Windows 10 version. Unfortunately, if critical networking features are absent, you might need to install them manually or consider using the full version of Windows for these tasks.
Enable SMB/CIFS File Sharing Support: You might already be aware of enabling SMB/CIFS support from the post, but it’s worth listing it here as a possible solution. Ensure that SMB 1.0/CIFS File Sharing Support is enabled on your Windows 10 Tiny device.
We hope the above solutions help resolve your issue. If the problem persists, please let us know, and we’ll do our best to find additional solutions to assist you. Thank you for visiting Winsides.com
Best Regards
Vigneshwaran