How to Enable Controlled Folder Access in Windows 11?
Controlled Folder Access minimizes the risk of file encryption by ransomware.
Controlled Folder Access in Windows 11: It is a security feature in Windows 11 designed to protect your files and folders from unauthorized changes by malicious applications, such as ransomware. A protected folder is a directory safeguarded from unauthorized changes by untrusted applications, especially malware and ransomware. When a folder is protected, only trusted and whitelisted applications can modify, delete, or create files within that folder. This helps prevent malicious software from encrypting or corrupting important data. Controlled Folder Access is a part of Windows Defender Exploit Guard and helps ensure that only trusted apps can access protected folders. This article will use simple steps to navigate the steps on How to Turn on Controlled Folder Access in Windows 11.
Recommended: Smb Direct In Windows 11 (easy Way)
Key Points
- Open Windows Settings.
- Navigate to Security and Privacy.
- Click on Manage Settings under the Virus & Threat Protection settings section.
- Enable Controlled Folder Access.
- Go to Windows Settings using the key combination Win Key + I.
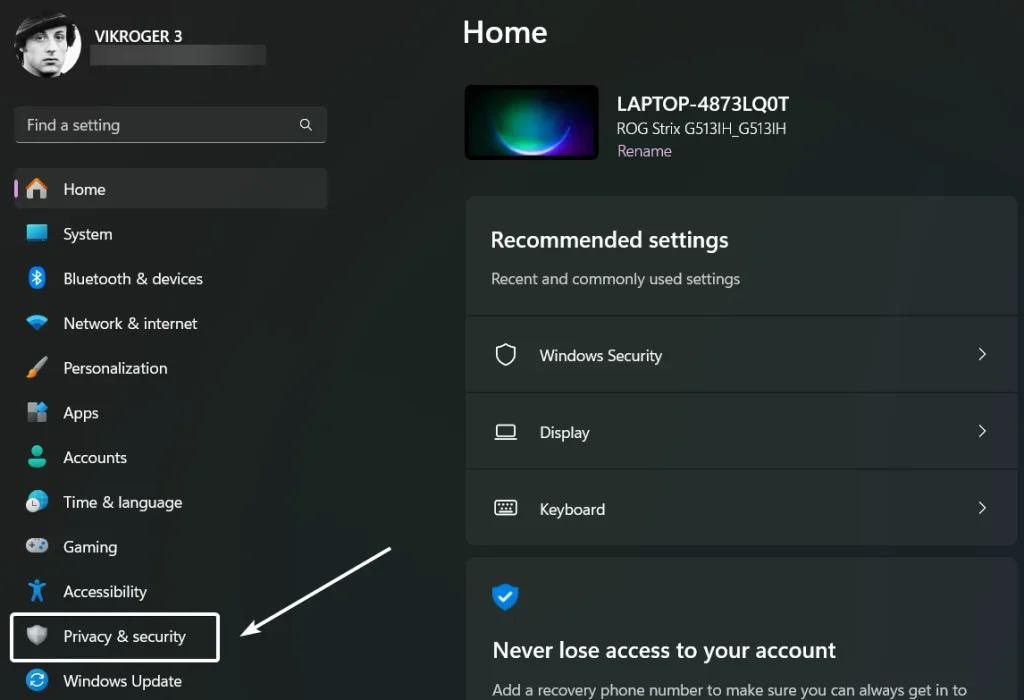
- You can find Privacy and Settings on the left pane. Click on that.
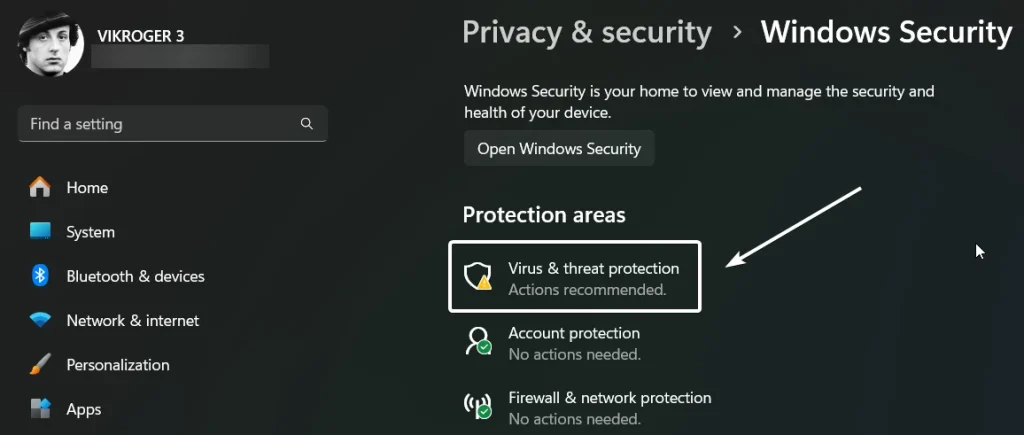
- Under Security, click on Windows Security.

- Now, click on Virus & Threat Protection under Protection areas.
- Click on Manage Settings under Virus & Threat Protection Settings.
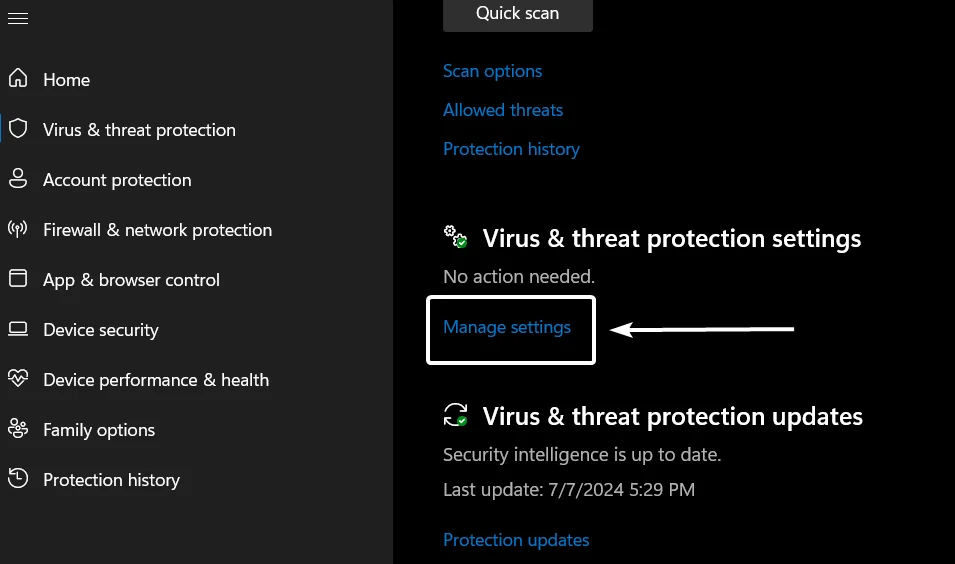
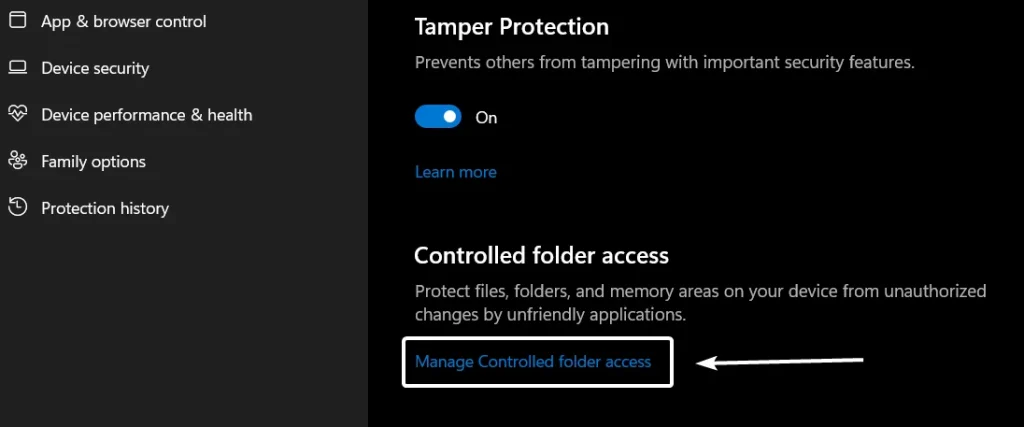
- Scroll down and locate Controlled Folder Access. Click on Manage Controlled Folder Access.
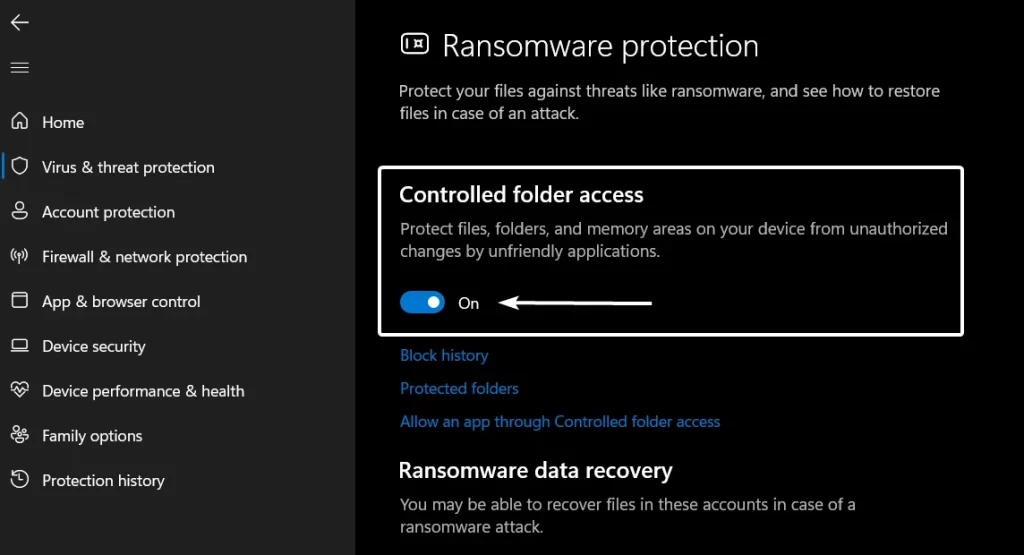
- Toggle the Controlled Folder Access switch to ON.
- User Account Control will open and ask for confirmation. “Do you want to allow this app to make changes in this Computer?“. Click Yes.
- That is it. Controlled Folder Access is now enabled in Windows 11.
How to Allow an App through Controlled Folder Access in Windows 11?
This option allows users to explicitly permit specific applications to access and modify files within protected folders. This is essential when you have trusted applications that need to interact with the files in these protected folders but are being blocked by the Controlled Folder Access feature. Some legitimate applications may need access to files within protected folders to function correctly. By allowing these apps, you ensure they can perform necessary tasks without being hindered by security restrictions. The following are the steps.
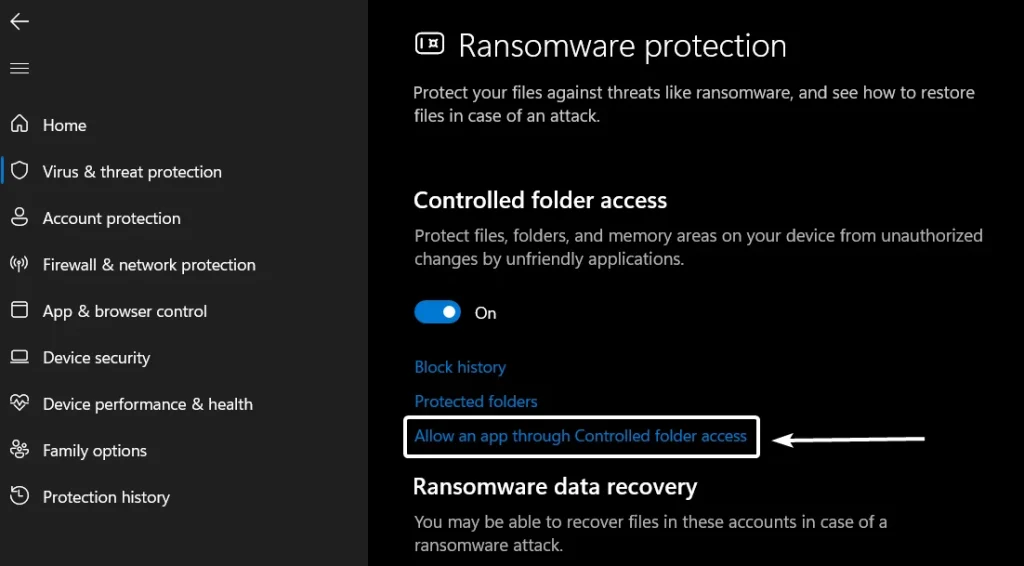
- Click on “Allow an App through Controlled Folder Access” under Controlled Folder Access.
- User Account Control will prompt for confirmation. Click Yes.
- Now, click on Add an allowed app.
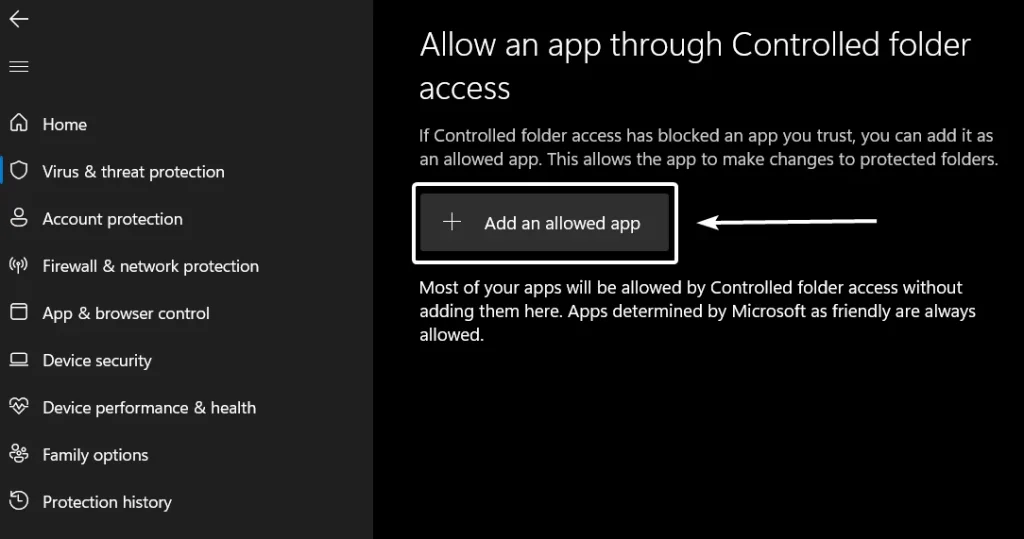
- You can find two options, “Recently Blocked Apps“, and “Browse All Apps“.
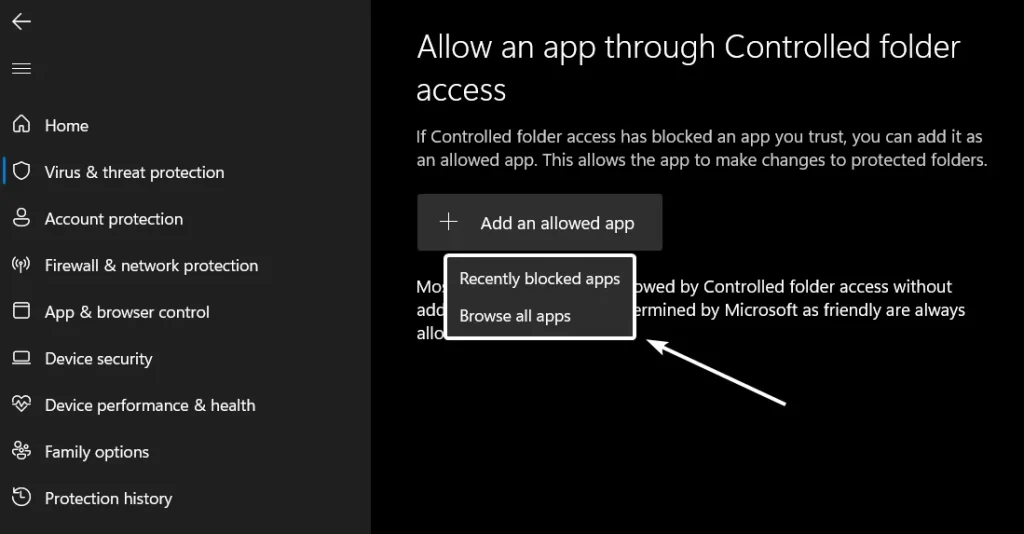
- If you have encountered any apps blocked recently, then click on Recently Blocked Apps, you can find the app over there, making it easy to choose. If not, click on Browse All Apps.
- Finally, choose the App that you want to allow through Controlled Folder Access. That is it!
Controlled Folder Access – Things to know:
- By default, Controlled Folder Access protects common folders such as Documents, Pictures, Videos, Music, Favorites, and Desktop.
- Users can add additional folders to be protected or remove default-protected folders as needed.
- If an unauthorized app attempts to modify files in a protected folder, you will receive a notification from Windows Security.
- This feature is integrated with Windows Defender Antivirus, providing a comprehensive security solution without needing third-party software. Check out: How to Enable Real-Time Protection in Windows 11?
Take away:
Controlled Folder Access in Windows 11 is an essential feature for enhancing your system’s security and safeguarding your data from potential threats. By enabling this feature, you can add an extra layer of protection to your valuable files and ensure they remain safe from malicious attacks. For more interesting articles, stay tuned to winsides.com. Safe Computing! Peace out!
Related Articles:
- Enable SMB 1.0 / CIFS File Sharing Support using Command Prompt & Windows PowerShell
- How to Run Device Manager as Administrator on Windows 11? 4 Best Ways!
- 3+ Easy ways: Run CHKDSK as Administrator on Windows 11?
We combine expert insights with user-friendly guidance. We thoroughly research and test everything to give you reliable and simple to understand tech guides. Please take a look at our publishing process to understand why you can trust Winsides.
