How to Split Files using Winrar in Windows 11?
Split Large FIles in multiple Zip or Rar files using WinRar
Splitting a single large file is crucial when trying to upload and transfer it to someone. Most online platforms restrict the uploading of large files to save on their server bandwidth costs. While input bandwidth is often free, output bandwidth, especially for downloading large files, can be expensive. Many online file transfer websites limit single file uploads to less than 500MB. If you want to transfer a movie that is 4GB in size, it becomes impossible to do so via an online portal. To overcome this issue, you can use WinRAR to split your movie into multiple 400MB files and create final ZIP files. This way, you can upload all the ZIP files to the transfer portal without any problems.
Splitting files might be difficult or completely new to many users, so I have detailed steps and instructions to perform file splitting using WinRAR in Windows 11. Let’s get into the tutorial.
Installing WinRar Application:
- Installing WinRAR is the first step in splitting large files.
- You can download the latest version of WinRAR from their official website: https://www.win-rar.com/download.html.
- Once you have downloaded the WinRAR.exe file, proceed with the installation process.
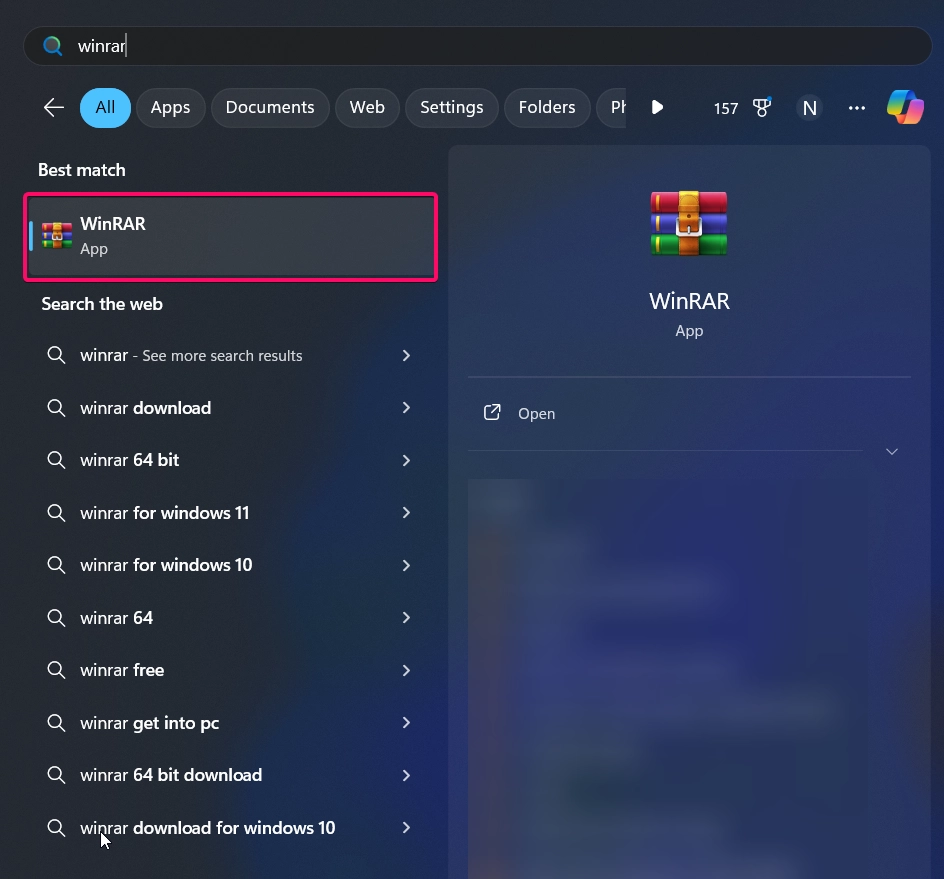
- You can verify that the installation process has been completed successfully by searching for “WinRAR” in the Start Menu. The application will be displayed as shown in the image below.
Splitting Files using WinRar:
- Now, you need to go to the directory where the large file you want to split is located.
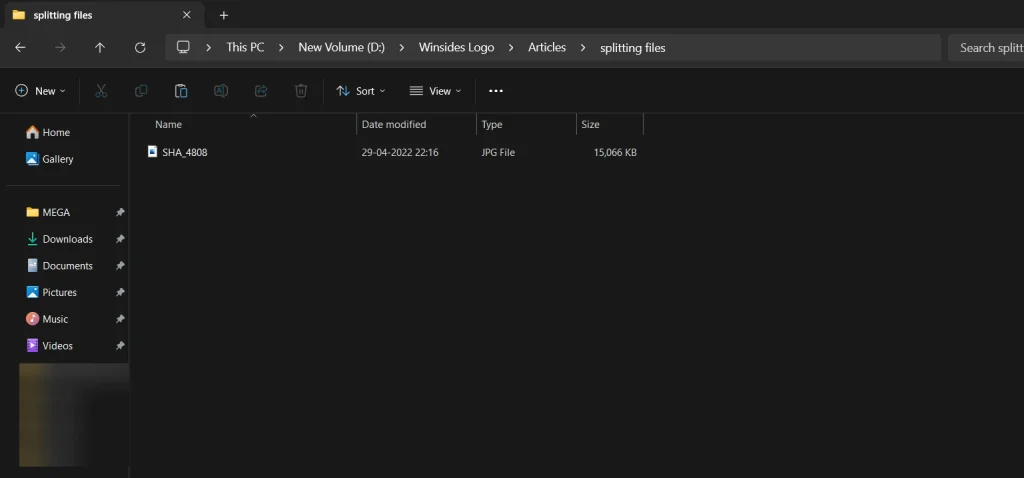
- Now, you need to hold the “Shift” key on the keyboard and right-click the file that needs to be split to view the expanded right-click options directly!
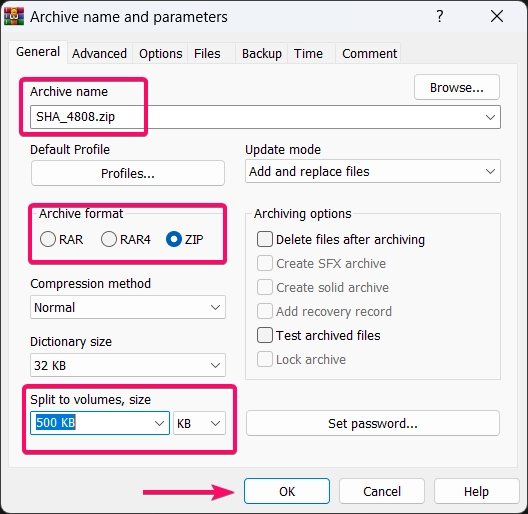
- In the expanded options, choose the “Add to archive” option. This will launch the WinRAR application.

- Now, you need to rename your file if needed; otherwise, you can leave it as is. It is recommended to choose the .zip format instead of the .rar format.
- Then, you need to set the size in the “Split into volumes, size” option. By default, it is set to 5MB replace it with your own values. Currently, it supports Bytes (B), Kilobytes (KB), Megabytes (MB), and Gigabytes (GB).
- I have set it to 1MB in the option, and finally, click the OK button to create the archive file.
- Once you click the OK button, WinRAR will create archive files by splitting the ZIP file into multiple 1MB files, as shown in the image below.
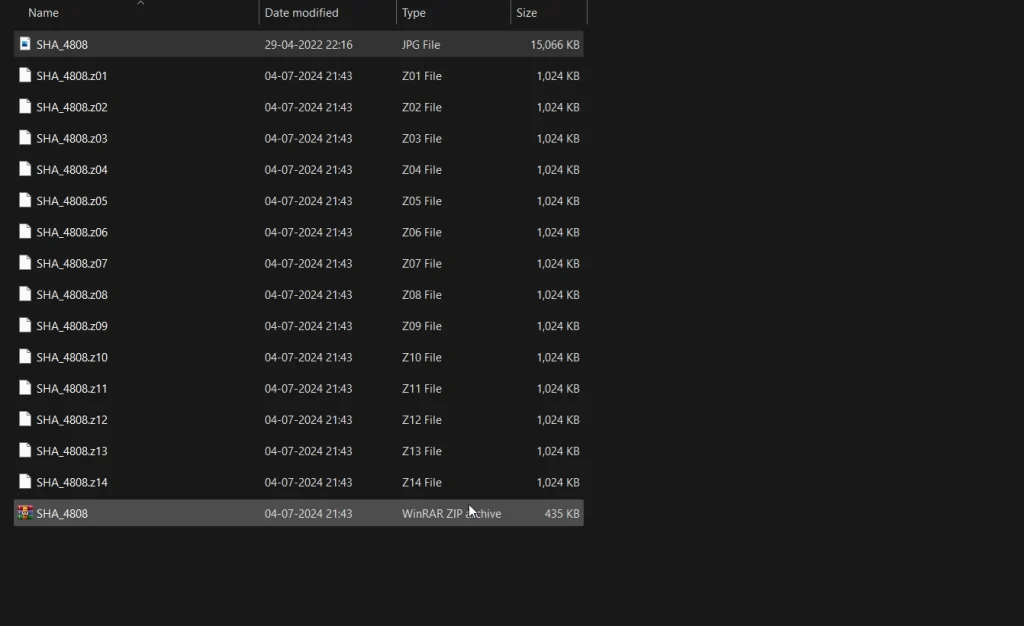
That’s it. Now the single large file has been split into multiple 1MB files. You can now easily upload these files to online portals without any barriers and easily transfer them.
Re-assembling the Splitted Files:
- Make sure all the files are located along with the main ZIP file in the directory!
- Right-click on the main ZIP file and click the “Extract All” option.
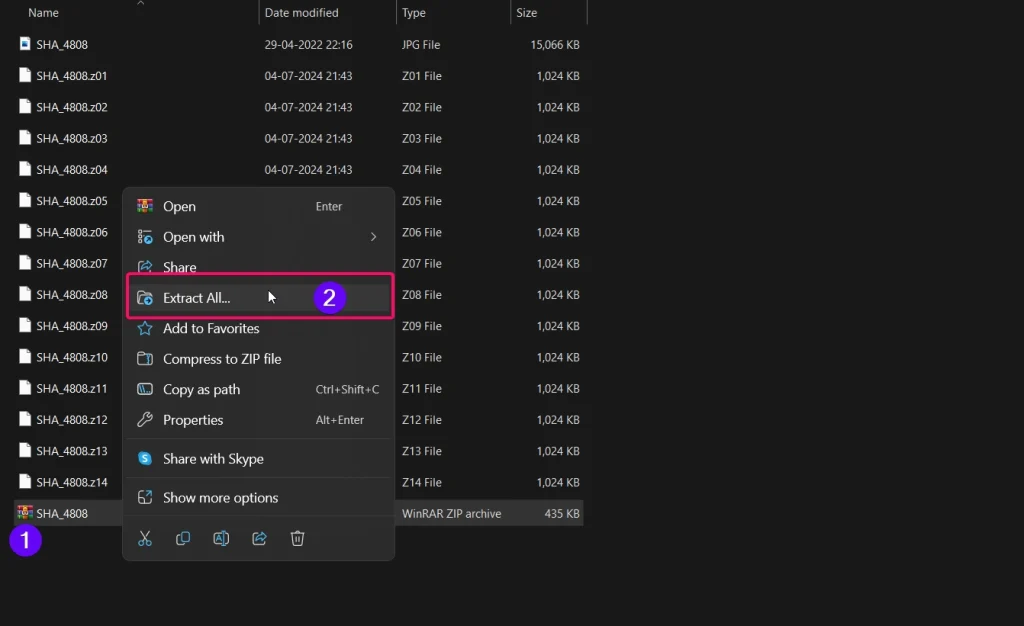
- Choose the destination directory and click the Extract button.
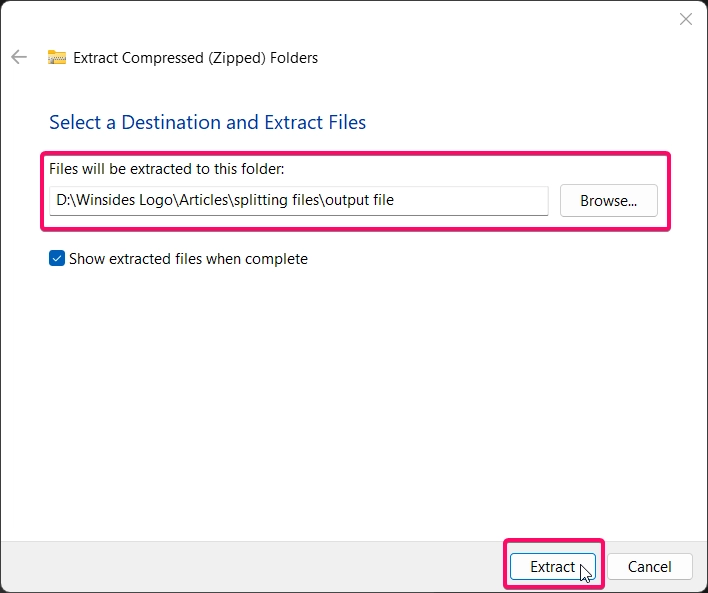
- Now, the WinRAR application will extract the ZIP file by combining all the split files into one merged output single large file.

Splitting Files using Winrar- Uses:
- Large files can be tough to transfer over the internet or other media. Splitting them into smaller parts makes it easier to email, upload, or transfer them.
- Many email services and online platforms have file size limits. By splitting files, I can bypass these limits by sending or uploading smaller, individual parts.
- Downloading a large file can often run into errors and interruptions. Smaller split files are less likely to have issues, and if one part fails, I only need to re-download that part.
- Splitting files helps me manage storage space on devices with limited capacity. I can store parts on different storage media or locations.
- It’s also useful for creating backups and archives, especially if I need to fit them onto multiple CDs, DVDs, or other storage devices with limited capacity.
- I can choose the size of each split part, giving me the flexibility to customize the file sizes based on my needs.
Verdict:
By using the above steps, I can easily split large files into smaller using WinRAR in Windows 11. This method not only helps in overcoming upload limits set by online platforms but also ensures smoother and more reliable file transfers. Whether I need to email, upload, or store these files, splitting them into smaller pieces makes the entire process hassle free. With the knowledge gained from this guide, I can confidently handle large files and transfer them without any barriers. Find more informative tutorials on our Homepage Winsides.com.
We combine expert insights with user-friendly guidance. We thoroughly research and test everything to give you reliable and simple to understand tech guides. Please take a look at our publishing process to understand why you can trust Winsides.


