Enable Active Directory Lightweight Directory Services in Windows 11
AD & AD LDS Services for Client in Windows 11: If you’re managing a network or developing applications and have Windows 11 Enterprise Edition, you might need to enable Active Directory (AD) or Lightweight Directory Services (AD LDS). These powerful tools are essential for handling directory services, managing network resources, and keeping everything running smoothly. Active Directory (AD) is the backbone of user and resource management in a Windows network environment. It helps you centrally manage users, groups, and computers. On the other hand, Active Directory Lightweight Directory Services (AD LDS) is a bit different. Think of it as a more streamlined version of AD. It’s designed for applications that need directory features but don’t require the full-blown AD domain infrastructure. This article will walk through the steps to enable Active Directory and Lightweight Directory Services for client on your Windows 11 Enterprise system. Check out: How to Enable Services for NFS in Windows 11?
Table of Contents
Key Steps:
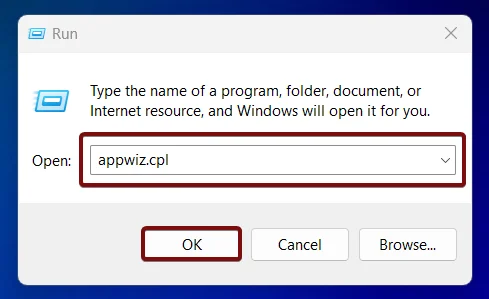
- The first step is to access Windows Features, to do so, we have to go to the Run command and execute the following command.
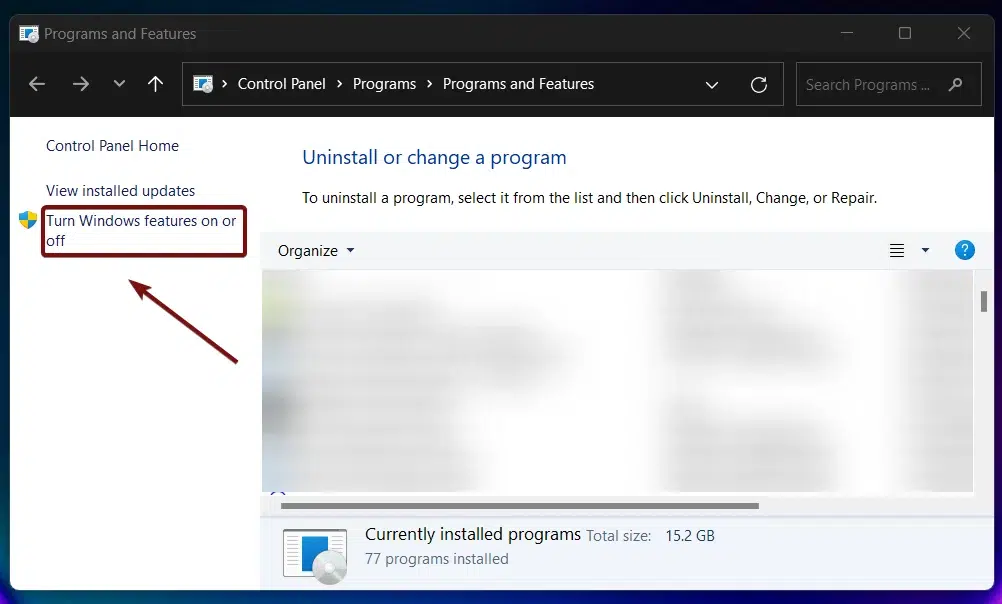
appwiz.cpl- Now, you find Programs and Features windows popping up. On the Programs and Features window, you can find Turn Windows Features on or off from the left pane. Click on that.
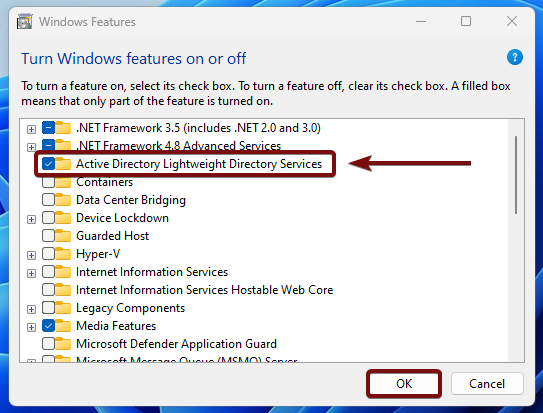
- Windows Features dialog box will open now. There are a lot of optional features available there. Look for Active Directory and Lightweight Directory Services. Once you locate it, click on the checkbox next to it to enable it and click OK.
- That is it. Active Directory and Lightweight Directory Services is enabled in Windows 11.
- Please note that this optional feature is avilable only in the Windows 11 Enterprise Editions
Turn on AD and AD LDS Client in Windows 11 – Simple steps:
Ready to get started? Here are the steps. If you are looking to enable this feature using Command Prompt or Windows PowerShell, we will have a detailed article explaining How to Enable AD LDS Client using CMD and Windows PowerShell.
- Go to the Start menu and open Run Command. You can also use the Win Key + R Shortcut. Execute the following in the run command.
appwiz.cpl
- The Programs and Features window will pop up now. You can find Turn Windows Features on or off on the left pane. Click on that.
- You can find Active Directory and Lightweight Directory Services in Windows 11 from the list of services available. Click on the checkbox next to it, and then Click OK. This process will help enable this optional feature in Windows 11.
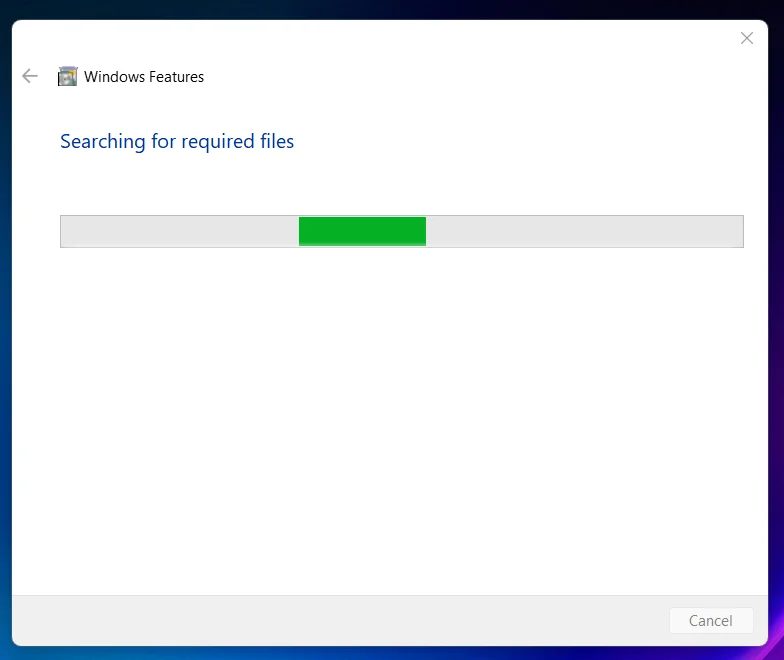
- Windows will search for the required files.
- After that, the Windows system will apply the necessary changes.
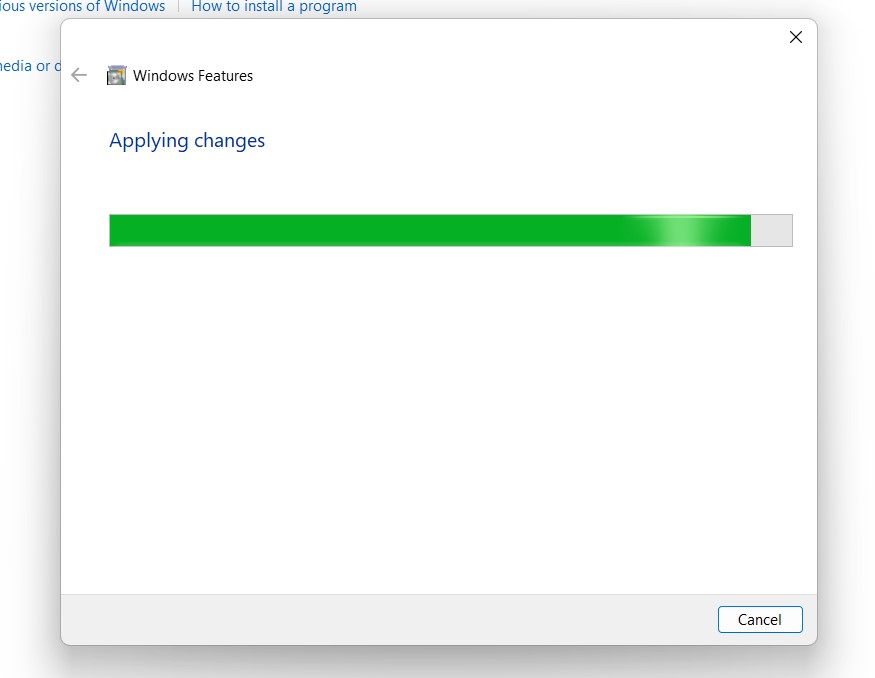
- Click Restart if you are prompted to restart or click Close accordingly. However, it is suggested that the changes be restarted right away so that they will be reflected.

- That is it. Active Directory and Active Directory Lightweight Services in Windows 11.
AD and AD LDS in Windows 11 Enterprise – Use Case Scenario:
What are SSI Commands and How do they work?
SSI commands are special directives that you place inside your HTML files to tell the server to perform specific actions. These actions could include inserting the content of another file, displaying the current date and time, executing a script, or displaying environment variables like the server name.
Scenarios:
Let’s say you have a website with a common navigation menu across all your pages. Instead of copying and pasting the same HTML code into every page, you could create a separate file just for the menu. In your .shtml pages, you’d include a command to pull in the menu file. When someone visits the page, the server processes the SSI command, inserts the menu, and then sends the completed page to the visitor.
Example:
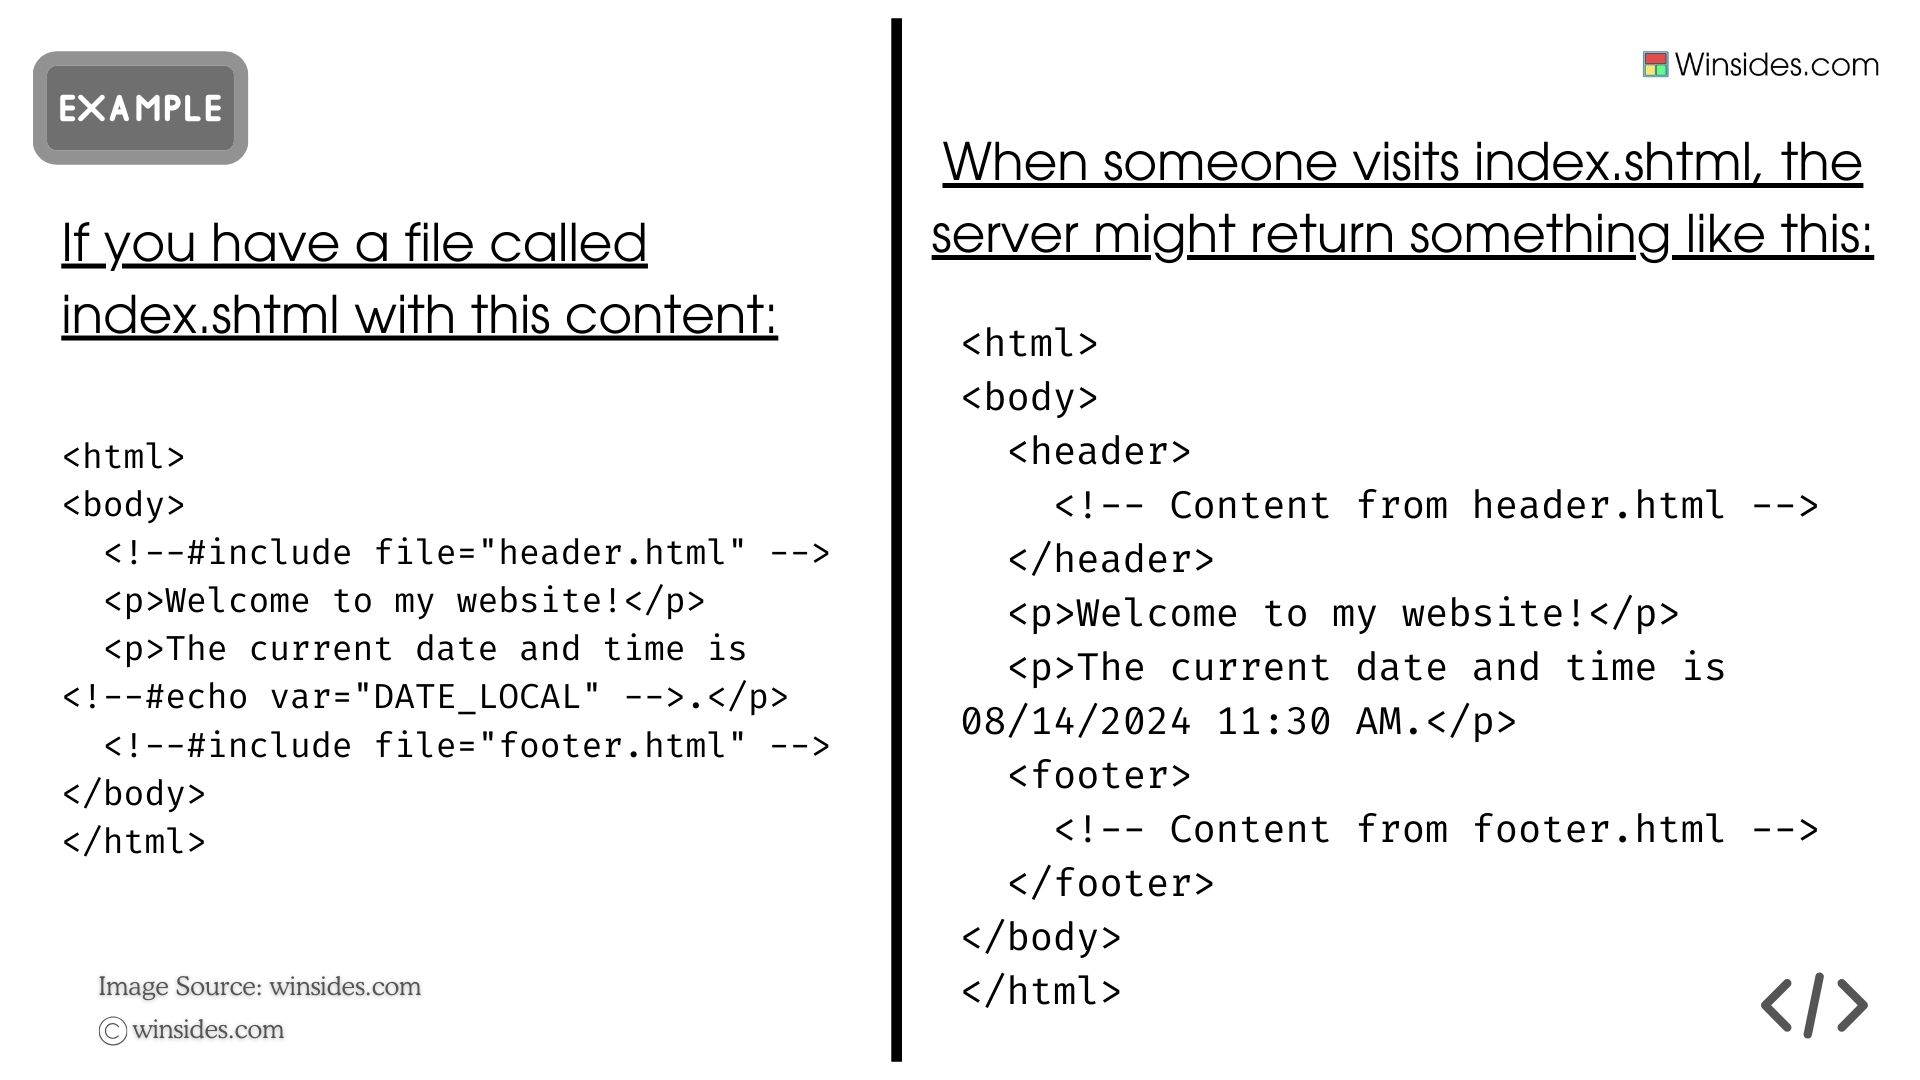
In this example, the server replaced the SSI commands with the actual content of the header.html and footer.html files and the current date and time. These commands are what make SSI so useful for web developers!
Take away:
And there you have it! Once you are aware of the above steps, Enabling Active Directory and Lightweight Directory Services for client on Windows 11 Enterprise will be a straightforward process. By following this guide, you can set up these essential services and ensure your network and applications are well-managed and efficient. If you have any questions or need more detailed instructions, don’t hesitate to reach out to us or check out Microsoft’s official documentation. Happy configuring! Peace out!
We combine expert insights with user-friendly guidance. We thoroughly research and test everything to give you reliable and simple to understand tech guides. Please take a look at our publishing process to understand why you can trust Winsides.

This is a great resource. Thanks for putting it together!
Thank you for your positive feedback!