Enable Server Side Includes [SSI] in Windows 11
serve .stm, .shtm, and .shtml from a website
Imagine you’ve got a website with 50 pages, all sharing the same header, footer, or menu. If you need to update any of these elements, normally you’d have to edit all 50 pages, super tedious, right? Instead of editing each page every time you make a change, Server Side Includes, known as SSI, lets you automatically include these common elements from a single file into multiple pages. It is like a handy little trick for web developers that helps you keep your website’s content organized and consistent without having to copy and paste the same pieces of code everywhere. This article will walk you through the simple steps on How to Enable SSI in Windows 11. Let’s get started!
Check Out: Enable No Gui Boot In Windows 11
Key Steps:
- You can access Windows Features using the following Run Command.
appwiz.cpl- Once you on the Windows Features dialog box, expand the Internet Information Services node.
- You can find World Wide Web Services, expand it and finally expand Application Development Features.
- There you can find Server-Side Includes which you can then enable by clicking on the checkbox next to it.
- That is it. Server Side Includes is now enabled in your Windows 11. You can start using it!
What’s so cool about SSI in Windows 11?
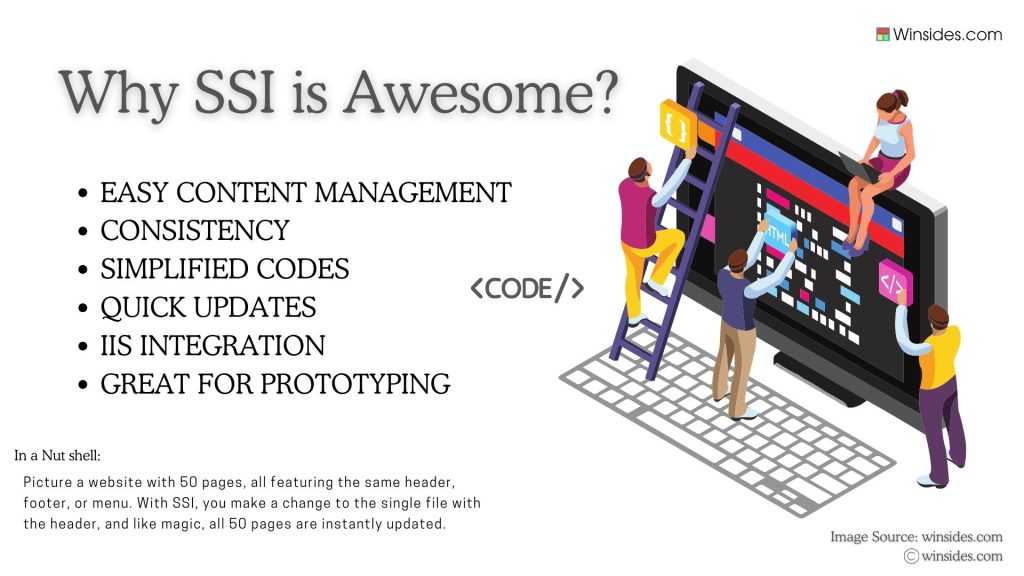
SSI in Windows 11 makes web development smoother, faster, and more efficient. It’s like having a set of shortcuts that let you manage your site’s content with minimal effort while keeping everything organized and consistent.
Easy Content Management and Consistency:
As mentioned in the introduction paragraph, imagine you’ve got a website with 50 pages, all sharing the same header, footer, or menu. With SSI, you update the single file containing the header; boom, all 50 pages get updated automatically. It’s like magic for your web content! In this way, it helps you maintain a uniform design across your entire site which is key for a professional looking website.
Code Simplification & Quick Updations:
Web pages can get cluttered with repetitive code, making them harder to manage and more prone to errors. SSI lets you clean up your HTML by pulling repetitive content from separate files.
SSI is a lifesaver when it comes to making quick updates across multiple pages. Need to add a new link to your footer? Change your site’s tagline? With SSI, you can do it in seconds, and the change will reflect across all pages that include that file. It may look easy for a WordPress Website or other Content Management Systems, but for a static website, it really can save a lot of time and effort.
Integration with Internet Information Services [IIS]:
Since SSI is integrated with Internet Information Services (IIS) in Windows 11, it’s easy to enable and start using it making it a reliable and scalable tool.
Turn on Server Side Includes in Windows 11 – Simple Steps:
Since SSI is mainly used in Web Development, specifically for creating dynamic web pages, not all Windows users use this and hence it is available as an Optional Feature in Windows 11. To enable this feature in Windows 11, You’ll need to get into the Windows Features. Here are the steps.
- Go to the Start menu and open Run Command. You can also use the Win Key + R Shortcut. Execute the following in the run command.
appwiz.cpl
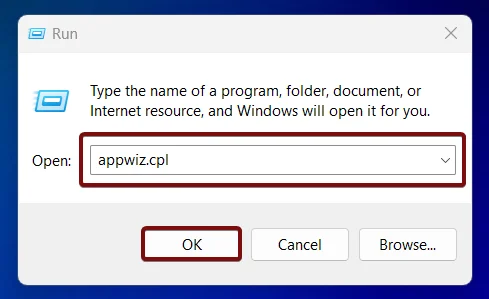
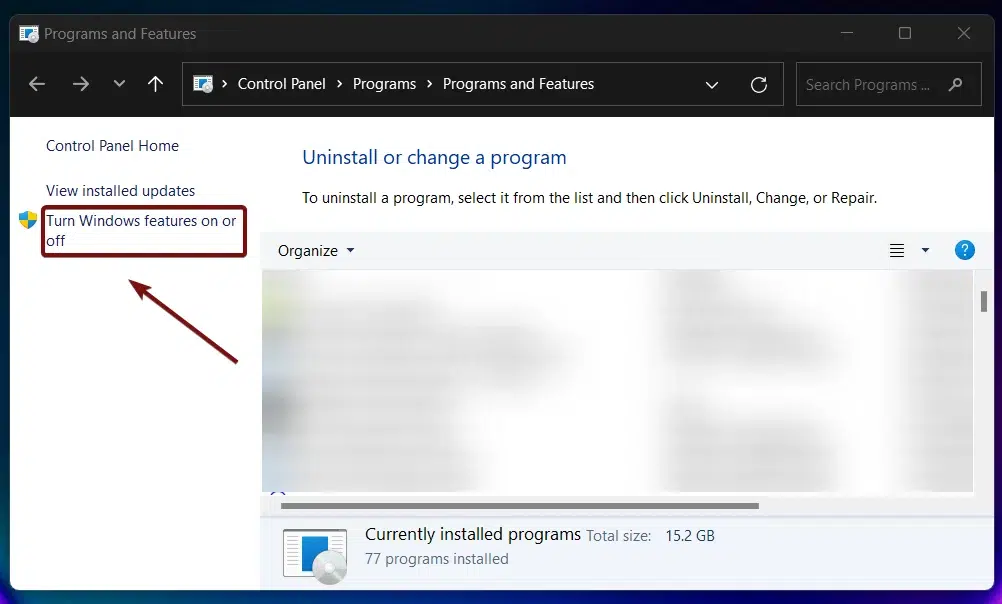
- The Programs and Features window will pop up now. On the left pane, you can find Turn Windows Features on or off. Click on that.
- From the list of services available, you can find Internet Information Services, usually located in the top section in almost all Windows 11 editions. Expand Internet Information Services.
![Enable Server Side Includes [SSI] in Windows 11 1 Expand IIS](https://winsides.com/wp-content/uploads/2024/07/Expand-IIS.webp)
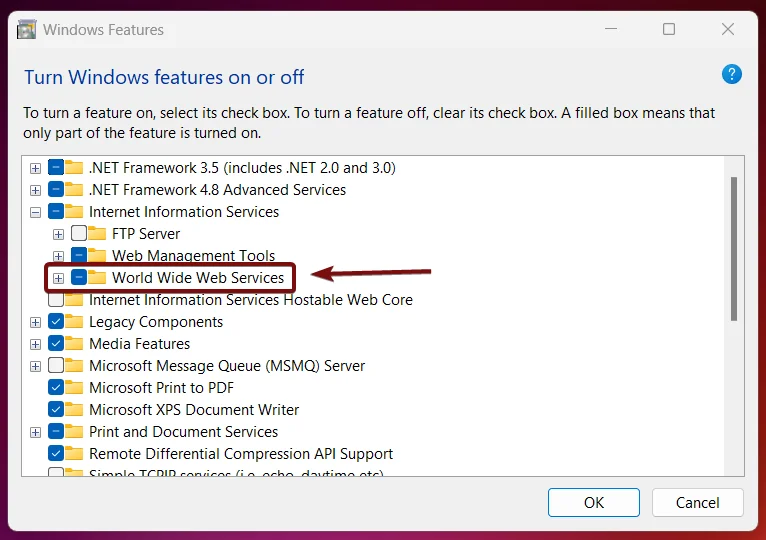
- Now, you can find 3 sub-nodes, FTP Server, Web Management Tools, and World Wide Web Services. Expand World Wide Web Services.
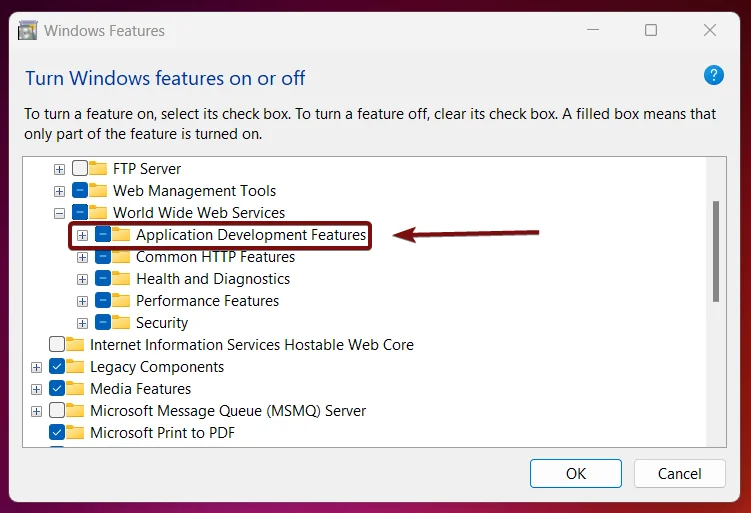
- The next step is to expand the Application Development Features which contains the Server-Side Includes.
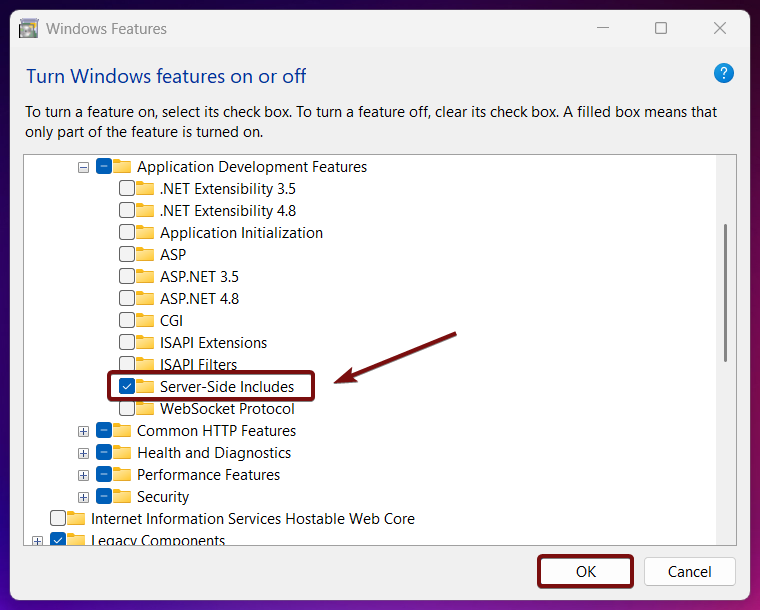
- On Application Development Features, Locate Server-Side Includes, click on the checkbox to enable it, and finally, click OK.
- Windows will search for the required files.
![Enable Server Side Includes [SSI] in Windows 11 2 Searching-for-the-Required-Files](https://winsides.com/wp-content/uploads/2024/06/Searching-for-the-Required-Files.webp)
- After that, the Windows system will apply the necessary changes.
![Enable Server Side Includes [SSI] in Windows 11 3 Applying Changes](https://winsides.com/wp-content/uploads/2024/01/Applying-Changes.jpg)
- Click Restart if you are prompted to restart or click Close accordingly. However, it is suggested that the changes be restarted right away so that they will be reflected.
![Enable Server Side Includes [SSI] in Windows 11 4 Close](https://winsides.com/wp-content/uploads/2024/07/image.webp)
- That is it. Server-Side Includes is now enabled in your Windows 11.
SSI commands are special directives that you place inside your HTML files to tell the server to perform specific actions. The difference in the extensions (.stm, .shtm, .shtml) is mostly historical and stylistic, but they all serve the same purpose of indicating that the files might contain server-side directives that need to be processed before being sent to the user’s browser.
Take away:
Server Side Includes in Windows 11 makes web development smoother, faster, and more efficient. It’s like having a set of shortcuts that let you manage your site’s content with minimal effort while keeping everything organized and consistent. If you like this article, give us a review, and if you have any queries, do let us know in the comment section, for more interesting articles, stay tuned to winsides.com. Happy Coding! Peace out!
Related Articles:
- 3 Easy ways to Run Microsoft Outlook as Administrator on Windows 11
- Run Windows Defender Scan via Command Prompt on Windows 11
- 6+ Ways to Run Windows Defender as Administrator on Windows 11?
We combine expert insights with user-friendly guidance. We thoroughly research and test everything to give you reliable and simple to understand tech guides. Please take a look at our publishing process to understand why you can trust Winsides.


