

You can create a custom library in Windows 11 from File Explorer's Libraries view. A library gives you one organized view of files that remain in one or more existing folders; it is not a new storage folder and it does not copy those files into a separate container.
This guide reproduces the complete workflow with a disposable library named WinSides Practice and a disposable source under Public Documents. The test created and named the library, included the exact source folder, reopened the saved library, verified a known sample file, removed only the custom library definition and disposable source, and confirmed that the six original libraries were unchanged. No administrator prompt, personal file, cloud folder, Registry edit, or permanent File Explorer preference was involved.
What is a Windows library?
A library is a virtual collection. It can present content from several folders together even though each file stays at its original path. For example, a project library could combine a local reference folder and another writable project folder without moving either one. Opening or editing a file through the library still changes the original file in its source folder.
That distinction matters before you delete or reorganize anything. Removing a library definition removes the combined view, not the source folders it points to. Deleting a file while browsing inside the library is different: that acts on the real file. Treat a library as a window onto existing storage, not as an independent backup.
Microsoft's Windows libraries documentation explains that libraries aggregate multiple storage locations and that users can create custom libraries and specify included folders. The procedure below uses that standard File Explorer model on the current Windows 11 build.
Table of contents
What should you prepare before creating a library?
Decide what the library should represent and identify at least one existing folder that belongs in it. A narrow purpose such as Research, Client Media, or Tax Records is easier to understand than a generic name. Before including a large folder, you can check the size of a folder before including it so the combined view does not surprise you with more material than expected.
Use folders that you are allowed to open and manage. A library does not grant new permissions, make private files public, or make an offline network location available. If a source is disconnected or access-controlled, the library can show an unavailable location until that source returns.
For a controlled test, use a new empty folder and put one harmless sample file inside it. Record the library name and exact source path. Those two details make verification and cleanup unambiguous.
How do you open the Libraries view?
Press Windows logo key + E to open File Explorer.
Select the address bar, type shell:Libraries, and press Enter. File Explorer should open a page whose address bar ends at Libraries.
Check the existing list before making a change. The reproduced system began with Camera Roll, Documents, Music, Pictures, Saved Pictures, and Videos. Your list can differ, so identify your own baseline rather than assuming six items.
The shell address opens the standard Libraries namespace even when Libraries is not pinned in the navigation pane. It does not create a library or change what is pinned.
How do you create and name a new library?
In the Libraries view, select New on the command bar.
Select Library. Windows should create a new library item and immediately highlight its temporary name.
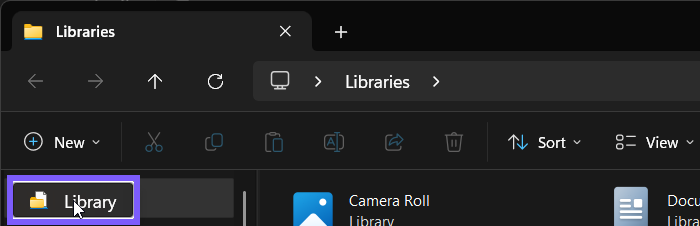
Type a specific name and press Enter. The test used WinSides Practice.
Read the finished item back before opening it. Its type should be Library, and it should appear beside the libraries that were already present.
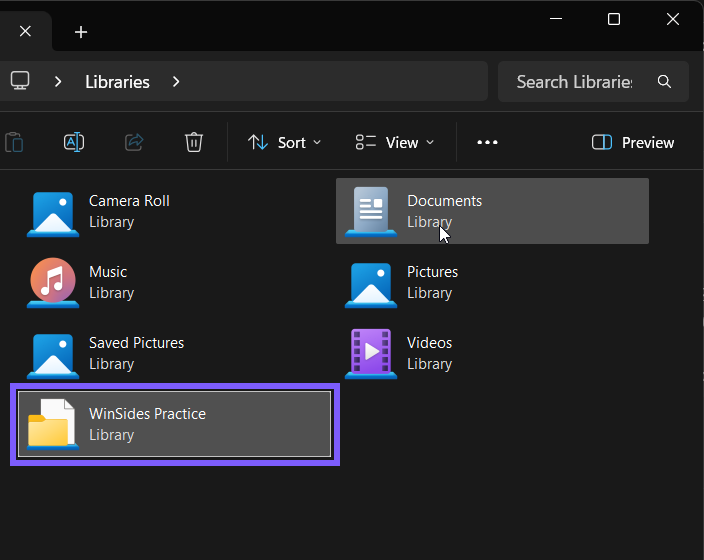
If the name is no longer selected, select the custom library, press F2, type the intended name, and press Enter. Renaming the library changes the view's label; it does not rename any source folder you add later.
How do you include a folder in the new library?
Open the custom library. A newly created library should report that it is empty and show Include a folder.
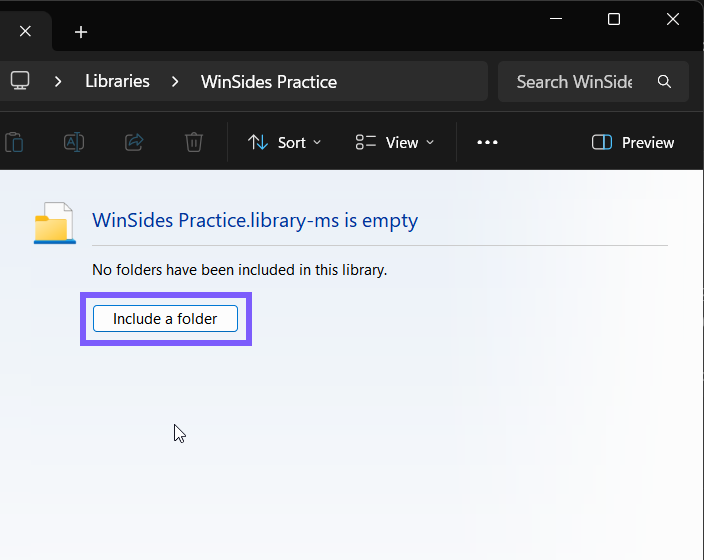
Select Include a folder. In the folder picker, navigate to the existing folder you prepared. You can also enter its exact path in the Folder field.
Confirm that the picker names the intended folder, then select Include folder. Do not choose a broad profile, drive root, or cloud tree merely because it is already selected.
Close and reopen the custom library. This read-back checks the saved definition instead of relying only on the first live refresh.
Confirm that the included folder heading and a known file from that folder appear. In the controlled run, the view showed WinSides Library Source, the Public Documents path, and Library sample.
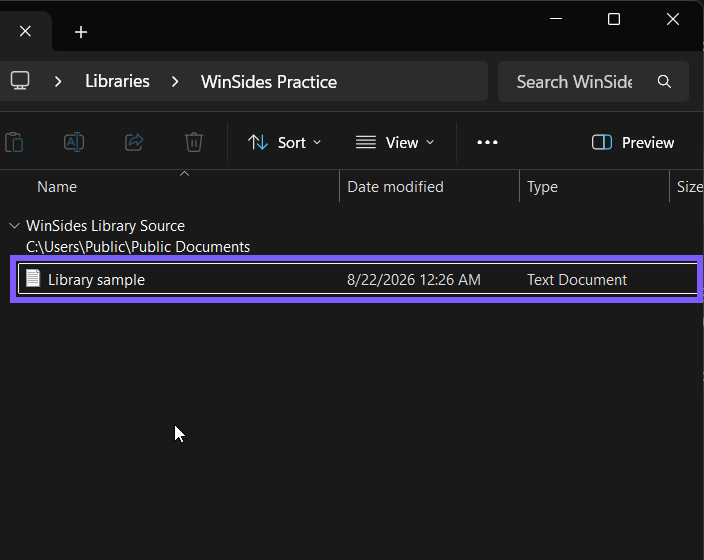
The sample remained at its original Public Documents path. The saved library definition changed when the source was included, but the sample file's path and hash did not. That is the expected difference between aggregating a folder and moving its contents.
What should you include in a library?
Include folders that serve the same working purpose and that you expect to browse together. Two project folders can make sense; an entire user profile usually does not. A small, deliberate set keeps search results, sorting, and save-location choices understandable.
Avoid adding a source simply to make it easier to find once. Pinning a folder to Quick access may be the clearer choice when you want a shortcut to one location rather than an aggregated view. Also remember that a library is not a synchronization tool: availability still depends on every source folder and its storage provider.
If you later include more than one folder, use a known filename in each source and verify that both appear. When similar filenames exist, show the folder path or group the view by location so you know which original file you are opening.
How do you verify that the library works?
Reopen the library from a fresh Libraries view. Confirm the library name, the source heading, and at least one known item. Open only a harmless sample, then compare its original folder path. A correct library view exposes that same item; it does not create a duplicate beside the source.
Try a search only after the basic path check succeeds. Search results depend on the included locations and their availability, so an absent network or cloud source can make a correctly configured library look incomplete. The saved definition and a known local file provide a more reliable first verification.
How do you remove a test library safely?
First decide whether you want to remove only the library view or also delete the source material. For a temporary library test, remove the custom library definition while preserving any real source folder. Do not delete files from inside the library as a substitute for removing the view.
Return to Libraries and select the exact custom library you created.
Select Delete on the command bar or press the Delete key, then confirm the library item is gone. This removes the custom definition; it should not delete the folders that were included.
Open the original source folder directly and confirm its files remain. If the source was disposable, inspect it and remove only the exact test file and empty test folder.
Refresh Libraries and compare the list with your recorded baseline.
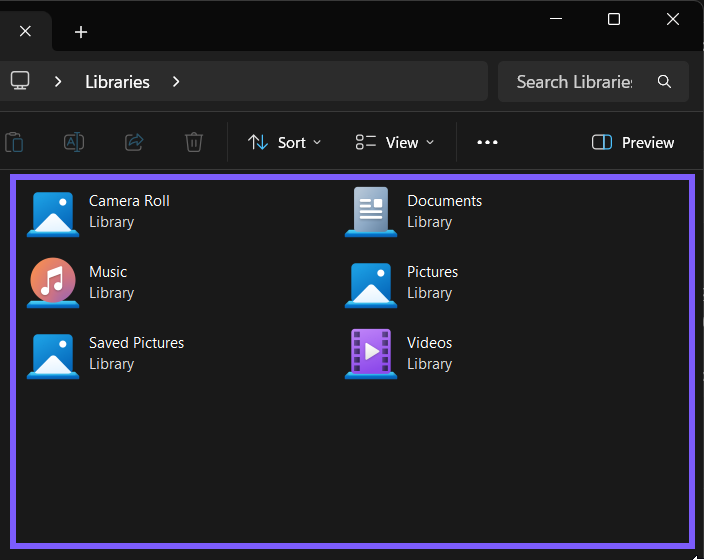
In the reproduced cleanup, only the exact WinSides Practice definition and the known disposable source were removed. The six original library definitions still matched their starting files exactly, and all temporary windows were closed afterward.
Why might the new library not appear?
You are in an ordinary folder
The New menu offers different item types according to the current location. Open shell:Libraries and verify that the address bar says Libraries before looking for New > Library.
The included folder is not the one you intended
Reopen the library and read the folder heading or path. If the picker started at your profile, cancel it and enter the exact prepared folder in the Folder field. Do not accept the current selection without checking it.
File Explorer has not refreshed
Close the library view and reopen it from Libraries. If the view remains stuck, follow the live guide to restart File Explorer if the Libraries view stops responding, then inspect the saved library again.
A source location is unavailable
Reconnect the drive, network share, or storage provider and confirm that the source opens directly. The library cannot bypass permissions or recover an offline source on its own.
Frequently Asked Questions
Does a Windows library copy my files?
No. A library presents files from included folders in one view. The files stay in their original source folders.
Can one library include more than one folder?
Yes. That is the main purpose of a library, but the folders should have a related purpose so the combined view remains useful.
Does deleting a library delete its source folders?
Removing the library definition removes the combined view, not the included folders. Deleting a file while browsing the library still deletes the real source file.
Why is Libraries missing from the navigation pane?
It may not be pinned there. Enter shell:Libraries in File Explorer's address bar to open the Libraries namespace without changing navigation-pane settings.
Conclusion
Open Libraries, use New > Library, give the view a clear name, and include only the existing folders that belong together. Reopen the saved library and verify a known source item before relying on it. For a temporary test, remove the custom definition, confirm the source remains intact, and compare Libraries with the starting list.
For more interesting articles, stay tuned to WinSides.com!
Community
Comments (0)