

Introduction to Split Screen in Windows 11
Split screen in Windows 11 is built around Snap, Snap Layouts, Snap Groups, keyboard shortcuts, and smarter window management. The goal is simple: keep two, three, or four apps visible at the same time without manually resizing every window. You can place a browser beside Word, Teams beside OneNote, File Explorer beside Settings, a reference page beside a command prompt, or a video call beside notes.
Windows 11 made split screen easier than older Windows versions because Snap Layouts are exposed from the maximize button, not only by dragging windows to screen edges. Microsoft introduced Windows 11 with productivity features such as Snap Layouts, Snap Groups, and Desktops as part of the operating system’s multitasking experience. Microsoft Windows 11 introduction covering Snap Layouts and Snap Groups Microsoft also documents Windows keyboard shortcuts, including window snapping shortcuts that help arrange windows without using the mouse. Microsoft Windows keyboard shortcuts documentation
For most users, the built-in Windows 11 Snap feature is enough. You can drag a window to the left or right edge for a two-way split, hover over the maximize button to choose a layout, use Windows key shortcuts, or drag a window to the top of the screen to reveal layout choices. For power users with ultrawide monitors or very specific layout needs, Microsoft PowerToys FancyZones offers custom zones beyond the default Snap layouts. Microsoft PowerToys FancyZones documentation
This guide explains how split screen works in Windows 11, how to use Snap Layouts, how to split two apps side by side, how to create three and four app layouts, how keyboard shortcuts work, how to fix Snap when it stops behaving, and when a custom FancyZones layout makes more sense.
Table of contents
Key Takeaways
- Split screen in Windows 11 is mainly powered by Snap. You can drag windows, use Snap Layouts from the maximize button, or use keyboard shortcuts.
- Two-window split is the easiest layout. Drag one app to the left or right edge, then choose another app for the remaining side.
- Snap Layouts are faster for three or four apps. Hover over the maximize button or use the keyboard shortcut workflow to choose a layout.
- Snap Groups help you return to a saved arrangement. When windows are snapped together, Windows can show the group from the taskbar.
- Windows shortcuts matter. Windows key plus arrow keys can move windows between halves, corners, monitors, and restored states. Microsoft Windows keyboard shortcuts documentation
- Display scale and resolution affect layout choices. Smaller screens may show fewer layout patterns, while ultrawide monitors may benefit from custom zones.
- PowerToys FancyZones is best for custom layouts. Use it when built-in Snap cannot create the exact columns or zones your workflow needs. Microsoft PowerToys FancyZones documentation
What Split Screen Means in Windows 11
Split screen means arranging more than one window on the same display so each window occupies a defined region of the screen. In Windows 11, this usually means snapping windows to the left half, right half, corners, thirds, or layout zones.
The classic two-window split places one app on the left and another app on the right. This is useful for writing while referencing a browser, copying files while viewing a folder, comparing two documents, or watching instructions while using Settings.
Windows 11 goes beyond basic side-by-side placement. Snap Layouts can show multiple patterns such as two equal halves, a large left window with two smaller right windows, three columns, or four quadrants. The exact choices depend on screen size, resolution, display scale, and the active window.
Snap Groups are also important. After you snap apps together, Windows can remember that group in the taskbar. When you switch away and come back, the group can reappear together instead of forcing you to rebuild the layout.
This is different from virtual desktops. A desktop separates workspaces. Split screen arranges windows inside one workspace. You can use both together: one desktop for research, one for writing, one for communication, and each desktop can have its own snapped apps.
How to Turn On Snap Windows
Snap is usually enabled by default, but it can be disabled. If split screen is not working, check the setting first.
Open Settings, go to System, then Multitasking. Look for Snap windows. Turn it on. Expand the Snap windows section if you want to review related options such as showing snap layouts when hovering over a window’s maximize button or showing snapped windows suggestions.
The exact wording can vary slightly across Windows 11 builds, but the setting remains under System > Multitasking. If Snap windows is off, dragging to the edge may only move the window instead of docking it into a layout.
Keep the helper options enabled unless you have a reason to simplify the experience. The hover menu, snap suggestions, and group behavior are what make Windows 11 split screen feel faster than older manual resizing.
If a managed work or school device hides these settings, policy may be involved. In that case, Windows itself may be healthy while your organization controls the multitasking options.
Method 1: Drag a Window to the Left or Right Edge
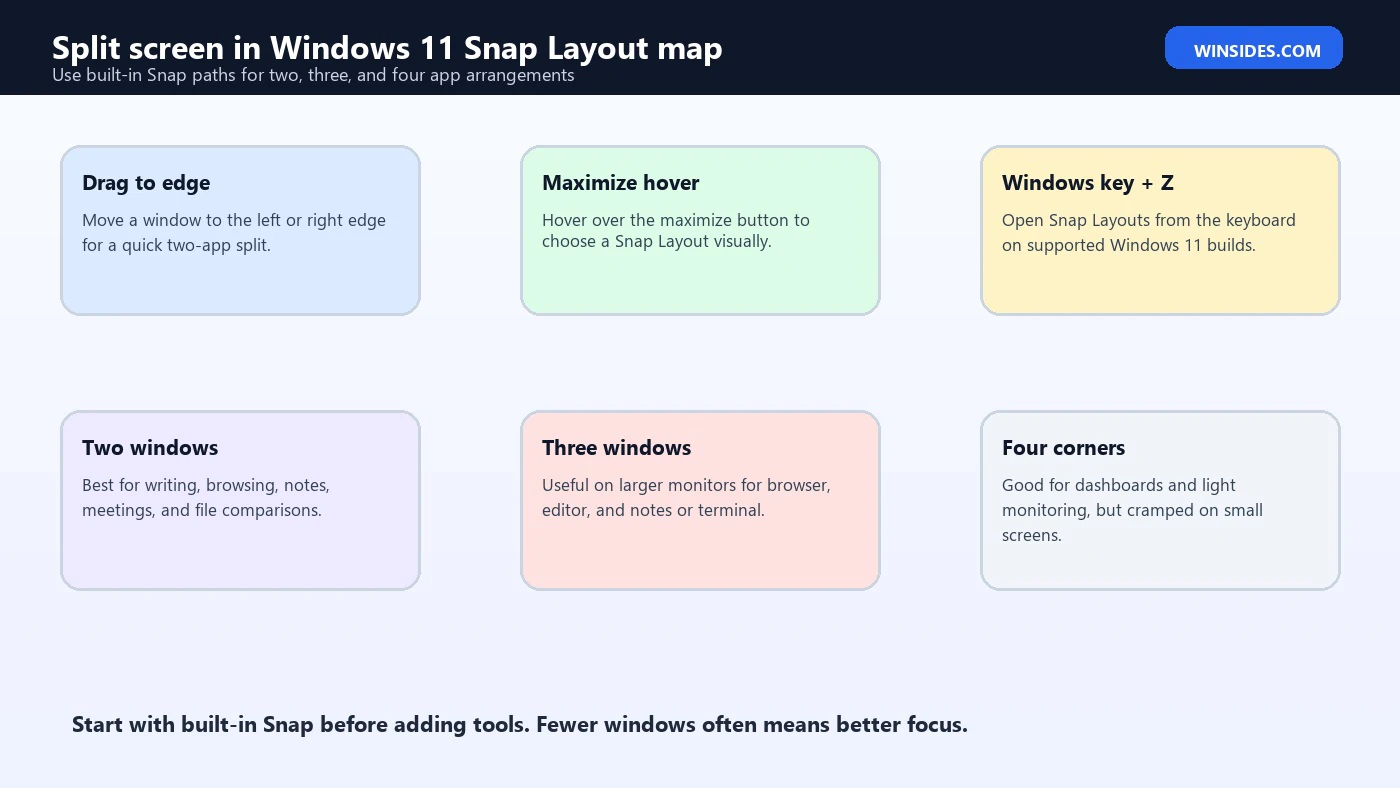
The fastest beginner method is dragging. Open the first app, hold its title bar, and drag it to the left edge of the screen. When you see the translucent outline, release the mouse. The window should snap to the left half.
Windows will then show other open windows as suggestions for the remaining side. Choose the second app, and it will fill the right half. You now have a two-app split screen.
You can reverse the layout by dragging the first app to the right edge instead. You can resize the divider between the two snapped windows by dragging the border. Windows will usually resize the paired window at the same time, which keeps the split neat.
This method is best for simple work: browser plus notes, document plus PDF, File Explorer plus Settings, email plus calendar, or two browser windows side by side.
If the window does not snap, make sure it is not a special fixed-size window. Some small dialog boxes, installers, old utilities, remote control windows, and tool palettes do not support normal Snap behavior.
Method 2: Use the Maximize Button Snap Layouts
Snap Layouts are one of the signature Windows 11 split screen features. Move your pointer over the maximize button in the top-right corner of a normal app window. A small layout picker appears. Choose the zone where you want the current window to go.
After placing the first window, Windows offers other open windows for the remaining zones. Select the next app, then the next, until the layout is filled or you stop.
This method is better than edge dragging when you want three or four windows. Instead of manually dragging windows into corners, you choose a structure first and let Windows guide the rest.
The available layouts depend on your display. On a small laptop screen, you may see fewer choices. On a large monitor, you may see more. Display scaling can also affect how many layouts appear. A high scaling percentage makes Windows treat the usable workspace as smaller, which can reduce layout options.
If the maximize hover menu does not appear, check Snap settings under System > Multitasking. Also make sure the active app is a normal resizable desktop window. Some apps use custom title bars and may not expose the standard maximize button behavior.
Method 3: Use Windows Key Shortcuts
Keyboard shortcuts are the fastest way to split screen once they become muscle memory. Microsoft documents Windows keyboard shortcuts, and the Windows key plus arrow key family is central to snapping. Microsoft Windows keyboard shortcuts documentation
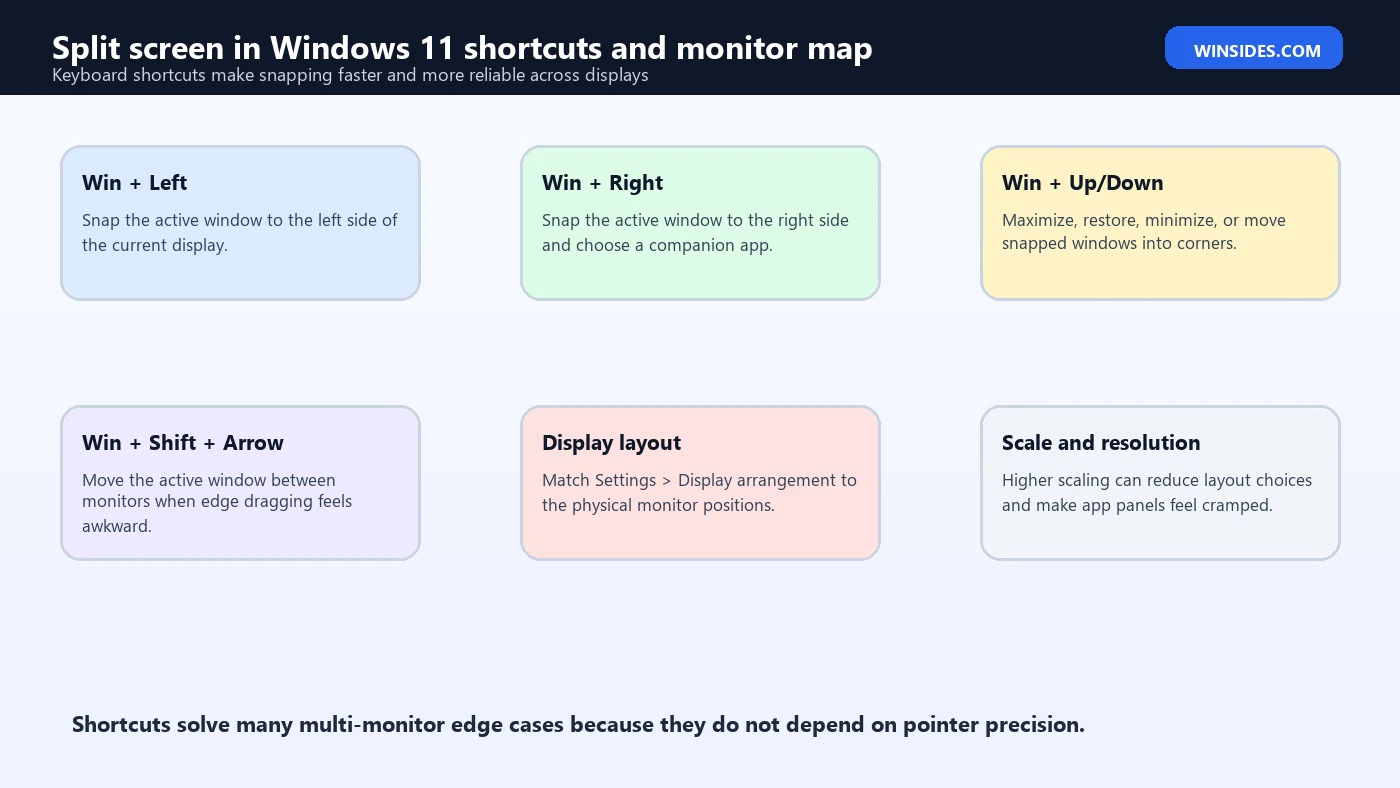
The most common shortcut is Windows key + Left Arrow or Windows key + Right Arrow. It snaps the active window to the left or right side. Then you can choose another window for the other side.
Windows key + Up Arrow can maximize a window. Windows key + Down Arrow can restore or minimize depending on the current state. When a window is already snapped left or right, pressing Windows key + Up Arrow or Down Arrow can move it into a corner arrangement.
On multi-monitor setups, Windows key + Shift + Left Arrow or Windows key + Shift + Right Arrow can move a window to another monitor. This is useful when a window opens on the wrong display or when you want to build a split-screen setup on a secondary monitor.
Keyboard snapping is especially useful for laptops. Trackpads are fine, but dragging windows precisely can be slower than pressing a shortcut. If you write, code, answer email, or compare documents all day, learn the keyboard path.
Method 4: Drag to the Top for Layout Choices
Recent Windows 11 builds can show layout choices when you drag a window toward the top area of the screen. Instead of only maximizing the window, Windows can reveal a Snap Layout picker. You can drop the window into the desired zone.
This feels natural when moving windows between monitors or when you already have the mouse on the title bar. It is also easier for some users than hovering over a small maximize button.
The same limits apply: the window must be resizable, Snap must be enabled, and the display must have enough space for the layout. If you only see maximize behavior, check the Snap windows settings and keep Windows updated.
This method is good for visual users because the layout appears before you commit. You see the possible zones and choose the slot that matches the workflow.
Best Two-App Split Screen Workflows
The two-app split is still the most useful split screen in Windows 11. It keeps the layout readable and avoids turning every window into a cramped panel.
For writing, put your document editor on one side and research on the other. If the research app needs more room, make the browser side wider. Windows allows you to drag the shared divider.
For troubleshooting, put Settings or Event Viewer on one side and a browser or notes app on the other. This keeps instructions visible while you change settings.
For file work, put two File Explorer windows side by side. This is much better than dragging files between overlapping windows. Use clear folder paths so you do not copy files in the wrong direction.
For meetings, place Teams or Zoom on one side and OneNote, Word, or a browser on the other. If screen space is limited, keep the meeting smaller and notes larger.
For coding, put an editor on one side and documentation, terminal, or preview window on the other. If you use a larger display, a three-zone layout may work better.
Three-Window and Four-Window Layouts
Three-window layouts are excellent on larger screens. A common pattern is one large window on the left and two smaller windows stacked on the right. For example, use a browser on the left, notes in the upper-right, and chat in the lower-right.
Another pattern is three columns. This works well on ultrawide or high-resolution monitors. You might use documentation on the left, code in the center, and terminal or preview on the right.
Four-window layouts divide the screen into quadrants. This can be useful for monitoring dashboards, file operations, virtual machines, or light reference work. It is less comfortable for deep reading unless the monitor is large.
Do not force four windows on a small laptop display just because Windows allows it. A split screen should reduce friction, not create tiny unreadable panels. If each app becomes too narrow, use two windows or switch to virtual desktops instead.
The best layout is the one that keeps the active work comfortable. Use extra zones only for secondary information.
Snap Groups and Taskbar Switching
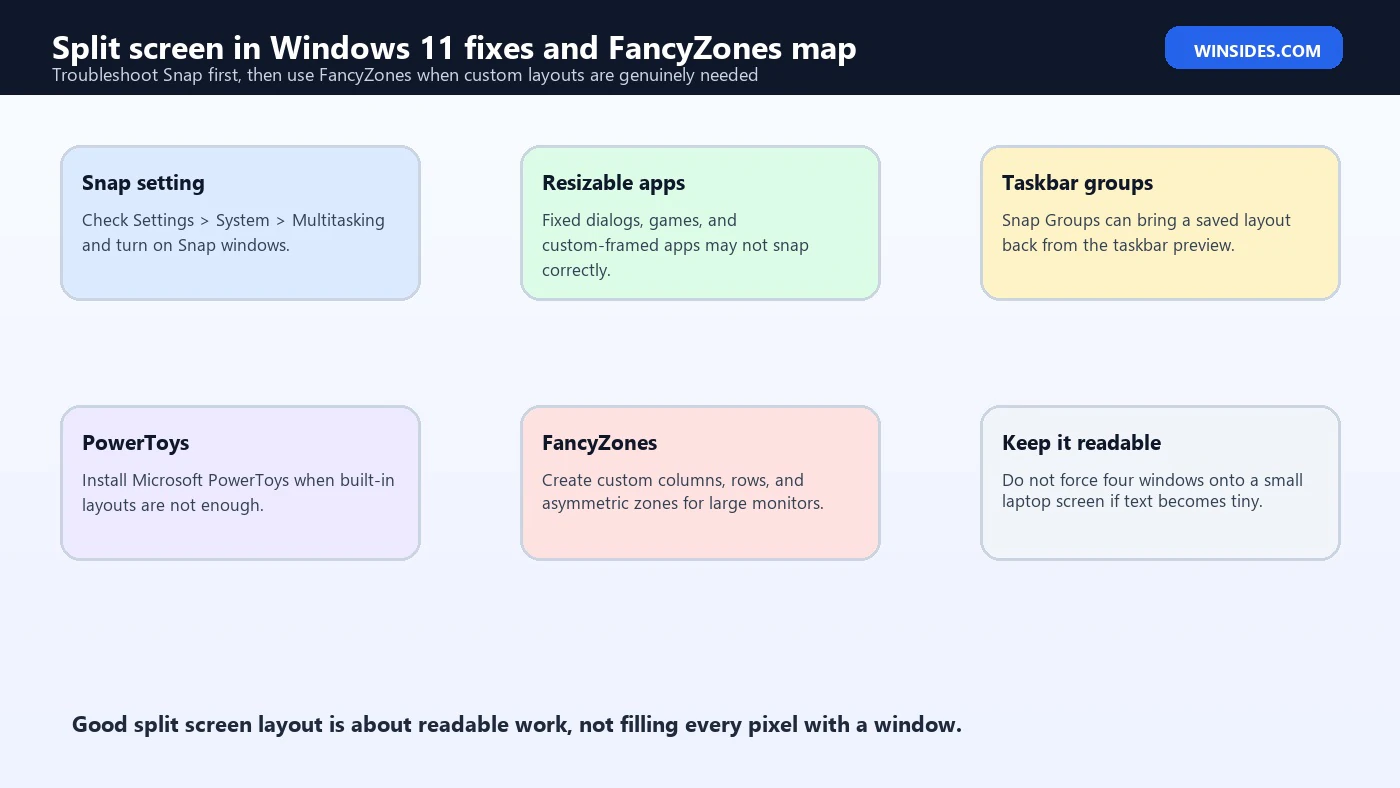
When you snap windows together, Windows can treat them as a group. Hover over one of the grouped apps in the taskbar, and you may see the individual app preview plus a group preview. Choosing the group brings the snapped arrangement back together.
Snap Groups are useful when you switch between unrelated tasks. For example, you might have one group for writing and research, another for email and calendar, and another for File Explorer and Settings.
This is one of the reasons Snap Layouts feel different from manual resizing. Manual window placement can be lost when you switch tasks. Snap Groups make it easier to return to the arrangement.
If Snap Groups do not appear, check Multitasking settings. Also remember that not every app behaves perfectly. Some apps open child windows, custom panels, or temporary views that do not participate in the group cleanly.
Snap Groups work best with normal desktop apps that keep stable windows open.
Split Screen on Laptops
Laptop split screen is useful, but screen size matters. On a 13-inch or 14-inch display, two windows side by side may be comfortable only if the apps have simple layouts. A browser plus Word can work. Two complex admin consoles may feel cramped.
Display scaling affects this heavily. If your laptop uses 150 percent or 175 percent scaling, Windows makes text and UI larger. That helps readability, but it reduces usable layout space. Snap Layouts may show fewer options, and apps may need more width.
If split screen feels cramped, try one of these adjustments: reduce browser zoom, collapse sidebars, hide bookmarks bars, use full-screen reading modes, or switch to a two-window layout instead of three or four.
A second monitor changes everything. A laptop plus external monitor can use split screen on the larger display while keeping communication apps on the laptop screen.
On touch laptops, dragging windows is natural, but precise resizing can be harder than using keyboard shortcuts or the maximize button layout picker.
Split Screen on Ultrawide and Large Monitors
Ultrawide monitors are where Windows 11 split screen becomes especially useful. Two equal halves on an ultrawide can feel too wide for many apps, so three-column layouts often work better.
A good ultrawide layout might be browser on the left, editor in the center, and notes or terminal on the right. Another layout might be email, calendar, and Teams. For support work, try ticket system, remote session, and documentation.
Built-in Snap Layouts may be enough. If they are not, PowerToys FancyZones is the next step. FancyZones lets you define custom zones that match your monitor and workflow. Microsoft documents FancyZones as a PowerToys utility for creating complex window layouts. Microsoft PowerToys FancyZones documentation
Use FancyZones when you want exact column widths, repeated zones, asymmetric layouts, or a layout that Windows Snap does not offer. It is especially useful for ultrawide monitors, vertical monitors, dashboards, and users who always arrange the same apps the same way.
Do not install PowerToys only because split screen exists. Try built-in Snap first. Add FancyZones when you know the built-in layouts are not enough.
Split Screen Across Multiple Monitors
Multiple monitors make split screen more flexible, but they also introduce edge behavior. When two monitors touch in display settings, dragging to the shared edge may move the window to the next monitor instead of snapping, depending on speed and pointer position.
If edge snapping feels inconsistent between monitors, use keyboard shortcuts. Windows key + Left Arrow and Windows key + Right Arrow can snap the active window. Windows key + Shift + Left Arrow or Right Arrow can move a window between monitors. Microsoft Windows keyboard shortcuts documentation
Check Settings > System > Display and make sure your monitor arrangement matches the physical layout on your desk. If Windows thinks the second monitor is on the wrong side, dragging and snapping will feel wrong.
Set the primary monitor deliberately. Some apps open on the primary display, and some remember their last location. A messy display configuration can make split screen feel unreliable.
If monitors have different scaling levels, window sizes may change when moved between screens. That is normal. Apps may reflow their layout when moving from a 125 percent display to a 150 percent display.
For best results, build one snapped group per monitor instead of stretching a single workflow awkwardly across both displays.
Touch, Tablet, and Convertible Behavior
Split screen on touch devices depends on window size, orientation, and whether the device is being used as a tablet or laptop. Dragging with a finger can work well, but small title bars and window borders can be harder to target.
In portrait orientation, side-by-side split may be less useful than top-bottom arrangements, but many desktop apps are still designed around horizontal width. If a layout feels awkward, rotate the device or use fewer windows.
On detachable keyboards, Snap keyboard shortcuts may be faster than touch dragging. On pure touch devices, the maximize button and top drag layout picker can be easier.
Some apps behave differently in touch-friendly modes. Store apps, web apps, and old desktop tools may not all resize gracefully. If an app refuses to snap or becomes too cramped, the app is the limit, not necessarily Windows.
When to Use FancyZones Instead of Snap Layouts
PowerToys FancyZones is for users who know exactly how they want windows arranged and need more control than Windows Snap provides. It can create custom zones, save layouts, and make repeated arrangements easier. Microsoft PowerToys FancyZones documentation
Use FancyZones for ultrawide monitors where three equal zones are better than two halves. Use it for a vertical monitor where you want stacked zones. Use it for dashboard work where one large zone and several smaller zones make sense. Use it when you repeatedly arrange the same apps every day.
Built-in Snap is better for casual users because it is already installed, simple, and integrated. FancyZones adds another layer of configuration. That is powerful, but it also means another tool to maintain.
If you install PowerToys, download it from official Microsoft sources. Do not install a random PowerToys repack. PowerToys is a Microsoft project, and its documentation explains each utility, including FancyZones. Microsoft PowerToys FancyZones documentation
The best approach is staged: master built-in Snap, then add FancyZones only if you can clearly name the layout problem it solves.
Common Split Screen Problems and Fixes
If split screen does not work at all, open Settings > System > Multitasking and make sure Snap windows is enabled. This is the first thing to check.
If the maximize button does not show Snap Layouts, confirm that the app uses a standard window frame and supports resizing. Some apps with custom title bars do not behave like normal desktop apps.
If snapping works in some apps but not others, test with File Explorer, Notepad, Settings, and Microsoft Edge. If those apps snap correctly, Windows is probably fine and the problem belongs to the app that refuses to snap.
If windows keep moving to the wrong monitor, check Settings > System > Display and correct the monitor arrangement. Also use Windows key + Shift + arrow shortcuts to move windows between monitors reliably. Microsoft Windows keyboard shortcuts documentation
If layout choices are missing, check display size, resolution, and scaling. A small screen or high scaling percentage can reduce available layouts.
If Snap Groups do not appear in the taskbar, check Snap windows settings and make sure related suggestions and group options are enabled. Also update Windows because Snap behavior has improved across Windows 11 versions.
Why Some Apps Do Not Snap Correctly
Not every window is a normal resizable window. Some apps use fixed dialog boxes. Some games use exclusive full-screen modes. Some remote desktop windows manage their own scaling. Some old utilities use custom frames that do not expose standard maximize behavior.
A window must be resizable for Snap to work properly. If the app has no maximize button or has a fixed size, Windows cannot magically create a good split-screen layout.
Some apps technically snap but become unusable when narrow. Examples include complex dashboards, spreadsheet views with many columns, large design tools, and admin consoles with fixed sidebars. In those cases, use a larger zone or a separate monitor.
Browser-based apps can often be improved by zooming out, collapsing navigation, or using responsive sidebars. Native apps depend on their own layout design.
When troubleshooting, always test with known Windows apps first. If File Explorer and Settings snap but one third-party utility does not, do not waste time repairing Windows.
Productivity Ideas for Split Screen
For research writing, use the browser on one side and the writing app on the other. Keep citations, notes, and the article outline visible without constant Alt+Tab.
For learning, place a tutorial video or documentation beside the app you are practicing. This is ideal for Windows settings, coding, design tools, and spreadsheets.
For file cleanup, open two File Explorer windows side by side. Put the source folder on the left and the destination folder on the right. This reduces copy mistakes.
For troubleshooting, put Event Viewer or Settings beside a browser guide or internal documentation. You can read steps and perform them without losing context.
For communication-heavy work, place Teams or email beside calendar or notes. Keep the meeting visible while writing action items.
For developers, use editor, terminal, and browser preview across a three-column layout. If your monitor is wide enough, this beats constant window switching.
Keyboard Shortcut Reference for Split Screen
Here are the most useful split-screen related shortcuts to memorize:
- Windows key + Left Arrow: snap the active window to the left side.
- Windows key + Right Arrow: snap the active window to the right side.
- Windows key + Up Arrow: maximize a window or move a snapped window toward the upper zone.
- Windows key + Down Arrow: restore, minimize, or move a snapped window toward the lower zone.
- Windows key + Z: open Snap Layouts on supported Windows 11 builds and windows.
- Windows key + Shift + Left or Right Arrow: move the active window to another monitor.
- Alt + Tab: switch between open windows and groups.
- Windows key + Tab: open Task View for windows and desktops.
Microsoft’s Windows keyboard shortcuts page is worth bookmarking if you want the complete list beyond snapping. Microsoft Windows keyboard shortcuts documentation
Split Screen vs Virtual Desktops
Split screen and virtual desktops solve different problems. Split screen is for seeing multiple windows at the same time. Virtual desktops are for separating tasks into different workspaces.
Use split screen when two apps belong together. Browser and Word. Excel and PDF. File Explorer and Settings. Terminal and documentation. Meeting and notes.
Use virtual desktops when tasks should not compete for attention. Keep writing on one desktop, communication on another, personal browsing on another, and troubleshooting on another.
You can combine them. For example, Desktop 1 can have a browser and editor snapped together. Desktop 2 can have Teams and calendar snapped together. Desktop 3 can have File Explorer and Settings snapped together.
This combination is powerful because it reduces both window overlap and task mixing. It also makes the taskbar feel less chaotic.
Best Settings for a Cleaner Split Screen Experience
Start with Snap windows enabled under System > Multitasking. Expand the options and keep layout suggestions turned on if you like the guided experience.
Use a sensible display scale. If everything is huge and layouts feel cramped, consider whether your display can comfortably use a slightly lower scaling percentage. Do not reduce scaling so far that text becomes hard to read.
Use browser zoom intentionally. If a website is too wide in a snapped browser, use Ctrl + minus to zoom out or collapse the website sidebar if available.
Keep only needed windows open. Snap suggestions are easier to use when you do not have twenty random windows competing for the second zone.
Use descriptive app windows. Multiple browser profiles, duplicate File Explorer windows, and several blank documents can make snap suggestions confusing. Name files and sessions clearly when possible.
Update Windows. Snap behavior has improved through Windows 11 updates, and future builds may continue refining layouts, groups, and taskbar integration.
Frequently Asked Questions
How do I split screen in Windows 11?
Drag a window to the left or right edge of the screen, then choose another window for the other side. You can also hover over the maximize button and choose a Snap Layout.
What is the shortcut for split screen in Windows 11?
Use Windows key + Left Arrow or Windows key + Right Arrow to snap the active window to one side. Use Windows key + Z to open Snap Layouts on supported Windows 11 builds.
Why is split screen not working in Windows 11?
Snap windows may be turned off, the app may not support resizing, the display may be too small for certain layouts, or a work device policy may restrict multitasking behavior. Start by checking Settings > System > Multitasking.
Can I split screen into three windows?
Yes. Use Snap Layouts from the maximize button or Windows key + Z. Three-window layouts work best on larger laptop screens, desktop monitors, and ultrawide displays.
Can I split screen into four windows?
Yes. You can use a four-corner layout, but it is comfortable only on sufficiently large or high-resolution screens. On small laptops, four windows may be too cramped.
What is FancyZones?
FancyZones is a Microsoft PowerToys utility for custom window zones. It is useful when built-in Windows 11 Snap Layouts do not match your monitor or workflow. Microsoft PowerToys FancyZones documentation
Does split screen work with multiple monitors?
Yes. You can snap windows on each monitor. If edge dragging feels awkward between monitors, use Windows key shortcuts and check your monitor arrangement in Display settings.
Why do some apps refuse to snap?
Some windows are fixed-size, custom-framed, full-screen, or not designed to resize. Test with File Explorer or Settings to confirm whether Windows Snap works in general.
Conclusion: Use Snap First, Then Customize When Needed
Split screen in Windows 11 is one of the fastest ways to reduce window switching. The built-in Snap system handles most workflows: two apps side by side, three apps on a larger monitor, four corners for monitoring, and taskbar groups for returning to a saved arrangement. You can use the mouse, the maximize button, the top drag layout picker, or Windows key shortcuts depending on how you work.
Start simple. Turn on Snap windows, learn Windows key + Left Arrow and Windows key + Right Arrow, and use the maximize button when you need more than two apps. If you use an ultrawide monitor or a repeated professional layout, add Microsoft PowerToys FancyZones for custom zones.
The best split screen setup is not the one with the most windows. It is the one that keeps the right information visible while leaving enough room to actually work.
For more interesting articles, stay tuned to Winsides.com!








Community
Comments (0)