

Introduction to DPC Watchdog Violation on Windows 11
Encountering a Blue Screen of Death (BSOD) on your Windows 11 system can be a frustrating and often alarming experience. Among the various stop codes that can appear, the DPC Watchdog Violation (error code 0x00000133) is particularly notorious for its disruptive nature. This error indicates that your system has detected a critical issue where a Deferred Procedure Call (DPC) has taken too long to execute, leading to an unresponsive system and an abrupt shutdown. For additional context, see Bug Check 0x133 DPC_WATCHDOG_VIOLATION, update drivers manually in Windows, Intel Support articles, NVIDIA drivers, and Samsung SSD support.
This comprehensive guide aims to demystify the DPC Watchdog Violation on Windows 11, providing you with a clear understanding of its origins and, more importantly, a systematic approach to resolve it. We will delve into the technical underpinnings, explore common culprits ranging from outdated drivers to hardware incompatibilities, and offer a suite of actionable troubleshooting methods.
Addressing this error promptly is paramount. Ignoring it can lead to repeated system crashes, potential data corruption, and a significant degradation in overall system performance. By following the steps outlined in this article, you can restore stability to your Windows 11 environment, safeguard your data, and ensure a smoother computing experience. Let’s embark on this journey to conquer the DPC Watchdog Violation.
Table of contents
Key Takeaways for Resolving DPC Watchdog Violation
Before diving into the detailed troubleshooting steps, here’s a quick summary of the most crucial strategies to tackle the DPC Watchdog Violation on Windows 11:
- Update Drivers Regularly: Outdated or corrupt device drivers, especially for storage controllers (AHCI/SATA) and graphics cards, are frequent causes. Prioritize updating these directly from manufacturer websites.
- Disable Fast Startup: This feature, while speeding up boot times, can sometimes interfere with hardware initialization, leading to DPC Watchdog errors. Disabling it often resolves the issue.
- Run System Diagnostics: Utilize Windows’ built-in tools like System File Checker (SFC) and Deployment Image Servicing and Management (DISM) to repair corrupted system files and restore system image integrity.
- Check Storage Device Firmware: Ensure your SSD or HDD firmware is up-to-date. Outdated firmware on storage devices can be a significant contributor to DPC Watchdog Violations.
- Analyze Event Viewer Logs: The Event Viewer provides critical clues. Look for error messages that precede the BSOD to pinpoint the problematic driver or hardware component.
- Perform a Clean Boot: Isolate software conflicts by starting Windows with a minimal set of drivers and programs. This helps identify third-party applications or services causing the problem.
- Adjust Power Settings: Incorrect power management settings, particularly for PCI Express and USB devices, can sometimes trigger DPC Watchdog errors due to device timeouts.
Understanding the DPC Watchdog Violation Error
The DPC Watchdog Violation is a critical system error that manifests as a Blue Screen of Death (BSOD) on Windows 11. Its appearance signals a fundamental problem within your system’s core operations, specifically related to how the operating system handles time-sensitive tasks. Understanding what a DPC is and why its failure triggers this error is the first step toward effective resolution.
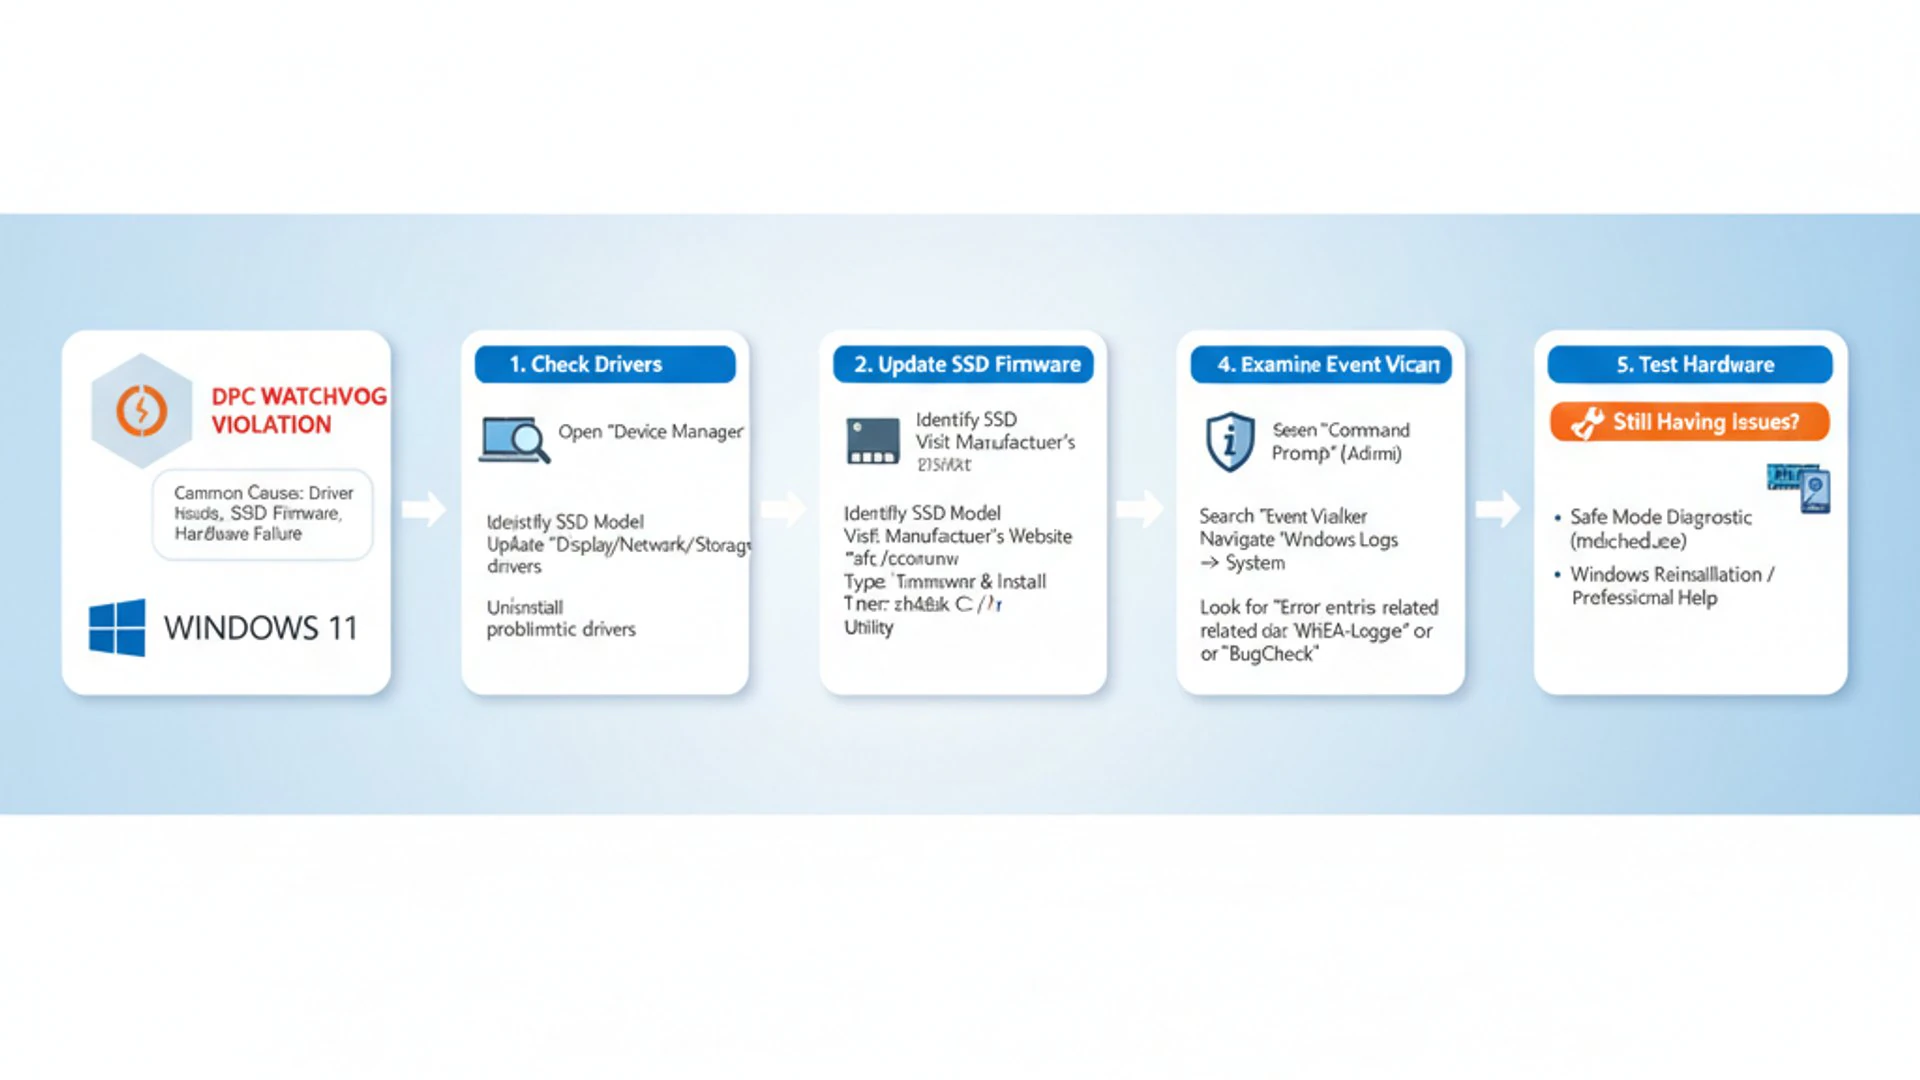
This error code, 0x00000133, points to a scenario where a Deferred Procedure Call has exceeded its allotted execution time. The “watchdog” component is a system mechanism designed to monitor these critical operations. If a DPC takes too long, the watchdog intervenes, crashing the system to prevent further instability or data corruption.
The implications of this error are significant. Repeated DPC Watchdog Violations can lead to data loss, especially if files are open or unsaved during a crash. It also severely impacts productivity and the overall reliability of your Windows 11 machine. A stable system is crucial for any user, and addressing this error ensures your PC remains dependable.
What is DPC and Why Does it Cause Errors?
A Deferred Procedure Call (DPC) is a crucial mechanism within the Windows kernel that allows device drivers and other low-level system components to perform tasks that are not immediately critical. These tasks are deferred from higher-priority interrupt service routines (ISRs) to a later, more convenient time, preventing delays in critical system operations.
Think of DPCs as a way for the operating system to manage its workload efficiently. When a device like a network card or a storage controller receives data, it generates an interrupt. The immediate, high-priority task is to acknowledge the interrupt and quickly save the data. Any further processing, like moving data to an application buffer, is often handled by a DPC.
The problem arises when a DPC takes too long to complete its execution. This could be due to a faulty driver entering an infinite loop, a hardware component failing to respond, or a resource contention issue. The system has a “watchdog” timer that monitors these DPCs. If a DPC exceeds its allotted time, typically a few hundred milliseconds, the watchdog triggers the BSOD to prevent the entire system from hanging indefinitely.
This safeguard ensures that the operating system remains responsive and doesn’t get stuck waiting for a single, problematic component. However, it also means that the underlying issue causing the DPC to hang needs to be identified and resolved. The DPC Watchdog Violation on Windows 11 is a direct consequence of this protective mechanism.
Common Causes Behind DPC Watchdog Violation
The DPC Watchdog Violation error is rarely caused by a single, straightforward issue; instead, it often stems from a confluence of factors. Identifying these common culprits is essential for effective troubleshooting. Understanding the root cause helps you target your efforts rather than blindly trying solutions.
One of the most frequent instigators is outdated or corrupted device drivers. Drivers act as translators between your hardware and the operating system. If a driver for a critical component, such as your storage controller (AHCI/SATA), graphics card, or network adapter, is faulty or incompatible with Windows 11, it can cause DPCs to hang.
Another significant factor is incompatible hardware or firmware issues. Newly installed hardware that isn’t fully compatible with your system, or outdated firmware on components like your SSD or motherboard, can lead to communication breakdowns that trigger the watchdog. Even peripherals like external hard drives or USB devices can sometimes be the source if their drivers are problematic.
Software conflicts also play a role. Certain third-party applications, especially security software, virtual machine software, or system optimization tools, can interfere with low-level system operations, leading to DPC delays. Corrupted system files, often a result of improper shutdowns or malware, can also destabilize the operating system and contribute to these errors.
Finally, power management settings can sometimes be a subtle cause. Aggressive power saving features might cause devices to enter low-power states too quickly or fail to wake up properly, leading to timeouts and DPC Watchdog Violations. Understanding these diverse causes empowers you to approach troubleshooting systematically.
Essential Preliminary Checks and Basic Troubleshooting
Before diving into more complex solutions, it’s always wise to start with the simplest and most common troubleshooting steps. These preliminary checks can often resolve transient issues or help narrow down the problem’s source without requiring extensive technical knowledge. Many DPC Watchdog Violation occurrences are temporary glitches that can be fixed with basic actions.
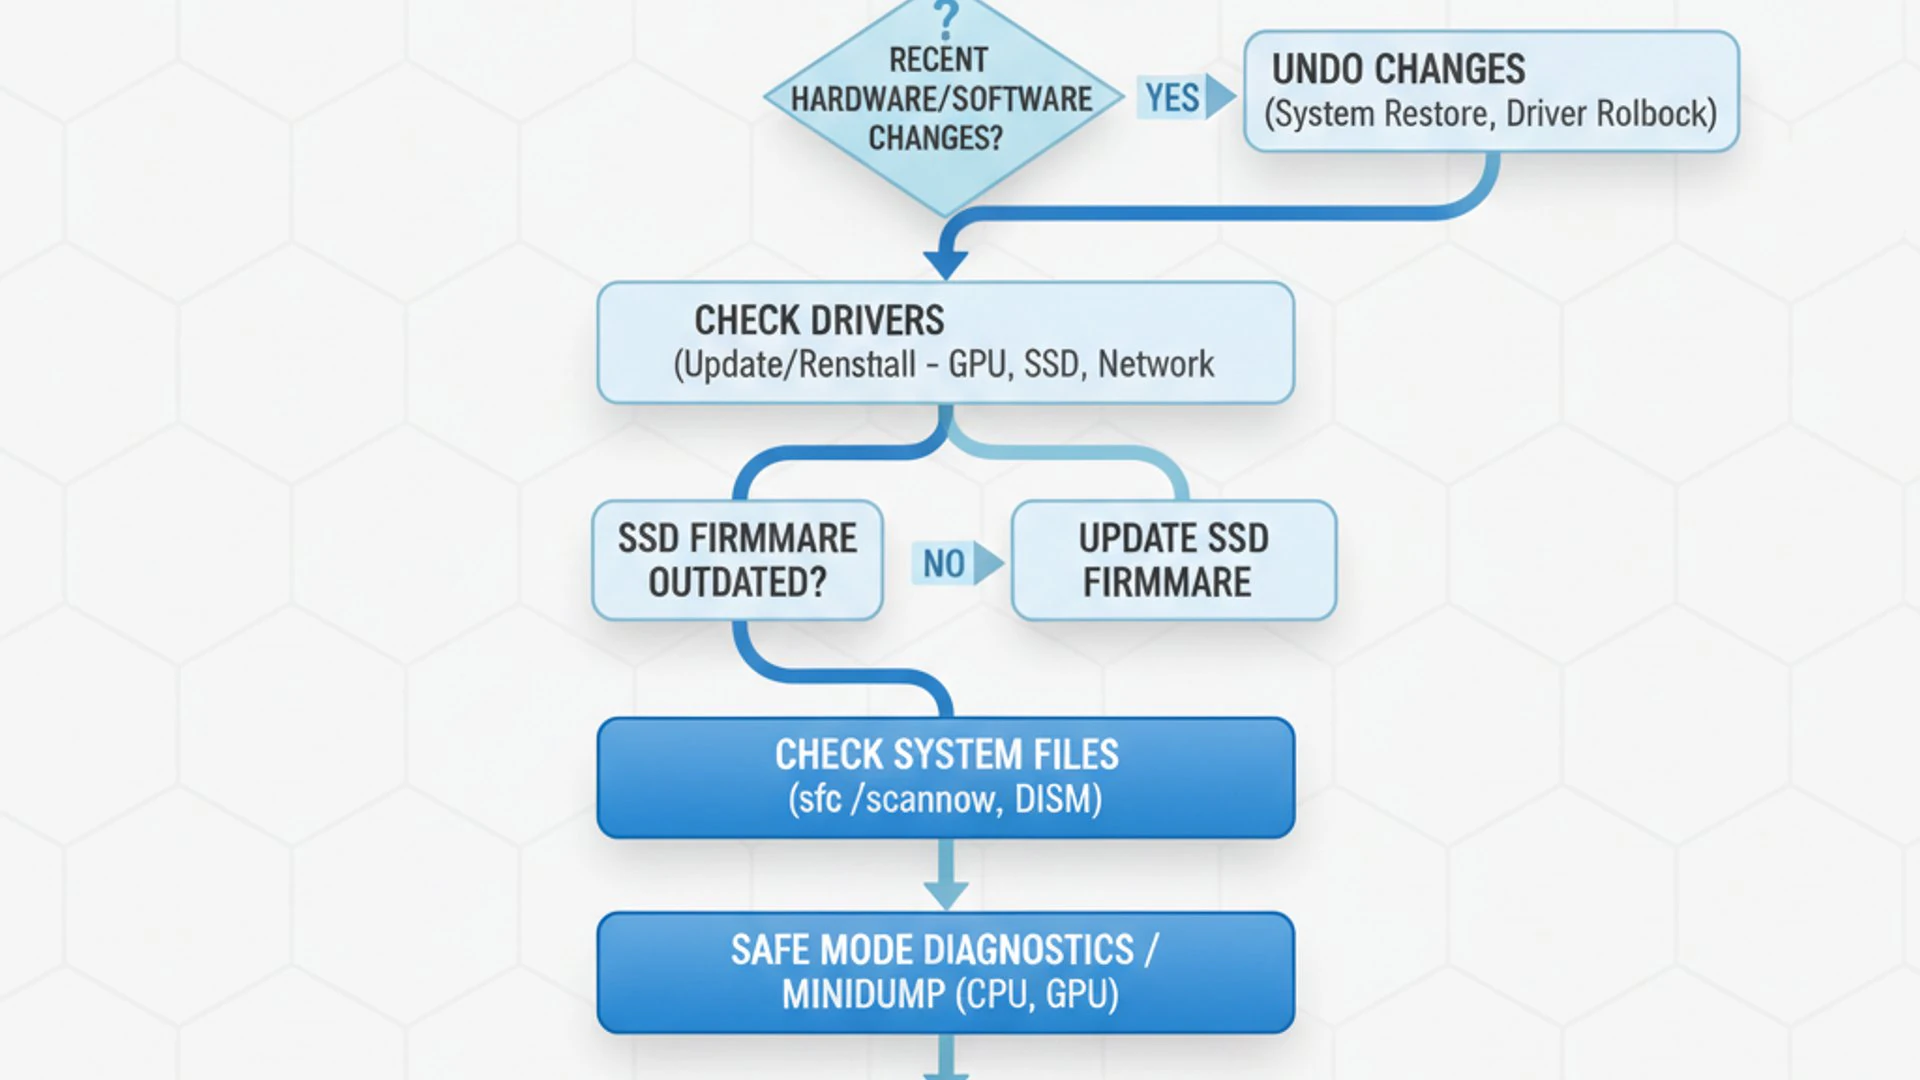
These initial steps are designed to rule out common software conflicts, temporary system overloads, or peripheral-related issues. They are quick to perform and can save you a lot of time and effort compared to immediately jumping into advanced diagnostics. A systematic approach always begins with the fundamentals.
Remember, even if these steps don’t immediately resolve the dpc watchdog violation on Windows 11, they provide a stable baseline for further investigation. Ensuring your system is up-to-date and free from obvious external interferences is a crucial first move in any troubleshooting endeavor.
Restarting Your System and Checking for Updates
The classic “turn it off and on again” advice holds surprising power, even for complex errors like the DPC Watchdog Violation. A simple system restart can clear temporary glitches, reset device states, and resolve minor software conflicts that might be causing the DPC to hang. It’s the first and easiest step to take.
After restarting, the next critical step is to ensure your Windows 11 system is fully updated. Microsoft frequently releases updates that include bug fixes, security patches, and improved driver compatibility. An outdated operating system can sometimes be the underlying cause of stability issues.
- Press
Windows key + Ito open Settings. - Navigate to Windows Update in the left pane.
- Click on Check for updates.
- Download and install any available updates. You might need to restart your computer multiple times to complete all installations.
Keeping your system updated is not just about fixing current problems but also about preventing future ones. It ensures you have the latest improvements and compatibility fixes from Microsoft, which can significantly reduce the likelihood of encountering a DPC Watchdog Violation on Windows 11.
Disconnecting External Peripherals
External peripherals, while essential for many users, can sometimes introduce unexpected conflicts or driver issues that lead to a DPC Watchdog Violation. Faulty USB devices, external hard drives, printers, or even certain gaming accessories can trigger system instability if their drivers are outdated or incompatible.
To rule out peripherals as the cause, perform a simple test:
- Shut down your Windows 11 computer completely.
- Disconnect all non-essential external peripherals. This includes USB drives, external hard drives, printers, webcams, secondary monitors (if possible), and any other devices not strictly necessary for basic operation. Keep only your keyboard and mouse connected.
- Restart your computer.
If the DPC Watchdog Violation does not reappear after disconnecting peripherals, it strongly suggests that one of the disconnected devices is the culprit. You can then reconnect them one by one, restarting your system after each connection, until the error reappears. This methodical approach helps you pinpoint the problematic device.
Once identified, you can focus on updating the drivers for that specific peripheral or considering its replacement if driver updates don’t resolve the issue. This step is a powerful diagnostic tool for isolating hardware-related conflicts.
Method 1: Updating Device Drivers
Outdated or corrupted device drivers are arguably the most common cause of the DPC Watchdog Violation on Windows 11. Drivers are the software components that allow your operating system to communicate effectively with your hardware. When these drivers are not functioning correctly, they can cause critical system processes, like DPCs, to hang, leading to a system crash.
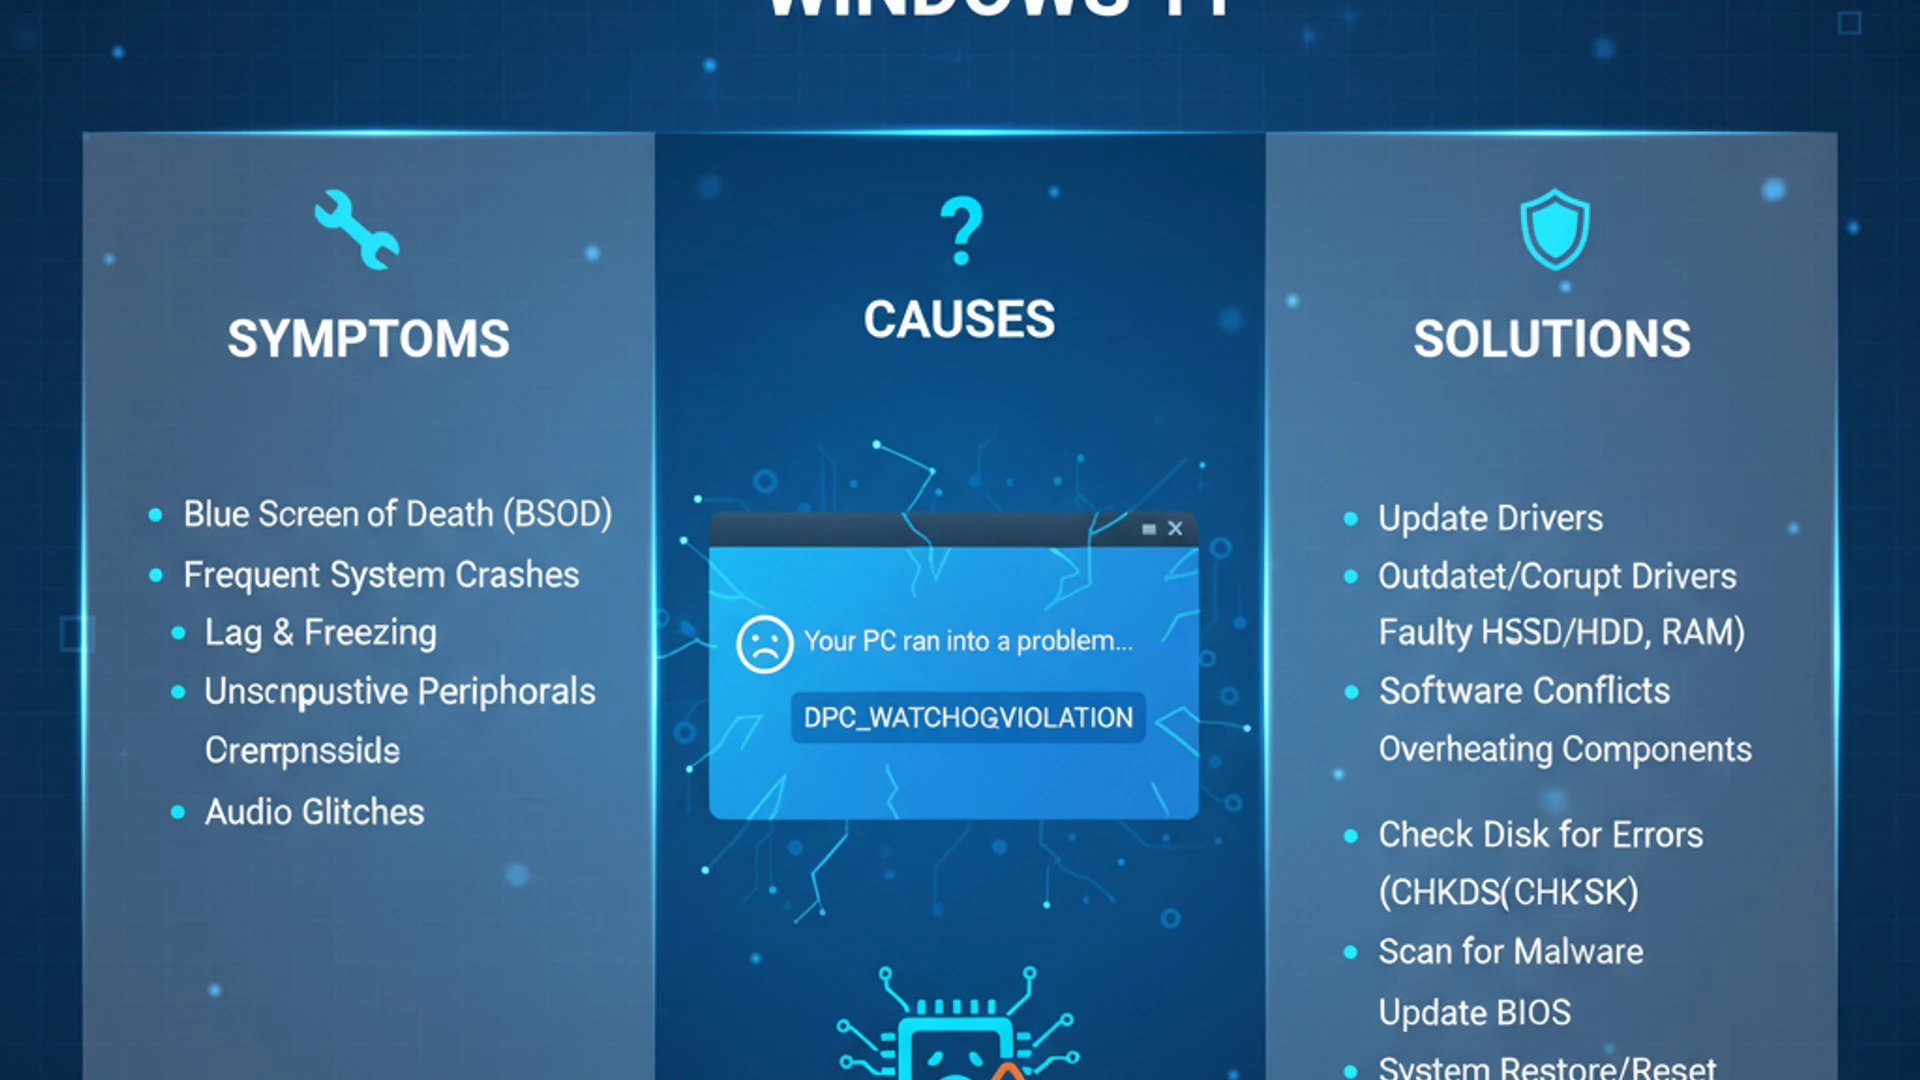
Focusing on updating drivers, especially for critical components such as storage controllers (SATA/AHCI), graphics cards, network adapters, and chipset drivers, is often the most effective first step in resolving this error. Microsoft provides generic drivers through Windows Update, but these are not always the most optimized or up-to-date versions.
It’s crucial to understand that a generic driver might work, but a manufacturer-specific driver is often tailored for optimal performance and stability. This section will guide you through using Device Manager and, more importantly, obtaining drivers directly from the hardware manufacturers.
Updating Drivers via Device Manager
The Device Manager is Windows’ built-in tool for managing all hardware devices connected to your system. It allows you to view device status, enable or disable devices, and, critically, update their drivers. While convenient, the “Update driver” option in Device Manager primarily checks for drivers available through Windows Update or those already stored on your system.
- Press
Windows key + Xand select Device Manager from the quick link menu. - Expand categories like Display adapters, IDE ATA/ATAPI controllers, Network adapters, and Storage controllers. These are common culprits.
- Right-click on a device (e.g., your graphics card or SATA AHCI controller) and select Update driver.
- Choose Search automatically for drivers. Windows will attempt to find a newer driver online or from your local system.
If Windows finds and installs a new driver, restart your computer to see if the DPC Watchdog Violation persists. This method is a good starting point, but it might not always fetch the absolute latest driver from the manufacturer, which is often crucial for resolving persistent issues.
Identifying Problematic Drivers
Sometimes, the DPC Watchdog Violation is triggered by a specific driver. Identifying this driver can significantly streamline the troubleshooting process. The Event Viewer (discussed in Method 5) is your primary tool for this, but you can also look for devices with warning signs in Device Manager.
In Device Manager, look for any devices with a yellow exclamation mark next to their icon. This indicates a problem with the device, often a driver issue. Right-clicking such a device and checking its properties might reveal an error code that can guide your search for a solution.
If you suspect a particular driver but don’t see an exclamation mark, you can try rolling back the driver to a previous version if an update recently occurred. In Device Manager, right-click the device, go to Properties, then the Driver tab, and click Roll Back Driver if available. This can sometimes resolve issues introduced by a faulty update.
Another approach involves using a tool like WhoCrashed, which analyzes minidump files created during a BSOD to identify the specific driver or module that caused the crash. This can provide a direct lead for which driver to focus on updating or reinstalling.
Using Manufacturer’s Websites for Driver Updates
For critical components, relying solely on Windows Update or Device Manager for drivers might not be enough. The most reliable way to get the latest, most stable, and fully compatible drivers is directly from your hardware manufacturer’s official website. This is especially true for your motherboard chipset, graphics card, and storage controller.
- Identify your hardware:
- For your motherboard chipset, find your motherboard model. You can often find this by typing “System Information” in the Windows search bar.
- For your graphics card, note down its model (e.g., NVIDIA GeForce RTX 3080, AMD Radeon RX 6800 XT).
- For your storage controller, you might need to check your motherboard’s specifications or look in Device Manager under “IDE ATA/ATAPI controllers” and “Storage controllers.”
- Visit the manufacturer’s support website: Go to the official website of your motherboard manufacturer (e.g., ASUS, MSI, Gigabyte), graphics card manufacturer (NVIDIA, AMD, Intel), or SSD/HDD manufacturer (Samsung, Western Digital, Crucial).
- Navigate to the “Support” or “Drivers” section: Use their search function to find drivers specific to your product model and Windows 11 (64-bit).
- Download and install: Download the latest recommended drivers. Always prefer drivers specifically listed for Windows 11. Follow the installation instructions provided by the manufacturer, which often involve running an executable file.
Always download drivers only from official manufacturer websites to avoid malware or incompatible software. Installing these specific drivers can often resolve the DPC Watchdog Violation on Windows 11 by ensuring optimal communication between your hardware and the operating system.
Method 2: Disabling Fast Startup
Fast Startup is a feature introduced in Windows 8 and carried over to Windows 11, designed to reduce boot times by saving a hibernation file of the kernel session when you shut down your computer. While beneficial for quick boots, this feature can sometimes cause conflicts with hardware initialization, particularly with drivers that don’t fully support the hybrid shutdown process.
These conflicts can lead to various issues, including the DPC Watchdog Violation. When Fast Startup is enabled, your system doesn’t perform a complete shutdown and restart. Instead, it enters a state similar to hibernation, which can prevent certain drivers or hardware components from properly refreshing their state upon startup. This can leave them in an unstable condition, making them prone to DPC-related errors.
Disabling Fast Startup forces your computer to perform a full shutdown every time, ensuring that all drivers and hardware components are completely reinitialized. This often resolves underlying issues that Fast Startup might be masking or exacerbating. It’s a simple yet effective troubleshooting step for the DPC Watchdog Violation on Windows 11.
Accessing Power Options
To disable Fast Startup, you’ll need to navigate through your system’s Power Options. This control panel applet allows you to manage various power-related settings, including how your computer behaves when you shut it down or put it to sleep.
- Open the Start Menu and type “Control Panel,” then select it from the search results.
- In the Control Panel, change the “View by” option to Large icons or Small icons to see all options.
- Click on Power Options.
Alternatively, you can right-click the Start button, select Run, type powercfg.cpl, and press Enter. This will directly open the Power Options window, saving you a few clicks. Once in Power Options, you’ll find the necessary settings to modify the shutdown behavior of your Windows 11 system.
Modifying Shutdown Settings
Within the Power Options window, you’ll find the setting to enable or disable Fast Startup. This option is usually hidden behind a link that requires administrative privileges to modify. Follow these steps to disable it:
- In the Power Options window, click on Choose what the power buttons do in the left-hand pane.
- On the next screen, you’ll see options under “Shutdown settings.” Notice that these options are likely grayed out. Click on Change settings that are currently unavailable at the top. This requires administrator permissions.
- Now, scroll down to the “Shutdown settings” section.
- Uncheck the box next to Turn on fast startup (recommended).
- Click Save changes.
Important Tip: After disabling Fast Startup, perform a full shutdown (not just a restart) and then power on your computer. This ensures that the change takes full effect and that your system performs a complete boot cycle, which is crucial for determining if this resolves the DPC Watchdog Violation on Windows 11.
While disabling Fast Startup might slightly increase your boot time, the potential gain in system stability and the resolution of the DPC Watchdog Violation often outweigh this minor inconvenience. If the error disappears, you’ve found a key part of your solution.
Method 3: Running System File Checker (SFC) and DISM
Corrupted system files are a common underlying cause of various Windows stability issues, including the DPC Watchdog Violation. These files are essential for the proper functioning of the operating system, and if they become damaged due to improper shutdowns, malware, or disk errors, they can lead to unpredictable behavior and crashes. Fortunately, Windows 11 provides powerful built-in tools to address these issues: System File Checker (SFC) and Deployment Image Servicing and Management (DISM).
SFC is designed to scan for and repair corrupted Windows system files, replacing them with correct versions. DISM, on the other hand, is a more robust tool that can repair the Windows image itself, which SFC relies upon. Using both in conjunction provides a comprehensive approach to ensuring the integrity of your operating system files, a critical step in resolving persistent DPC Watchdog Violations.
These tools are non-invasive and safe to use, making them an excellent next step if driver updates and Fast Startup adjustments haven’t resolved the issue. They directly address the core stability of your Windows 11 installation.
Utilizing SFC to Repair Corrupted System Files
The System File Checker (SFC) utility is a command-line tool that scans for and restores corrupted Windows system files. It compares the current system files with the official versions stored in the Windows component store and replaces any discrepancies.
- Press
Windows key + S, type “cmd,” right-click on Command Prompt, and select Run as administrator. - In the Command Prompt window, type
sfc /scannowand pressEnter. - The scan will begin and may take some time to complete. Do not close the window until the verification process is 100% finished.
Upon completion, you will see a message indicating the scan results. It might say “Windows Resource Protection did not find any integrity violations,” “Windows Resource Protection found corrupt files and successfully repaired them,” or “Windows Resource Protection found corrupt files but was unable to fix some of them.” If files were repaired, restart your computer and check if the DPC Watchdog Violation on Windows 11 is resolved.
Deploying DISM for System Image Repair
If SFC reports that it couldn’t fix some files, or if the problem persists, the underlying Windows system image itself might be corrupted. This is where the Deployment Image Servicing and Management (DISM) tool comes into play. DISM can repair the Windows image that SFC uses as its source, ensuring that SFC has a healthy reference to work with.
- Open Command Prompt as administrator, just as you did for SFC.
- Type the following commands one by one, pressing
Enterafter each:DISM /Online /Cleanup-Image /CheckHealth(Checks for corruption)DISM /Online /Cleanup-Image /ScanHealth(Performs a more advanced scan for corruption)DISM /Online /Cleanup-Image /RestoreHealth(Repairs the Windows image using Windows Update as a source)
The RestoreHealth command can take a considerable amount of time, sometimes up to an hour, depending on the extent of the corruption and your internet connection. Ensure you have a stable internet connection as it downloads necessary files from Windows Update. After DISM completes, restart your computer and then run sfc /scannow again to ensure all system files are now properly repaired. This two-pronged approach is highly effective for addressing core system file integrity issues.
Method 4: Checking and Optimizing Your SSD/HDD Firmware
Storage devices, particularly Solid State Drives (SSDs), are critical components in modern Windows 11 systems. Their performance and stability are heavily reliant on their firmware – the embedded software that controls the drive’s operations. Outdated or buggy firmware on an SSD or even a traditional Hard Disk Drive (HDD) can lead to a variety of issues, including slow performance, data corruption, and, crucially, the DPC Watchdog Violation.
A storage device with problematic firmware might respond slowly or incorrectly to read/write requests, causing the DPC associated with disk I/O operations to exceed its time limit. This triggers the watchdog, leading to a BSOD. Keeping your storage device firmware up-to-date is a vital maintenance step that often gets overlooked but can significantly impact system stability.
This method focuses on verifying your storage device’s health and current firmware version, then guiding you through the process of safely updating it. This proactive measure can prevent many stability issues and ensure your Windows 11 system runs smoothly.
Verifying SSD/HDD Health and Firmware Version
Before attempting any firmware updates, it’s prudent to check the current health and firmware version of your storage devices. This helps you determine if an update is necessary and provides a baseline for comparison.
- Check Disk Health:
- Press
Windows key + S, type “cmd,” right-click on Command Prompt, and select Run as administrator. - Type
wmic diskdrive get statusand pressEnter. If all your drives show “OK,” their basic health is good. For a more detailed check, you might use third-party tools like CrystalDiskInfo.
- Press
- Find Firmware Version:
- Open Device Manager (
Windows key + X> Device Manager). - Expand Disk drives.
- Right-click on your SSD or HDD and select Properties.
- Go to the Details tab.
- In the “Property” dropdown, select Hardware Ids. The firmware version is often embedded in the string displayed. For example, “SAMSUNG_SSD_850_EVO_250GB_FW_VERSION“
- Open Device Manager (
Note down the model number and current firmware version of your primary drive. This information will be crucial when you visit the manufacturer’s website to look for updates. A healthy drive with outdated firmware is still a potential risk for the DPC Watchdog Violation on Windows 11.
Updating Storage Device Firmware
Updating storage device firmware is a more delicate process than updating drivers, as an interruption or incorrect procedure can potentially brick your drive. Always proceed with caution and follow the manufacturer’s instructions precisely.
- Backup Your Data: This is the most critical step. Before attempting any firmware update, ensure you have a complete system image backup or at least a backup of all your important files to an external drive or cloud service.
- Visit Manufacturer’s Website: Go to the official support page for your SSD/HDD manufacturer (e.g., Samsung, Crucial, Western Digital, Seagate).
- Locate Firmware Updates: Search for your specific drive model. Look for a “Downloads,” “Support,” or “Firmware” section.
- Download the Firmware Update Tool: Manufacturers usually provide a dedicated utility or an ISO file that you can use to create a bootable USB drive for the update process. Read the instructions carefully.
- Follow Manufacturer’s Instructions: The update process varies by manufacturer. It often involves booting from a USB drive, running the utility, and allowing it to flash the new firmware. Do not interrupt this process.
Warning: Ensure your computer is connected to a stable power source (e.g., a laptop plugged into an outlet, not just battery) during the firmware update to prevent power loss, which could corrupt the drive. Incorrect firmware updates can render your drive unusable.
After a successful firmware update, restart your system and monitor for the DPC Watchdog Violation. An updated and optimized storage device can significantly contribute to overall system stability and responsiveness.
Method 5: Analyzing Event Viewer Logs
When your Windows 11 system experiences a DPC Watchdog Violation, it typically logs critical information about the event. The Event Viewer is a powerful diagnostic tool that records a detailed history of system events, errors, warnings, and information messages. Learning to navigate and interpret these logs can provide invaluable clues about the root cause of your BSOD, often pointing directly to the problematic driver or hardware component.
Relying on Event Viewer is a more scientific approach than trial-and-error troubleshooting. Instead of guessing, you’re looking for concrete evidence of what happened immediately before the system crashed. This can save you significant time and effort by directing your focus to the most likely culprits.
This section will guide you through accessing the Event Viewer and understanding how to filter and interpret the critical entries that precede a DPC Watchdog Violation, helping you diagnose the underlying problem with greater precision.
Navigating to Event Viewer
Accessing the Event Viewer is straightforward in Windows 11. It’s a standard administrative tool that provides a centralized location for all system logs.
- Press
Windows key + Xto open the Quick Link menu. - Select Event Viewer from the list.
Alternatively, you can type “Event Viewer” into the Windows search bar and select the application from the results. Once the Event Viewer window opens, you’ll see a complex interface with various log categories. Our primary focus will be on the “Windows Logs,” specifically “System” and “Application” logs, as these are where critical errors like BSODs are typically recorded.
The left pane shows different log types, while the center pane displays events for the selected log, and the right pane offers actions like filtering and searching. Getting comfortable with this interface is key to effective diagnostics for the DPC Watchdog Violation on Windows 11.
Interpreting Critical Errors and Warnings
Once in Event Viewer, you need to filter and examine the logs around the time of the DPC Watchdog Violation.
- In the left pane, navigate to Windows Logs > System.
- In the right pane, click on Filter Current Log…
- In the “Filter Current Log” dialog, under “Event level,” check Critical, Error, and Warning. You can also specify a time range if you know roughly when the BSOD occurred. Click OK.
Now, scroll through the filtered events, paying close attention to the timestamps. Look for Error or Critical events that occurred just before the DPC Watchdog Violation. The BSOD itself will often be logged as a “BugCheck” event with the source “Microsoft-Windows-Kernel-Power” or “BugCheck.”
Look for events that precede the BugCheck. Common culprits include:
- Source: disk, storahci (related to storage controllers)
- Source: nvlddmkm (NVIDIA graphics driver) or amdkmdap (AMD graphics driver)
- Source: Netwtw0x (Intel Wi-Fi driver)
- Event ID: 41 (Kernel-Power, indicating an unexpected shutdown)
Pro Tip: Once you find a suspicious error, double-click it to open its properties. The “General” tab often provides a description, and the “Details” tab (especially “XML View”) can offer more technical information, sometimes even naming the specific driver (.sys file) involved. Search online for any specific error codes or driver names you find.
This detailed analysis of Event Viewer logs is one of the most effective ways to pinpoint the exact cause of the DPC Watchdog Violation on Windows 11, guiding your troubleshooting efforts towards the most likely solution.
Method 6: Performing a Clean Boot
Software conflicts are a common yet often overlooked cause of system instability, including the DPC Watchdog Violation. Third-party applications, background services, or startup programs can sometimes interfere with critical Windows processes or drivers, leading to DPCs hanging and triggering a BSOD. Identifying which specific software is causing the conflict can be challenging, as many applications run silently in the background.
A clean boot is a diagnostic startup mode for Windows that starts the operating system with a minimal set of drivers and startup programs. This effectively isolates the system from most third-party software, allowing you to determine if an external application or service is the source of the problem. If the DPC Watchdog Violation on Windows 11 stops occurring in a clean boot environment, you’ve successfully narrowed down the problem to a third-party element.
This method requires a systematic approach of re-enabling services and startup items one by one or in small groups to pinpoint the exact culprit. It’s a powerful tool for diagnosing software-related stability issues.
Configuring System Configuration for Clean Boot
To perform a clean boot, you’ll use the System Configuration utility (msconfig).
- Press
Windows key + Rto open the Run dialog. - Type
msconfigand pressEnterto open the System Configuration window. - Go to the General tab. Select Selective startup and ensure that Load system services and Load startup items are unchecked.
- Go to the Services tab. Check the box next to Hide all Microsoft services. This is crucial to avoid disabling essential Windows services.
- Click Disable all.
- Go to the Startup tab. Click Open Task Manager.
- In Task Manager, go to the Startup tab. Disable all startup items by right-clicking each one and selecting Disable. Close Task Manager.
- Back in the System Configuration window, click Apply and then OK.
- You will be prompted to restart your computer. Click Restart.
Your computer will now boot into a clean environment. Observe if the DPC Watchdog Violation on Windows 11 still occurs. If it doesn’t, you know the problem lies with a third-party service or startup item.
Identifying Conflicting Software or Services
If the DPC Watchdog Violation disappears in a clean boot state, you can begin the process of identifying the problematic software or service. This involves re-enabling items systematically until the error reappears.
- Restart your computer in clean boot mode.
- Open
msconfigagain. - Go to the Services tab.
- Enable half of the non-Microsoft services that you previously disabled. Click Apply, then OK, and restart your computer.
- If the error does not return, repeat step 4, enabling half of the remaining disabled services.
- If the error *does* return, you know the culprit is within the last group of services you enabled. Disable half of that group and restart again to narrow it down further.
- Once you identify a specific service, you can either keep it disabled, look for an update, or uninstall the associated software.
Repeat this process for the Startup items in Task Manager if the issue wasn’t found in services. This methodical approach, known as the “binary search” method, allows you to efficiently isolate the conflicting software or service causing the DPC Watchdog Violation. Once identified, you can then decide on the best course of action for that specific application.
Method 7: Adjusting Power Management Settings
Power management settings in Windows 11 are designed to optimize energy consumption, especially for laptops, but sometimes these aggressive power-saving features can inadvertently lead to system instability. When devices enter low-power states too quickly or fail to resume properly, it can cause delays in their response times. These delays, particularly for critical components, can trigger the DPC Watchdog Violation as the system waits for a response that takes too long.
Two specific power management settings are often implicated in DPC Watchdog errors: PCI Express Link State Power Management and settings that allow USB devices to power down. Modifying these settings to be less aggressive can sometimes resolve the issue by ensuring devices remain responsive when needed.
This method involves making changes within the advanced power plan settings. While these adjustments might slightly increase power consumption, the trade-off for improved system stability and the elimination of the DPC Watchdog Violation on Windows 11 is often well worth it.
Modifying PCI Express Link State Power Management
PCI Express (PCIe) is the high-speed serial computer expansion bus standard used for connecting various hardware components like graphics cards, SSDs, and network cards. Link State Power Management allows the PCIe link to enter low-power states when not actively in use. While good for energy saving, it can sometimes cause devices to become unresponsive or take too long to wake up, leading to DPC Watchdog Violations.
- Press
Windows key + S, type “edit power plan,” and select Edit power plan. - Click on Change advanced power settings.
- In the Power Options dialog box, scroll down and expand PCI Express.
- Expand Link State Power Management.
- Change the setting for both “On battery” and “Plugged in” to Off.
- Click Apply and then OK.
This change prevents your PCIe devices from entering low-power states, ensuring they remain fully active and responsive. Restart your computer after making this adjustment and observe if the DPC Watchdog Violation persists. This is a common fix for issues related to graphics cards or NVMe SSDs.
Preventing USB Devices from Powering Down
Similar to PCIe, USB devices also have power management settings that can cause issues. Windows can automatically turn off USB devices to save power, which might lead to connectivity problems or delays that trigger a DPC Watchdog Violation, especially if a critical USB device (like a storage drive or network adapter) is involved.
- Open Device Manager (
Windows key + X> Device Manager). - Expand Universal Serial Bus controllers.
- For each “USB Root Hub” and “Generic USB Hub” entry:
- Right-click on it and select Properties.
- Go to the Power Management tab.
- Uncheck the box that says Allow the computer to turn off this device to save power.
- Click OK.
Note: You might need to repeat this for several USB Root Hubs. Also, consider doing this for any specific USB devices that appear as separate entries under “Universal Serial Bus controllers” or other categories if you suspect them. For example, a USB Wi-Fi adapter might be listed under “Network adapters” but its power management is still relevant.
After disabling power saving for your USB devices, restart your system. This ensures that all USB devices remain powered and responsive, potentially resolving the DPC Watchdog Violation on Windows 11 if it was caused by a USB-related power issue.
Method 8: Reinstalling Windows 11 (Last Resort)
If you’ve diligently followed all the troubleshooting steps outlined above—updating drivers, checking firmware, running diagnostics, adjusting power settings, and performing a clean boot—and the DPC Watchdog Violation on Windows 11 continues to plague your system, a clean reinstallation of Windows 11 might be your most effective, albeit last resort, solution. This step essentially wipes your primary drive and installs a fresh copy of the operating system, eliminating any deep-seated software corruption, driver conflicts, or registry issues that are difficult to pinpoint individually.
A clean installation provides a completely fresh start, ensuring that your operating system is free from accumulated clutter, malware, and any persistent software-related problems. While it’s a significant undertaking, requiring you to reinstall all your applications and restore your data, it often resolves stubborn system errors that resist conventional troubleshooting.
Before proceeding with this drastic step, it is absolutely critical to understand the implications and prepare thoroughly, especially regarding data backup. This section will guide you through the essential preparations and the process of performing a clean installation.
Backing Up Important Data
Performing a clean installation of Windows 11 will erase everything on your primary drive (usually your C: drive). This means all your personal files, documents, photos, videos, installed programs, and settings will be permanently deleted. Therefore, backing up your important data is a non-negotiable first step.
- External Hard Drive: The most common method is to copy all critical files and folders to an external USB hard drive.
- Cloud Storage: Services like OneDrive, Google Drive, or Dropbox offer convenient ways to back up your files to the cloud.
- Network Attached Storage (NAS): If you have a home network with a NAS device, you can transfer your data there.
- System Image Backup: For a more comprehensive backup, consider creating a system image backup of your entire drive. While you won’t restore the image if you’re doing a clean install to fix an issue, it can serve as a safety net for individual file recovery.
Critical Reminder: Do not proceed with a clean installation until you are 100% certain that all your irreplaceable data is safely backed up and accessible from another source. Double-check your backups before you start the reinstallation process.
Additionally, make a list of all your essential software and their product keys, if applicable. You’ll need to reinstall these applications and reactivate them after Windows 11 is reinstalled.
Performing a Clean Installation
Once your data is safely backed up, you can proceed with reinstalling Windows 11. This typically involves creating a bootable USB drive with the Windows 11 installation media.
- Create Windows 11 Installation Media:
- Download the Windows 11 Media Creation Tool from Microsoft’s official website.
- Run the tool and follow the prompts to create a bootable USB flash drive (at least 8GB).
- Boot from the USB Drive:
- Insert the bootable USB drive into your computer.
- Restart your computer and access your BIOS/UEFI settings (usually by pressing F2, F10, F12, or Del during startup).
- Change the boot order to prioritize the USB drive. Save and exit BIOS/UEFI.
- Install Windows 11:
- Your computer will boot from the USB drive. Follow the on-screen instructions.
- When prompted, choose Custom: Install Windows only (advanced).
- Select the partition where Windows is currently installed (usually Drive 0 Partition 2 or similar) and click Delete. Confirm the deletion. This will create unallocated space.
- Select the unallocated space and click Next to install Windows 11.
- Complete Setup:
- Windows will install. Your computer will restart several times.
- Follow the remaining setup prompts to configure your region, keyboard, Microsoft account, and other settings.
After the clean installation, you’ll have a fresh, stable Windows 11 system. Reinstall your drivers (starting with chipset and graphics drivers from manufacturer websites), then your applications, and finally restore your backed-up data. This should definitively resolve the DPC Watchdog Violation, providing you with a pristine computing environment.
Preventing Future DPC Watchdog Violations
Resolving a DPC Watchdog Violation on Windows 11 is a significant achievement, but the goal isn’t just to fix the current problem—it’s to prevent it from recurring. Proactive maintenance and consistent vigilance are key to maintaining a stable and reliable Windows 11 system. By adopting good habits and regularly checking your system’s health, you can significantly reduce the likelihood of encountering this frustrating BSOD again.
Prevention involves a combination of routine updates, careful hardware management, and monitoring system performance. It’s about staying ahead of potential issues rather than reacting to them after they’ve caused a crash. Implementing these preventive measures will not only safeguard against DPC Watchdog Violations but also contribute to the overall longevity and efficiency of your computer.
Think of it as routine maintenance for your digital life. Just as you service your car, your computer also benefits from regular check-ups and care to keep it running optimally. Let’s explore the best practices to maintain a healthy Windows 11 environment.
Regular Driver Maintenance and System Updates
One of the most critical preventive measures is to maintain an up-to-date driver and operating system environment. Outdated drivers are a leading cause of DPC Watchdog Violations, and Microsoft frequently releases updates to improve system stability and compatibility.
- Prioritize Driver Updates: Regularly check the websites of your motherboard, graphics card, and critical peripheral manufacturers for the latest Windows 11 drivers. Don’t solely rely on Windows Update for these, as manufacturer-specific drivers are often more optimized.
- Keep Windows Updated: Ensure Windows Update is enabled and regularly check for and install all available updates, including optional ones. These often contain crucial bug fixes and security patches.
- Avoid Beta Drivers: Unless you are an experienced user troubleshooting a specific issue, generally stick to stable, WHQL-certified drivers. Beta drivers, while offering new features, can sometimes introduce instability.
- Uninstall Unused Drivers: Periodically review your Device Manager and uninstall drivers for hardware you no longer use or have disconnected permanently. This reduces potential conflicts.
By consistently maintaining your drivers and Windows 11 installation, you minimize the chances of software-related conflicts or incompatibilities leading to a DPC Watchdog Violation. This proactive approach is foundational to system stability.
Monitoring System Performance and Hardware Health
Beyond software, keeping an eye on your hardware’s health and system performance can help you detect potential issues before they escalate into a DPC Watchdog Violation. Early detection allows for intervention before a critical failure occurs.
- Monitor Temperatures: Overheating components (CPU, GPU, chipset) can lead to instability and driver issues. Use monitoring software (e.g., HWMonitor, Core Temp) to keep an eye on temperatures, especially during heavy workloads. Ensure your cooling system is clean and functioning correctly.
- Check Disk Health: Regularly use tools like CrystalDiskInfo or Windows’ built-in disk check (
chkdsk) to monitor the health of your SSDs and HDDs. Early signs of disk failure can manifest as slow responses, which might contribute to DPC errors. - Observe System Responsiveness: Pay attention to unusual slowdowns, freezes, or stuttering. These can be early indicators of underlying problems that, if left unaddressed, could lead to a DPC Watchdog Violation.
- Review Event Viewer Periodically: Even if your system isn’t crashing, periodically check the Event Viewer for recurring warnings or errors (e.g., disk errors, driver warnings) that might suggest an impending issue.
By combining regular driver and system updates with diligent hardware and performance monitoring, you create a robust defense against the DPC Watchdog Violation on Windows 11 and ensure a more reliable computing experience.
Conclusion: Restoring Stability to Your Windows 11 System
The DPC Watchdog Violation on Windows 11 is undoubtedly a frustrating and disruptive error, but as this comprehensive guide has demonstrated, it is far from insurmountable. By understanding its technical underpinnings and systematically applying the troubleshooting methods outlined, you can effectively diagnose and resolve the root causes of this notorious Blue Screen of Death.
We’ve covered a wide array of solutions, from the fundamental steps of updating device drivers and disabling Fast Startup to more advanced diagnostics like analyzing Event Viewer logs and performing a clean boot. Each method targets a specific potential culprit, empowering you to approach the problem with precision and confidence.
Remember that patience and a methodical approach are your best allies in troubleshooting. Start with the simplest solutions and gradually move to the more complex ones, always observing your system’s behavior after each change. And when all else fails, a clean reinstallation of Windows 11 stands as a reliable ultimate remedy, providing a fresh, stable foundation.
Beyond just fixing the current issue, the insights gained from this guide will also equip you with the knowledge to prevent future DPC Watchdog Violations. Regular driver maintenance, consistent system updates, and proactive hardware health monitoring are crucial habits for any Windows 11 user. By embracing these practices, you can ensure a stable, reliable, and enjoyable computing experience, free from the disruptions of unexpected system crashes.
For more interesting articles, stay tuned to Winsides.com!









Community
Comments (0)