

Introduction to ReFS Dedup Service on Windows 11
In the digital age, data continues to proliferate at an astonishing rate, creating significant challenges for storage management. Businesses and advanced users alike are constantly seeking innovative solutions to optimize their storage infrastructure without compromising performance or data integrity. This is where the ReFS Dedup Service on Windows 11 emerges as a powerful ally, offering a sophisticated approach to data efficiency. Learn more at Install and enable Data Deduplication.
The Resilient File System (ReFS), a cornerstone of modern Windows Server environments, has brought its robust capabilities to specific Windows 11 editions, particularly in professional and enterprise contexts. Its inherent resilience and scalability make it an ideal foundation for demanding data workloads. When combined with data deduplication, the potential for storage savings becomes truly transformative.
This comprehensive guide will delve deep into the intricacies of the ReFS Dedup Service. We will explore its fundamental principles, architectural components, and the precise mechanisms it employs to identify and eliminate redundant data. We aim to equip you with a thorough understanding of how this service functions, its myriad benefits, and the practical steps required to enable, configure, and manage it effectively on your Windows 11 system. By the end of this article, you will be well-prepared to harness the full power of ReFS deduplication to maximize your storage efficiency.
Table of contents
Key Takeaways
- The ReFS Dedup Service on Windows 11 significantly reduces storage consumption by eliminating duplicate data blocks.
- It leverages the inherent resilience and scalability of the Resilient File System (ReFS) for enhanced data integrity.
- Deduplication operates at a block level, identifying identical data segments and replacing them with pointers to a single stored copy.
- Enabling and managing the service primarily involves PowerShell commands, offering granular control over policies and schedules.
- Proper configuration and monitoring are crucial for balancing storage savings with potential impacts on system resources such as CPU and RAM.
- The service is particularly beneficial for virtual machine libraries, backup repositories, and other environments with high data redundancy.
- Troubleshooting common issues often involves checking service status, volume health, and reviewing deduplication job logs for insights.
Understanding ReFS: The Resilient File System Foundation
Before we dive into the specifics of deduplication, it’s essential to grasp the underlying technology: the Resilient File System, or ReFS. Introduced by Microsoft, ReFS was designed as the next-generation file system, addressing many limitations of its predecessor, NTFS, particularly regarding data integrity and scalability in large-scale storage environments.
ReFS prioritizes data integrity above all else. It achieves this through several innovative mechanisms, including integrity streams, which use checksums to detect data corruption. If corruption is found, ReFS can automatically repair it using alternate copies of the data, often without any user intervention. This self-healing capability is a significant advantage for mission-critical data.
Beyond integrity, ReFS is built for scalability. It supports extremely large volumes and files, making it suitable for modern data centers and high-capacity storage solutions. Its architecture is optimized for virtualized workloads, making it a popular choice for hosting virtual machine disks (VHD/VHDX files) and other large datasets where performance and reliability are paramount.
Core Features and Advantages of ReFS
ReFS boasts several distinctive features that set it apart. One of its primary advantages is its inherent resilience against data corruption. It employs checksums for metadata and optionally for user data, allowing it to detect and correct errors automatically. This is a stark contrast to older file systems, where corruption often leads to data loss or extensive recovery efforts.
Another key feature is its ability to handle very large volumes and files, far exceeding the practical limits of NTFS. ReFS supports volumes up to 262,144 exabytes and file sizes up to 16 exabytes, making it future-proof for the ever-growing demands of data storage. This scalability is crucial for environments like large-scale virtual machine deployments or extensive archival systems.
ReFS also introduces innovations like block cloning and sparse VDL (Valid Data Length). Block cloning allows for instant file copies and rapid expansion of fixed VHDs, significantly improving the performance of virtual machine operations. Sparse VDL, on the other hand, enables efficient creation of large files, as disk space is only allocated when data is actually written, rather than up front.
These features collectively contribute to a more robust, scalable, and efficient storage foundation. For users dealing with vast amounts of data, especially in server roles or advanced workstation setups, ReFS offers a compelling alternative to traditional file systems, ensuring both performance and peace of mind regarding data integrity.
Why ReFS and Deduplication are a Powerful Combination
The combination of ReFS and data deduplication creates a particularly potent solution for storage optimization. ReFS’s architecture, with its focus on block-level operations and metadata management, provides an ideal environment for deduplication to thrive. Deduplication works by identifying and storing unique blocks of data, replacing redundant copies with pointers. ReFS’s robust design ensures that these pointers and the shared data blocks are managed with the highest degree of integrity.
Consider a scenario involving a virtual machine library. Many VMs share common operating system files, applications, and configurations. Without deduplication, each VM’s virtual hard disk would store these identical blocks independently, consuming vast amounts of disk space. With ReFS deduplication, these common blocks are stored only once, and all VMs point to that single instance. This dramatically reduces the overall storage footprint.
Furthermore, ReFS’s performance characteristics, particularly its ability to handle large files and its efficient metadata operations, complement the demands of deduplication. While deduplication can be resource-intensive, ReFS helps mitigate some of these overheads by providing a stable and performant underlying file system. The integrity features of ReFS also ensure that the deduplicated data remains consistent and recoverable, a critical factor for any storage optimization strategy. This synergy makes the ReFS Dedup Service on Windows 11 an excellent choice for optimizing storage in environments with high data redundancy.
What is Data Deduplication and How Does it Work?
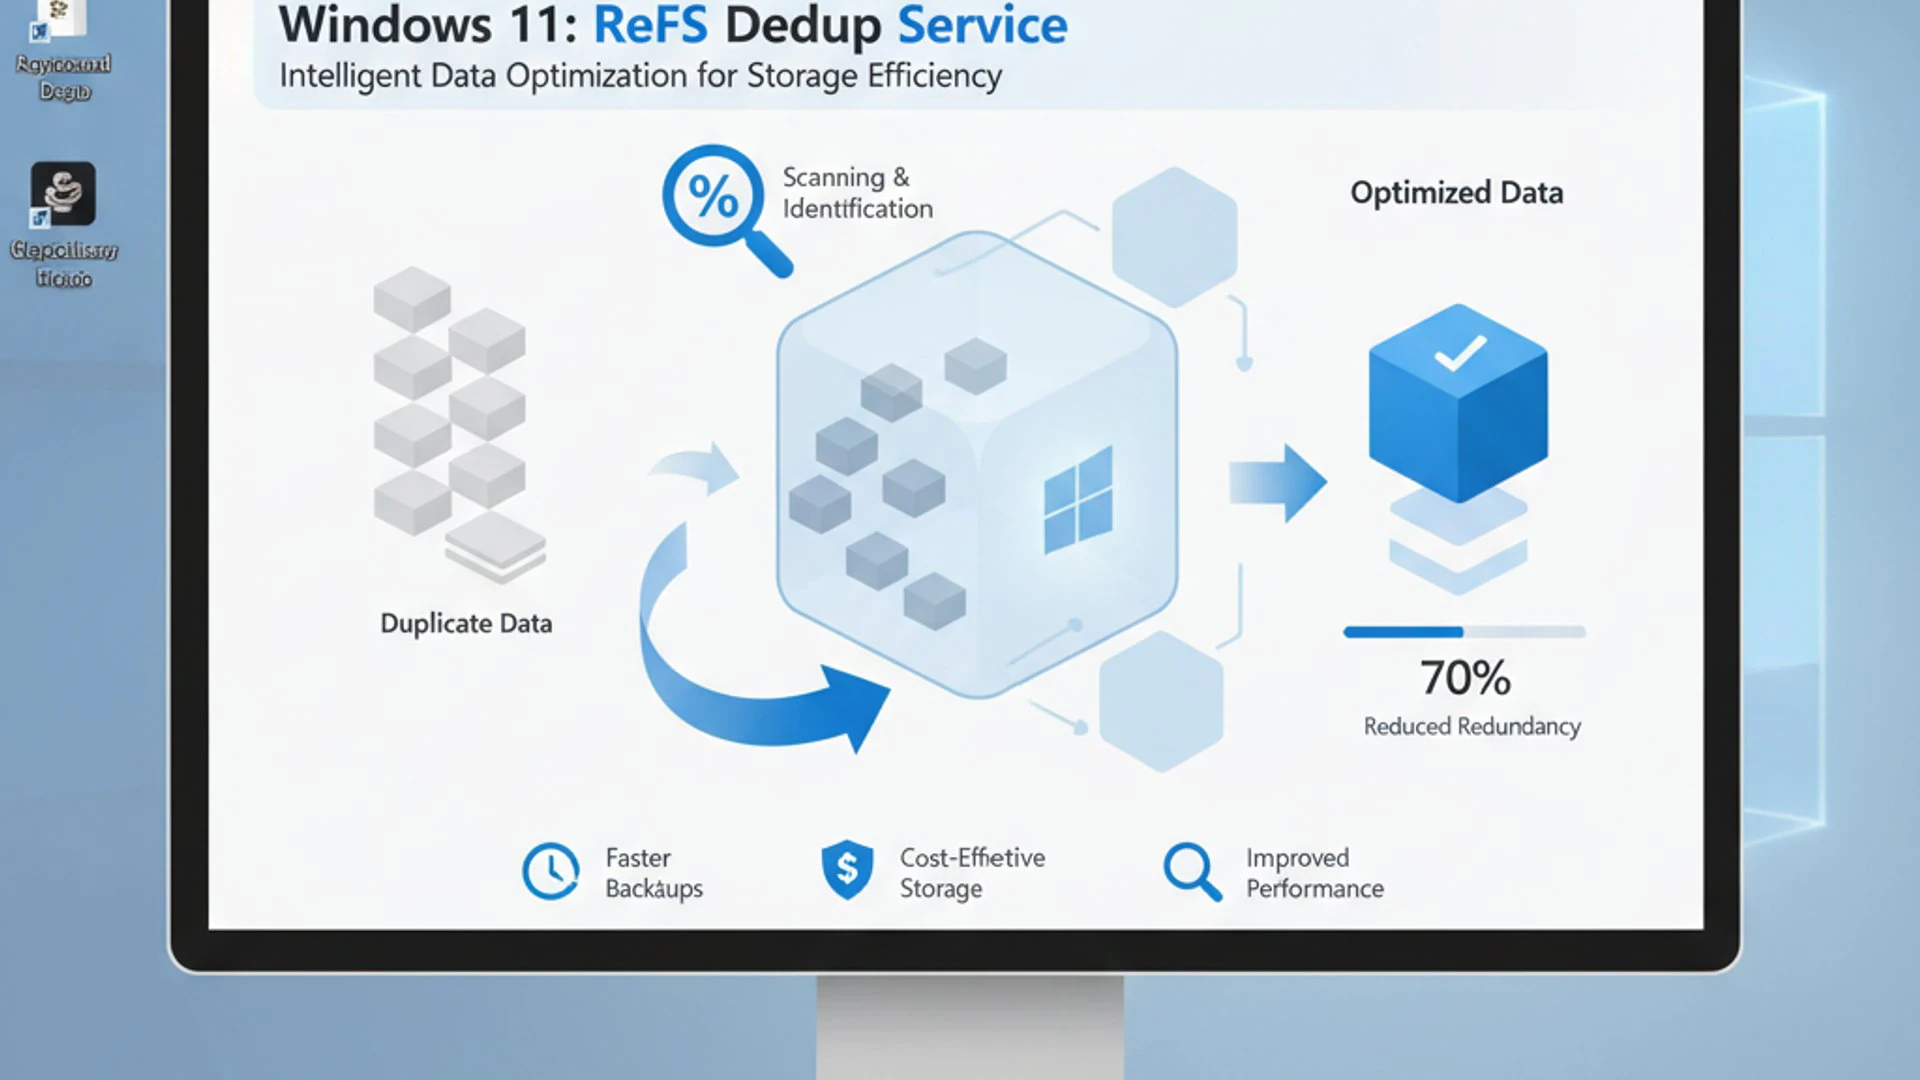
Data deduplication is a specialized storage technology designed to eliminate redundant copies of data. Its core principle is simple yet profoundly effective: instead of storing multiple identical copies of the same information, it stores only one unique instance and replaces all other copies with pointers to that single, original data block. This process significantly reduces the physical storage space required, leading to substantial cost savings and improved storage efficiency.
Imagine a scenario where you have multiple versions of a document, or several virtual machines running the same operating system. A large portion of their data will be identical. Deduplication scans your storage volume, identifies these duplicate data segments, and then performs its magic. It’s not merely about finding identical files; it operates at a much finer, granular level, which is key to its effectiveness.
The benefits extend beyond just saving space. Reduced data footprint means less data to back up, leading to faster backup times and smaller backup targets. It also translates to less data to replicate for disaster recovery, improving recovery point objectives (RPOs) and recovery time objectives (RTOs). For any organization or individual dealing with large volumes of repetitive data, understanding and implementing data deduplication is a strategic imperative.
The Mechanics of Deduplication: Block-Level Optimization
At its heart, data deduplication is a block-level optimization technique. Unlike file-level deduplication, which only identifies identical files, block-level deduplication breaks down files into smaller, fixed or variable-sized data blocks. It then computes a unique cryptographic hash (a digital fingerprint) for each of these blocks.
When a new block of data is written to the volume, the deduplication service calculates its hash. This hash is then compared against a database of hashes of all previously stored unique blocks. If a match is found, it means this new block is identical to one already stored. Instead of writing the new block, the system simply creates a pointer that references the existing unique block.
If no match is found, the block is considered unique. It is then written to the physical storage, and its hash is added to the database of unique blocks. This process is continuous and transparent to the user and applications. When a file is accessed, the file system reconstructs it on-the-fly by following these pointers to the unique data blocks, presenting the complete file as if it were stored entirely in its original form.
This granular approach allows deduplication to achieve significant savings even when files are only partially identical or when small changes are made between versions. It’s particularly effective for datasets like virtual machine images, software deployment shares, and user home directories, where common data patterns are prevalent.
Fixed vs. Variable Block Deduplication
The efficacy of deduplication often depends on how it segments data into blocks. There are two primary methodologies: fixed block deduplication and variable block deduplication.
Fixed block deduplication divides data into segments of a predetermined, uniform size. For example, every 4KB or 8KB of data might be treated as a block. While simpler to implement, this method can be less efficient. If a small insertion or deletion occurs at the beginning of a file, it can shift all subsequent blocks, making them appear unique even if their content hasn’t changed. This phenomenon, known as “chunk alignment,” reduces the deduplication ratio.
Variable block deduplication, also known as content-aware chunking, is more sophisticated. It uses algorithms to identify natural boundaries within the data stream, often based on specific byte patterns. This means block sizes can vary. The key advantage here is resilience to changes: if a small modification occurs, only the affected block and its immediate neighbors are likely to change. The majority of the file’s blocks remain intact and identifiable as duplicates, leading to much higher deduplication ratios.
Windows Server’s Data Deduplication, and by extension the ReFS Dedup Service on Windows 11, primarily utilizes a form of variable block deduplication. This advanced approach allows it to achieve superior storage savings, especially with diverse and frequently updated datasets. The ability to intelligently segment data ensures that the deduplication engine can maximize its effectiveness by finding the smallest common units of data, regardless of their position within a file.
The ReFS Dedup Service: Its Role and Architecture
The ReFS Dedup Service on Windows 11 is not just a feature; it’s a critical background process designed to actively manage and optimize storage on ReFS volumes. Its primary role is to continuously scan designated volumes, identify redundant data blocks, and consolidate them into single instances, thereby freeing up valuable disk space. This service is particularly relevant for Windows 11 installations used in advanced scenarios, such as hosting virtual machines for development or running specialized applications that generate large, repetitive datasets.
The service operates transparently, meaning that once configured, users and applications interact with files as they normally would, unaware that the underlying data might be deduplicated. When a file is opened, the file system seamlessly reassembles the data from its unique blocks and pointers. This abstraction ensures that performance is maintained for read operations, even as storage efficiency is dramatically improved.
Its architecture is tightly integrated with the Windows operating system, leveraging existing components for file system interaction and scheduling. This integration allows for efficient resource utilization and ensures that deduplication tasks can be scheduled during off-peak hours to minimize impact on foreground operations. Understanding this architecture is key to effective management and troubleshooting of the service.
Components and Processes of the Dedup Service
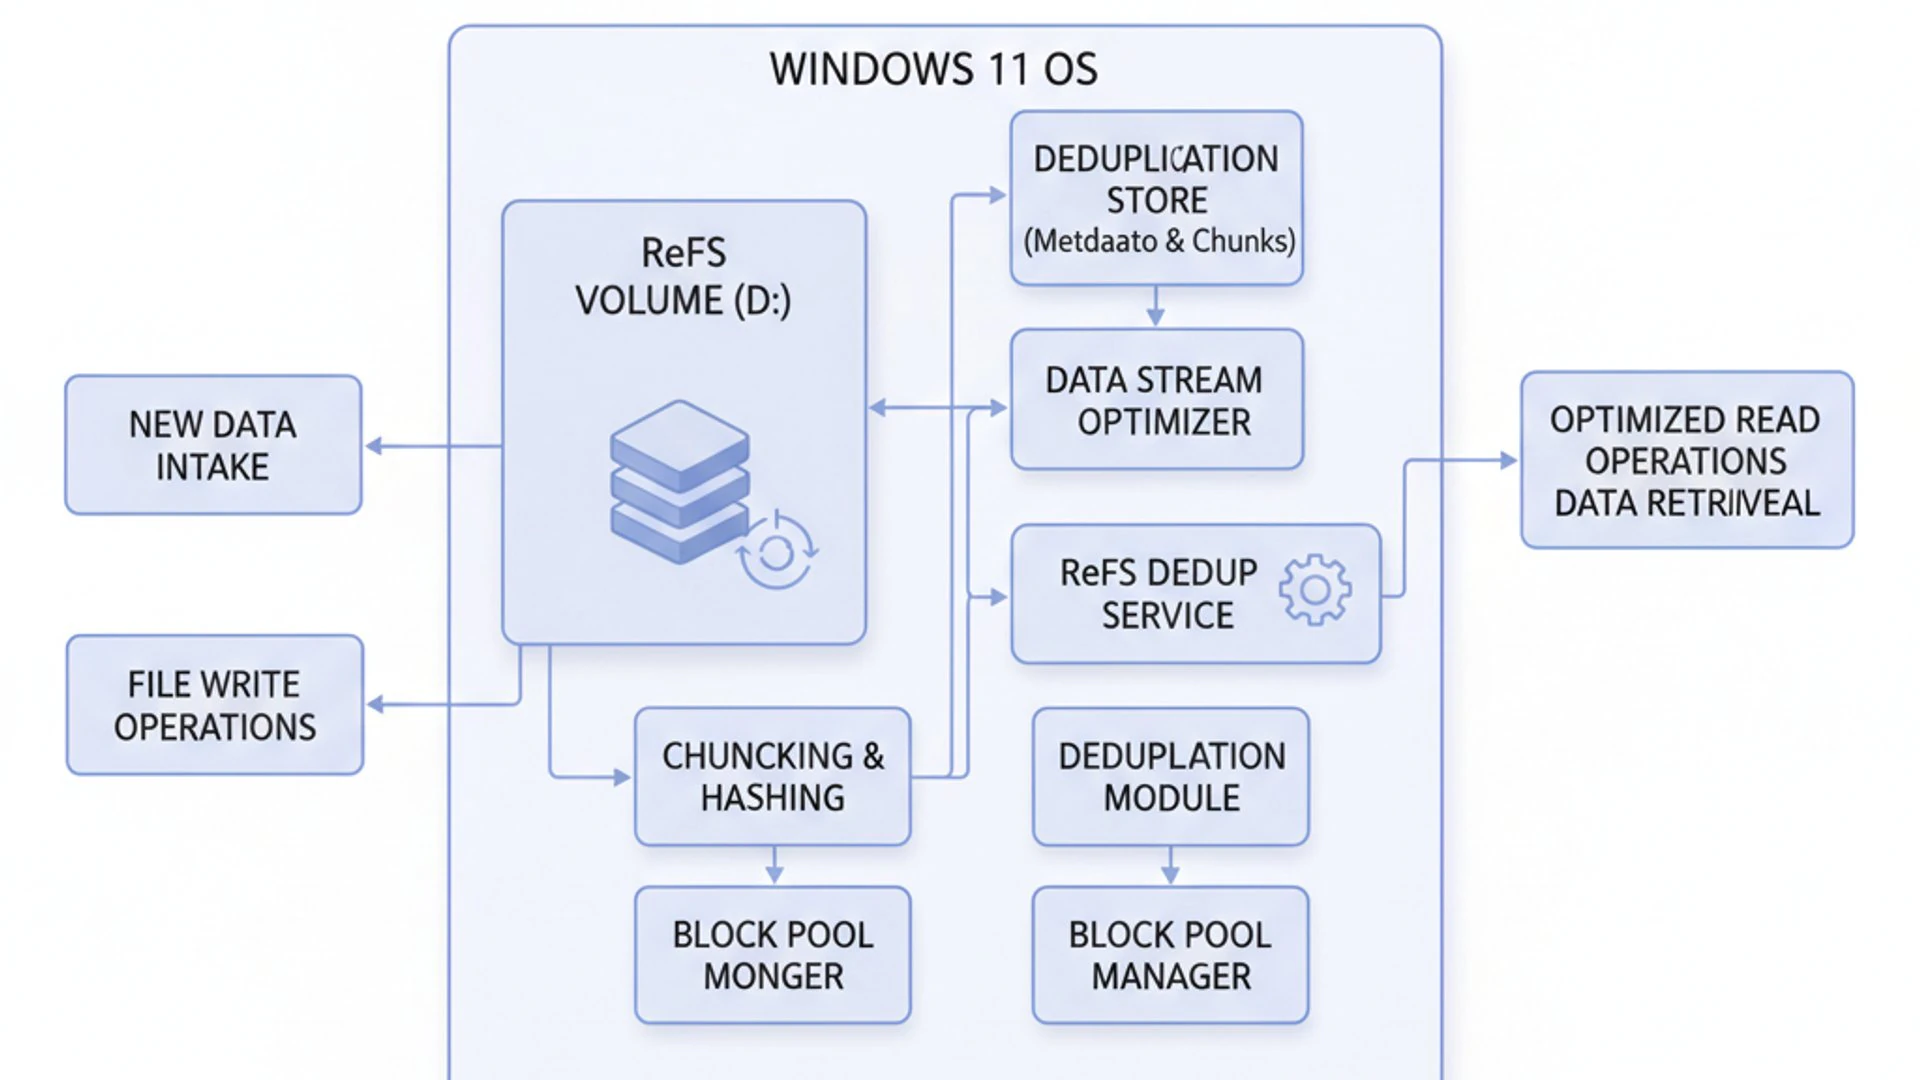
The ReFS Dedup Service is comprised of several interconnected components that work in harmony to achieve storage optimization. At its core is the Data Deduplication filter driver, which intercepts file system I/O requests. This driver is responsible for identifying new data blocks and determining if they are unique or duplicates.
Another crucial component is the Deduplication engine. This engine runs as a background process, performing the heavy lifting of scanning volumes, chunking data into blocks, calculating hashes, and managing the deduplication store. The deduplication store is where all unique data blocks are kept, along with their associated metadata and hash values. This store is typically located on the same ReFS volume that is being deduplicated.
The service also relies on a job scheduler, which orchestrates the various deduplication tasks. These tasks include optimization (the main deduplication process), garbage collection (removing unreferenced unique blocks), and integrity scrubbing (verifying the health of the deduplicated data). These jobs can be configured to run automatically on a schedule or triggered manually, providing flexibility for administrators.
When a file is written, the filter driver sends the data to the deduplication engine. The engine then performs the variable-size chunking and hashing. If a hash matches an existing block, a reparse point is created, pointing to the unique block in the deduplication store. If it’s a new block, it’s written to the store, and its hash is added to the hash index. This intricate dance of components ensures efficient, resilient, and transparent data reduction.
Prerequisites for Enabling ReFS Deduplication on Windows 11
While the concept of deduplication is universally appealing, enabling the ReFS Dedup Service on Windows 11 comes with specific prerequisites. It’s not a feature available on all editions of Windows 11, nor is it universally applicable to all storage configurations. Understanding these requirements is crucial before attempting to deploy the service.
Firstly, data deduplication for ReFS is primarily a feature of Windows Server operating systems. However, Microsoft has made it available on certain client editions of Windows for specific use cases, typically those involving virtualized workloads. For Windows 11, you will generally need a Pro for Workstations or Enterprise edition to access this functionality. Standard Windows 11 Home or Pro editions typically do not include the necessary components.
Secondly, the volume you intend to deduplicate must be formatted with ReFS. You cannot enable ReFS deduplication on an NTFS volume. If you have an existing NTFS volume that you wish to optimize, you would need to migrate its data to a newly formatted ReFS volume. This often involves backing up data, reformatting, and then restoring.
Thirdly, while there are no strict hardware requirements beyond sufficient disk space, it’s important to consider system resources. Deduplication, especially during optimization jobs, can be CPU and RAM-intensive. Therefore, a system with a modern multi-core processor and at least 8GB of RAM (preferably more for heavy workloads) is recommended to ensure smooth operation without significantly impacting foreground tasks. Adequate I/O performance on the storage subsystem is also beneficial for efficient deduplication and data access.
Enabling and Configuring ReFS Deduplication on Windows 11
Once you’ve confirmed that your Windows 11 edition and storage configuration meet the prerequisites, the next step is to enable and configure the ReFS Dedup Service on Windows 11. This process is primarily command-line driven, utilizing PowerShell, which provides granular control and automation capabilities. While the initial setup might seem daunting, following these steps will guide you through the process effectively.
Before proceeding, ensure you have administrative privileges. All PowerShell commands for managing deduplication must be run from an elevated PowerShell console. It’s also a good practice to back up any critical data on the target ReFS volume before making significant configuration changes, although deduplication is designed to be non-destructive.
The configuration involves installing the necessary feature, enabling deduplication on a specific ReFS volume, and then defining the policies and schedules that govern how and when deduplication jobs run. Proper configuration is vital for balancing storage savings with system performance, ensuring that deduplication operates efficiently without negatively impacting your daily operations.
Using PowerShell to Activate Deduplication
The first step is to install the Data Deduplication feature, which is not enabled by default on Windows 11, even on eligible editions. Open PowerShell as an administrator and execute the following command:
Enable-WindowsOptionalFeature -Online -FeatureName "Microsoft-Windows-Data-Deduplication" -AllThis command installs all necessary components for data deduplication. You might be prompted to restart your system after installation. Once the feature is installed, you can enable deduplication on your target ReFS volume. Identify the drive letter of your ReFS volume (e.g., E:).
Enable-DedupVolume -Volume "E:"This command activates deduplication on the specified volume. By default, it applies the “Default” usage type, which is suitable for general-purpose file servers. For more specific workloads, you can specify a -UsageType parameter.
Tip: Always verify the drive letter of your ReFS volume before running
Enable-DedupVolumeto avoid enabling deduplication on an unintended volume.
After enabling, deduplication won’t happen instantly. The service will begin scanning the volume based on its configured schedule. You can initiate an immediate optimization job for testing or initial deduplication using:
Start-DedupJob -Volume "E:" -Type OptimizationThis command starts an optimization job, which is the process that identifies and deduplicates data. Depending on the size of your volume and the amount of data, this initial job can take a significant amount of time.
Setting Deduplication Policies and Schedules
Effective deduplication relies on well-defined policies and schedules. The ReFS Dedup Service on Windows 11 allows you to customize these settings to match your specific workload and performance requirements. You can configure various parameters, such as the minimum file age for deduplication, the minimum file size, and the frequency of deduplication jobs.
To view the current deduplication settings for a volume, use:
Get-DedupVolume -Volume "E:" | Select *This command will display detailed information, including the UsageType and current job schedules. Windows Data Deduplication offers several built-in usage types, each with optimized settings:
- Default: General-purpose file servers.
- HyperV: Optimized for Hyper-V virtual machine files (VHD/VHDX). This is often the most relevant for Windows 11 users leveraging ReFS for virtualization.
- Backup: Optimized for virtualized backup applications.
To change the usage type for a volume, you would use:
Set-DedupVolume -Volume "E:" -UsageType HyperVYou can also modify specific deduplication parameters. For instance, to change the minimum file age before deduplication (default is 3 days) or the minimum file size (default is 32KB), use:
Set-DedupVolume -Volume "E:" -MinimumFileAgeDays 0 -MinimumFileSize 16KBSetting MinimumFileAgeDays To 0 means files will be eligible for deduplication immediately. Adjusting MinimumFileSize can help deduplicate smaller files, but might increase processing overhead. For scheduling, you can view existing jobs:
Get-DedupJobTo create or modify a scheduled job, for example, to run optimization daily at 1 AM with high priority:
New-DedupSchedule -Name "DailyOptimization" -Type Optimization -Volume "E:" -InputOutputThrottleLevel High -Cores 50 -Memory 50 -Priority Normal -Days Mon,Tue,Wed,Thu,Fri,Sat,Sun -StartTime 01:00This command creates a new schedule. You can adjust InputOutputThrottleLevel, Cores, and Memory percentages to control resource consumption during the job. For example, setting -Cores 50 -Memory 50 limits the job to 50% of available CPU cores and memory is crucial for maintaining system responsiveness. For more advanced scheduling, consider using Task Scheduler in conjunction with Start-DedupJob.
Monitoring Deduplication Status and Efficiency
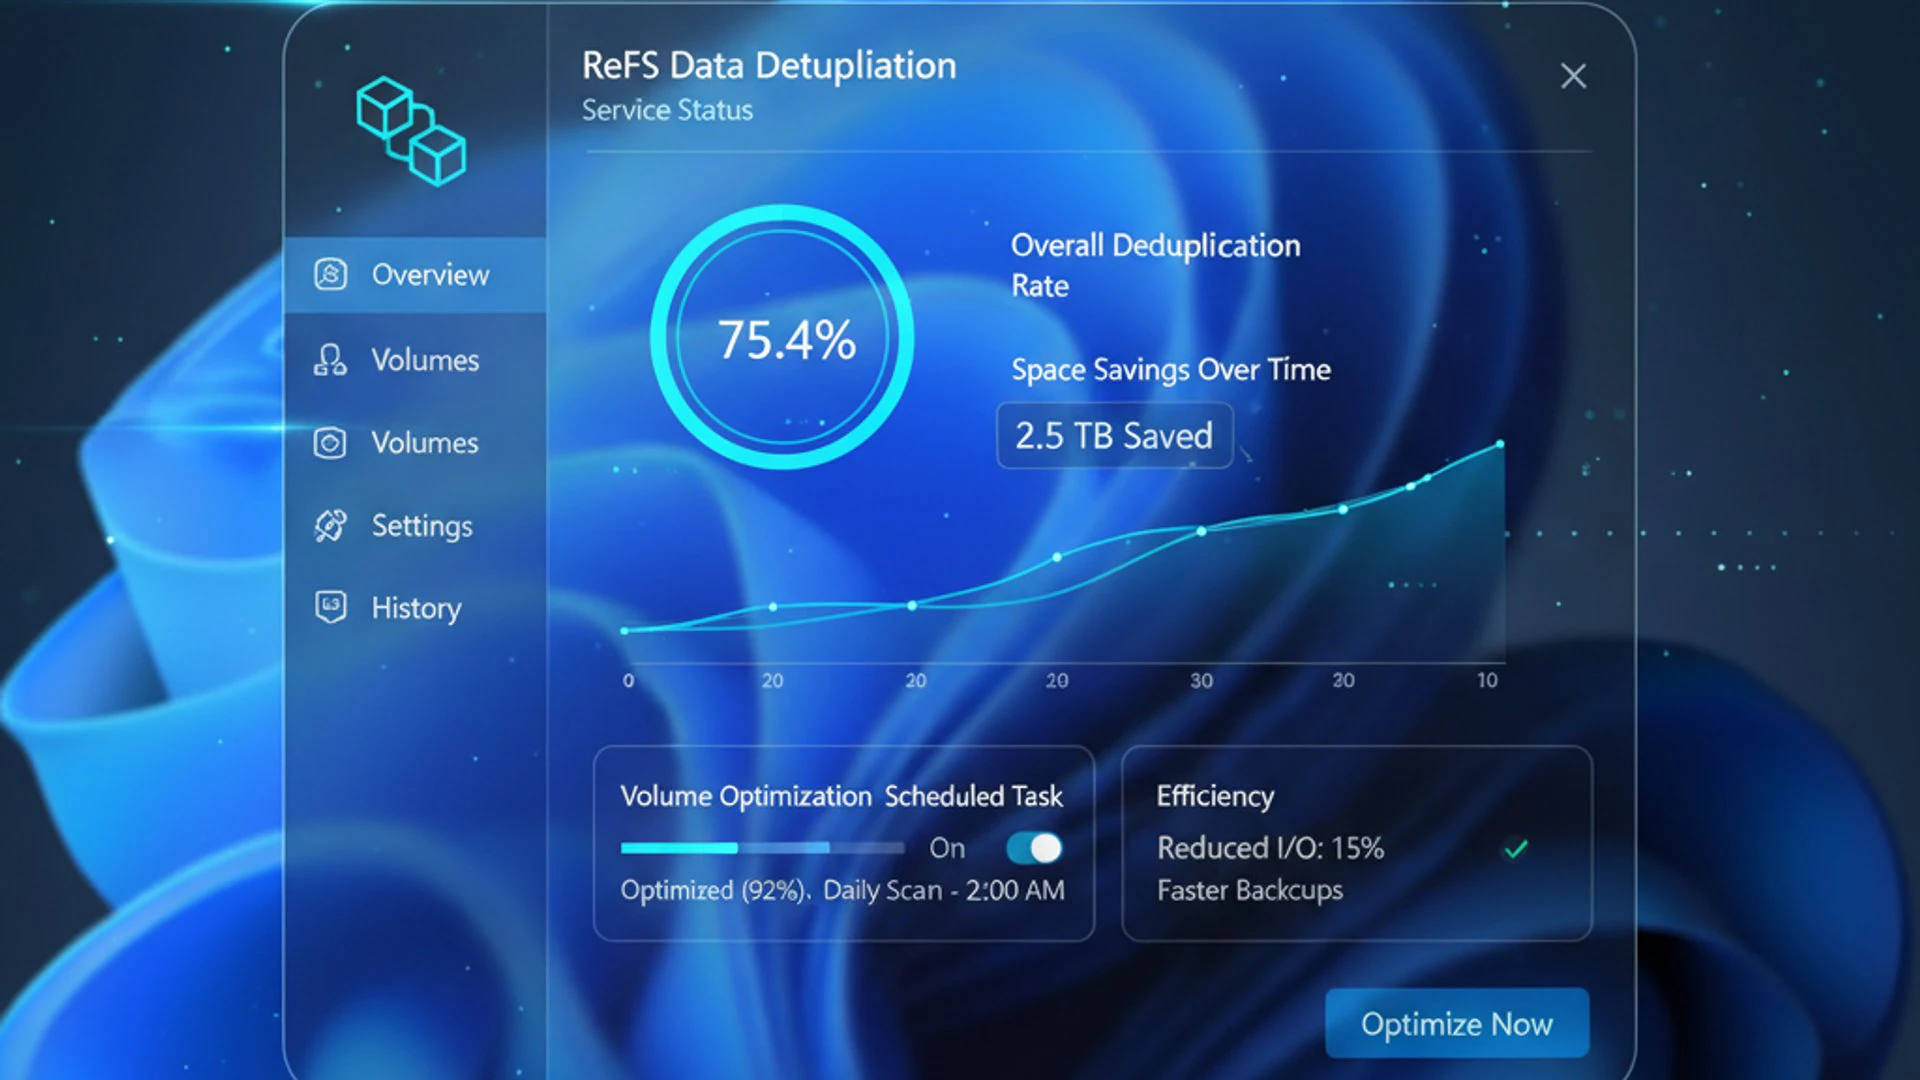
Once deduplication is enabled and configured, it’s essential to monitor its status and efficiency to ensure it’s performing as expected. Regular monitoring helps you understand the storage savings achieved and identify any potential issues with the ReFS Dedup Service on Windows 11.
The primary command for checking deduplication status is Get-DedupStatus:
Get-DedupStatus -Volume "E:" | Select *This command provides a wealth of information, including:
- VolumeId: The unique identifier for the volume.
- Volume: The drive letter.
- OptimizedFiles: Number of files that have been processed by deduplication.
- OptimizedSize: The logical size of data that has been deduplicated.
- SavedSpace: The actual physical space saved due to deduplication.
- SavingsRate: The percentage of space saved (
SavedSpace / OptimizedSize). This is a key metric to track. - LastOptimizationTime: When the last optimization job completed.
- LastGarbageCollectionTime: When the last garbage collection job completed.
You can also check the status of active or recently completed deduplication jobs using Get-DedupJob:
Get-DedupJob -Volume "E:"This command will show details about currently running or recently finished jobs, including their type (Optimization, Garbage Collection, Scrubbing), status, progress, and duration. If a job is stuck or failing, this is the first place to look. For a more detailed look at job history, you can filter by status:
Get-DedupJob -Volume "E:" | Where-Object {$_.Status -eq "Succeeded" -or $_.Status -eq "Failed"}Monitoring these metrics regularly allows you to gauge the effectiveness of your deduplication strategy and make informed adjustments to your policies and schedules. A high SavingsRate indicates successful deduplication, while a low rate might suggest that the data on the volume is not highly redundant or that the deduplication policies need fine-tuning.
Performance Considerations and Best Practices for ReFS Dedup
While the ReFS Dedup Service on Windows 11 offers significant storage savings, it’s not without its performance implications. Data deduplication is a resource-intensive process, and understanding its impact on system resources is crucial for optimal deployment. Improper configuration can lead to degraded system performance, especially during active deduplication jobs. Therefore, adopting best practices is essential to maximize storage efficiency without compromising overall system responsiveness.
The key is to strike a balance. You want to achieve the highest possible deduplication ratio, but not at the expense of your primary workloads. This involves careful consideration of when deduplication jobs run, how much system resources they consume, and the nature of the data being deduplicated. By proactively managing these factors, you can ensure that ReFS deduplication enhances your storage infrastructure rather than hindering it.
This section will explore the specific resource impacts and provide actionable advice on optimizing your deduplication settings for various types of workloads. Implementing these best practices will help you unlock the full potential of ReFS deduplication while maintaining a smooth and responsive Windows 11 experience.
Impact on System Resources: CPU, RAM, and I/O
The process of data deduplication, particularly the optimization job, involves several computationally intensive tasks that can impact system resources:
- CPU: Calculating cryptographic hashes for every data block is a CPU-intensive operation. The deduplication engine needs to process vast amounts of data, chunk it, and generate unique fingerprints. This can consume a significant percentage of CPU cycles, especially during the initial deduplication of a large volume or during subsequent large-scale optimization runs.
- RAM: The deduplication process requires memory to store and manage the hash index and other metadata associated with the unique data blocks. A larger volume with more unique blocks will demand more RAM for the hash store. If insufficient RAM is available, the system might resort to paging, which can severely degrade performance. Microsoft recommends at least 1GB of RAM for every 1TB of logical data being deduplicated, in addition to the RAM needed for the operating system and other applications.
- I/O Operations: While deduplication ultimately reduces physical I/O by storing less data, the process itself generates I/O. During optimization, the service reads data from the volume, writes unique blocks to the deduplication store, and updates metadata. This can lead to increased disk activity, especially on the volume being deduplicated. Read operations on deduplicated files might also incur a slight overhead as the file system reconstructs the data from pointers, though this is generally negligible on modern storage.
The impact is most noticeable during active optimization jobs. Therefore, scheduling these jobs during off-peak hours is a critical strategy to minimize disruption to foreground applications. Monitoring tools like Task Manager or Performance Monitor can help you track CPU, RAM, and disk usage during deduplication jobs to fine-tune your resource allocation settings.
Optimizing Deduplication for Specific Workloads
To achieve the best results with the ReFS Dedup Service on Windows 11, it’s crucial to tailor your deduplication settings to your specific workload. Different types of data and usage patterns benefit from different configurations.
1. Virtual Machine Libraries (Hyper-V):
This is one of the most common and beneficial use cases for ReFS deduplication on Windows 11. Virtual hard disks (VHD/VHDX) often contain highly redundant data (e.g., multiple VMs running the same OS).
- UsageType: Set to
HyperV. This optimizes settings for VHD/VHDX files, including a smallerMinimumFileAgeDays(often 0 or 1 day) and potentially a smallerMinimumFileSize. - Schedule: Schedule optimization jobs during periods of low VM activity, such as overnight or weekends. Consider running garbage collection and scrubbing less frequently, perhaps weekly or monthly.
- Resource Throttling: Use
New-DedupScheduleorSet-DedupJobto limit CPU and memory usage (e.g.,-Cores 25 -Memory 25) to prevent performance degradation during VM operations.
2. Backup Repositories:
If you’re using ReFS as a target for backups, especially incremental or differential backups, deduplication can save significant space.
- UsageType: Consider
BackuporDefault. TheBackuptype is specifically designed for this. - MinimumFileAgeDays: Set to 0 or a very low number, as backup files are often written once and then rarely modified.
- Schedule: Run optimization jobs immediately after backup completion or during quiet periods.
3. General File Shares/User Data:
For general-purpose file shares, where data redundancy might be lower and access patterns more varied.
- UsageType:
Defaultis usually appropriate. - MinimumFileAgeDays: Keep the default of 3 days or increase it slightly (e.g., 5-7 days) to avoid deduplicating frequently changing files, which can reduce efficiency.
- MinimumFileSize: The default 32KB is generally fine. Deduplicating very small files might not yield significant savings and could increase overhead.
- Schedule: Schedule optimization jobs during off-peak hours.
General Best Practices:
- Monitor Regularly: Use
Get-DedupStatusandGet-DedupJobto track savings and job health. - Resource Allocation: Always throttle deduplication jobs to prevent them from monopolizing system resources.
- Storage Performance: Ensure the underlying storage (SSDs are highly recommended) has good I/O performance to handle the deduplication process efficiently.
- Volume Size: Deduplication is most effective on volumes with at least a few TBs of data and significant redundancy.
By carefully considering these factors and adjusting your configuration, you can ensure that ReFS deduplication provides maximum benefit with minimal performance impact on your Windows 11 system.
Common Issues and Troubleshooting the ReFS Dedup Service
Even with careful configuration, you might encounter issues with the ReFS Dedup Service on Windows 11. These can range from deduplication not running as expected to concerns about performance or data integrity. Effective troubleshooting requires understanding the common pitfalls and knowing how to diagnose them. This section will guide you through identifying and resolving the most frequent problems, ensuring your deduplication service operates smoothly and efficiently.
When troubleshooting, it’s important to approach the problem systematically. Start by checking the basics, such as service status and volume health, before delving into more complex diagnostics. PowerShell commands are your primary tools for gathering information and making adjustments. Additionally, reviewing event logs can often provide crucial clues about the root cause of an issue. Remember that patience and methodical investigation are key to resolving these challenges.
Deduplication Not Running or Inefficient
If you suspect that deduplication isn’t running or isn’t providing the expected savings, here are some common areas to investigate:
- Check Service Status:
Ensure the Data Deduplication service is running. Open Services (services.msc) and look for “Data Deduplication” or use PowerShell:Get-Service -Name ddpsvcIf it’s not running, try starting it.
- Verify Volume Status:
Confirm that deduplication is enabled on the specific ReFS volume:Get-DedupVolume -Volume "E:"
Look for
Enabled: True. If it’s false, re-enable it usingEnable-DedupVolume. - Check Job Schedules:
Review your deduplication job schedules to ensure they are configured correctly and do not overlap with other resource-intensive tasks:Get-DedupSchedule -Volume "E:"Ensure the
StartTimeandDaysare set appropriately. You can manually trigger an optimization job to test:Start-DedupJob -Volume "E:" -Type Optimization - Examine Job History and Errors:
Look for any failed or stalled deduplication jobs:Get-DedupJob -Volume "E:" | Where-Object {$_.Status -ne "Succeeded"}Check the Windows Event Log (under
Applications and Services Logs > Microsoft > Windows > Deduplication) for any errors or warnings related to deduplication jobs. These logs often provide specific error codes or messages that can pinpoint the problem. - Review Deduplication Policies:
Ensure yourMinimumFileAgeDaysandMinimumFileSizeSettings are not too restrictive. If files are too new or too small, they won’t be deduplicated.Get-DedupVolume -Volume "E:" | Select MinimumFileAgeDays, MinimumFileSizeAdjust these if necessary, using
Set-DedupVolume. For example, settingMinimumFileAgeDaysto 0 makes files eligible immediately. - Data Redundancy:
If theSavingsRatereported byGet-DedupStatusis low, it might simply mean the data on your volume doesn’t have much redundancy. Deduplication is most effective on datasets like virtual machine images, backup files, or large software libraries.
Resolving Performance Degradation
If you notice a slowdown in your Windows 11 system when deduplication jobs are active, it’s likely due to resource contention. Here’s how to address it:
- Adjust Job Throttling:
Deduplication jobs can consume significant CPU and RAM. When creating or modifying schedules, use the-InputOutputThrottleLevel,-Cores, and-Memoryparameters to limit resource usage.Set-DedupJob -Volume "E:" -Type Optimization -InputOutputThrottleLevel Low -Cores 25 -Memory 25This example sets the throttling level to low and limits CPU and memory usage to 25% of available resources. Experiment with these values to find a balance that works for your system.
- Reschedule Jobs:
Ensure that resource-intensive deduplication jobs (especially optimization) are scheduled during off-peak hours when the system is less utilized. Avoid running them during critical work periods.Set-DedupSchedule -Name "DailyOptimization" -Volume "E:" -StartTime 03:00 -Days Mon,Tue,Wed,Thu,FriThis moves the job to 3 AM on weekdays.
- Monitor System Resources:
Use Task Manager (Performance tab) or Performance Monitor (perfmon.exe) to track CPU, RAM, and disk I/O during deduplication jobs. This will help you identify which resource is being bottlenecked. Pay attention to theDeduplicationprocess. - Check Disk Health and Speed:
Ensure your ReFS volume is on healthy and reasonably fast storage. Deduplication can be I/O intensive, and slow disks can exacerbate performance issues. Consider using SSDs for better performance. Run a disk check (chkdsk E: /f) if you suspect disk issues. - Increase System Resources (if possible):
If throttling and rescheduling aren’t enough, and you have consistently high resource usage, consider adding more RAM or upgrading your CPU if your hardware allows. This is particularly relevant for systems acting as Hyper-V hosts. - Data Integrity Concerns:
ReFS itself has strong data integrity features. However, if you suspect issues with deduplicated data, run an integrity scrubbing job:Start-DedupJob -Volume "E:" -Type Scrubbing -FullThis job verifies the integrity of the deduplicated data and attempts to repair any corruption found. Regularly scheduled scrubbing is a good practice to maintain data health.
By systematically addressing these points, you can effectively troubleshoot and resolve the most common issues related to the ReFS Dedup Service on Windows 11, ensuring both storage efficiency and system performance.
Managing and Disabling ReFS Deduplication
Managing the ReFS Dedup Service on Windows 11 goes beyond initial setup and troubleshooting. There might be scenarios where you need to temporarily suspend deduplication, perhaps for maintenance or during periods of peak system usage. Conversely, you might decide to completely disable deduplication and reclaim the space, for example, when migrating data or reconfiguring your storage. Understanding these management tasks is crucial for maintaining control over your storage environment.
The flexibility of PowerShell commands allows for precise control over the deduplication process. Whether you need to pause ongoing jobs, adjust schedules on the fly, or fully revert a volume to its non-deduplicated state, the tools are readily available. This section will provide clear, step-by-step instructions for these common management operations, empowering you to adapt your deduplication strategy as your needs evolve.
Suspending and Resuming Deduplication Jobs
There are times when you might need to temporarily pause deduplication activity to free up system resources for other critical tasks or to perform maintenance on the volume. The ReFS Dedup Service on Windows 11 allows you to suspend and resume jobs gracefully.
To suspend all currently running deduplication jobs on a specific volume:
Stop-DedupJob -Volume "E:" -Type Optimization -StopWhenSystemBusyThe -StopWhenSystemBusy parameter is useful as it allows the job to finish its current chunk before stopping, ensuring a clean pause. You can specify other job types, like GarbageCollection or Scrubbing, if needed. If you want to stop all jobs immediately, you can omit -StopWhenSystemBusy, but be aware that this might interrupt the current operation more abruptly.
Once jobs are suspended, they will remain in a stopped state until explicitly resumed or until their next scheduled run time. To resume a suspended job, you typically don’t need a specific “resume” command. Instead, you can simply start a new job of the same type, and it will pick up where the previous one left off:
Start-DedupJob -Volume "E:" -Type OptimizationAlternatively, if you have scheduled jobs, they will automatically resume at their next scheduled interval. Suspending jobs is a non-destructive operation; no data is lost, and the deduplication state of the volume is preserved. This feature provides flexibility, allowing you to manage resource consumption dynamically based on your system’s current demands.
Completely Disabling Deduplication and Reclaiming Space
If you decide that deduplication is no longer needed for a specific ReFS volume, or if you plan to reconfigure your storage, you can completely disable the service and “undeduplicate” the data. This process is known as unoptimization and involves expanding all deduplicated files back to their original, full size. This will reclaim the space that was saved by deduplication, so ensure you have enough free space on the volume before proceeding.
First, stop any active deduplication jobs on the volume:
Stop-DedupJob -Volume "E:" -Type AllNext, initiate the unoptimization process. This is a crucial step that will expand all deduplicated files. This process can take a significant amount of time, depending on the volume size and the amount of deduplicated data. During unoptimization, the volume will be accessible, but performance might be affected.
Start-DedupJob -Volume "E:" -Type UnoptimizationYou can monitor the progress of the unoptimization job using Get-DedupJob -Volume "E:". Once the unoptimization job completes, all files will be fully rehydrated to their original size, and the space savings will be gone. After the unoptimization is finished, you can then disable deduplication on the volume:
Disable-DedupVolume -Volume "E:"This command prevents deduplication from running on the volume in the future. Finally, if you no longer need the Data Deduplication feature on your Windows 11 system at all, you can uninstall it:
Disable-WindowsOptionalFeature -Online -FeatureName "Microsoft-Windows-Data-Deduplication"You might be prompted to restart your system after uninstalling the feature. It’s important to reiterate that the unoptimization step is critical. Simply disabling the volume without unoptimizing will leave the files in a deduplicated state, which can cause issues if the deduplication service is later removed or if the volume is moved to a system without deduplication capabilities. Always ensure unoptimization is complete before fully disabling or uninstalling the feature.
Conclusion: Maximizing Storage Efficiency with ReFS Dedup
The ReFS Dedup Service on Windows 11 represents a powerful and sophisticated solution for tackling the ever-growing challenge of data storage. Intelligently identifying and eliminating redundant data blocks, it empowers users and administrators to significantly reduce their storage footprint, leading to substantial cost savings and improved operational efficiency. Its integration with the robust and resilient Resilient File System (ReFS) ensures that these storage optimizations are achieved without compromising data integrity or availability.
Throughout this guide, we’ve explored the foundational aspects of ReFS, the intricate mechanics of block-level data deduplication, and the specific role of the ReFS Dedup Service within Windows 11. We’ve provided detailed instructions on how to enable, configure, and monitor this service using PowerShell, emphasizing the importance of tailored policies and schedules for different workloads. Furthermore, we’ve addressed crucial performance considerations and offered practical troubleshooting steps to overcome common issues, ensuring a smooth and effective deployment.
Leveraging the ReFS Dedup Service is not merely about saving disk space; it’s about optimizing your entire storage ecosystem. It translates to faster backups, more efficient disaster recovery, and the ability to store more data on existing hardware. However, its true potential is unlocked through proper configuration, continuous monitoring, and a clear understanding of its impact on system resources. By adhering to the best practices outlined in this article, you can confidently deploy and manage ReFS deduplication, transforming your Windows 11 storage into a leaner, more efficient, and highly resilient asset.
If you have any queries, kindly let us know in the comments. For more interesting articles, stay tuned to Winsides.com!









Community
Comments (0)