

Introduction to WHEA Logger Event 18 on Windows 11
Encountering unexpected system crashes, freezes, or performance hiccups on your Windows 11 machine can be incredibly frustrating. Often, these issues leave behind cryptic messages in the system logs, one of the most concerning being WHEA Logger Event 18. This particular event signifies a critical hardware error, indicating that your system has detected a problem with a core component, such as the CPU, memory, or motherboard. For additional context, see WHEA_UNCORRECTABLE_ERROR bug check, Windows Hardware Error Architecture (WHEA), Intel Processor Support, AMD Support, and MemTest86 for memory diagnostics.
Far from being a mere nuisance, a persistent WHEA Logger Event 18 on Windows 11 is a serious warning sign that demands immediate attention. Ignoring it can lead to further system instability, data corruption, and potentially irreversible hardware damage. Understanding the root causes and implementing effective troubleshooting strategies is paramount to maintaining the health and longevity of your PC.
This comprehensive guide will demystify WHEA Event 18, providing you with the knowledge and tools to diagnose, troubleshoot, and ultimately resolve this critical hardware error. We will delve into its technical underpinnings, guide you through interpreting its complex error messages, and offer a step-by-step approach to bring stability back to your Windows 11 system.
Table of contents
Key Takeaways: Understanding and Resolving WHEA Event 18
Before diving into the detailed troubleshooting steps, here are the most crucial points to remember about WHEA Logger Event 18 on Windows 11:
- Critical Hardware Error: WHEA Event 18 signals a severe issue with a fundamental hardware component, often the CPU, memory, or motherboard.
- Prompt Action is Essential: Ignoring this event can lead to system instability, data loss, and permanent hardware damage.
- Common Causes: Overclocking, outdated/corrupt drivers, unstable power supply, faulty RAM, and subtle hardware degradation are frequent culprits.
- Event Viewer is Your Friend: The Windows Event Viewer provides vital clues, including specific error codes and component information, to pinpoint the problem.
- Systematic Troubleshooting: Start with basic checks like temperature monitoring and driver updates, then progress to advanced steps like RAM testing and PSU assessment.
- Prevention is Key: Regular updates, maintaining optimal system temperatures, and avoiding aggressive overclocking can help prevent recurrence.
- Know When to Seek Help: If extensive troubleshooting fails, professional diagnosis or hardware replacement may be necessary.
What is WHEA Logger Event 18 and Why Does It Occur?
The appearance of WHEA Logger Event 18 on Windows 11 in your Event Viewer is a clear indication that your system has encountered a significant hardware-related problem. To effectively address this, it’s crucial to understand what WHEA stands for and the common scenarios that lead to this particular event ID.
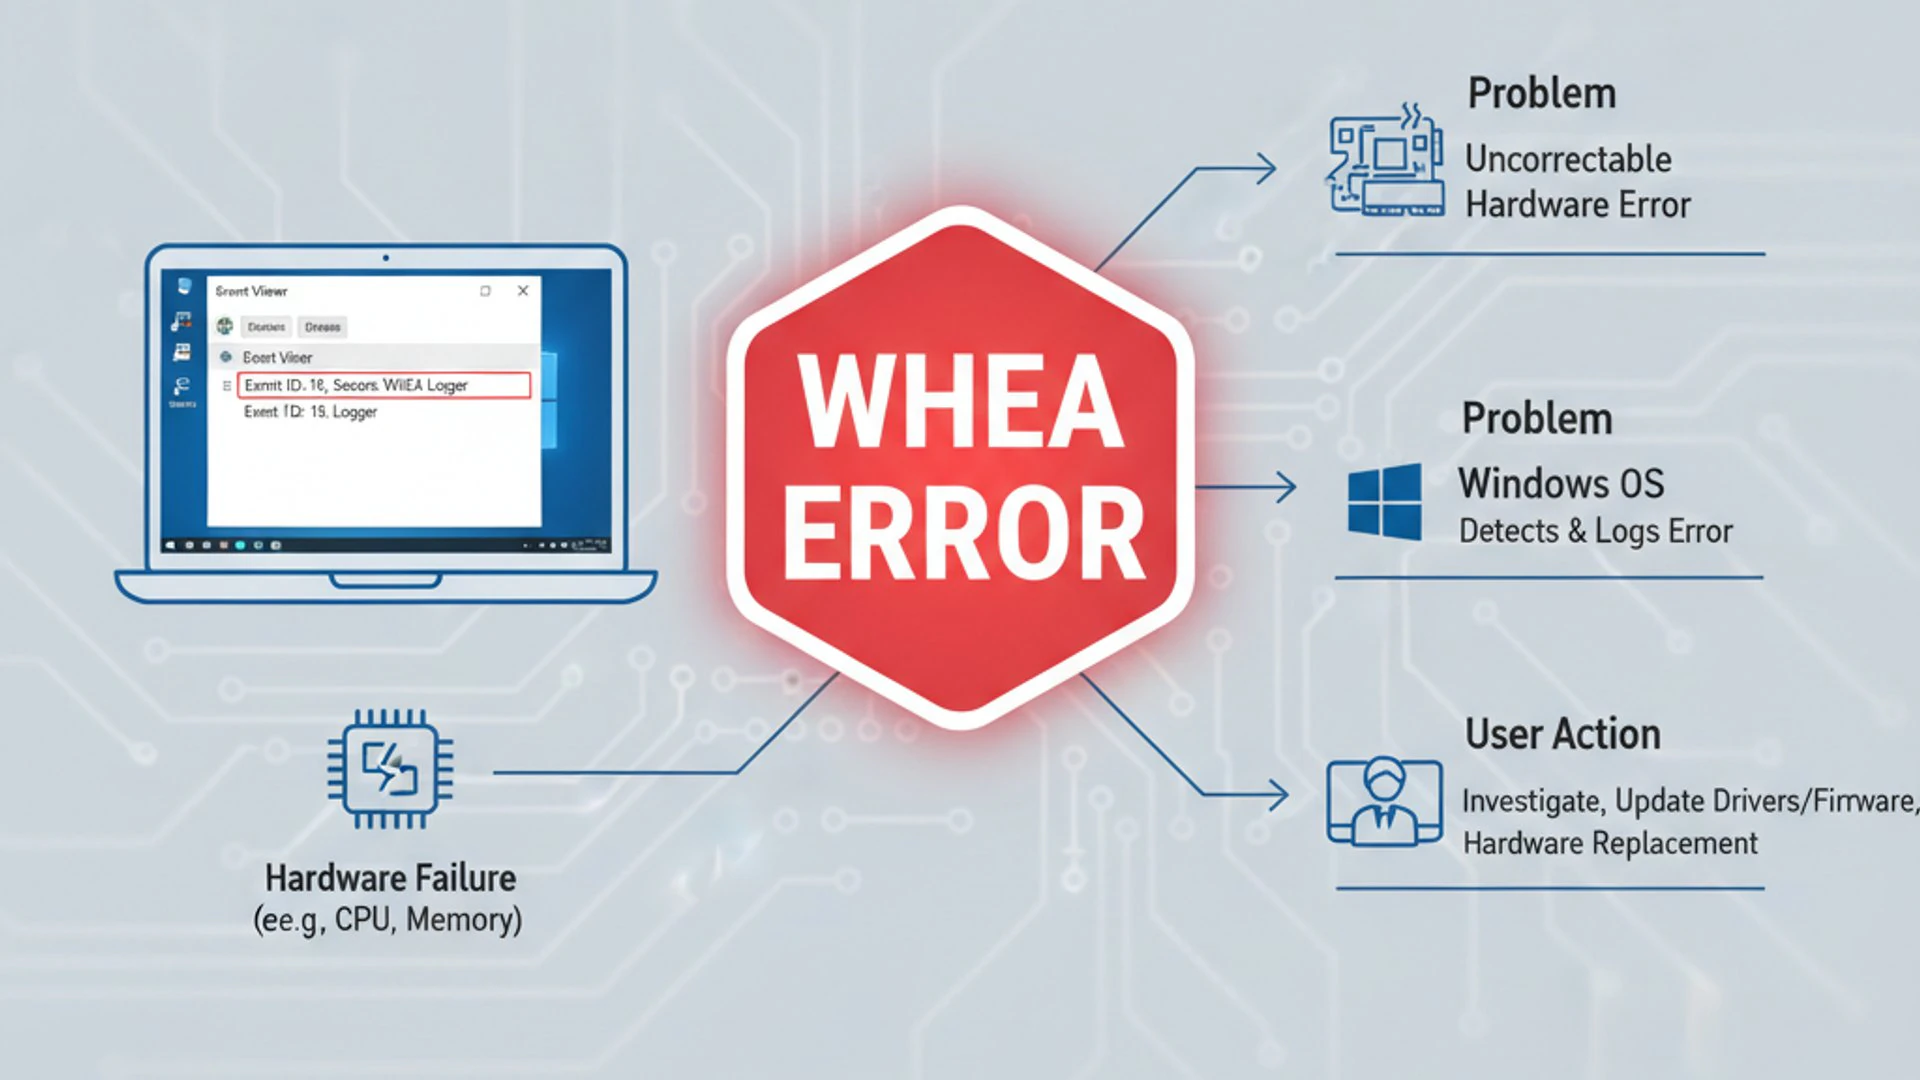
This event often points to issues with core components that are vital for the system’s operation, such as the Central Processing Unit (CPU) or Random Access Memory (RAM). Its presence suggests a level of instability that could compromise data integrity and system reliability over time.
The Role of WHEA in System Stability
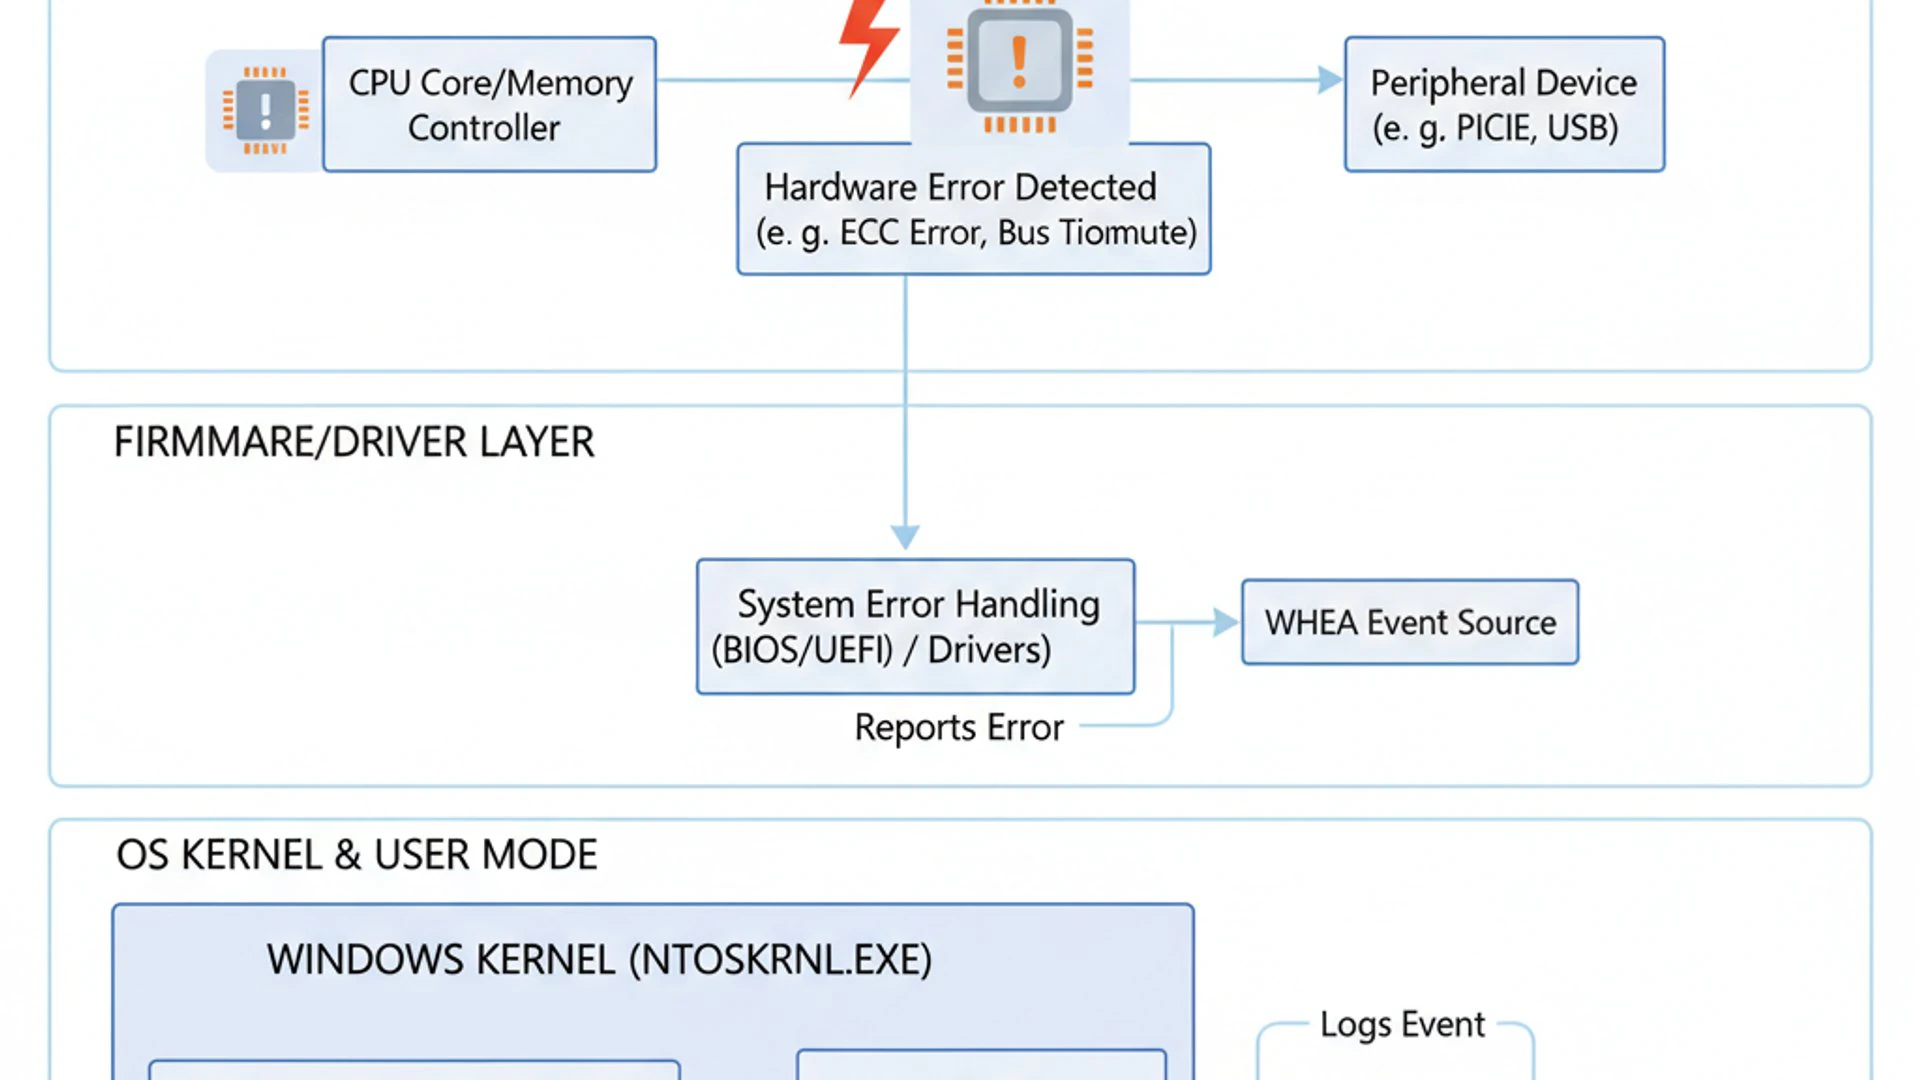
WHEA stands for Windows Hardware Error Architecture. It’s a robust framework designed by Microsoft to detect, report, and recover from hardware errors within the operating system. When a critical hardware component encounters an uncorrectable error, WHEA logs this event, often attempting to recover or gracefully shut down the system to prevent further damage.
Event ID 18 specifically categorizes these as “Corrected Hardware Errors” or “Uncorrectable Hardware Errors.” While “Corrected” might sound benign, it still indicates an underlying issue that the system had to compensate for, which could escalate into a more severe problem if left unaddressed. Uncorrectable errors, on the other hand, are much more serious and frequently lead to system crashes or reboots.
The WHEA framework plays a vital role in system diagnostics, providing a standardized way for hardware and firmware to communicate errors to the operating system. This mechanism is essential for modern Windows 11 systems, which rely on complex interactions between various components.
Common Triggers for Event ID 18
Several factors can trigger a WHEA Logger Event 18 on Windows 11. These range from user-induced configurations to subtle hardware degradation over time. Identifying the specific trigger is often the most challenging part of the troubleshooting process.
Understanding these common causes can help narrow down your diagnostic efforts significantly. It’s a process of elimination, but knowing where to start can save a lot of time and effort.
Hardware Overclocking and Instability
One of the most frequent culprits behind WHEA Event 18 is overclocking. Pushing your CPU or RAM beyond their manufacturer-specified speeds and voltages can introduce instability. While overclocking aims to boost performance, it can also lead to errors when the hardware can no longer maintain stability under the increased load or insufficient voltage.
Even a seemingly stable overclock might eventually trigger WHEA errors as hardware ages or environmental conditions (like temperature) change. The system detects these deviations from expected operational parameters and logs them as critical errors. It’s a delicate balance between performance gains and system reliability.
Driver Incompatibilities and Corruption
Outdated, incompatible, or corrupt device drivers can also be a significant source of WHEA Logger Event 18. Drivers act as the communication bridge between your hardware and the operating system. If this bridge is faulty, the hardware might not function correctly, leading to errors that WHEA detects.
This is particularly true for critical drivers like those for your chipset, graphics card (GPU), and storage controllers. A driver bug could cause hardware to misreport its status or operate outside its stable parameters, triggering the event. Keeping your drivers updated is a simple yet effective preventative measure.
“A persistent WHEA Logger Event 18 is your system’s way of telling you that something fundamental is amiss. Don’t ignore these warnings; they are crucial for preventing more severe system failures.”
Interpreting WHEA Logger Event 18 Details in Event Viewer
Once you encounter a WHEA Logger Event 18 on Windows 11, the next critical step is to delve into the Event Viewer to extract specific details. This tool is your primary diagnostic interface, providing a wealth of information that can help pinpoint the exact nature and source of the hardware error.
Without properly interpreting these details, troubleshooting becomes a blind guessing game. The Event Viewer provides context, error codes, and even component information that are invaluable for effective diagnosis.
Locating the Event Log
Accessing the Event Viewer is straightforward on Windows 11. Here’s how to navigate to the relevant logs:
- Press Windows Key + X to open the Power User Menu.
- Select “Event Viewer” from the list.
- In the Event Viewer window, expand “Windows Logs” in the left-hand pane.
- Click on “System”.
- In the central pane, you will see a list of events. Look for events with a “Level” of “Error” and a “Source” of “WHEA-Logger”.
- Double-click on any WHEA-Logger Event 18 to open its detailed properties.
You might find multiple instances of the same event, especially if the issue is recurring. Examining the timestamps can help you correlate them with system crashes or performance issues you’ve observed.
Deciphering the Error Codes and Parameters
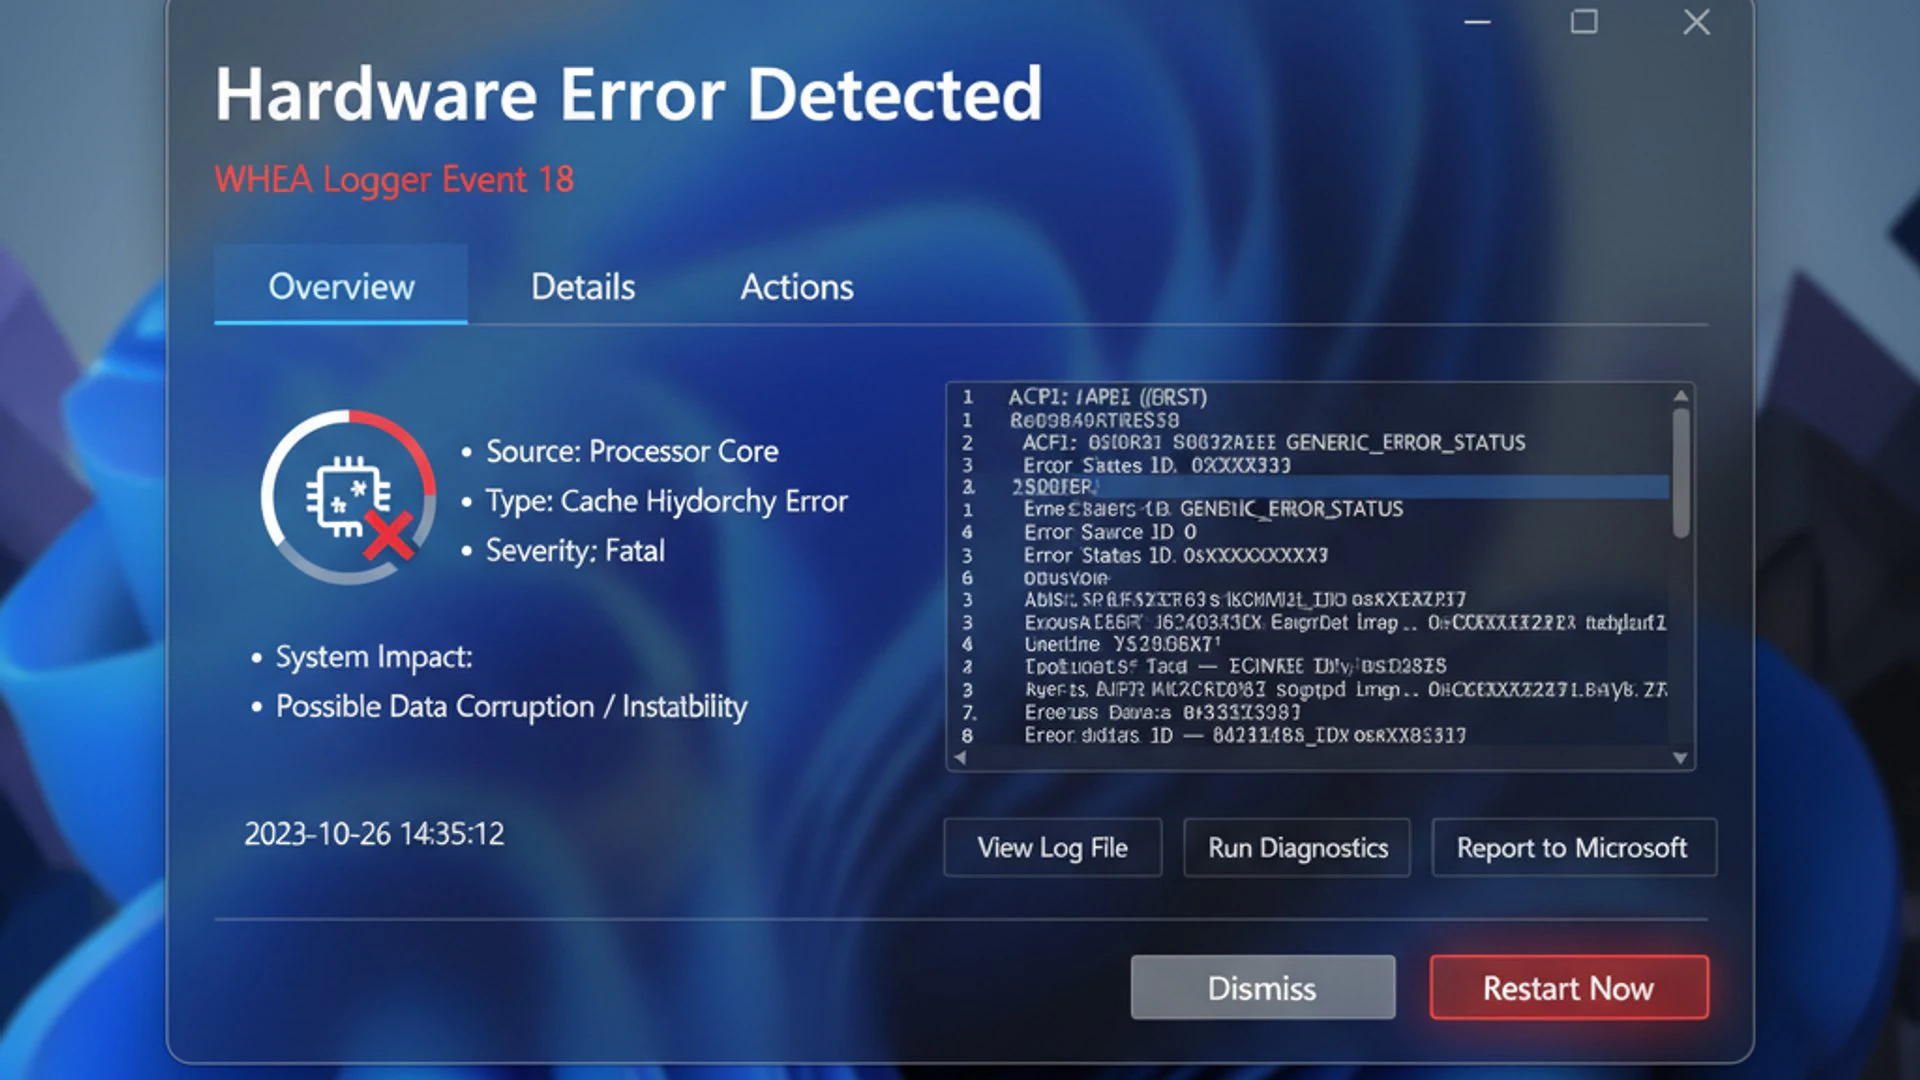
The detailed properties window for WHEA Event 18 contains crucial information, often presented in XML format or as a series of hexadecimal codes. While intimidating at first glance, these codes are the key to understanding the error.
- Component: This field often indicates the problematic hardware area, such as Processor Core, Memory Controller, or PCI Express Root Port. This is a primary indicator of where to focus your efforts.
- Error Source: This specifies the type of error source, like Machine Check Exception (MCE) for CPU errors or PCI Express Error.
- Error Type: Provides more specific details, such as Cache Hierarchy Error, TLB Error, or Bus/Interconnect Error.
- APIC ID: For CPU-related errors, this identifies the specific CPU core that experienced the error.
- Processor APIC ID: Similar to APIC ID, helps pinpoint the CPU core.
- Vendor ID, Device ID, Function ID: These are critical for PCIe-related errors, helping identify the specific device (e.g., graphics card, network adapter) on the PCIe bus. You can often cross-reference these IDs with online databases to identify the exact component.
Pay close attention to the BugCheckCode if present, as this can sometimes lead to specific Microsoft knowledge base articles related to the stop error (Blue Screen of Death) that might have accompanied the WHEA event. Searching online for the combination of “WHEA Logger Event 18” and the specific error codes you find can often yield valuable insights from other users or technical forums.
Initial Diagnostic Steps for WHEA Event 18
Before diving into complex hardware replacements or software reconfigurations, it’s wise to start with a series of initial, easily accessible diagnostic steps. These checks can often resolve the issue if it stems from common environmental factors or minor hardware glitches, saving you time and effort in the long run.
Many apparent hardware errors can be traced back to simple oversight or environmental conditions. Addressing these first provides a solid foundation for more advanced troubleshooting if necessary.
Checking System Temperatures and Cooling
Overheating is a common cause of hardware instability, leading to errors like WHEA Event 18. When components like the CPU or GPU get too hot, they can become unstable, leading to errors or even thermal throttling, which reduces performance.
- Monitor Temperatures: Use third-party software like HWMonitor or Core Temp to monitor your CPU and GPU temperatures, especially under load.
- Clean Dust: Power down your PC, unplug it, and open the case. Use compressed air to carefully clean dust from CPU coolers, GPU heatsinks, case fans, and power supply vents. Dust acts as an insulator, trapping heat.
- Verify Fan Functionality: Ensure all case fans, CPU cooler fans, and GPU fans are spinning freely and quietly. Replace any noisy or non-functional fans.
- Check Thermal Paste: If CPU temperatures are unusually high despite cleaning, the thermal paste between your CPU and its cooler might need to be reapplied. This is a more involved step, but crucial for optimal heat transfer.
Maintaining optimal operating temperatures is crucial for hardware longevity and stability. Even a few degrees above normal can contribute to intermittent errors.
Running Basic Hardware Diagnostics
Windows 11 includes several built-in tools that can help diagnose basic hardware health without requiring specialized software. These are excellent starting points for ruling out common issues.
- Windows Memory Diagnostic: This tool checks your RAM for errors.
- Type “Windows Memory Diagnostic” into the Windows Search bar and open it.
- Choose “Restart now and check for problems (recommended)”.
- Your PC will restart and run a memory test. If errors are found, it will report them upon rebooting into Windows.
- Disk Error Checking: While less directly related to WHEA Event 18, storage drive issues can sometimes manifest in unexpected ways.
- Open “This PC”, right-click on your C: drive (or any other drive), and select “Properties”.
- Go to the “Tools” tab and click “Check” under Error checking.
- Follow the prompts to scan the drive for errors.
- Verify Power Connections: Power down your PC and unplug it. Open the case and ensure all power cables are securely seated. This includes the main 24-pin ATX connector, the 4/8-pin CPU power connector, and all PCIe power connectors to your graphics card. Loose connections can cause intermittent power delivery issues.
- Peripheral Integrity: Disconnect any non-essential peripherals (external hard drives, extra monitors, USB devices) to see if the WHEA event stops. A faulty peripheral can sometimes cause system-wide instability.
Advanced Troubleshooting Methods for Resolving WHEA Event 18
If the initial diagnostic steps don’t resolve the WHEA Logger Event 18 on Windows 11, it’s time to move on to more advanced troubleshooting methods. These involve deeper dives into your system’s software and hardware configurations, often requiring more technical expertise.
These steps are designed to systematically eliminate potential causes, focusing on components that are frequently implicated in critical hardware errors. Patience and methodical execution are key here.
Updating Drivers and Firmware
Outdated or corrupt drivers and firmware are a common source of hardware instability. Ensuring these are up-to-date is a critical step in resolving WHEA Event 18. This process ensures that your hardware communicates effectively with Windows 11.
Always download drivers directly from the manufacturer’s official website. Avoid generic driver update utilities, as they can sometimes install incompatible or outdated versions.
Graphics Card Drivers
Your graphics card (GPU) drivers are particularly important, especially if the WHEA event occurs during graphically intensive tasks. Faulty GPU drivers can lead to display issues, crashes, and hardware errors.
- Identify Your GPU: Press Windows Key + X, select “Device Manager”, and expand “Display adapters”.
- Download Latest Drivers: Visit the official website of your GPU manufacturer (e.g., NVIDIA, AMD, Intel) and download the latest drivers for your specific model and Windows 11.
- Clean Installation: During installation, choose the “Custom” or “Clean Installation” option if available. This removes old driver files that might be causing conflicts.
Chipset Drivers and BIOS/UEFI Firmware
The chipset drivers are crucial as they manage communication between your CPU, RAM, and other components on the motherboard. The BIOS/UEFI firmware is the low-level software that initializes your hardware before Windows even loads.
- Identify Motherboard Model: Use a tool like CPU-Z or check your system documentation to find your motherboard model.
- Download Chipset Drivers: Go to your motherboard manufacturer’s website (e.g., ASUS, MSI, Gigabyte, ASRock) and download the latest chipset drivers for your model and Windows 11.
- Update BIOS/UEFI: On the same manufacturer’s website, look for the latest BIOS/UEFI firmware update. Proceed with extreme caution here. A failed BIOS update can brick your motherboard. Follow the manufacturer’s instructions precisely, ensuring your system has stable power throughout the process.
Updating BIOS/UEFI can sometimes resolve compatibility issues that lead to critical hardware errors, especially with newer CPUs or RAM modules. However, it’s a step that should only be taken after careful consideration and preparation.
Testing and Adjusting RAM Modules
Faulty or unstable RAM is a very common cause of WHEA Logger Event 18. Even if Windows Memory Diagnostic didn’t find issues, a more thorough test is often warranted.
- MemTest86: Download MemTest86, create a bootable USB drive, and boot your PC from it. Let it run for at least 4-8 passes (preferably overnight). Any errors indicate faulty RAM.
- Isolate RAM Sticks: If MemTest86 finds errors, test each RAM stick individually in different slots to identify the faulty module or slot.
- Check RAM Seating: Power down and unplug your PC. Reseat all RAM modules firmly in their slots.
- Adjust XMP/DOCP Profile: If you are using an XMP (Intel) or DOCP (AMD) profile for your RAM, try disabling it in the BIOS/UEFI or setting the RAM speed manually to its default JEDEC speed (e.g., 2133MHz or 2400MHz). Unstable XMP profiles are a frequent cause of WHEA errors.
Verifying CPU Stability and Settings
The CPU is often at the heart of WHEA Event 18. Ensuring its stability, especially if you’ve made any performance adjustments, is crucial.
- Reset BIOS to Defaults: Enter your BIOS/UEFI settings and load “Optimized Defaults” or “Factory Defaults.” This will revert any manual changes, including potential overclocking, that might be causing instability.
- Disable CPU Overclocking: If you have manually overclocked your CPU, revert it to stock speeds. Even a slight overclock can cause WHEA errors if not perfectly stable.
- Stress Test CPU: Use a CPU stress testing tool like Prime95 (blend test) or OCCT to put your CPU under heavy load. Monitor for errors or crashes during the test. Stop immediately if temperatures become dangerously high.
A stable CPU is fundamental to a stable system. Any instability here will ripple through all other components, making troubleshooting incredibly difficult.
Power Supply Unit (PSU) Integrity Check
An unstable or failing power supply unit (PSU) can lead to insufficient or fluctuating power delivery to your components, causing critical hardware errors. While difficult to diagnose without specialized equipment, there are some indicators.
- Age of PSU: PSUs degrade over time. If yours is several years old, it might not be delivering stable power anymore.
- Wattage: Ensure your PSU has sufficient wattage for your components, especially if you’ve upgraded your GPU or CPU.
- Visual Inspection: Look for bulging capacitors on the PSU itself (if accessible) or on the motherboard. This indicates component failure.
- Swap Test: If possible, test with a known good PSU. This is the most definitive way to rule out the PSU as the culprit.
A failing PSU can manifest as intermittent crashes, random reboots, or WHEA errors under load. It’s a component often overlooked but critical for system stability.
Disabling Overclocking and XMP Profiles
As mentioned earlier, overclocking is a prime suspect for WHEA Logger Event 18. This includes both CPU and GPU overclocks, as well as enabling XMP (Extreme Memory Profile) or DOCP (Direct Overclock Profile) for your RAM.
- Access BIOS/UEFI: Restart your computer and repeatedly press the designated key (usually Del, F2, F10, or F12) to enter your BIOS/UEFI settings.
- Locate Overclocking Settings: Navigate to sections related to CPU Overclocking, Memory Settings, or AI Tweaker (on ASUS boards).
- Disable Overclocking: Set CPU Ratio/Multiplier to Auto or its stock value. Set CPU Core Voltage to Auto.
- Disable XMP/DOCP: Find the XMP/DOCP profile setting and set it to “Disabled” or “Auto”, which will revert your RAM to its JEDEC standard speed.
- Save and Exit: Save your changes and exit the BIOS/UEFI. Your system will restart with default or stock settings.
Run your system for a few days with these settings. If the WHEA events cease, you’ve found your culprit. You can then try to re-enable them one by one, or with more conservative settings, to find a stable configuration.
Running System File Checker and DISM
While WHEA Event 18 points to hardware, corrupted system files can sometimes interact with hardware drivers in ways that trigger these errors. Windows provides two powerful command-line tools to address system file integrity.
- Open Command Prompt as Administrator: Type “cmd” in the Windows Search bar, right-click “Command Prompt”, and select “Run as administrator”.
- Run SFC (System File Checker): Type
sfc /scannowand press Enter. This tool scans for and repairs corrupted Windows system files. Let it complete, which may take some time. - Run DISM (Deployment Image Servicing and Management): If SFC reports issues it couldn’t fix, or even as a standalone measure, run these DISM commands sequentially:
These commands check the Windows image for corruption and attempt to repair it using Windows Update as a source. This is particularly useful for ensuring the underlying operating system is sound.
DISM /Online /Cleanup-Image /CheckHealthDISM /Online /Cleanup-Image /ScanHealthDISM /Online /Cleanup-Image /RestoreHealth
After running these tools, restart your computer and monitor for the WHEA Logger Event 18. While not a direct hardware fix, ensuring system file integrity can eliminate software-related triggers that mimic hardware issues.
Preventing Future WHEA Logger Event 18 Occurrences
Once you’ve successfully resolved the WHEA Logger Event 18 on Windows 11, the next logical step is to implement proactive measures to prevent its recurrence. A stable system is not just about fixing problems, but also about maintaining optimal conditions and practices.
Prevention is always better than cure, especially when dealing with critical hardware errors. Adopting good maintenance habits can significantly extend the life and reliability of your Windows 11 PC.
Maintaining Optimal System Conditions
Environmental factors and physical care play a significant role in hardware health. Simple practices can go a long way in preventing stress on your components.
- Temperature Management: Regularly clean your PC’s interior to prevent dust buildup, which can impede airflow and cause overheating. Ensure your case has adequate ventilation and consider upgrading cooling solutions if temperatures remain high under load.
- Stable Power: Use a reputable surge protector or, ideally, an Uninterruptible Power Supply (UPS) to protect your system from power fluctuations, spikes, and outages. These can stress your PSU and other components.
- Secure Connections: Periodically check that all internal cables (power, SATA, PCIe) are securely seated. Vibrations or accidental nudges can sometimes loosen connections over time.
- Avoid Physical Shocks: Handle your PC with care. Sudden impacts can dislodge components or damage delicate connections.
These physical maintenance steps are fundamental to creating a stable operating environment for your hardware. Neglecting them can lead to a host of issues, including WHEA errors.
Regular Software and Driver Updates
Keeping your software ecosystem up-to-date is just as important as physical maintenance. Manufacturers constantly release updates to improve stability, fix bugs, and enhance compatibility.
- Windows Updates: Ensure Windows 11 is always up-to-date. Microsoft frequently releases patches that address system stability and hardware compatibility issues. You can check for updates in Settings > Windows Update.
- Driver Updates: Regularly check for updated drivers for your motherboard chipset, graphics card, network adapter, and other critical components. Always download these directly from the component manufacturer’s official website.
- BIOS/UEFI Firmware: While not as frequent, keep an eye out for BIOS/UEFI updates from your motherboard manufacturer. These can introduce support for new hardware, improve stability, and fix underlying firmware bugs. Remember to exercise caution when updating BIOS.
A proactive approach to updates minimizes the chances of software conflicts or outdated firmware causing hardware errors. It ensures your system benefits from the latest stability improvements.
When to Seek Professional Help
Despite your best efforts and diligent troubleshooting, there may come a point where the WHEA Logger Event 18 on Windows 11 persists. This is a clear indicator that the issue might be beyond standard user-level repair, potentially involving a deeply embedded hardware fault or complex diagnostic equipment.
Knowing when to call in the experts can save you further frustration, time, and potentially prevent additional damage to your system. Sometimes, a fresh pair of eyes with specialized tools is exactly what’s needed.
- Persistent Errors: If you’ve systematically gone through all the troubleshooting steps outlined in this guide and the WHEA Event 18 continues to appear, especially with system crashes.
- Unidentified Component: If the Event Viewer logs do not clearly point to a specific component, or if the error codes are too generic to diagnose effectively.
- Suspected Hardware Failure: When you suspect a core component like the CPU, motherboard, or PSU is failing, but you lack the spare parts or expertise to perform a swap test.
- Lack of Tools/Expertise: If you don’t feel comfortable performing more invasive diagnostics, such as reapplying thermal paste, or lack the necessary tools (like a multi-meter for PSU testing).
- Warranty Considerations: If your PC or a specific component is still under warranty, attempting advanced repairs yourself might void it. A professional can often diagnose without voiding the warranty.
A professional technician has access to advanced diagnostic tools and a wealth of experience with various hardware configurations. They can perform more detailed tests, such as using specialized PSU testers or component-specific stress tests, to accurately identify the failing part. They can also advise on potential hardware replacements and ensure they are installed correctly.
Conclusion: Ensuring a Stable Windows 11 Experience
The WHEA Logger Event 18 on Windows 11 is more than just another entry in your Event Viewer; it’s a critical warning that your system’s fundamental hardware stability is compromised. Addressing this error promptly and systematically is paramount to safeguarding your data, preventing further hardware degradation, and ensuring a reliable computing experience.
By understanding what WHEA is, meticulously interpreting the Event Viewer logs, and methodically applying the diagnostic and troubleshooting steps outlined in this guide, you equip yourself with the knowledge to tackle this challenging issue. From basic checks like temperature monitoring and driver updates to advanced techniques such as RAM testing and BIOS adjustments, each step brings you closer to a stable system.
Remember that proactive maintenance, including regular updates and optimal system conditions, plays a crucial role in preventing these errors from recurring. Ultimately, a stable Windows 11 system is a productive one. By taking these steps, you not only resolve an immediate problem but also invest in the long-term health and performance of your PC. Should the issue persist, do not hesitate to seek professional assistance to ensure a definitive resolution.
For more interesting articles, stay tuned to Winsides.com!









Community
Comments (0)