

Introduction to Clock Watchdog Timeout on Windows 11
Encountering a Blue Screen of Death (BSOD) can be one of the most frustrating experiences for any Windows user, especially when it interrupts your workflow or gaming session. Among the various cryptic error messages that can appear, the “Clock Watchdog Timeout” error stands out as particularly vexing for many Windows 11 users. This error typically signals a fundamental communication breakdown within your system’s core components, often pointing to issues with your CPU, memory, or even critical drivers. For additional context, see Bug Check 0x101: CLOCK_WATCHDOG_TIMEOUT, Intel Processor Support, and AMD Support & Drivers.
When your system throws a Clock Watchdog Timeout, it means a crucial processor thread has stopped responding within a predetermined timeframe. Essentially, the “watchdog” – a monitoring mechanism – has detected that a component, usually the CPU, is not acknowledging its instructions as expected. This can lead to system instability, data loss, and repeated crashes, making your Windows 11 experience less than ideal.
This comprehensive guide aims to demystify the Clock Watchdog Timeout error on Windows 11. We will delve into its technical underpinnings, explore the most common causes, and provide a structured, step-by-step approach to troubleshooting and resolving this persistent issue. By the end of this article, you will have a clear understanding of how to diagnose and fix the problem, restoring stability and performance to your PC.
Whether you’re a seasoned tech enthusiast or a casual user, the methods outlined here will equip you with the knowledge to tackle this challenging error effectively. Let’s embark on this journey to reclaim your Windows 11 system from the clutches of the Clock Watchdog Timeout.
Table of contents
Key Takeaways for Resolving Clock Watchdog Timeout
- Start with the Basics: Always begin by restarting your PC and ensuring Windows 11 is fully updated. Disconnect non-essential peripherals to rule out external device conflicts.
- Driver Updates are Crucial: Outdated or corrupted drivers, especially for graphics and chipset, are frequent culprits. Prioritize updating these directly from the manufacturer’s website.
- System File Integrity: Use SFC and DISM commands to check for and repair corrupted Windows system files, which can often lead to instability.
- Hardware Diagnostics: Test your RAM with Windows Memory Diagnostic and monitor CPU temperatures. Overheating or faulty memory modules are common hardware causes.
- Power and Overclocking: Review your power plan settings and disable any CPU or RAM overclocking. Aggressive settings can destabilize your system and trigger the error.
- BIOS/UEFI Firmware: Updating your motherboard’s firmware can resolve compatibility issues and improve system stability, but proceed with caution.
- Clean Boot for Software Conflicts: Perform a clean boot to isolate third-party applications or services that might be conflicting with your Windows 11 system.
Understanding the ‘Clock Watchdog Timeout’ Error
The “Clock Watchdog Timeout” error is a specific type of Blue Screen of Death (BSOD) that indicates a critical system failure in Windows 11. It’s not just a random crash; it points to a very particular problem where a processor core or thread fails to respond within an expected timeframe. Imagine a vigilant guard (the watchdog) constantly checking if a worker (a CPU core) is performing its task. If the worker doesn’t report back or respond in time, the guard raises an alarm, leading to a system halt to prevent further damage or data corruption.
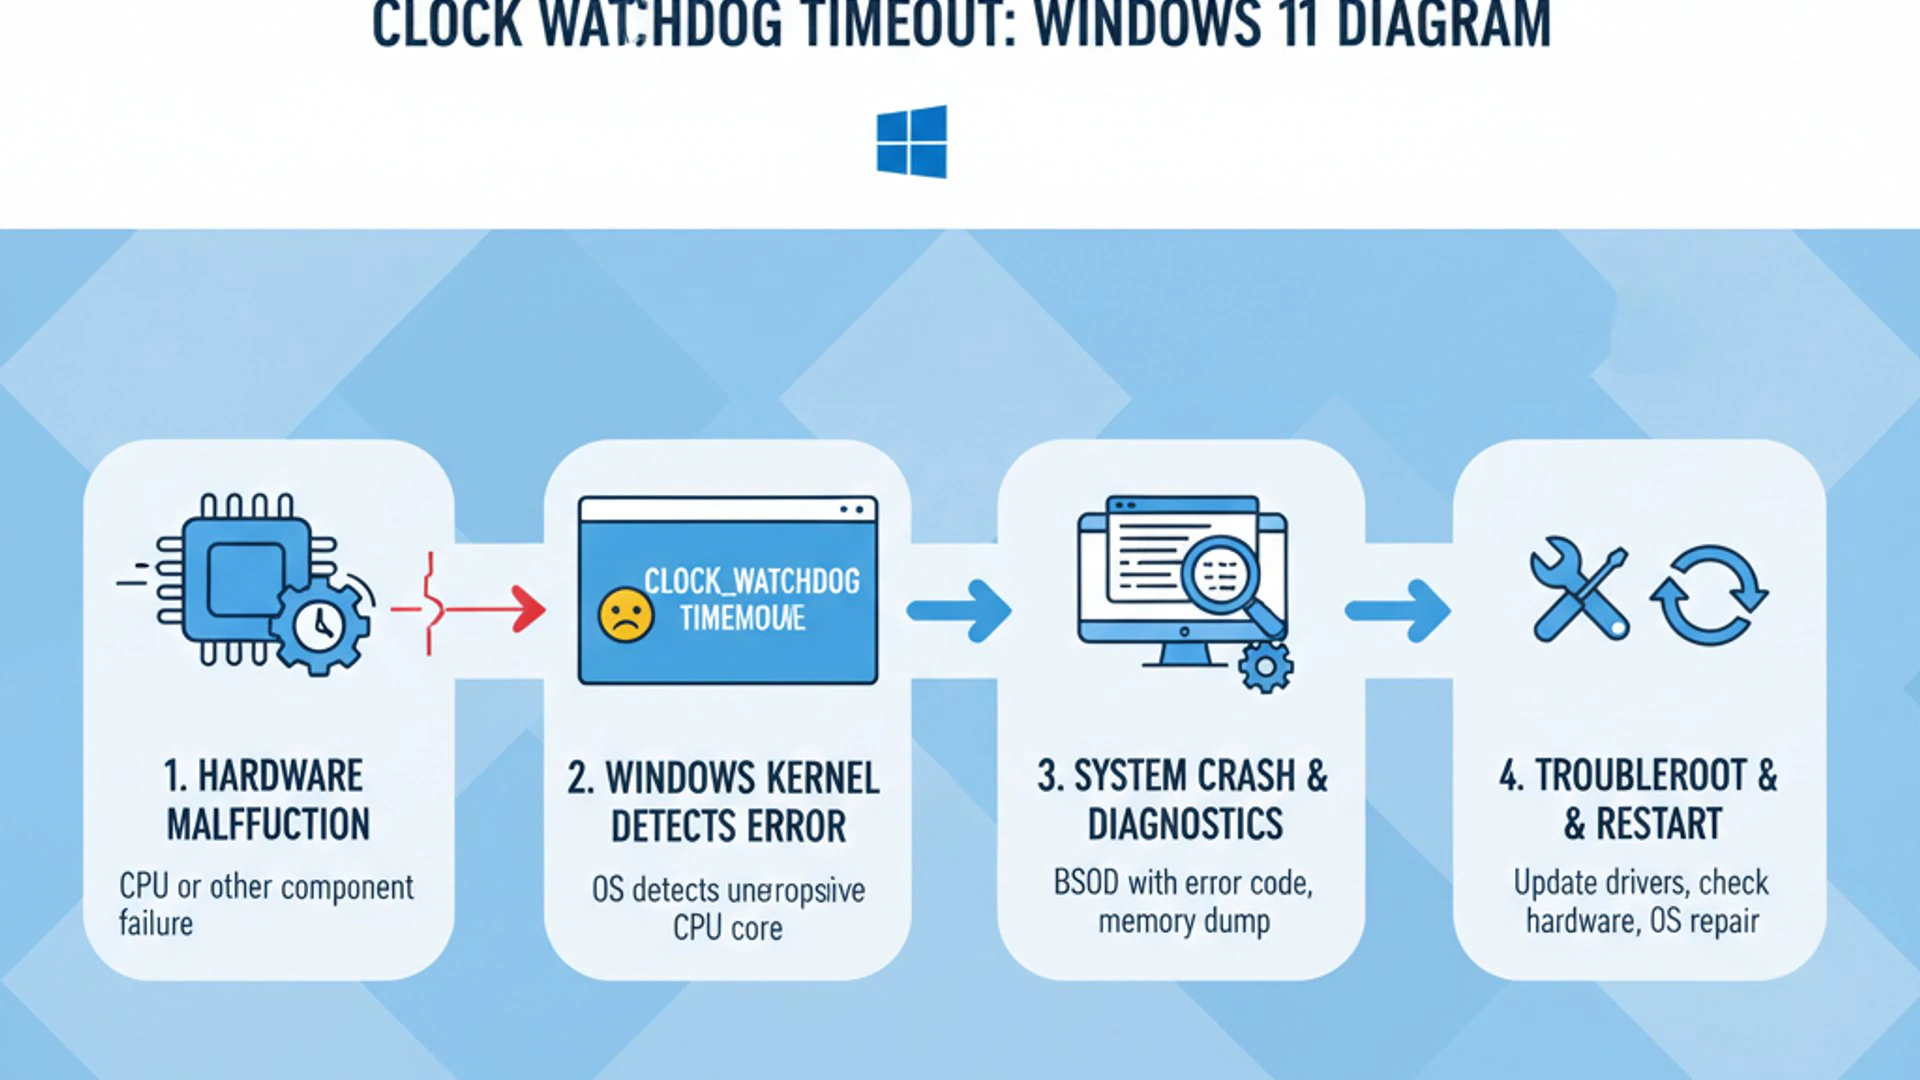
This error message, often accompanied by the stop code 0x00000101, signifies that a multi-processor system has detected a non-responding processor. The processor is essentially “stuck” or “hung,” unable to process instructions or acknowledge interrupts. This can be due to a myriad of reasons, ranging from hardware malfunctions to intricate software conflicts, making it a challenging error to diagnose without a systematic approach.
Understanding this technical aspect is key to effective troubleshooting. It tells us that the problem is deeply rooted in how your system’s central processing unit interacts with other components and software. Therefore, our diagnostic efforts must span both hardware integrity and software compatibility.
What Causes This Blue Screen of Death (BSOD)?
The underlying causes of a Clock Watchdog Timeout on Windows 11 are diverse, but they generally fall into two main categories: hardware-related issues and software/driver conflicts. Pinpointing the exact cause often requires a process of elimination, as symptoms can overlap significantly.
It’s important to remember that this error is a symptom, not the root cause itself. The system is telling you that something fundamental has gone wrong, and it’s up to us to investigate what that “something” is. Let’s break down the common culprits.
Hardware-Related Issues
Hardware problems are a significant contributor to the Clock Watchdog Timeout error. The CPU, as the brain of your computer, is often at the center of these issues. For instance, CPU overheating can cause the processor to throttle down or become unresponsive, triggering the watchdog timer. Inadequate cooling, dust buildup, or a failing CPU fan can all lead to elevated temperatures.
Another common hardware culprit is faulty RAM (Random Access Memory). Corrupted memory modules can lead to incorrect data processing, causing the CPU to get stuck in an infinite loop or attempt to access non-existent memory addresses. This can manifest as a Clock Watchdog Timeout, as the CPU struggles to complete its tasks correctly.
Furthermore, an unstable power supply unit (PSU) delivering inconsistent voltage can also destabilize components, particularly the CPU and GPU, leading to unexpected behavior and crashes. Even a faulty motherboard, though less common, can cause communication issues between components, resulting in this error. Overclocking, which pushes hardware beyond its factory specifications, is another frequent cause of instability, directly leading to these timeouts.
Software and Driver Conflicts
Beyond hardware, software and driver issues play an equally significant role in triggering the Clock Watchdog Timeout. Outdated or corrupted device drivers are a primary suspect. Graphics card drivers, chipset drivers, and even network drivers can interfere with system stability if they are incompatible with Windows 11 or have become corrupted. These drivers act as translators between hardware and the operating system; a faulty translation can cause the CPU to hang.
The Windows 11 operating system itself can sometimes be the source of the problem. Corrupted system files, perhaps due to a failed update or malware infection, can lead to critical processes failing or behaving erratically. This directly impacts the CPU’s ability to execute commands smoothly, potentially leading to a watchdog timeout.
Lastly, third-party applications, especially those that deeply integrate with the system or demand significant resources, can also cause conflicts. Antivirus software, virtual machine applications, or even certain games with aggressive anti-cheat mechanisms can sometimes interfere with core system operations, leading to instability and the dreaded BSOD.
Initial Troubleshooting Steps Before Deeper Fixes
Before diving into more complex diagnostic procedures, it’s always wise to start with a few simple yet effective troubleshooting steps. These actions can often resolve the Clock Watchdog Timeout error without requiring extensive technical knowledge or time. They help rule out common, easily fixable issues and provide a stable baseline for further investigation if needed.
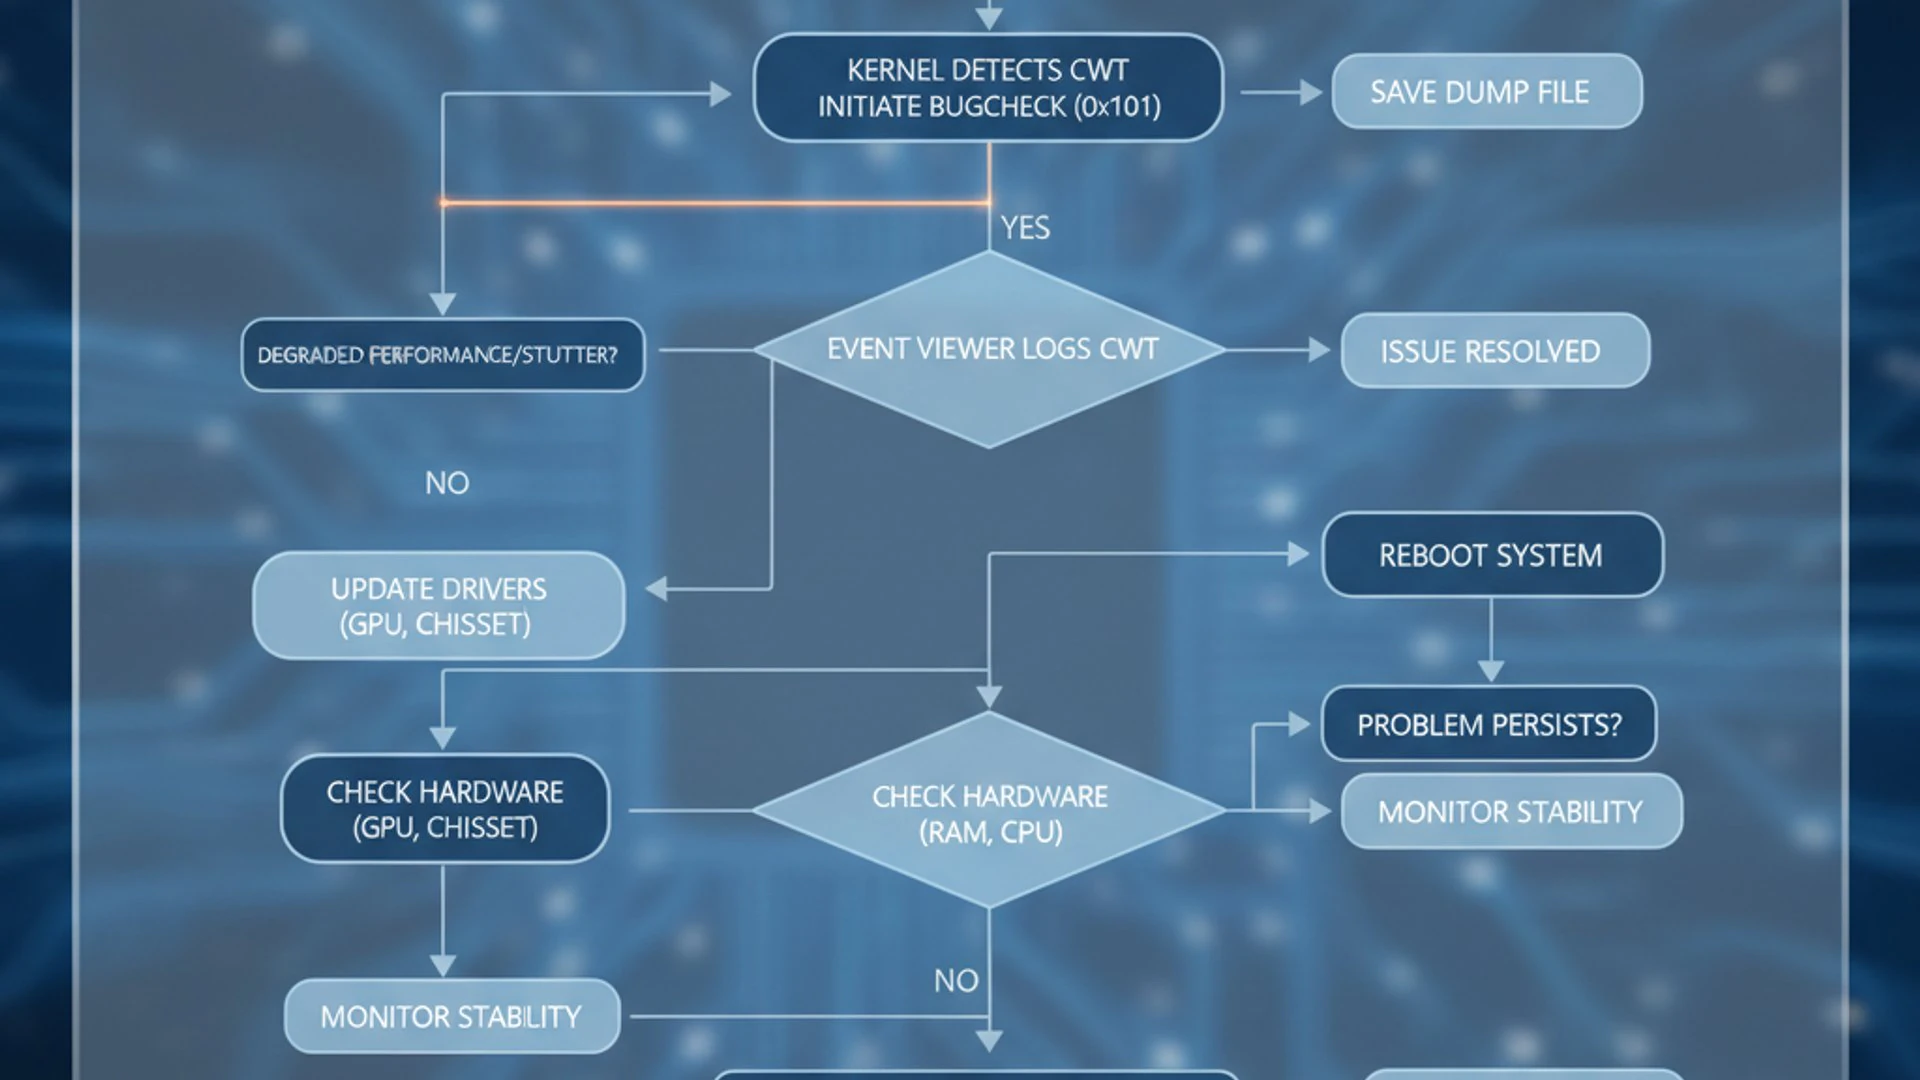
Think of these as the first aid for your computer. They are quick, non-invasive, and surprisingly effective in a good number of cases. By systematically going through these initial steps, you can save yourself a lot of time and effort in the long run.
Restart Your PC and Check for Updates
The classic “turn it off and on again” advice holds true for a reason. A simple restart can clear temporary glitches, reset system states, and resolve minor software conflicts that might be causing the Clock Watchdog Timeout. It flushes out temporary data and reloads all system processes from a clean slate.
- Click the Start button.
- Click the Power icon.
- Select Restart.
Once your PC has restarted, the next crucial step is to ensure your Windows 11 operating system is fully up-to-date. Microsoft frequently releases updates that include bug fixes, performance improvements, and driver updates that can address underlying causes of system instability.
- Press
Windows key + Ito open Settings. - Navigate to Windows Update.
- Click Check for updates.
- Download and install any available updates, then restart your PC as prompted.
Keeping your system current is a fundamental aspect of maintaining stability and preventing various errors, including the Clock Watchdog Timeout. This simple habit can often prevent many headaches.
Disconnect Non-Essential Peripherals
External devices can sometimes introduce conflicts or draw excessive power, leading to system instability. Temporarily disconnecting non-essential peripherals can help determine if one of these devices is the culprit behind the Clock Watchdog Timeout error.
This method is particularly useful if the error started occurring after you connected a new device or if the error is intermittent. It helps isolate the problem to either your core system components or an external accessory.
- Shut down your PC completely.
- Unplug all non-essential devices. This includes external hard drives, USB hubs, printers, webcams, extra monitors, and any other USB-connected accessories. Keep only your keyboard, mouse, and primary monitor connected.
- Restart your PC.
If the error does not reappear after disconnecting peripherals, try reconnecting them one by one, restarting your PC after each addition, until you identify the problematic device. This methodical approach helps pinpoint the exact source of the conflict.
Pro Tip: Always ensure your external devices have up-to-date drivers. Sometimes, an outdated peripheral driver can trigger system-wide instability, even if the hardware itself is not faulty.
Method 1: Update Your System Drivers
Outdated or corrupted drivers are among the most common culprits behind the Clock Watchdog Timeout error on Windows 11. Drivers are essential software components that allow your operating system to communicate with your hardware. If this communication breaks down, especially with critical components like your graphics card or motherboard chipset, system instability is almost guaranteed.
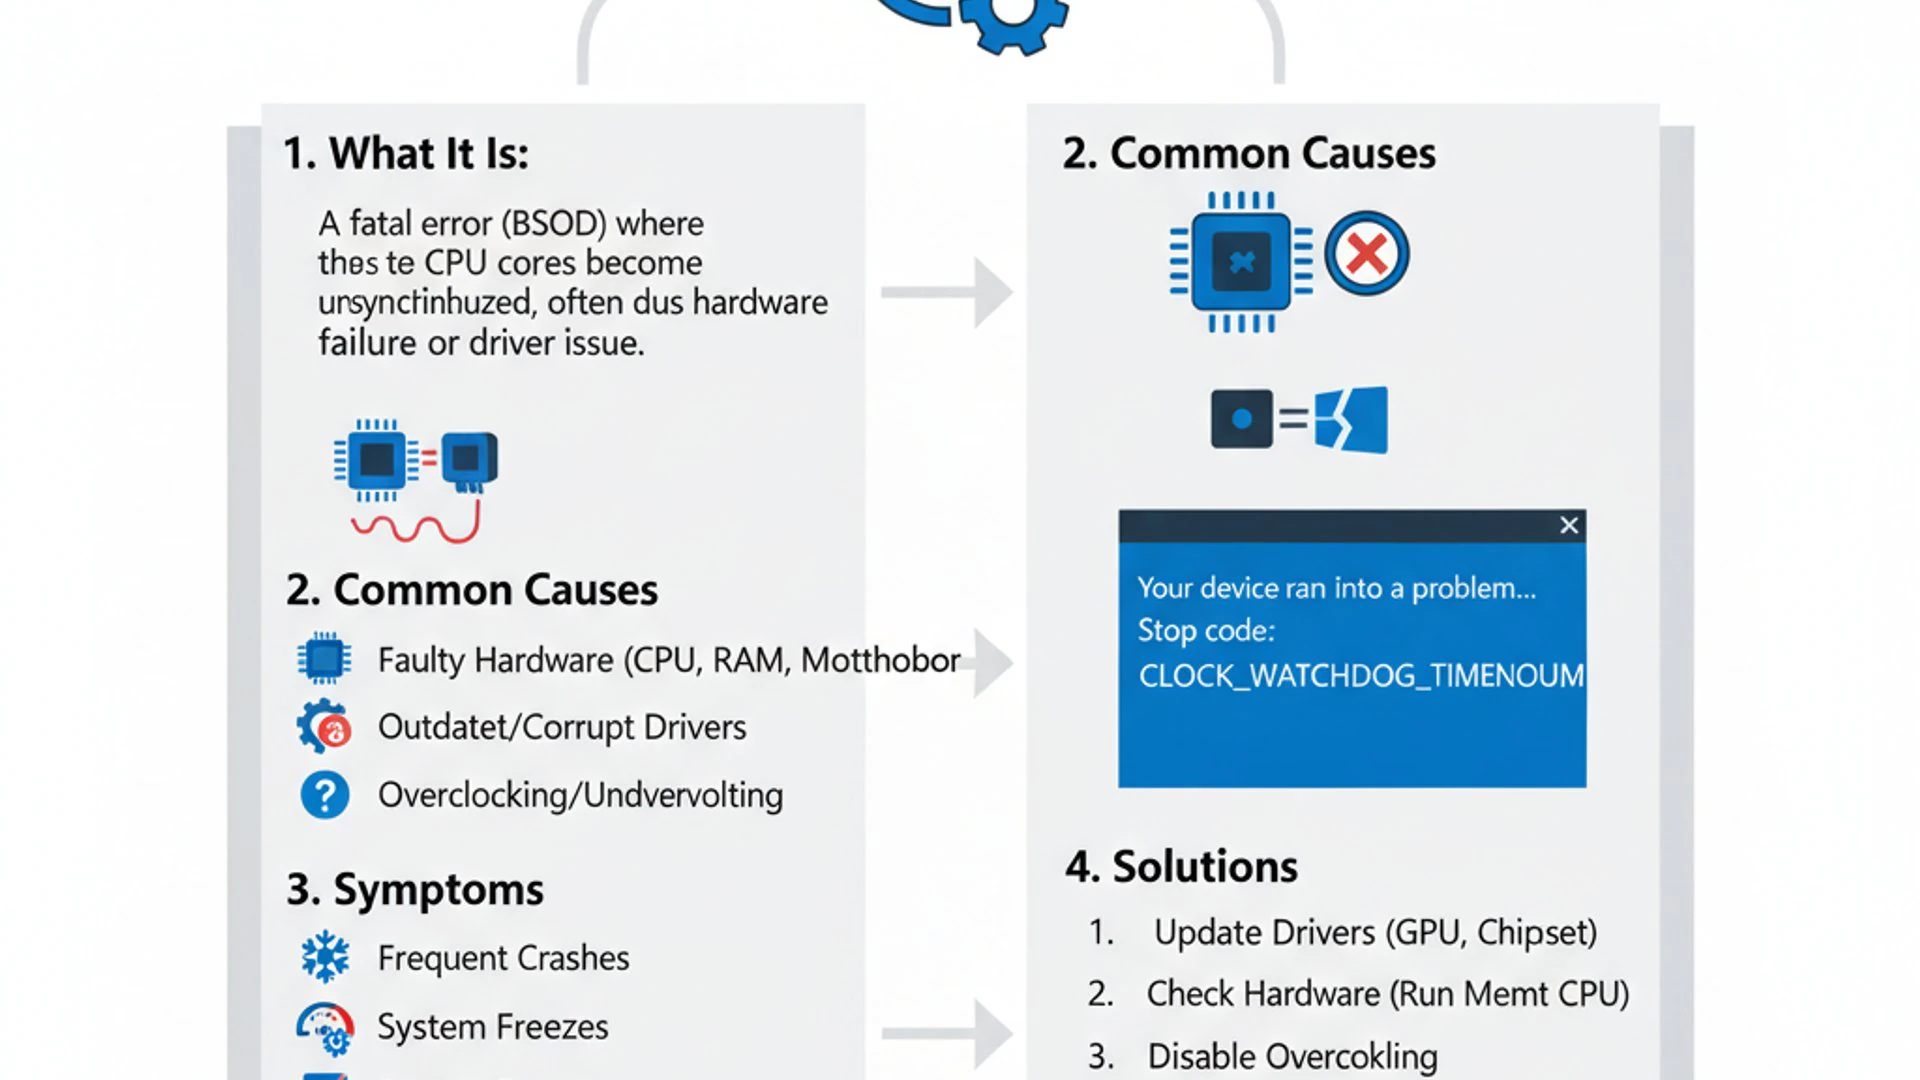
Updating drivers is not just about getting new features; it’s about ensuring compatibility, fixing bugs, and improving overall system performance and stability. For the Clock Watchdog Timeout error, focusing on graphics and chipset drivers is particularly important, as they directly influence how the CPU interacts with the rest of the system.
Always obtain drivers directly from the component manufacturer’s official website. While Windows Update can provide generic drivers, specific manufacturer drivers are often optimized for performance and stability.
Updating Graphics Drivers
Your graphics card driver plays a crucial role in system stability, especially if you engage in graphics-intensive tasks like gaming or video editing. A faulty or outdated graphics driver can easily lead to a Clock Watchdog Timeout.
Here’s how to update your graphics drivers:
- Identify your graphics card: Press
Windows key + R, typedxdiag, and press Enter. Go to the “Display” tab to see your graphics card model and manufacturer (NVIDIA, AMD, or Intel). - Visit the manufacturer’s website:
- For NVIDIA: NVIDIA Drivers
- For AMD: AMD Drivers & Support
- For Intel: Intel Graphics Drivers
- Download the latest driver: Use the automatic detection tool or manually select your graphics card model and Windows 11 (64-bit) to download the most recent stable driver.
- Install the driver: Run the downloaded installer. It’s often recommended to perform a “clean installation” if the option is available, which removes old driver files before installing new ones.
- Restart your PC: After installation, restart your computer to ensure the new drivers are fully integrated.
Regularly checking for graphics driver updates is a good practice for any Windows 11 user, not just those experiencing errors. It ensures optimal performance and compatibility.
Updating Chipset Drivers
Chipset drivers are equally vital, as they manage communication between your CPU and other components on the motherboard, such as USB controllers, storage controllers, and integrated peripherals. An outdated chipset driver can directly impact the CPU’s ability to communicate effectively, leading to a Clock Watchdog Timeout.
To update your chipset drivers:
- Identify your motherboard and chipset: You can often find this information in your system’s documentation, by using a tool like CPU-Z, or by checking Device Manager under “System devices.” Look for entries related to your CPU manufacturer (Intel or AMD) and chipset model.
- Visit your motherboard or CPU manufacturer’s website:
- For Intel chipsets: Intel Chipset Drivers
- For AMD chipsets: AMD Chipset Drivers
- Alternatively, visit your motherboard manufacturer’s support page (e.g., ASUS, MSI, Gigabyte, ASRock) and search for your specific motherboard model.
- Download the latest chipset driver: Ensure you select the correct driver for your Windows 11 (64-bit) operating system.
- Install the driver: Run the installer and follow the on-screen prompts.
- Restart your PC: A restart is usually required for chipset driver updates to take full effect.
Updating chipset drivers can significantly improve system stability and resolve communication issues that might be causing the Clock Watchdog Timeout error. This step is often overlooked but is incredibly important.
Method 2: Check for System File Corruption
Corrupted Windows system files can lead to a wide range of issues, including the dreaded Clock Watchdog Timeout. These files are critical for the proper functioning of your operating system, and if they become damaged or go missing, the system can become unstable, causing the CPU to encounter unexpected errors and eventually trigger a BSOD.
Fortunately, Windows 11 includes powerful built-in tools designed to scan for and repair such corruption. The System File Checker (SFC) and Deployment Image Servicing and Management (DISM) tools are your first line of defense against system file integrity issues. Using these tools can often resolve the root cause of the timeout without needing more drastic measures.
It’s a good practice to run these checks periodically, even if you’re not experiencing issues, as a preventative measure. They help maintain the health and integrity of your Windows 11 installation.
Running SFC Scan
The System File Checker (SFC) is a command-line utility that scans for and restores corrupted Windows system files. If it finds any protected system files that have been overwritten or damaged, it replaces them with correct versions from a cached copy.
Here’s how to run an SFC scan:
- Press
Windows key + S, typecmd, right-click on Command Prompt, and select Run as administrator. - In the Command Prompt window, type the following command and press Enter:
sfc /scannow - The scan will begin. This process can take some time, typically 5-15 minutes, depending on your system’s speed and the extent of any corruption.
- Once the scan is complete, you will see one of the following messages:
- “Windows Resource Protection did not find any integrity violations.” (No issues found)
- “Windows Resource Protection found corrupt files and successfully repaired them.” (Issues found and fixed)
- “Windows Resource Protection found corrupt files but was unable to fix some of them.” (Issues found, some not fixed – proceed to DISM)
- If repairs were made, it’s a good idea to restart your PC.
The SFC scan is a powerful first step in addressing file corruption. If it reports that it couldn’t fix all issues, the DISM tool is your next course of action.
Utilizing DISM Commands
The DISM tool is more advanced than SFC and is used to service a Windows image. It can repair deeper corruption within the Windows component store, which SFC relies on. If SFC fails to fix issues, DISM can often provide the necessary repairs.
Follow these steps to use DISM:
- Open Command Prompt as administrator (as described in the SFC section).
- Type the following command to check the health of the Windows image and press Enter:
DISM /Online /Cleanup-Image /CheckHealthThis command quickly checks if any corruption has been detected.
- Next, run this command to scan the Windows image for corruption:
DISM /Online /Cleanup-Image /ScanHealthThis scan is more thorough and can take several minutes to complete.
- If corruption is found, use the following command to repair the Windows image:
DISM /Online /Cleanup-Image /RestoreHealthThis command attempts to repair any detected corruption using Windows Update to download necessary files. This can take longer, sometimes up to 30 minutes or more, and requires an active internet connection.
- After the DISM process completes, it is highly recommended to run the SFC scan again (
sfc /scannow) to ensure all system files are now correctly repaired. - Finally, restart your PC.
Important: Running DISM /RestoreHealth requires a stable internet connection as it often downloads files from Microsoft’s servers to repair the image.
Method 3: Test and Monitor Hardware Components
When software and driver solutions don’t resolve the Clock Watchdog Timeout, the problem very likely lies within your hardware. Faulty or unstable hardware components, particularly RAM and the CPU, are frequent causes of this specific BSOD. Testing and monitoring these crucial parts can help identify if they are contributing to the instability.
This section will guide you through using built-in Windows tools and recommending third-party software to assess the health and performance of your RAM and CPU. Addressing hardware issues often requires a more direct approach, sometimes even component replacement, but proper diagnosis is the first step.
Checking RAM Health with Windows Memory Diagnostic
Defective or unstable RAM modules can cause data corruption and lead to the CPU getting stuck or receiving incorrect instructions, triggering a Clock Watchdog Timeout. Windows 11 includes a built-in tool called Windows Memory Diagnostic to check for RAM issues.
Here’s how to use it:
- Press
Windows key + R, typemdsched.exe, and press Enter. - You will be prompted with two options:
- Restart now and check for problems (recommended): This is the preferred option. Your PC will restart immediately and run the diagnostic tool.
- Check for problems the next time I start my computer: Choose this if you need to save your work first.
- Your computer will restart and enter the Windows Memory Diagnostic environment. The test will run automatically. It typically performs two passes.
- Once the test is complete, your computer will restart again and boot back into Windows 11.
- To view the results, press
Windows key + S, typeEvent Viewer, and open it. - Navigate to Windows Logs > System.
- In the right-hand pane, click Find… and type
MemoryDiagnostic, then click Find Next. Look for entries that indicate the results of the memory test.
If the diagnostic reports errors, it suggests your RAM might be faulty. You may need to replace the problematic RAM stick(s). If you have multiple RAM sticks, try testing them individually to pinpoint the faulty one.
Monitoring CPU Temperature and Stability
Overheating is a common cause of CPU instability and can directly lead to a Clock Watchdog Timeout. When a CPU gets too hot, it throttles its performance or shuts down to prevent damage, which can trigger the watchdog timer. Monitoring your CPU temperature is crucial.
While Windows doesn’t have a built-in CPU temperature monitor, several reliable third-party tools are available:
- HWMonitor: A free, lightweight tool that displays real-time temperatures, voltages, and fan speeds for various components.
- Core Temp: Specifically designed to monitor CPU temperature and core load.
- Open Hardware Monitor: Another open-source option for comprehensive system monitoring.
Steps to monitor and address CPU temperature:
- Download and install one of the recommended monitoring tools.
- Run the tool and observe your CPU temperatures, especially when your system is under load (e.g., running demanding applications or games).
- Ideal CPU temperatures typically range from 30-50°C at idle and should stay below 80-85°C under heavy load. Consistently exceeding 90°C is a strong indicator of overheating.
- If temperatures are high:
- Clean your PC: Dust accumulation in CPU coolers and case fans can severely impede airflow. Use compressed air to clean them thoroughly.
- Check CPU cooler: Ensure the CPU cooler is properly seated and making good contact with the CPU. The thermal paste might need reapplication.
- Improve case airflow: Ensure your PC case has adequate intake and exhaust fans, and that cables aren’t obstructing airflow.
Addressing overheating can significantly improve CPU stability and prevent the Clock Watchdog Timeout error. If temperatures remain high even after cleaning and checking, consider upgrading your CPU cooler.
Method 4: Adjust Power Settings and Disable Overclocking
Aggressive power management settings or unstable overclocking can push your system components beyond their stable limits, leading to intermittent failures and, ultimately, the Clock Watchdog Timeout error. These settings directly influence how your CPU and other components operate under various loads, and misconfigurations can easily destabilize the system.
By adjusting your power plan and reverting any overclocking, you can bring your system back to a more stable, factory-recommended state. This often resolves stability issues that arise from components being pushed too hard or not receiving adequate power when needed.
Modifying Power Plan Settings
Windows 11 offers various power plans that control how your system manages power to different components. While “High Performance” or custom plans can offer a speed boost, they might also contribute to instability if not properly configured or if your hardware isn’t perfectly stable. Switching to a balanced power plan can sometimes resolve the Clock Watchdog Timeout.
Here’s how to adjust your power plan:
- Press
Windows key + S, typepower plan, and select Choose a power plan. - In the Power Options window, select Balanced (recommended) if it’s not already chosen.
- If you are already on “Balanced” or still experiencing issues, click Change plan settings next to your selected plan.
- Click Change advanced power settings.
- Scroll down and expand Processor power management.
- Expand Minimum processor state and set it to a slightly higher value, such as 5-10%, especially if it’s at 0%.
- Expand Maximum processor state and ensure it’s set to 100%.
- Click Apply and then OK.
- Restart your PC to ensure the changes take effect.
Sometimes, setting the minimum processor state too low can cause issues as the CPU struggles to ramp up quickly enough, leading to a timeout. A balanced approach ensures stability.
Reverting Overclocking Settings in BIOS/UEFI
Overclocking involves manually increasing the clock speed of your CPU or RAM beyond their manufacturer-specified limits to gain performance. While it can offer a noticeable boost, it also significantly increases heat generation and system instability. If you have overclocked your system, it’s a prime suspect for the Clock Watchdog Timeout error.
To revert overclocking settings:
- Restart your PC and repeatedly press the designated key to enter your BIOS/UEFI firmware settings. Common keys include
Del,F2,F10, orF12(check your motherboard manual if unsure). - Once in BIOS/UEFI, navigate to the overclocking or performance section. This might be labeled “AI Tweaker,” “OC,” “Advanced Frequency Settings,” or similar.
- Look for options related to CPU Ratio, CPU Core Voltage, Memory Frequency (DRAM Frequency), or XMP/DOCP profiles for RAM.
- Disable any overclocking settings. The easiest way to do this is often to load “Optimized Defaults” or “Factory Defaults.” This will reset all BIOS settings to their original, stable configuration.
- If you only enabled an XMP/DOCP profile for your RAM, try disabling it or setting the memory frequency manually to its default JEDEC speed (e.g., 2133MHz or 2400MHz) instead of the advertised higher speed.
- Save changes and exit BIOS/UEFI. Your PC will restart.
Disabling overclocking is a critical step in troubleshooting the Clock Watchdog Timeout. It ensures your hardware is operating within its intended specifications, eliminating a major source of instability.
Method 5: Update Your BIOS/UEFI Firmware
Updating your motherboard’s BIOS (Basic Input/Output System) or UEFI (Unified Extensible Firmware Interface) firmware is a more advanced troubleshooting step, but it can be highly effective in resolving persistent Clock Watchdog Timeout errors. Firmware updates often include critical bug fixes, improved hardware compatibility, and enhanced stability for your motherboard and its components, particularly the CPU and RAM.
However, this process carries a degree of risk. An interruption during the update (like a power outage) or installing the wrong firmware can permanently damage your motherboard, rendering your PC inoperable. Therefore, it’s crucial to proceed with extreme caution and follow the manufacturer’s instructions precisely.
Steps to Safely Update BIOS/UEFI
Before you begin, ensure you have a stable power supply and an uninterrupted internet connection. It’s highly recommended to perform this during a time when power outages are unlikely.
- Identify your motherboard model:
- Press
Windows key + R, typemsinfo32, and press Enter. Look for “BaseBoard Manufacturer” and “BaseBoard Product” to find your motherboard model. - Alternatively, use a tool like CPU-Z or physically inspect your motherboard.
- Press
- Visit your motherboard manufacturer’s website: Go to the support section for your specific motherboard model. (e.g., ASUS, MSI, Gigabyte, ASRock, etc.)
- Locate the latest BIOS/UEFI firmware: Download the most recent stable version that is compatible with your Windows 11 operating system. Read the release notes to see if it addresses stability issues or CPU compatibility.
- Read the update instructions carefully: Each manufacturer has a slightly different procedure. Common methods include:
- USB Flash method: Copy the firmware file to a FAT32 formatted USB drive, then access a special update utility within your BIOS/UEFI.
- In-OS utility: Some manufacturers provide a utility that allows you to update the BIOS from within Windows. This is generally less recommended due to potential conflicts.
- Prepare the update media: If using the USB method, ensure the USB drive is properly formatted and the firmware file is placed in the correct directory.
- Enter BIOS/UEFI and perform the update: Restart your PC and enter BIOS/UEFI (usually by pressing
DelorF2). Navigate to the update utility (often called “EZ Flash,” “Q-Flash,” “M-Flash,” or similar). Select the firmware file from your USB drive and initiate the update. - DO NOT interrupt the process: Let the update complete without turning off or restarting your computer. It may take several minutes. Your computer might restart multiple times.
- Verify and reconfigure: After the update, your PC will boot into Windows. You might need to re-enter BIOS/UEFI to reconfigure any custom settings you had, such as boot order or XMP profiles (if you’re sure they are stable).
Warning: BIOS/UEFI updates are critical. If you are unsure or uncomfortable with the process, consider seeking assistance from an experienced technician.
Method 6: Perform a Clean Boot or System Restore
If the Clock Watchdog Timeout error persists after addressing drivers, system files, and hardware basics, the issue might stem from a software conflict. Third-party applications or services that launch with Windows can interfere with core system processes, leading to instability. A clean boot helps isolate these conflicts, while System Restore allows you to revert your system to a previous, stable state.
These methods are powerful diagnostic and recovery tools that can save you from a complete Windows reinstallation. They target software-related issues without necessarily wiping your data.
Identifying Conflicts with a Clean Boot
A clean boot starts Windows with a minimal set of drivers and startup programs. This helps eliminate software conflicts that occur when you install a program or an update. If the Clock Watchdog Timeout error doesn’t occur in a clean boot environment, it indicates that a third-party application or service is the cause.
Here’s how to perform a clean boot:
- Press
Windows key + R, typemsconfig, and press Enter to open System Configuration. - Go to the Services tab.
- Check the box for Hide all Microsoft services. This is crucial to avoid disabling essential Windows services.
- Click Disable all.
- Go to the Startup tab.
- Click Open Task Manager.
- In Task Manager, go to the Startup tab. Disable each startup item individually by right-clicking and selecting Disable.
- Close Task Manager.
- Back in System Configuration, click OK and then Restart your computer.
If the error disappears in a clean boot state, you can then enable services and startup items one by one (or in small groups), restarting your PC after each change, until the error reappears. This process will help you pinpoint the problematic software. Once identified, you can update, reinstall, or remove the conflicting application.
Reverting to a Previous State with System Restore
If the Clock Watchdog Timeout error began after a recent software installation, driver update, or system change, System Restore can be an invaluable tool. It allows you to revert your Windows 11 system files, installed applications, Windows Registry, and system settings back to an earlier point in time, known as a restore point, without affecting your personal files.
This is particularly useful if you suspect a recent software change caused the instability.
- Press
Windows key + S, typecreate a restore point, and select the option from the search results. - In the System Properties window, click the System Restore… button.
- Click Next.
- You will see a list of available restore points. Choose a restore point created before you started experiencing the Clock Watchdog Timeout error. You can click Scan for affected programs to see what programs will be removed or added.
- Click Next, then Finish to confirm.
- Your computer will restart and begin the restoration process. Do not interrupt it.
After System Restore completes, your PC will revert to the chosen state, hopefully resolving the Clock Watchdog Timeout error. If no suitable restore points are available, or if the error persists, you might need to consider more drastic measures.
For more comprehensive backup solutions, you might want to explore options like System Image Backup on Windows 11: Comprehensive Guide.
Advanced Troubleshooting: Reinstalling Windows 11
When all other troubleshooting methods fail to resolve the persistent Clock Watchdog Timeout error, a complete reinstallation of Windows 11 becomes the final, albeit drastic, solution. This step essentially wipes your primary drive and installs a fresh copy of the operating system, eliminating any deep-seated software corruption, driver conflicts, or registry issues that might be causing the problem.
A clean installation ensures that you start with a pristine Windows environment, ruling out almost all software-related causes. It’s the ultimate reset button for your operating system.
When to consider a full reinstallation:
- You’ve exhausted all other troubleshooting steps without success.
- The Clock Watchdog Timeout error occurs frequently and prevents normal use of your PC.
- You suspect deep-seated software corruption or malware that cannot be removed by other means.
- You’re comfortable with backing up your data and reinstalling all your applications.
Before you begin, critical steps:
- Back up all your important data: This is paramount. Copy all personal files (documents, photos, videos, music, etc.) to an external hard drive, cloud storage, or another safe location. A clean install will erase everything on your system drive.
- Gather product keys: Make sure you have product keys for Windows 11 (though often automatically reactivated with a digital license) and any essential software you’ll need to reinstall.
- Download drivers: Download the latest drivers for your motherboard (chipset, LAN, audio) and graphics card to a USB drive beforehand, as you might not have internet access immediately after reinstallation.
- Create Windows 11 installation media: Use the Media Creation Tool from Microsoft’s website to create a bootable USB drive or DVD.
Performing the reinstallation:
- Insert your Windows 11 installation media (USB drive or DVD) into your PC.
- Restart your PC and enter your BIOS/UEFI settings (usually by pressing
Del,F2,F10, orF12during startup). - Change the boot order to prioritize booting from your USB drive or DVD. Save changes and exit.
- Your PC will boot from the installation media. Follow the on-screen prompts to install Windows 11.
- During the installation, choose the “Custom: Install Windows only (advanced)” option.
- Delete all partitions on your primary drive (the one where Windows is currently installed) and then select the unallocated space to install Windows. This ensures a truly clean install.
- Complete the installation process, set up your user account, and then install your backed-up drivers and applications.
After a clean reinstallation, if the Clock Watchdog Timeout error still occurs, it strongly suggests a fundamental hardware failure that cannot be resolved by software means. At this point, professional hardware diagnosis or component replacement would be necessary.
Preventing Future Clock Watchdog Timeout Errors
Once you’ve successfully resolved the Clock Watchdog Timeout error on your Windows 11 system, the next logical step is to implement practices that help prevent its recurrence. Proactive maintenance and mindful usage can significantly enhance your PC’s stability and longevity. Prevention is always better than cure, especially when dealing with frustrating BSODs.
Adopting a few simple habits can keep your system running smoothly and minimize the chances of encountering this or other critical errors. These recommendations focus on maintaining system health, managing resources, and staying informed about your hardware and software.
- Regularly Update Drivers and Windows: Make it a habit to check for and install the latest Windows updates and device drivers. Outdated software is a common source of instability.
- Monitor System Temperatures: Keep an eye on your CPU and GPU temperatures, especially during intensive tasks. Use monitoring software like HWMonitor or Core Temp. Ensure adequate cooling by regularly cleaning dust from fans and heatsinks.
- Avoid Overclocking (or do it cautiously): If you do overclock, do so incrementally and thoroughly test for stability using stress-testing tools. Revert to default settings if any instability occurs.
- Maintain Good Airflow: Ensure your PC case has proper airflow with well-placed intake and exhaust fans. Keep your computer in a well-ventilated area, away from direct sunlight or heat sources.
- Run Regular System Scans: Periodically run SFC and DISM commands to check for and repair corrupted system files. Use reliable antivirus software to protect against malware that can corrupt files.
- Check RAM Health: Consider running the Windows Memory Diagnostic tool every few months to catch potential RAM issues before they become critical.
- Use a Reliable Power Supply: Ensure your Power Supply Unit (PSU) is sufficient for your components and from a reputable brand. An unstable PSU can lead to widespread system instability.
- Install Software Judiciously: Be selective about the software you install. Avoid unnecessary programs, especially those that run in the background or claim to “optimize” your system, as they can sometimes introduce conflicts.
- Create Restore Points: Regularly create System Restore Points before making significant system changes (e.g., installing new hardware or major software). This provides a quick rollback option.
By following these preventative measures, you can significantly reduce the likelihood of experiencing the Clock Watchdog Timeout error and enjoy a more stable and reliable Windows 11 experience.
Conclusion: Restoring Stability to Your Windows 11 System
The “Clock Watchdog Timeout” error on Windows 11 is undoubtedly a frustrating and often perplexing issue, capable of disrupting your productivity and enjoyment. However, as we’ve explored in this comprehensive guide, it’s an error with identifiable causes and, more importantly, actionable solutions. By systematically approaching the problem, from initial restarts and driver updates to in-depth hardware diagnostics and system repairs, you can effectively diagnose and resolve this challenging BSOD.
We’ve covered a wide spectrum of troubleshooting steps, ranging from simple fixes like updating drivers and checking for Windows updates, to more advanced procedures such as running SFC and DISM scans, testing RAM, monitoring CPU temperatures, and even updating BIOS/UEFI firmware. Each method targets a specific potential cause, empowering you to narrow down the problem and apply the most appropriate solution.
Remember that patience and a methodical approach are your best allies when dealing with such complex system errors. While a complete Windows 11 reinstallation remains a final resort, it often provides a clean slate when all other avenues have been exhausted. More importantly, adopting preventative measures, such as regular updates, system monitoring, and careful software management, will significantly reduce the chances of encountering the Clock Watchdog Timeout error again.
By understanding the nature of this error and applying the strategies outlined here, you are now equipped to restore and maintain the stability of your Windows 11 system. May your computing experience be free from the dreaded blue screen, allowing you to focus on what truly matters.
For more interesting articles, stay tuned to Winsides.com!









Community
Comments (0)