

Introduction to nvlddmkm Black Screen Errors on Windows 11
Encountering a black screen on your Windows 11 system can be an incredibly frustrating experience, especially when it’s accompanied by the dreaded nvlddmkm.sys error. This particular issue often points to a critical problem with your NVIDIA display driver, leaving your screen blank and your system unresponsive. It’s more than just a minor glitch; it signifies a fundamental communication breakdown between your graphics hardware and the operating system. For additional context, see NVIDIA driver downloads, Display Driver Uninstaller (DDU), Windows 11 official website, TDR registry keys, and HWInfo for system monitoring.
The nvlddmkm black screen Windows 11 error can manifest in various ways, from a momentary flicker followed by a complete blackout to a system crash that prevents you from even reaching the desktop. This guide aims to demystify this complex problem, providing you with a structured approach to diagnose and resolve it. We’ll delve into the technical underpinnings of the error, explore its common symptoms, and offer a comprehensive suite of troubleshooting steps, ranging from basic checks to advanced system modifications.
Our goal is to empower you with the knowledge and tools necessary to regain control of your Windows 11 machine and restore its graphical stability. By following these detailed instructions, you can systematically eliminate potential causes and bring your display back to life. Let’s embark on this journey to conquer the nvlddmkm black screen once and for all.
Understanding the nvlddmkm.sys Driver
The nvlddmkm.sys file is a crucial component of your NVIDIA graphics driver package. It acts as the kernel-mode driver for NVIDIA graphics cards, essentially serving as the primary interface between your GPU hardware and the Windows operating system. When Windows needs to communicate with your NVIDIA card, or when the card needs to render graphics, this driver facilitates that interaction.
This driver is responsible for managing various aspects of your graphics card’s operation, including memory allocation, power management, and the rendering pipeline. Its proper functioning is paramount for stable graphical output and system performance. Any corruption, incompatibility, or instability within this driver can lead to severe display issues, such as the black screen error we are addressing.
When Windows encounters an issue with a device driver, especially a critical one like nvlddmkm.sys, it often triggers a Timeout Detection and Recovery (TDR) event. This mechanism is designed to reset the graphics driver if it becomes unresponsive, preventing a complete system freeze. However, if the driver repeatedly fails to recover, or if the underlying problem is severe, it can result in a persistent black screen or a system crash.
Common Symptoms and Impact
The most prominent symptom of the nvlddmkm.sys error is, as the name suggests, a black screen. This can occur at various points: during Windows startup, while playing graphically intensive games, or even during routine desktop usage. The screen might go black suddenly, sometimes preceded by flickering or strange graphical artifacts.
Users often report a complete loss of display output, with the monitor indicating no signal, even though the computer itself appears to still be running. You might hear system sounds or fan noise, but see nothing on the screen. In some cases, the system might attempt to recover, showing the desktop briefly before going black again, or displaying a “Display driver stopped responding and has recovered” message before the eventual blackout.
The impact of the nvlddmkm black screen Windows 11 error is significant. It renders your computer unusable, interrupting work, gaming, and general productivity. Persistent occurrences can lead to data loss if applications aren’t properly closed, and it can cause considerable frustration. Identifying these symptoms early is the first step toward effective troubleshooting.
Table of contents
Key Takeaways for Resolving nvlddmkm Black Screen Issues
- Clean Driver Reinstallation is Paramount: Always use Display Driver Uninstaller (DDU) in Safe Mode to completely remove old NVIDIA drivers before installing new ones. This prevents conflicts.
- TDR Settings Can Help: Adjusting the Timeout Detection and Recovery (TDR) values in the Windows Registry can provide more time for your graphics driver to recover, potentially preventing black screens.
- BIOS/UEFI Firmware Updates: Outdated or corrupted BIOS/UEFI can cause hardware communication issues. Updating it to the latest version can resolve underlying stability problems.
- Hardware Diagnosis is Crucial: Don’t overlook physical components. Test your GPU, verify PSU stability, and monitor temperatures to rule out overheating or failing hardware.
- System File Integrity Matters: Use SFC and DISM commands to scan and repair corrupted Windows system files that might be interfering with driver operations.
- Keep Windows Up-to-Date: Ensure your Windows 11 operating system is fully updated, as Microsoft often releases patches that improve driver compatibility and system stability.
Initial Troubleshooting Steps Before Advanced Fixes
Before diving into more complex solutions for the nvlddmkm black screen Windows 11 error, it’s essential to perform some basic checks. These foundational steps can often resolve simpler issues or provide crucial information that guides further troubleshooting. Starting with these ensures you’re not overlooking an obvious fix.
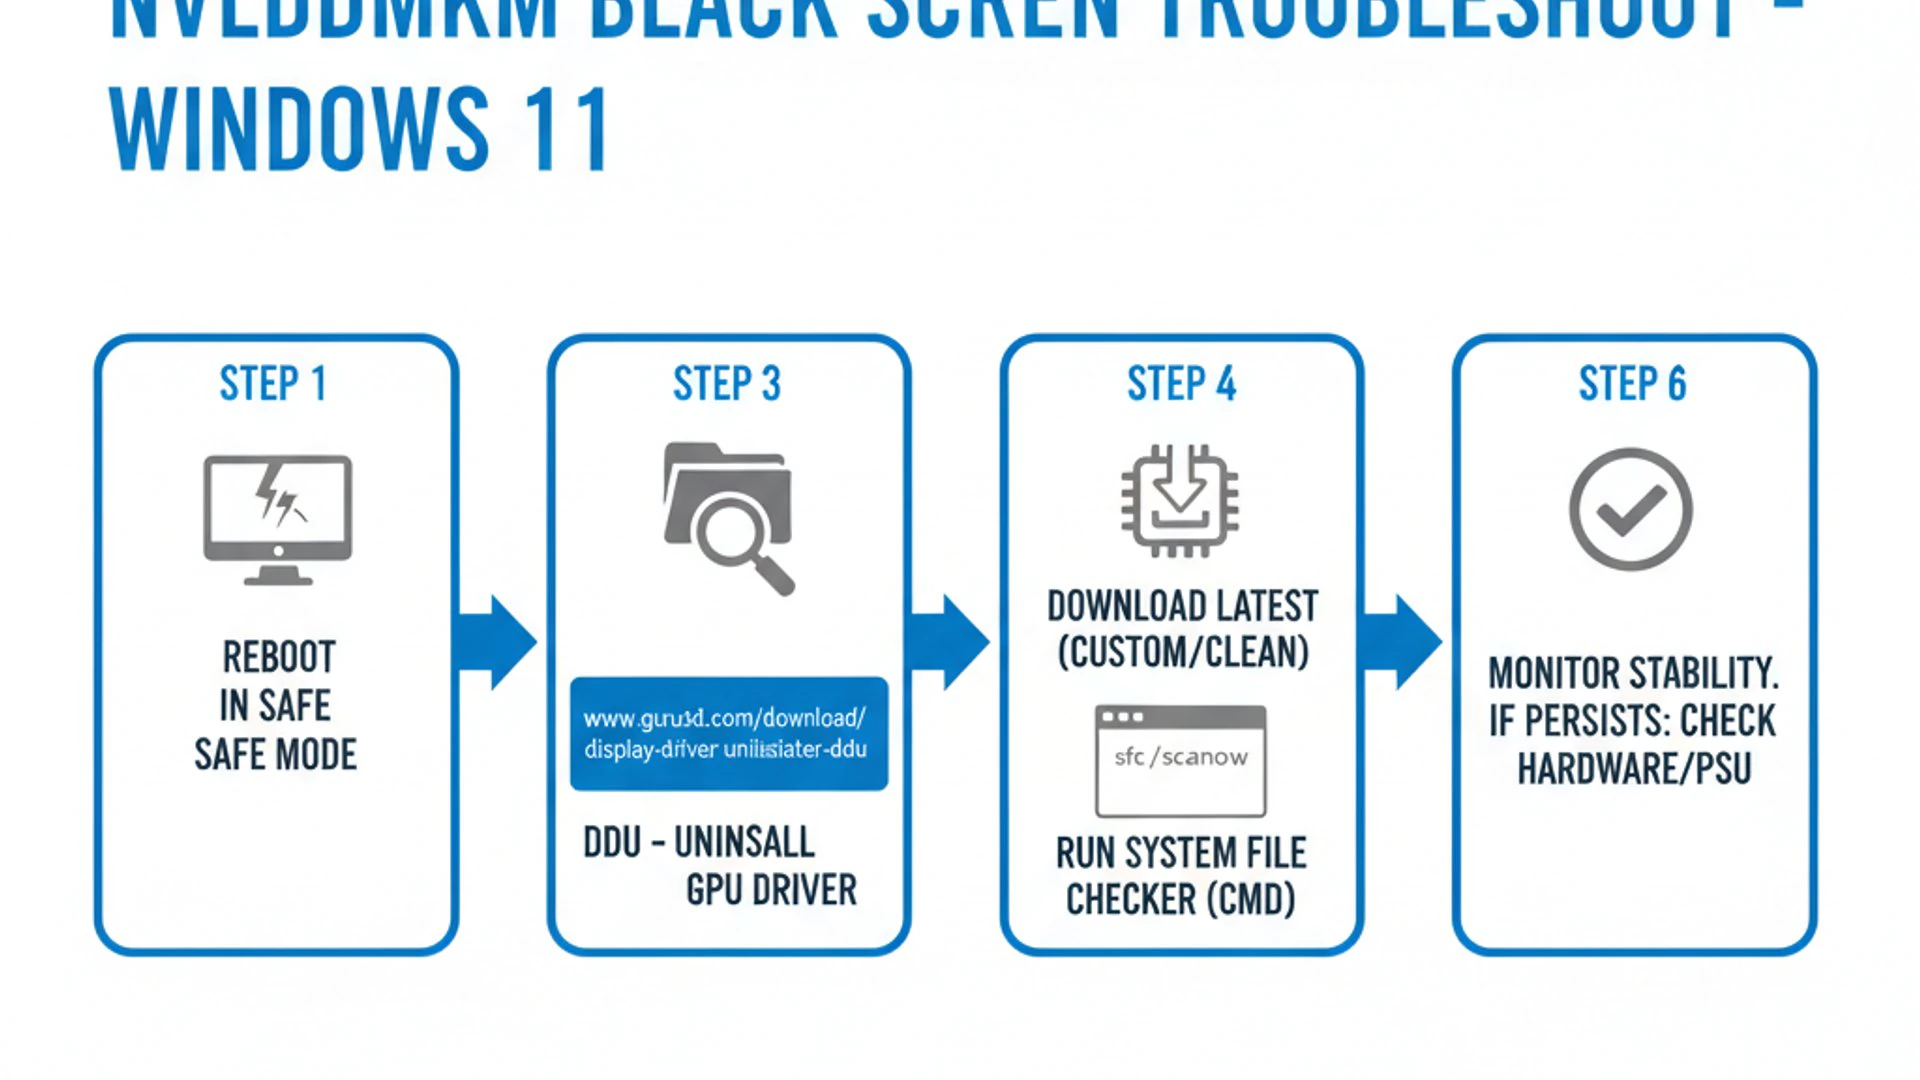
Many display problems stem from easily rectifiable causes, such as loose cables or temporary software glitches. By systematically working through these initial steps, you can save time and effort. This methodical approach helps isolate the problem, confirming whether it’s a software-related driver issue or something more fundamental like a hardware connection.
Remember, patience is key during troubleshooting. Each step, no matter how minor, contributes to a comprehensive diagnostic process. Let’s begin with accessing Safe Mode, which is often your gateway to resolving critical system errors.
Booting into Safe Mode
When your system is plagued by a black screen, accessing Safe Mode is often your first and most critical step. Safe Mode starts Windows with a minimal set of drivers and services, bypassing many potential conflicts, including problematic display drivers. This allows you to gain control of your system and implement fixes without the black screen interfering.
To enter Safe Mode in Windows 11, if you can’t see anything on your screen, you’ll typically need to interrupt the boot process multiple times. Power on your PC, and as soon as you see the Windows logo or the manufacturer’s logo, press and hold the power button for 5-10 seconds to force a shutdown. Repeat this process two or three times until you see the “Automatic Repair” screen.
- From the “Automatic Repair” screen, select Advanced options.
- Choose Troubleshoot.
- Select Advanced options again.
- Click on Startup Settings.
- Press Restart.
- After restarting, you’ll see a list of options. Press F4 or 4 to Enable Safe Mode, or F5 or 5 for Safe Mode with Networking. The latter is useful if you need to download drivers.
Once in Safe Mode, your display should function, albeit at a lower resolution and with basic graphics. This environment is ideal for running tools like DDU or making registry edits without the NVIDIA driver causing further issues. It’s your safe haven for implementing the more advanced solutions discussed later.
Checking Basic Hardware Connections
Before assuming a complex software issue, always verify your basic hardware connections. A loose cable can easily mimic a severe driver problem, leading to an unnecessary troubleshooting rabbit hole. This simple check can save you a lot of time and frustration when dealing with the nvlddmkm black screen Windows 11 error.
Start by ensuring your monitor’s power cable is securely plugged into both the monitor and a working power outlet. Next, check the video cable (HDMI, DisplayPort, DVI, or VGA) connecting your monitor to your graphics card. Make sure it’s firmly seated at both ends. Try unplugging and re-plugging it to ensure a solid connection.
If you have multiple video outputs on your graphics card or motherboard, try connecting your monitor to a different port. Sometimes, a specific port can be faulty. Also, if you have a dedicated graphics card, ensure your monitor is plugged into the GPU’s output, not the motherboard’s integrated graphics port, unless you are specifically trying to bypass the dedicated GPU for testing.
Finally, open your computer case and visually inspect your graphics card. Ensure it is firmly seated in its PCIe slot. Gently press down on it to confirm it’s fully engaged. Also, check that any supplementary power cables (6-pin or 8-pin PCIe power connectors) are securely plugged into the graphics card. A loose power connection can prevent the GPU from receiving adequate power, leading to instability and black screens.
Method 1: Reinstalling NVIDIA Graphics Drivers Cleanly
One of the most effective solutions for the nvlddmkm black screen Windows 11 error involves a complete and clean reinstallation of your NVIDIA graphics drivers. Simply installing new drivers over old ones can leave behind conflicting files or corrupted entries, perpetuating the problem. A truly clean installation ensures that all remnants of previous drivers are removed, providing a fresh slate for the new installation.
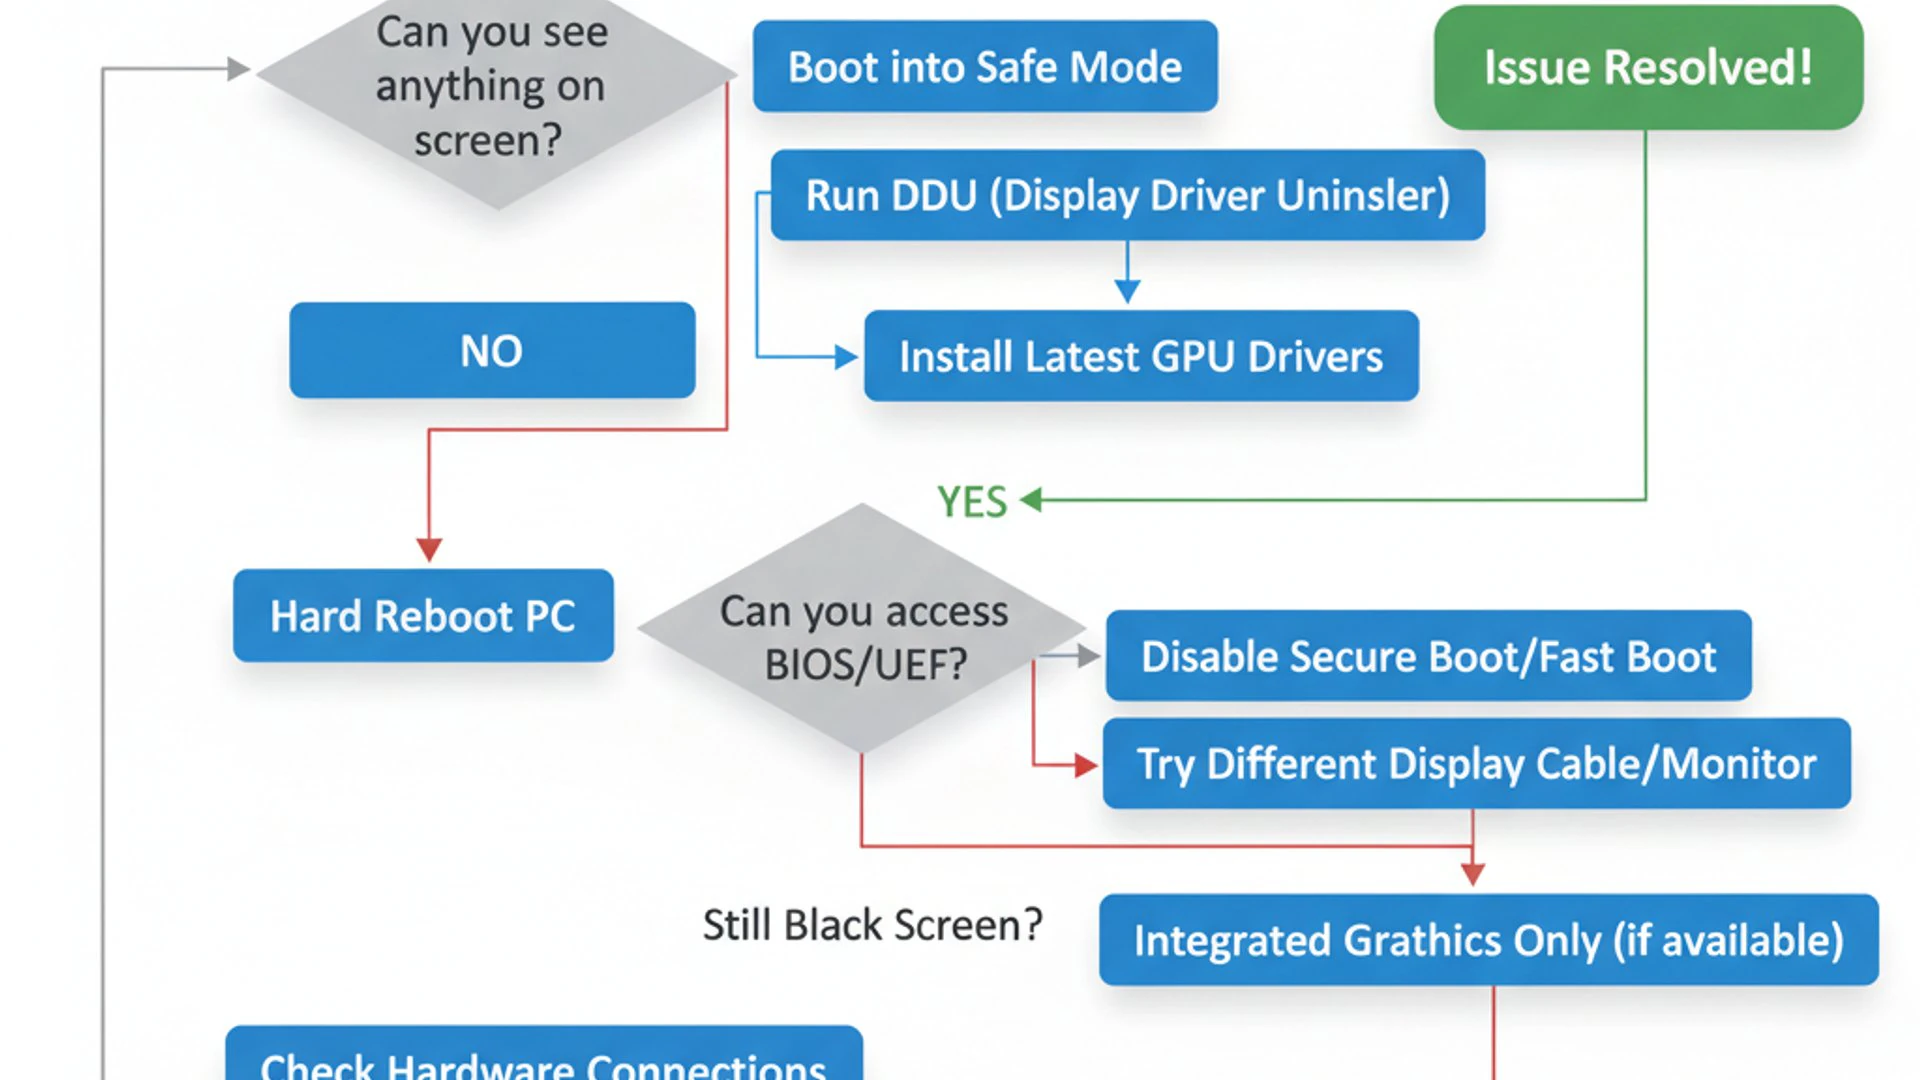
This process is crucial because the nvlddmkm.sys file is an integral part of the NVIDIA driver package. If this specific file or any related components become corrupted, a standard update might not fully resolve the issue. By meticulously cleaning out all previous driver traces, we minimize the chances of old problems resurfacing. This method is often the first major step recommended by experts and NVIDIA itself.
The key to a successful clean reinstallation lies in using a specialized tool designed to thoroughly remove display drivers. This tool, known as Display Driver Uninstaller (DDU), goes far beyond what Windows’ built-in uninstaller can achieve, ensuring a pristine environment for your new drivers. Following this, installing the latest stable drivers from NVIDIA’s official website is paramount.
Using Display Driver Uninstaller (DDU)
Display Driver Uninstaller (DDU) is a free, third-party utility specifically designed to remove graphics drivers (NVIDIA, AMD, Intel) completely from your system. It cleans out all driver remnants, including registry keys, folders, and files, that standard uninstallers often leave behind. This meticulous cleaning is vital for resolving persistent driver-related issues like the nvlddmkm black screen.
Using DDU ensures that no old, corrupted, or conflicting driver files interfere with a fresh installation. It’s particularly effective when you’re experiencing severe graphical problems or when you’ve tried regular driver updates without success. Always download DDU from its official source to ensure you’re getting a legitimate and safe version of the software.
Before proceeding, it’s highly recommended to create a system image backup on Windows 11. While DDU is generally safe, unexpected issues can sometimes occur during critical system changes. Having a backup provides a safety net, allowing you to revert your system to a previous stable state if anything goes wrong.
Steps to Use DDU Effectively
- Download DDU: Obtain the latest version of Display Driver Uninstaller from its official website, typically Guru3D. Extract the downloaded archive to a folder on your desktop.
- Download New NVIDIA Drivers: Go to the official NVIDIA website (nvidia.com/drivers) and download the latest stable drivers for your specific graphics card and Windows 11 version. Save this installer to a location you can easily find, like your Downloads folder, but do not install it yet.
- Boot into Safe Mode: As discussed earlier, restart your computer and enter Windows 11 Safe Mode. This is crucial because DDU works best and most safely when the display drivers are not actively running.
- Run DDU: Navigate to the folder where you extracted DDU and run the
Display Driver Uninstaller.exeexecutable. - Select Options: In the DDU application, select “GPU” as the device type and then choose “NVIDIA” from the dropdown menu.
- Clean and Restart: Click on the “Clean and restart (Highly Recommended)” button. DDU will now thoroughly remove all NVIDIA driver components and then automatically restart your computer into normal mode.
After the restart, your system will be running on basic Microsoft display drivers, likely at a lower resolution. This is normal and indicates that DDU has successfully removed your NVIDIA drivers. You are now ready for the next step: installing the fresh drivers.
Installing the Latest Stable Drivers
With a clean slate provided by DDU, you can now proceed to install the newly downloaded NVIDIA drivers. This step is critical to restore full functionality and resolve the nvlddmkm black screen Windows 11 issue. Ensure you have the correct driver version for your specific graphics card and operating system.
Locate the NVIDIA driver installer file you downloaded earlier. Double-click on it to begin the installation process. Follow the on-screen prompts carefully. When given the option, choose “Custom (Advanced)” installation rather than “Express.”
During the custom installation, ensure that the “Perform a clean installation” checkbox is selected. Although DDU has already performed a thorough clean, this option within the NVIDIA installer provides an additional layer of assurance. Deselect any optional components you don’t need, such as GeForce Experience, if you prefer a leaner installation, though GeForce Experience is generally harmless.
Once the installation is complete, the installer will prompt you to restart your computer. Do so immediately. Upon reboot, your display resolution should return to normal, and your NVIDIA graphics card should be fully recognized and functional. Monitor your system closely for any recurrence of the black screen error after this process. If the issue persists, it indicates a deeper problem beyond simple driver corruption.
Method 2: Adjusting TDR (Timeout Detection and Recovery) Settings
When facing the persistent nvlddmkm black screen Windows 11 error, especially if it’s accompanied by messages like “Display driver stopped responding and has recovered,” adjusting the Timeout Detection and Recovery (TDR) settings can be a viable solution. TDR is a Windows feature designed to prevent system crashes by resetting the graphics driver if it becomes unresponsive for a certain period. However, sometimes the default timeout period is too short for demanding tasks, leading to unnecessary resets and black screens.
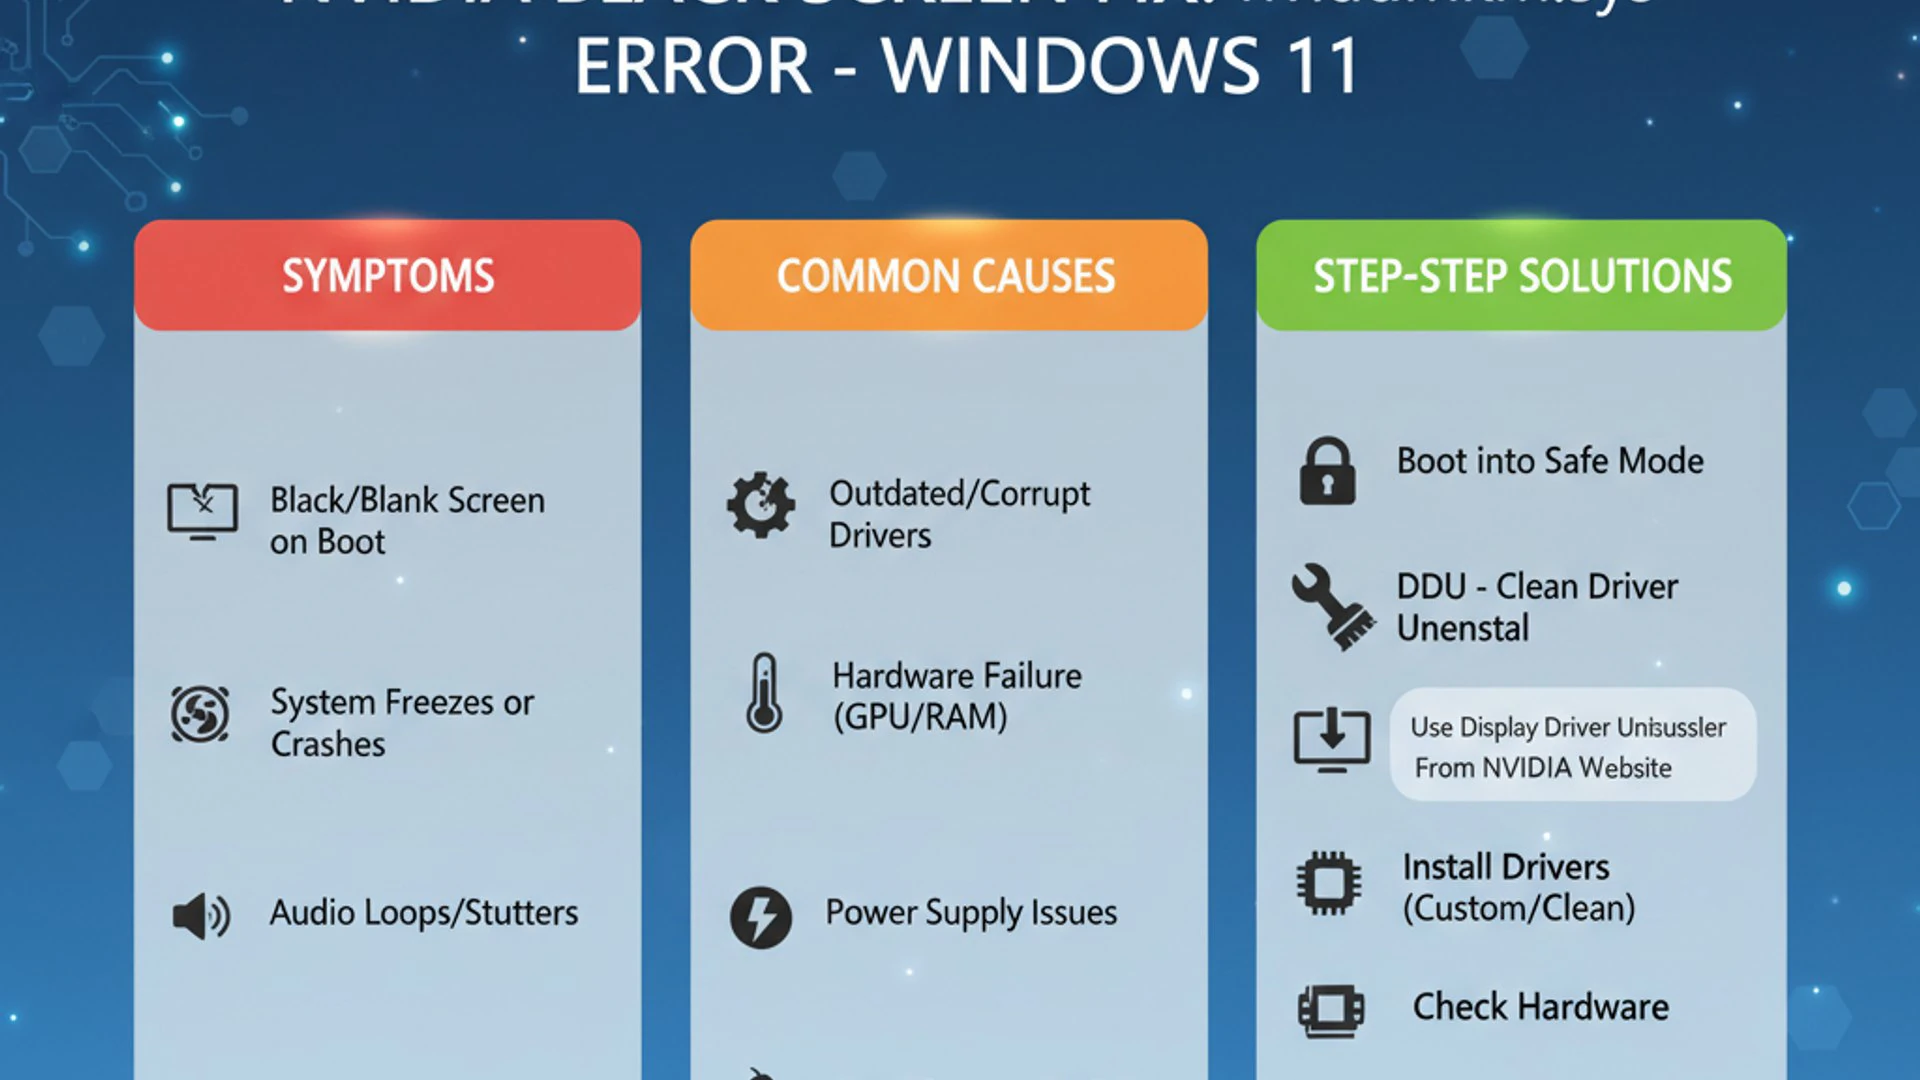
By modifying the TDR delay, you can give your graphics card and driver more time to complete complex operations before Windows intervenes. This can prevent the system from prematurely flagging the driver as unresponsive, thereby avoiding the black screen. This method involves editing the Windows Registry, which requires careful attention to detail to avoid unintended system issues.
Understanding how TDR works and how to safely adjust its parameters is crucial for implementing this fix effectively. While it’s a powerful tool, incorrect registry edits can lead to system instability, so proceed with caution and follow the instructions precisely. This adjustment can often provide the necessary breathing room for your GPU to function correctly under heavy load.
Understanding TDR and its Role
Timeout Detection and Recovery (TDR) is a critical feature implemented in Windows operating systems since Windows Vista. Its primary purpose is to enhance system stability by detecting when a graphics driver or GPU becomes unresponsive. If the GPU fails to respond to a command within a predefined time limit (the TDR delay), Windows will attempt to reset the driver. This prevents a complete system freeze, allowing the user to continue working without losing unsaved data.
The default TDR delay in Windows is typically very short, often around 2 seconds. While this is generally sufficient for most scenarios, certain graphically intensive applications, games, or even complex rendering tasks can cause the GPU to become momentarily unresponsive for longer periods. When this happens, Windows interprets it as a driver failure and initiates a TDR event, which can manifest as a black screen or a driver crash.
The nvlddmkm.sys driver, being a kernel-mode driver, is directly involved in these TDR events. If the driver is under heavy load or encounters a minor hiccup, and the TDR timeout is too short, Windows might prematurely reset it, leading to the nvlddmkm black screen Windows 11 issue. By extending this timeout, we essentially tell Windows to be more patient with the graphics driver, giving it more time to recover naturally without intervention.
Modifying Registry Entries for TDR
To adjust the TDR delay, you’ll need to create or modify specific entries in the Windows Registry. This process involves adding a new DWORD (32-bit) Value or QWORD (64-bit) Value, depending on your system architecture, to control the TDR delay. This change will allow your graphics card more time to respond before the system attempts to reset it.
- Press Windows Key + R to open the Run dialog.
- Type
regeditand press Enter to open the Registry Editor. You may need to grant administrator permissions. - Navigate to the following path:
HKEY_LOCAL_MACHINE\SYSTEM\CurrentControlSet\Control\GraphicsDrivers. - In the right-hand pane, right-click on an empty space, select New, and then choose either DWORD (32-bit) Value (for 32-bit Windows or if unsure) or QWORD (64-bit) Value (for 64-bit Windows).
- Name the new value
TdrDelay. - Double-click on the newly created
TdrDelayentry. - In the “Edit DWORD (or QWORD) Value” window, set the “Base” to Decimal.
- For “Value data,” enter a number between 5 and 10. This number represents the delay in seconds. A value of 8 is often a good starting point.
- Click OK and then close the Registry Editor.
- Restart your computer for the changes to take effect.
This modification should give your graphics driver more time to recover from temporary unresponsiveness, potentially resolving the nvlddmkm black screen Windows 11 issue without triggering a full driver reset. If the problem persists, you can try increasing the value slightly, but avoid excessively high values as they can lead to an unresponsive system during genuine driver failures.
Cautionary Notes for Registry Edits
Warning: Editing the Windows Registry incorrectly can lead to severe system instability or even render your operating system unbootable. Always exercise extreme caution when making changes to the Registry. It is strongly recommended to create a system restore point or a full system backup before proceeding with any registry modifications. If you are uncomfortable with this process, seek assistance from a knowledgeable professional.
Before you begin modifying the registry, it’s prudent to back up the specific registry key you’re about to change. In the Registry Editor, navigate to HKEY_LOCAL_MACHINE\SYSTEM\CurrentControlSet\Control\GraphicsDrivers, right-click on “GraphicsDrivers,” and select “Export.” Save this .reg file to a safe location. If you encounter issues after the edit, you can double-click this file to restore the original settings.
Never modify or delete registry entries unless you are absolutely certain of their purpose and the impact of the change. Stick strictly to the instructions provided, creating only the specified value and setting its data as advised. Incorrectly altering other keys could have unforeseen and detrimental consequences for your Windows 11 system. If the TDR adjustment doesn’t resolve your nvlddmkm black screen Windows 11 problem, remember to revert the change or restore your backup before moving on to other troubleshooting methods.
Method 3: Updating or Rolling Back Your BIOS/UEFI Firmware
While often overlooked, your system’s Basic Input/Output System (BIOS) or Unified Extensible Firmware Interface (UEFI) plays a foundational role in how your hardware components, including your graphics card, communicate with each other and the operating system. An outdated, corrupted, or incompatible BIOS/UEFI firmware can sometimes be the underlying cause of persistent graphical issues, including the nvlddmkm black screen Windows 11 error.
Firmware updates often include crucial microcode updates for CPUs, improved compatibility with newer hardware components (like graphics cards), and bug fixes that enhance system stability. Conversely, a very recent BIOS/UEFI update might introduce new bugs or compatibility issues with older hardware, making a rollback a necessary step in certain situations. This section will explore why these firmware updates matter and how to perform them safely.
It’s important to approach BIOS/UEFI updates with caution. This is a low-level operation that, if done incorrectly, can permanently damage your motherboard. Always follow your motherboard manufacturer’s specific instructions meticulously. However, when other solutions fail, a firmware update or rollback can sometimes be the definitive fix for deep-seated hardware-software communication problems.
Why BIOS/UEFI Updates Matter for Graphics
The BIOS/UEFI firmware is essentially the first software that runs when you power on your computer. It initializes all hardware components, performs a Power-On Self-Test (POST), and then hands control over to the operating system. For your graphics card, the BIOS/UEFI provides the initial instructions and establishes the communication pathways with the CPU and other system components.
Manufacturers frequently release BIOS/UEFI updates to address various issues. These updates might include:
- Improved Hardware Compatibility: Ensuring newer graphics cards or other PCIe devices work correctly with the motherboard.
- Bug Fixes: Resolving issues that could lead to system instability, crashes, or incorrect hardware detection.
- Performance Enhancements: Optimizing how the system interacts with components, potentially improving stability under load.
- Security Patches: Addressing vulnerabilities in the firmware itself.
Steps for Safely Updating BIOS/UEFI
Updating your BIOS/UEFI is a critical procedure that requires careful attention. Incorrect steps can brick your motherboard. Always consult your motherboard’s manual or the manufacturer’s website for precise instructions, as the process varies significantly between brands and models.
- Identify Your Motherboard: Use tools like CPU-Z or simply check your system information (
msinfo32) to find your motherboard manufacturer and model number. - Visit Manufacturer’s Website: Go to the official support page for your motherboard model (e.g., ASUS, MSI, Gigabyte, ASRock).
- Download Latest Firmware: Locate the “Support” or “Downloads” section and find the latest BIOS/UEFI firmware version. Read the release notes carefully to see if it addresses graphics stability or specific hardware compatibility.
- Prepare USB Drive: Format a USB flash drive (FAT32 is usually required). Copy the downloaded BIOS/UEFI file to the root directory of the USB drive. Some manufacturers require specific renaming of the file.
- Enter BIOS/UEFI: Restart your computer and repeatedly press the designated key (e.g., Del, F2, F10) to enter the BIOS/UEFI setup utility.
- Locate Flash Utility: Find the built-in flash utility, often named “EZ Flash,” “Q-Flash,” “M-Flash,” or similar.
- Perform Update: Select the BIOS/UEFI file from your USB drive and initiate the update. Do not interrupt this process under any circumstances. A power outage during this time can be catastrophic.
- Restart and Configure: After the update, the system will restart. You may need to reconfigure some BIOS/UEFI settings, such as boot order or XMP profiles, as they often revert to default.
If you suspect a recent BIOS/UEFI update caused the nvlddmkm black screen Windows 11, you might need to find an older, stable firmware version on your manufacturer’s website and follow a similar flashing procedure to roll back. Again, consult your motherboard’s specific instructions for rollback procedures.
Method 4: Diagnosing and Addressing Hardware Issues
While the nvlddmkm black screen Windows 11 error often points to driver-related software problems, it’s crucial not to rule out underlying hardware malfunctions. A failing graphics card, an unstable power supply, or even excessive heat can manifest with symptoms identical to a driver crash. Systematically diagnosing your hardware components is a vital step in comprehensive troubleshooting.
Ignoring potential hardware issues can lead to endless loops of driver reinstallation without ever addressing the root cause. This section will guide you through testing your graphics card, verifying the stability of your Power Supply Unit (PSU), and monitoring system temperatures. Identifying a hardware fault early can save you significant time and prevent further damage to your components.
Remember that hardware diagnostics might require some physical interaction with your computer’s internal components. If you’re uncomfortable opening your PC case, consider seeking assistance from a qualified technician. However, many diagnostic steps can be performed with software tools, providing valuable insights into your system’s health.
Testing Your Graphics Card (GPU)
A faulty graphics card is a prime suspect when experiencing a black screen. There are several ways to test your GPU to determine if it’s the culprit behind the nvlddmkm black screen Windows 11 error.
- Visual Inspection: Power down and open your PC. Look for any visible damage on the GPU, such as swollen capacitors, burn marks, or bent pins. Ensure the card is seated correctly in its PCIe slot and that all power connectors are firmly attached. Clean any dust from the fans and heatsink.
- Integrated Graphics Test: If your CPU has integrated graphics (e.g., Intel UHD Graphics, AMD Radeon Graphics), remove your dedicated NVIDIA card and connect your monitor directly to the motherboard’s video output. If the system boots and runs stably without a black screen, it strongly suggests an issue with your dedicated NVIDIA GPU.
- Stress Testing: Use a dedicated GPU stress test utility like FurMark or Heaven Benchmark. Run these tests in Safe Mode (if possible) or immediately after a clean boot. Monitor for artifacts, crashes, or black screens during the test. If the GPU fails these tests, it indicates instability.
- Cross-Testing: If you have access to another PC, try installing your NVIDIA GPU into it. If the black screen error follows the card to the other system, the GPU is likely faulty. Conversely, if another GPU works fine in your system, it further points to your original card.
If these tests consistently point to your graphics card, it might be time to consider a repair or replacement. Even a slight defect can cause the nvlddmkm.sys driver to crash.
Checking Power Supply Unit (PSU) Stability
An insufficient or failing Power Supply Unit (PSU) can lead to intermittent power delivery to your graphics card, causing instability and triggering the nvlddmkm black screen Windows 11 error. GPUs are often the most power-hungry components in a system, and a weak PSU can struggle to provide consistent power, especially under load.
Here’s how to check your PSU’s stability:
- Verify Wattage: Ensure your PSU’s wattage meets or exceeds the recommended wattage for your NVIDIA graphics card and the rest of your system components. NVIDIA’s website or your GPU’s manual will provide this information. A common mistake is underestimating the power requirements for a high-end GPU.
- Check Connections: Double-check that all power cables from the PSU are securely connected to your motherboard, graphics card, and other components. Loose connections can lead to power fluctuations.
- Listen for Sounds: A failing PSU might emit unusual noises, such as whining or clicking. These can be indicators of internal component degradation.
- Voltage Monitoring: Use monitoring software like HWMonitor or HWInfo64 to observe the 12V rail voltage from your PSU. Significant drops below 12V (e.g., 11.5V or lower) under load can indicate an unstable PSU. However, software readings are not always perfectly accurate.
- Cross-Testing (if possible): If you have access to a known good PSU, try swapping it into your system. If the black screen issue resolves, your original PSU was likely the problem.
If you suspect your PSU is failing or insufficient, replacing it with a reputable brand that provides adequate wattage is a wise investment to ensure system stability.
Monitoring System Temperatures
Overheating is a common cause of system instability and can easily trigger the nvlddmkm black screen Windows 11 error. When a GPU or CPU reaches critical temperatures, it might throttle performance or even shut down to prevent damage, leading to a black screen. Ensuring proper cooling is essential for stable operation.
Use monitoring software like HWMonitor, MSI Afterburner, or HWInfo64 to keep an eye on your GPU and CPU temperatures. Run these applications in the background while you perform typical tasks, and especially during graphically intensive activities that previously caused the black screen.
Ideal GPU temperatures under load typically range from 60-80°C, though some high-end cards can run slightly hotter. If your GPU consistently hits 85-90°C or higher, it’s likely overheating. For CPUs, temperatures above 80-85°C under load are also a concern.
If you detect high temperatures:
- Clean Dust: Power down your PC and use compressed air to thoroughly clean dust from your GPU heatsink and fans, CPU cooler, and case fans. Dust acts as an insulator, trapping heat.
- Improve Airflow: Ensure your PC case has adequate airflow, with intake fans pulling cool air in and exhaust fans pushing hot air out. Consider reorganizing cables to prevent obstruction of airflow.
- Check Thermal Paste: If your components are several years old, the thermal paste between your CPU/GPU and their respective coolers might have dried out. Reapplying fresh thermal paste can significantly improve cooling. This is a more advanced step.
- Fan Speeds: Use software like MSI Afterburner to manually adjust your GPU fan curve, ensuring fans spin up aggressively enough under load to keep temperatures in check.
Addressing overheating can often resolve mysterious black screen issues, as stable temperatures are fundamental for reliable hardware operation.
Method 5: Running System File Checker and DISM
Corrupted or missing Windows system files can interfere with the proper functioning of drivers, including the NVIDIA display driver, potentially leading to the nvlddmkm black screen Windows 11 error. Windows 11 includes powerful built-in tools, the System File Checker (SFC) and Deployment Image Servicing and Management (DISM), specifically designed to verify and repair the integrity of these critical system files.
These tools work by scanning your system for discrepancies between your current system files and the official Windows installation files. If any corruption is detected, they attempt to replace the faulty files with correct versions. Running SFC and DISM is a crucial diagnostic and repair step that can resolve underlying operating system issues that might be contributing to your graphics driver problems.
It’s a good practice to run these commands periodically, even if you’re not experiencing issues, as they help maintain the overall health and stability of your Windows installation. When troubleshooting a persistent black screen, they provide a systematic way to rule out or fix system file corruption as a cause.
Verifying System File Integrity
The System File Checker (SFC) tool is designed to scan for and restore corrupted Windows system files. It checks files protected by Windows Resource Protection and replaces any incorrect versions with correct Microsoft versions. This can be particularly helpful if the nvlddmkm.sys file or other critical system components have become damaged.
To run SFC:
- Press Windows Key + S, type
cmd, right-click on “Command Prompt” in the search results, and select “Run as administrator.” - In the Command Prompt window, type
sfc /scannowand press Enter. - The scan will take some time to complete. Do not close the window until the verification process is 100% finished.
- Upon completion, you will see a message indicating the outcome, such as “Windows Resource Protection found corrupt files and successfully repaired them” or “Windows Resource Protection did not find any integrity violations.”
If SFC reports that it found and repaired corrupt files, restart your computer and check if the nvlddmkm black screen Windows 11 issue is resolved. Even if it finds no violations, it’s still a good preparatory step before running DISM, as SFC sometimes relies on a healthy Windows image, which DISM can ensure.
Repairing Windows Image with DISM
While SFC checks and repairs system files, the Deployment Image Servicing and Management (DISM) tool goes a step further. It can repair the underlying Windows system image that SFC uses for its repairs. If the Windows image itself is corrupted, SFC might not be able to fix anything. DISM can fetch healthy files from Windows Update or a local source to restore the image’s integrity.
It’s generally recommended to run DISM before SFC if you suspect deep-seated system file corruption. To use DISM:
- Open Command Prompt as an administrator, just as you did for SFC.
- Type the following command and press Enter:
DISM /Online /Cleanup-Image /CheckHealth. This command checks for corruption in the Windows image. - Next, type:
DISM /Online /Cleanup-Image /ScanHealthand press Enter. This performs a more thorough scan for corruption. - Finally, type:
DISM /Online /Cleanup-Image /RestoreHealthand press Enter. This command attempts to repair any detected corruption in the Windows image by downloading necessary files from Windows Update. This step requires an active internet connection.
Each DISM command can take several minutes to complete. Once all commands have finished, restart your computer. After running DISM, it’s a good idea to run sfc /scannow again to ensure all system files are consistent with the now-repaired Windows image. This two-pronged approach significantly increases your chances of resolving system file-related causes of the nvlddmkm black screen Windows 11 error.
Method 6: Checking for Windows Updates and Compatibility
Maintaining an up-to-date Windows 11 operating system is crucial for overall system stability and hardware compatibility. Microsoft frequently releases updates that include bug fixes, security patches, and improved driver compatibility. An outdated Windows build can sometimes create conflicts with newer NVIDIA drivers, potentially leading to the nvlddmkm black screen Windows 11 error.
Conversely, sometimes a very recent Windows update might introduce an incompatibility with your specific NVIDIA driver version, requiring either a driver update or a rollback. This section emphasizes the importance of keeping your OS current and understanding the interplay between Windows builds and graphics driver compatibility. Ensuring harmony between your operating system and its drivers is a fundamental step in preventing and resolving graphical issues.
It’s not just about having the latest versions, but ensuring that the versions you have are known to work well together. A mismatch can lead to unexpected behavior, including the dreaded black screen. Regularly checking for updates and reviewing compatibility information can save you from many headaches.
Ensuring Windows 11 is Up-to-Date
Keeping your Windows 11 installation fully updated is a straightforward yet powerful troubleshooting step. Microsoft often releases cumulative updates and feature updates that address known issues, improve system performance, and enhance compatibility with various hardware components, including graphics cards.
To check for and install Windows 11 updates:
- Press Windows Key + I to open the Settings app.
- Click on “Windows Update” in the left-hand pane.
- Click the “Check for updates” button.
- If updates are available, download and install them. Your system may require several restarts during this process.
- After all updates are installed, restart your computer one final time.
Sometimes, a pending update or a partially installed update can cause system instability. Ensuring everything is fully updated eliminates this as a potential factor for the nvlddmkm black screen Windows 11 issue. It also ensures that your operating system has the latest fixes that might prevent driver crashes.
Additionally, check the “Update history” section in Windows Update settings to see if any recent updates failed to install or if a particular update coincided with the start of your black screen issues. This information can be valuable for pinpointing the problem.
Driver Compatibility with Windows 11 Builds
The relationship between your NVIDIA graphics driver and your specific Windows 11 build is critical. NVIDIA drivers are optimized for certain Windows versions and builds. A driver that works perfectly on one Windows 11 build might exhibit issues on another, especially after a major feature update from Microsoft.
If you’re experiencing the nvlddmkm black screen Windows 11 error after a Windows update, or if you’re on a specific Windows Insider build, consider the following:
- Check NVIDIA Release Notes: When downloading NVIDIA drivers, always review the release notes. They often specify which Windows versions and builds the driver is compatible with and any known issues.
- Windows Rollback: If the black screen started immediately after a Windows feature update, you might consider rolling back to the previous Windows version. Go to Settings > System > Recovery > Go back. Note that this option is usually only available for 10 days after a major update.
- Try Older NVIDIA Drivers: Sometimes, the very latest NVIDIA driver might have a bug specific to your hardware or Windows build. In such cases, rolling back to a slightly older, but stable, NVIDIA driver version (using DDU for a clean uninstall first) can resolve the issue. NVIDIA’s website usually provides an archive of older drivers.
- Forum Research: Search NVIDIA forums or Windows communities for users with similar hardware and Windows 11 builds. Others might have already identified a specific driver version that works best for their configuration.
Ensuring that your NVIDIA driver and Windows 11 build are compatible is a nuanced but essential step in maintaining graphical stability and preventing the black screen error.
Additional Advanced Troubleshooting Tips
If you’ve systematically worked through all the previous methods and the nvlddmkm black screen Windows 11 error persists, it’s time to consider more drastic measures. These advanced tips are typically reserved as last resorts when all other software and basic hardware diagnostics have failed to yield a solution. They involve significant time investment and, in some cases, professional intervention.
It’s important to approach these steps with a clear understanding of their implications. A clean Windows 11 installation, for instance, will wipe your data, necessitating a thorough backup. Seeking professional hardware support means entrusting your system to experts who can perform more in-depth diagnostics and repairs than might be feasible at home. These options are for when you’ve exhausted all other avenues and need a definitive resolution to the stubborn black screen problem.
Remember, the goal is to restore your system’s stability. If you’re not comfortable with any of these advanced procedures, especially a clean installation, it’s always best to consult with someone experienced or a professional service.
Performing a Clean Windows 11 Installation
If the nvlddmkm black screen Windows 11 error stubbornly refuses to go away after trying all other software and driver-related fixes, a clean installation of Windows 11 might be your ultimate solution. This process completely erases your current operating system and all installed programs, providing a fresh, uncorrupted environment. It effectively rules out any deep-seated software conflicts, corrupted system files, or persistent malware as the cause.
Before you begin, it is absolutely critical to back up all your important data. This includes documents, photos, videos, and any other files you wish to keep. You can use an external hard drive, cloud storage, or create a system image backup on Windows 11 if you want to restore your entire system later. Once the clean installation begins, there’s no turning back for your data.
To perform a clean installation:
- Create Installation Media: Download the Windows 11 Media Creation Tool from Microsoft’s official website and use it to create a bootable USB drive (at least 8GB).
- Boot from USB: Insert the USB drive, restart your computer, and boot from the USB. You may need to adjust your BIOS/UEFI boot order.
- Follow Setup: Follow the on-screen instructions. When prompted, choose “Custom: Install Windows only (advanced)” and delete all existing partitions on your primary drive before installing Windows 11 onto the unallocated space.
- Install Drivers: After Windows 11 is installed, immediately download and install the latest stable NVIDIA graphics drivers (as described in Method 1). Install essential motherboard drivers (chipset, LAN, audio) from your motherboard manufacturer’s website.
A clean installation is a significant undertaking, but it often provides a definitive answer: if the black screen persists even on a fresh Windows installation with new drivers, the problem is almost certainly hardware-related.
Seeking Professional Hardware Support
When all troubleshooting efforts, including a clean Windows 11 installation, fail to resolve the nvlddmkm black screen Windows 11 error, it’s a strong indication of a fundamental hardware problem. At this point, seeking professional hardware support becomes the most logical and often the most efficient next step. Technicians have access to specialized diagnostic tools and replacement parts that are not typically available to the average user.
A professional can perform more in-depth diagnostics on components like your graphics card, power supply, motherboard, and RAM. They can test individual components under various loads and conditions to pinpoint the exact failing part. This level of diagnosis is crucial when the issue is intermittent or difficult to replicate, or when you lack the necessary spare parts for cross-testing.
Consider taking your system to a reputable computer repair shop or contacting the manufacturer if your PC or graphics card is still under warranty. Provide them with a detailed history of the problem, including all the troubleshooting steps you’ve already attempted. This information can significantly help them narrow down the potential causes and expedite the repair process. Investing in professional support can save you from further frustration and potentially prevent you from unnecessarily replacing functional components.
Conclusion: Regaining Stability from nvlddmkm Black Screen
The nvlddmkm black screen Windows 11 error is undoubtedly one of the most challenging issues a PC user can face, effectively rendering your system unusable. It’s a complex problem that often stems from the intricate relationship between your NVIDIA graphics driver, the Windows operating system, and your underlying hardware. However, by adopting a systematic and patient approach, as outlined in this comprehensive guide, you can significantly increase your chances of diagnosing and resolving the issue.
We’ve covered everything from essential initial checks, such as booting into Safe Mode and verifying hardware connections, to critical software solutions like performing a clean NVIDIA driver reinstallation using DDU. We delved into advanced registry modifications for TDR settings, emphasized the importance of BIOS/UEFI firmware, and guided you through thorough hardware diagnostics for your GPU, PSU, and system temperatures. Furthermore, we highlighted the role of Windows updates and system file integrity with SFC and DISM, culminating in advanced options like a clean OS installation or professional support.
Regaining stability from the nvlddmkm black screen requires diligence and attention to detail. Each step in this guide is designed to eliminate potential causes, moving you closer to a stable and functional Windows 11 environment. Remember to always back up your data before making significant system changes and to consult official documentation for specific hardware procedures. With perseverance, your system can be restored to its optimal performance, free from the frustration of graphical blackouts.
For more interesting articles, stay tuned to Winsides.com!









Community
Comments (0)