

Introduction to DISM and the 62% Stuck Issue
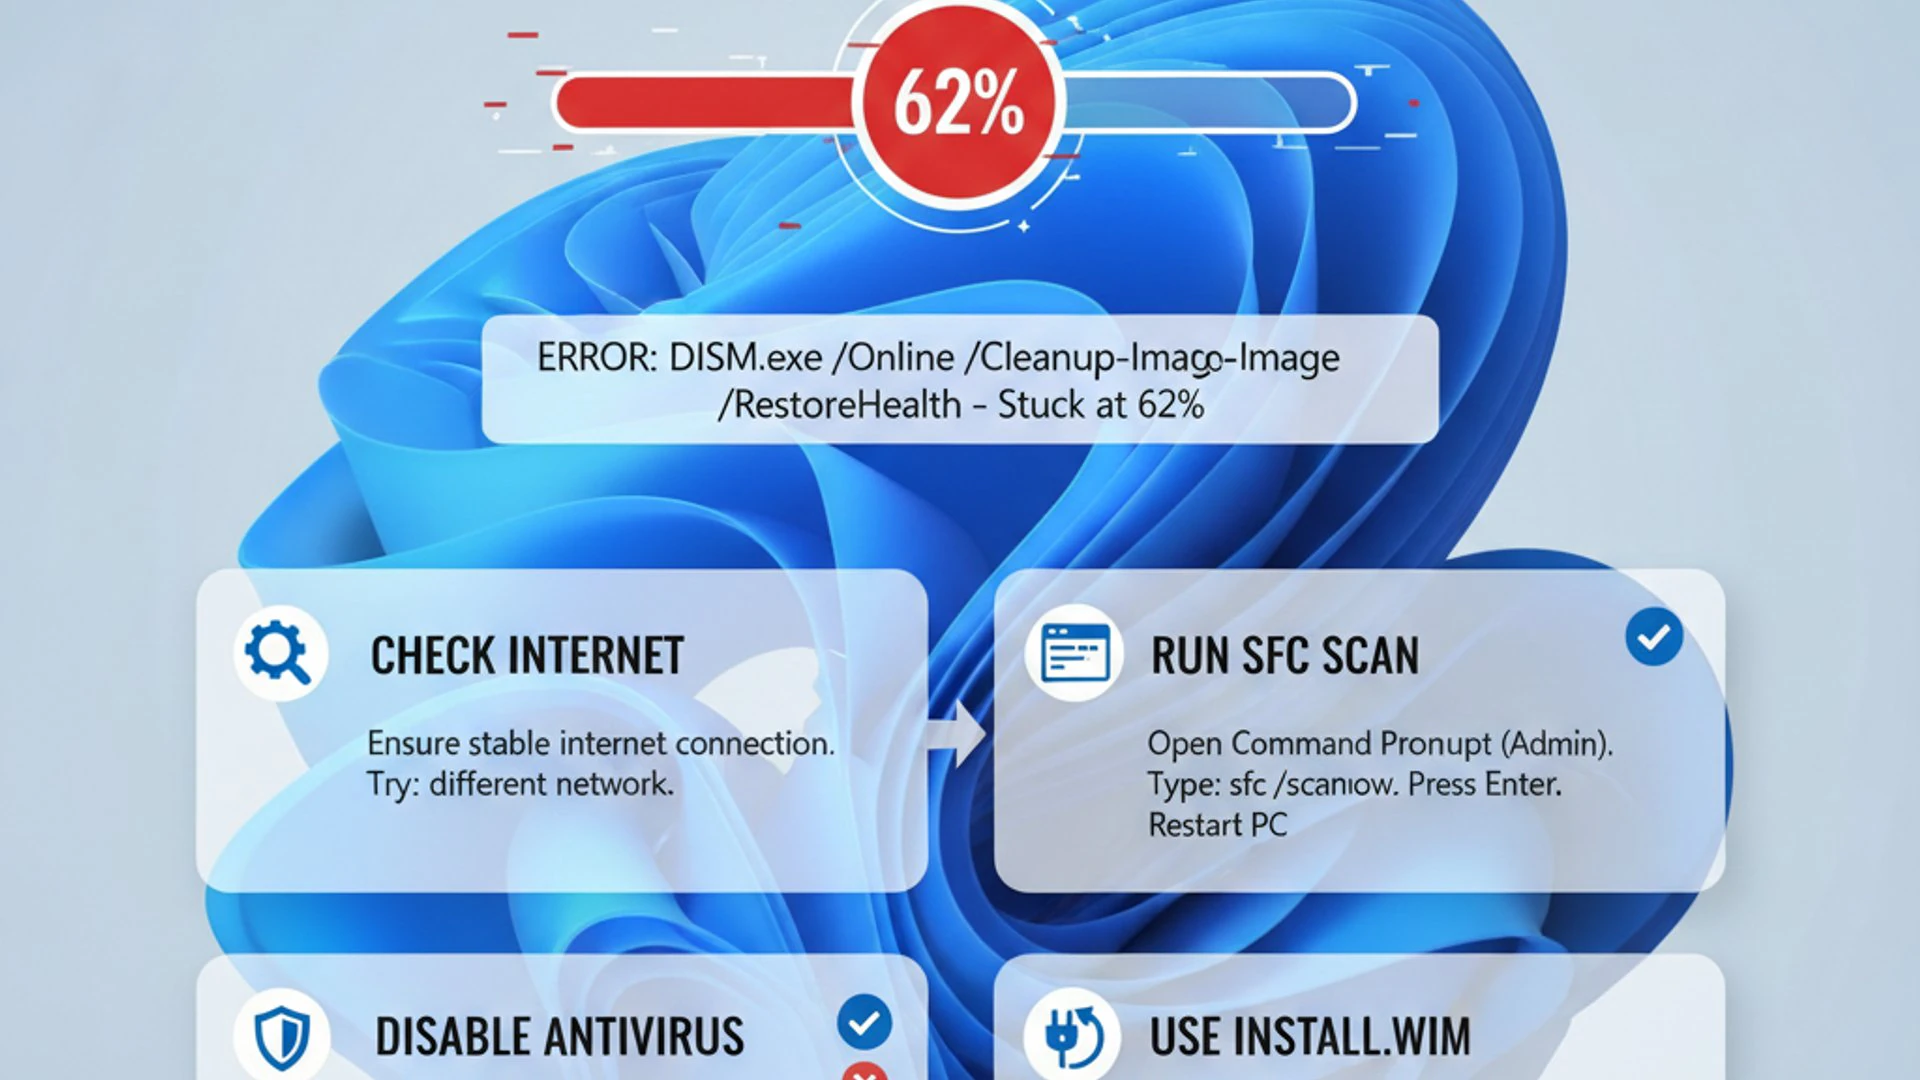
Encountering system issues on Windows 11 can be frustrating, especially when critical repair tools fail to complete their tasks. One such common and particularly vexing problem is when the DISM RestoreHealth stuck at 62% Windows 11. This specific hang-up point has become a notorious roadblock for many users attempting to restore their system’s integrity. For additional context, see repair a Windows image, System File Checker (SFC) tool, perform a clean boot, Windows Update Catalog, and Microsoft’s official DISM documentation.
The Deployment Image Servicing and Management (DISM) tool is a powerful command-line utility essential for maintaining the health and stability of your Windows operating system. When it gets stuck, it signals a deeper underlying problem that prevents your system from being properly repaired. This article will thoroughly explore why this happens and, more importantly, provide a comprehensive suite of solutions to get your system back on track.
Understanding the Role of DISM in Windows 11
DISM is not just another utility; it’s a foundational component for managing and preparing Windows images, including the recovery, setup, and installation environments. It plays a crucial role in repairing corrupted Windows system files, managing features, and preparing Windows Preinstallation Environment (Windows PE) images.
Think of DISM as a digital surgeon for your operating system. It can scan for corruption, download necessary replacement files from Windows Update, or even utilize a specified source image to fix problems. Its primary goal is to ensure that the core components of your Windows installation are healthy and functional.
Why DISM RestoreHealth is Crucial
The DISM /Online /Cleanup-Image /RestoreHealth command is specifically designed to repair the Windows component store corruption. This store, often referred to as the WinSxS folder, contains all the components needed to customize, update, and enable features in Windows. If this store becomes corrupted, it can lead to various system instabilities, update failures, and even prevent other repair tools like System File Checker (SFC) from working correctly.
When DISM RestoreHealth gets stuck at 62%, it usually indicates that the tool is encountering an obstacle while trying to access or process the necessary repair files. This could stem from network issues, corrupted local files, conflicts with other software, or problems with the Windows Update service itself. Resolving this specific hang-up is paramount for maintaining a stable and secure Windows 11 environment.
Table of contents
Key Takeaways: Quick Solutions for DISM RestoreHealth
Before diving into the detailed troubleshooting steps, here are some immediate actions you can take if you encounter the DISM RestoreHealth stuck at 62% Windows 11 issue. These quick tips often resolve the problem for many users.
- Verify Internet Connection: Ensure you have a stable and active internet connection, as DISM often needs to download repair files from Microsoft servers.
- Disable Security Software: Temporarily turn off your antivirus and firewall, as they can sometimes interfere with DISM’s access to system files.
- Run as Administrator: Always execute Command Prompt or PowerShell with administrative privileges.
- Use a Reliable Source: If online repair fails, specify a local Windows 11 ISO or installation media as the source for repair files.
- Restart and Retry: A simple system restart can sometimes clear temporary glitches preventing DISM from completing.
- Check Disk Space: Ensure you have sufficient free space on your system drive for DISM to download and process files.
“A proactive approach to system maintenance, including regular checks and prompt issue resolution, is key to preventing major disruptions on your Windows 11 machine.”
Initial Checks Before Advanced Troubleshooting
Before embarking on more complex troubleshooting methods, it’s crucial to rule out common environmental factors that can cause the DISM RestoreHealth stuck at 62% Windows 11 problem. These initial checks are quick, easy, and often resolve the issue without needing deeper intervention.
Many users overlook these fundamental steps, leading to unnecessary frustration. By systematically verifying these basic conditions, you can save significant time and effort in your diagnostic process. Let’s ensure your system is in the best possible state for DISM to function correctly.
Verify Internet Connection and Proxy Settings
DISM, particularly when using the /RestoreHealth command without a local source, relies heavily on a stable internet connection to download necessary repair components from Windows Update. If your connection is intermittent or restricted, DISM may hang.
First, confirm that your internet connection is active and stable. Try browsing a few websites or running a speed test. If you’re using a proxy server, ensure it’s correctly configured and not blocking access to Microsoft’s update servers. Incorrect proxy settings or a VPN can sometimes interfere with DISM’s ability to communicate with online resources.
To check your proxy settings, you can go to Settings > Network & internet > Proxy. Ensure that “Use a proxy server” is toggled off unless you specifically require one. If you use a VPN, try temporarily disabling it before running DISM.
Disable Antivirus and Firewall Temporarily
Security software, including third-party antivirus programs and even Windows Defender Firewall, can sometimes be overly protective. They might mistakenly identify DISM’s operations, especially when it tries to access or modify critical system files, as suspicious activity.
This interference can prevent DISM from completing its scan or repair process, leading to it getting stuck. Temporarily disabling these security measures can help determine if they are the root cause of the problem. Remember to re-enable them immediately after troubleshooting to maintain your system’s security.
To disable Windows Defender Firewall, search for “Windows Defender Firewall” in the Start menu, then click “Turn Windows Defender Firewall on or off” and select to turn it off for both private and public networks. For third-party antivirus, right-click its icon in the system tray and look for an option to disable it temporarily.
Method 1: Utilizing the Correct DISM Commands
When facing the DISM RestoreHealth stuck at 62% Windows 11 issue, ensuring you’re using the correct commands and parameters is paramount. Often, users run the basic command without considering external factors or alternative sources for repair files. This section will guide you through the optimal way to execute DISM, emphasizing the importance of providing a reliable source.
The DISM tool is powerful, but its effectiveness hinges on having access to uncorrupted system files. If your online connection or the Windows Update service itself is compromised, DISM needs an alternative. This is where specifying a local source becomes invaluable, bypassing potential online download issues.
Running DISM with Source Parameter
The standard /RestoreHealth command attempts to use Windows Update as its source for repair files. However, if Windows Update is malfunctioning or if your internet connection is unstable, DISM can fail. By adding the /Source parameter, you can direct DISM to use a local, known-good source for the necessary files.
This local source is typically a mounted Windows 11 ISO file or a USB installation media. Using a local source ensures that DISM has immediate and reliable access to the files it needs, circumventing any issues with online downloads. This is often the most effective solution when the online repair gets stuck.
Using an ISO or Mounted Image as Source
To use an ISO file as a source, you first need to download a Windows 11 ISO from Microsoft’s official website. Once downloaded, you can mount it by right-clicking the ISO file and selecting “Mount.” This will create a virtual DVD drive. Note the drive letter (e.g., D:).
Open Command Prompt or PowerShell as an administrator. Then, use the following command, replacing X: with the drive letter of your mounted ISO:
The /LimitAccess parameter tells DISM not to contact Windows Update for repair files, relying solely on the specified local source. This is crucial for bypassing any online connectivity or Windows Update service issues. Ensure the ISO is the same version and build as your installed Windows 11.
Executing SFC Scannow After DISM
While DISM focuses on repairing the Windows component store, the System File Checker (SFC) tool is designed to scan and repair corrupted or missing protected system files. These two tools often work in conjunction, with DISM typically run first.
The reason for this order is that SFC relies on the integrity of the component store (which DISM repairs) to function correctly. If the component store itself is corrupted, SFC might not be able to retrieve the correct versions of system files, or it might report that it found corrupt files but was unable to fix them.
After successfully running DISM and resolving the DISM RestoreHealth stuck at 62% Windows 11 issue, it’s highly recommended to run SFC. Open Command Prompt or PowerShell as an administrator and type:
Allow this scan to complete. It will check all protected system files for integrity violations and attempt to replace incorrect versions with correct Microsoft versions. A successful SFC scan after DISM confirms a more robust repair of your core operating system files.
Method 2: Clearing the Component Store (WinSxS)
The WinSxS folder, or Component Store, is a critical part of Windows that stores files necessary for system functions, updates, and feature installations. Over time, this folder can grow significantly, sometimes accumulating corrupted or outdated files that can interfere with DISM operations, leading to issues like DISM RestoreHealth stuck at 62% Windows 11.
Clearing or managing this store doesn’t mean deleting the folder entirely, which would be disastrous. Instead, it involves using built-in Windows tools to clean up unnecessary components, thereby potentially removing the corrupted elements that are causing DISM to fail.
Understanding the WinSxS Folder
The WinSxS folder (Windows Side-by-Side) is located at C:\Windows\WinSxS. It contains multiple versions of system components, libraries, and update files. This allows Windows to provide backward compatibility and to roll back updates if necessary. While essential, its size can become substantial.
Corruption within this folder can prevent DISM from correctly identifying and replacing damaged files. By cleaning up the component store, you’re essentially giving DISM a fresh, less cluttered environment to work with, which can help resolve the 62% hang-up.
Using Disk Cleanup to Clear System Files
Windows includes a built-in utility called Disk Cleanup that can help manage the size of the WinSxS folder by removing outdated or superseded components. This process is safe and can free up disk space while potentially resolving underlying corruption issues.
To use Disk Cleanup:
- Search for “Disk Cleanup” in the Start menu and open it.
- Select your system drive (usually
C:) and click OK. - In the Disk Cleanup window, click on Clean up system files.
- Again, select your system drive and click OK.
- Wait for the utility to scan for files. Once it presents a list, scroll down and check the box next to Windows Update Cleanup. You might also consider checking “Previous Windows installations” if you have any.
- Click OK and then Delete Files to confirm.
This process can take some time, especially if a lot of update files need to be removed. After it completes, restart your computer and then attempt to run the DISM RestoreHealth command again. This often resolves the DISM RestoreHealth stuck at 62% Windows 11 issue by removing conflicting update components.
Method 3: Performing a Clean Boot Environment
Software conflicts are a common culprit behind various Windows issues, including the frustrating DISM RestoreHealth stuck at 62% Windows 11 problem. A clean boot environment starts Windows with a minimal set of drivers and startup programs. This helps isolate whether a background program or service is interfering with DISM’s operations.
By temporarily disabling non-Microsoft services and startup items, you create a pristine environment. If DISM completes successfully in a clean boot, you can then systematically re-enable services to pinpoint the exact conflicting application. This diagnostic approach is highly effective for identifying software-related interference.
Steps to Configure a Clean Boot
Performing a clean boot involves using the System Configuration utility (msconfig). Follow these steps carefully:
- Press
Win + Rto open the Run dialog, typemsconfig, and press Enter. This opens the System Configuration window. - Go to the Services tab. Check the box labeled Hide all Microsoft services. This is a critical step to avoid disabling essential Windows functions.
- Click Disable all. This will turn off all non-Microsoft services.
- Navigate to the Startup tab and click Open Task Manager.
- In Task Manager, go to the Startup tab. For each item listed, select it and click Disable. Remember which items you disable so you can re-enable them later.
- Close Task Manager, then click OK in the System Configuration window.
- You will be prompted to restart your computer. Choose Restart.
After your computer restarts in a clean boot state, try running the DISM RestoreHealth command again. If it completes successfully, you’ve confirmed a software conflict. To find the culprit, re-enable services and startup items one by one (or in small groups) and restart each time, running DISM until the issue reappears. Once identified, you can update, reinstall, or remove the problematic software. Remember to revert your system to a normal startup configuration after troubleshooting by going back into msconfig and selecting “Normal startup” on the General tab.
Method 4: Addressing Windows Update Issues
Since DISM often relies on Windows Update to fetch repair files, any underlying problems with the update service itself can directly cause the DISM RestoreHealth stuck at 62% Windows 11 error. This section focuses on diagnosing and resolving common Windows Update issues that might be hindering DISM’s progress.
Windows Update can sometimes get bogged down by corrupted cache files, incorrect service configurations, or temporary glitches. By resetting its components or using the dedicated troubleshooter, you can often clear these blockages and allow DISM to complete its task without interruption.
Running the Windows Update Troubleshooter
Windows 11 includes a built-in troubleshooter specifically designed to detect and fix common issues with Windows Update. This tool can automatically identify problems like corrupted update databases, missing components, or incorrect service registrations.
To run the troubleshooter:
- Go to Settings > System > Troubleshoot.
- Click on Other troubleshooters.
- Find Windows Update in the list and click Run next to it.
Allow the troubleshooter to complete its scan and apply any recommended fixes. After it finishes, restart your computer and then attempt to run the DISM RestoreHealth command again. This simple step can often resolve minor update-related issues that were preventing DISM from progressing.
Manually Resetting Windows Update Components
If the troubleshooter doesn’t resolve the issue, a more thorough approach is to manually reset the Windows Update components. This involves stopping the relevant services, clearing the update cache, and then restarting the services. This effectively gives Windows Update a fresh start.
Follow these steps from an elevated Command Prompt (Run as administrator):
- Stop the BITS, Windows Update, and Cryptographic services:
net stop bits net stop wuauserv net stop appidsvc net stop cryptsvc - Delete the qmgr*.dat files:
Del "%ALLUSERSPROFILE%\Application Data\Microsoft\Network\Downloader\qmgr*.dat" - Rename the SoftwareDistribution and catroot2 folders (these store update history and temporary files):
Ren %systemroot%\SoftwareDistribution SoftwareDistribution.bak Ren %systemroot%\system32\catroot2 catroot2.bak - Reset the BITS and Windows Update services to their default security descriptors:
sc.exe sdset bits D:(A;;CCLCSWRPWPDTLOCRRC;;;SY)(A;;CCDCLCSWRPWPDTLOCRSDRCWDWO;;;BA)(A;;CCLCSWLOCRRC;;;AU)(A;;CCLCSWRPWPDTLOCRRC;;;PU) sc.exe sdset wuauserv D:(A;;CCLCSWRPWPDTLOCRRC;;;SY)(A;;CCDCLCSWRPWPDTLOCRSDRCWDWO;;;BA)(A;;CCLCSWLOCRRC;;;AU)(A;;CCLCSWRPWPDTLOCRRC;;;PU) - Re-register the BITS files and Windows Update DLLs. This is a lengthy list, so execute them one by one:
regsvr32.exe /s atl.dll regsvr32.exe /s urlmon.dll regsvr32.exe /s mshtml.dll regsvr32.exe /s shdocvw.dll regsvr32.exe /s browseui.dll regsvr32.exe /s jscript.dll regsvr32.exe /s vbscript.dll regsvr32.exe /s scrrun.dll regsvr32.exe /s msxml.dll regsvr32.exe /s msxml3.dll regsvr32.exe /s msxml6.dll regsvr32.exe /s actxprxy.dll regsvr32.exe /s wups.dll regsvr32.exe /s wintrust.dll regsvr32.exe /s cryptdlg.dll regsvr32.exe /s dssit.dll regsvr32.exe /s gpkcsp.dll regsvr32.exe /s sccbase.dll regsvr32.exe /s slbcsp.dll regsvr32.exe /s initpki.dll regsvr32.exe /s wuaueng.dll regsvr32.exe /s wucltui.dll regsvr32.exe /s wuweb.dll regsvr32.exe /s qmgrprxy.dll regsvr32.exe /s wucltui.dll regsvr32.exe /s wuaueng.dll regsvr32.exe /s wuaueng1.dll regsvr32.exe /s wucltui.dll regsvr32.exe /s wups.dll regsvr32.exe /s wups2.dll regsvr32.exe /s wuweb.dll regsvr32.exe /s cryptsvc.dll - Restart the services:
net start bits
net start wuauserv
net start appidsvc
net start cryptsvc
After performing these steps, restart your computer and then try running the DISM RestoreHealth command again. This comprehensive reset often resolves persistent Windows Update issues that contribute to the DISM RestoreHealth stuck at 62% Windows 11 problem.
Method 5: Checking and Repairing System Files with SFC
While DISM focuses on the component store, the System File Checker (SFC) tool is indispensable for verifying and repairing individual protected system files. Although often run after DISM, it’s worth noting its independent function, especially if you suspect core system file corruption is the primary issue causing the DISM RestoreHealth stuck at 62% Windows 11 problem.
Sometimes, severe corruption in critical system files can prevent DISM from even starting or progressing correctly. Running SFC might, in rare cases, clear up enough underlying issues for DISM to then complete its more extensive component store repair. It acts as a frontline defense against file integrity issues.
How SFC Scannow Works
The sfc /scannow command initiates a scan of all protected system files. It checks their integrity against a cached copy of known good system files. If it finds any discrepancies—such as a file that has been modified, corrupted, or is missing—it attempts to replace it with the correct version from the Windows component store.
This process is crucial because many system functionalities, including those used by DISM, rely on these core files. If a critical DLL or executable is damaged, it can lead to unexpected behavior or outright failure of other system tools. A successful SFC scan indicates that your core system files are in good order.
To run SFC:
- Open Command Prompt or PowerShell as an administrator.
- Type
sfc /scannowand press Enter. - Allow the scan to complete. This can take some time, so be patient.
Upon completion, you will receive one of several messages:
- “Windows Resource Protection did not find any integrity violations.” (Good news!)
- “Windows Resource Protection found corrupt files and successfully repaired them.”
- “Windows Resource Protection found corrupt files but was unable to fix some of them.” (This indicates deeper issues, likely requiring DISM or other methods.)
Method 6: Using System Restore or In-place Upgrade
When all other troubleshooting methods fail to resolve the DISM RestoreHealth stuck at 62% Windows 11 issue, it might indicate more profound system corruption that cannot be fixed by command-line tools alone. In such severe cases, reverting to a previous system state or performing an in-place upgrade becomes necessary. These options are more drastic but often effective in restoring system functionality.
Always consider these as last resorts, as they involve significant changes to your system. Before proceeding, ensure you have backed up all your important personal data. For comprehensive backup solutions, you might find System Image Backup on Windows 11: Comprehensive Guide helpful.
Reverting to a Previous Restore Point
System Restore is a Windows feature that allows you to revert your system files, installed applications, Windows Registry, and system settings to an earlier point in time, known as a restore point. This can be incredibly useful if the corruption causing DISM to fail was introduced recently.
To use System Restore:
- Search for “Create a restore point” in the Start menu and open it.
- In the System Properties window, click on the System Restore… button.
- Click Next.
- Choose a restore point from before you started experiencing the DISM issue. If you don’t see any, ensure System Protection is turned on for your drive.
- Click Next and then Finish to confirm.
Your computer will restart and begin the restoration process. This will not affect your personal files, but any programs installed after the restore point was created will be removed. After the restore completes, try running DISM RestoreHealth again.
Performing an In-place Upgrade for System Repair
An in-place upgrade, also known as a repair install, is a powerful method to fix severe operating system corruption without losing your personal files, installed applications, or settings. It essentially reinstalls Windows 11 over your existing installation, replacing all core system files with fresh ones.
This method is highly effective for resolving persistent issues like the DISM RestoreHealth stuck at 62% Windows 11 error, as it refreshes the entire operating system foundation. You will need a Windows 11 ISO file, preferably the same version and build you are currently running.
Steps for an in-place upgrade:
- Download the official Windows 11 ISO file from Microsoft’s website.
- Mount the ISO file by right-clicking it and selecting “Mount.”
- Open the mounted drive and run setup.exe.
- Follow the on-screen instructions. When prompted, choose Keep personal files and apps. This ensures your data and programs remain intact.
- Allow the process to complete. Your computer will restart several times.
The in-place upgrade can take a significant amount of time, similar to a full Windows installation. Once finished, your Windows 11 system should be refreshed, and the DISM RestoreHealth command should now execute without getting stuck.
Advanced Troubleshooting: Log Files and Permissions
When the standard solutions don’t work, and the DISM RestoreHealth stuck at 62% Windows 11 issue persists, it’s time to dig deeper. Advanced troubleshooting involves examining the DISM log files for specific error codes and verifying system file permissions. This approach provides granular insights into the exact point of failure, enabling more targeted solutions.
Understanding the error messages within the log files can transform a vague problem into a clear diagnostic path. Similarly, incorrect file permissions can silently block DISM from accessing or modifying necessary components, leading to an unexplained hang.
Analyzing the DISM Log File
DISM generates detailed log files that record every operation it performs, including any errors encountered. These logs are your best resource for understanding why DISM is getting stuck. The primary DISM log file is located at C:\Windows\Logs\DISM\dism.log.
To analyze the log file:
- Open File Explorer and navigate to
C:\Windows\Logs\DISM\. - Open
dism.logwith a text editor like Notepad. - Search for keywords like “Error,” “Failed,” “Warning,” or “Result.” Pay close attention to entries around the time you ran the DISM command and specifically look for error codes (e.g.,
0x800f081f,0x80070005).
Specific error codes often point to particular issues:
0x800f081f: Indicates that the source files could not be found. This often means DISM couldn’t connect to Windows Update or the specified local source was invalid.0x80070005: An “Access Denied” error, suggesting a permissions issue or interference from security software.
Verifying System File Permissions
Incorrect permissions on critical system files or folders can prevent DISM from reading or writing necessary data, causing it to halt. While rare, it’s a possibility, especially after malware infections or manual system modifications. The 0x80070005 error code from the DISM log often points to this.
Checking and correcting permissions can be complex, but you can start by verifying permissions on the C:\Windows\WinSxS folder and the temporary directory used by DISM. Ensure that the “SYSTEM” account and “Administrators” group have full control.
To check permissions for a folder:
- Right-click the folder (e.g.,
C:\Windows\WinSxS) and select Properties. - Go to the Security tab.
- Click Advanced.
- Ensure that “SYSTEM” and “Administrators” have “Full control.” If not, you may need to take ownership and then grant the necessary permissions. This is an advanced procedure and should be done with caution.
If you suspect widespread permission issues, running a command like icacls C:\ /reset /t /c /q from an elevated Command Prompt can reset permissions to default for all files and folders on the C: drive. However, use this command with extreme caution, as incorrect usage can cause system instability. It’s generally safer to address specific file or folder permissions identified by log errors.
Conclusion: Restoring Your Windows 11 System Integrity
The experience of having DISM RestoreHealth stuck at 62% Windows 11 can be incredibly frustrating, signaling deeper issues within your operating system’s core. However, as we’ve explored, a systematic approach to troubleshooting, ranging from basic checks to advanced diagnostics, can effectively resolve this persistent problem.
From ensuring a stable internet connection and temporarily disabling security software to utilizing correct DISM commands with a reliable source, clearing the component store, and addressing Windows Update issues, each method plays a vital role in restoring your system’s health. When all else fails, System Restore or an in-place upgrade offer robust solutions for severe corruption.
Ultimately, maintaining a healthy Windows 11 environment requires vigilance and proactive measures. Regularly running tools like DISM and SFC, keeping your system updated, and understanding the implications of system changes can prevent many issues before they escalate. By following the comprehensive steps outlined in this guide, you can confidently tackle the 62% hang-up and ensure the long-term integrity and stability of your Windows 11 machine.
For more interesting articles, stay tuned to Winsides.com!









Community
Comments (0)