

Encountering a Windows 11 random black screen no error message can be one of the most perplexing and frustrating issues a user faces. Imagine working diligently on an important project, engrossed in a game, or simply browsing the web, when suddenly your display goes completely dark. There are no warning signs, no error codes, and no blue screen of death to offer a clue. Your computer appears to be running, fans might be spinning, and lights are on, but the screen remains stubbornly blank.
This unsettling phenomenon disrupts productivity, causes data loss if unsaved, and leaves users feeling helpless. The absence of an explicit error message makes diagnosis particularly challenging, as the root cause could stem from a myriad of software conflicts or subtle hardware malfunctions. It’s not just a minor inconvenience; it’s a significant roadblock to a stable computing experience.
This comprehensive guide is designed to demystify the random black screen issue on Windows 11. We will explore a structured approach to troubleshooting, moving from simple checks to more advanced diagnostics. By systematically addressing potential causes, you can identify and resolve the underlying problem, restoring your system’s reliability. Let’s embark on this journey to bring your display back to life and prevent future occurrences.
Table of contents
Key Takeaways: Quick Solutions for Black Screen Issues
Before diving into detailed troubleshooting, here are some immediate actions and common fixes that often resolve the Windows 11 random black screen no error problem: For additional context, see Microsoft’s Troubleshoot black screen or blank screen errors, Intel Graphics Driver Support, NVIDIA Driver Downloads, AMD GPU Driver Installation Guide, and SFC command on Windows Server.
- Check All Connections: Ensure monitor cables (HDMI, DisplayPort, DVI) and power cords are securely plugged into both the monitor and the PC.
- Perform a Hard Reboot: Power cycle your computer by holding the power button for 10-15 seconds, then restarting it. This can clear temporary glitches.
- Update Graphics Drivers: Outdated or corrupted display drivers are a frequent culprit. Try updating them via Device Manager or a clean installation using DDU.
- Disable Fast Startup: This Windows feature can sometimes interfere with display initialization, leading to black screens. Turn it off in Power Options.
- Monitor Temperatures: Overheating components, especially the GPU, can cause the system to shut down the display. Check your system’s thermal performance.
- Test Monitor/Cable: If possible, connect your monitor to another device or use a different cable to rule out external display hardware failure.
- Run System Scans: Use SFC and DISM commands to repair corrupted system files that might be affecting display output.
Initial Troubleshooting Steps: What to Do Immediately
When your Windows 11 system presents a random black screen with no error, the initial moments can be confusing. The key is to remain calm and follow a systematic approach. These first steps are designed to address the most common and easily fixable issues, often resolving the problem before you need to delve into more complex diagnostics.
Many display problems are not software-related at all, but rather simple physical disconnections or temporary system glitches. Starting with these basic checks can save a significant amount of time and effort. It’s about ruling out the obvious before investigating the intricate.
This section will guide you through verifying your physical setup, performing a crucial hard reboot, and accessing recovery environments. These foundational steps are essential for any troubleshooting process, especially when dealing with a display issue that prevents normal interaction with your operating system.
Check Physical Connections and Peripherals
The first and often overlooked step is to meticulously inspect all physical connections. A loose cable can easily lead to a Windows 11 random black screen no error. Start with your monitor’s power cable and the video cable connecting it to your PC.
Ensure that the HDMI, DisplayPort, DVI, or VGA cable is firmly seated at both ends – into your monitor and into your graphics card or motherboard. Sometimes, a slight bump can dislodge these connections. If you have multiple monitors, check all of them.
Next, consider your peripherals. Disconnect any non-essential USB devices, such as external hard drives, webcams, or game controllers. Occasionally, a faulty peripheral can draw too much power or cause a conflict that leads to display issues. Try booting your system with only the essential keyboard and mouse connected.
“A surprising number of display issues are resolved by simply reseating cables. Always start with the basics; it can save hours of complex troubleshooting.”
Also, if your PC has both integrated graphics (on the motherboard) and a dedicated graphics card, make sure your monitor is plugged into the correct port. The dedicated graphics card ports are usually located lower down on the back of the PC, horizontally aligned with the expansion slots.
Perform a Hard Reboot or Power Cycle
A hard reboot, also known as a power cycle, is a fundamental troubleshooting step that can clear many temporary system glitches, including a random black screen. This process completely drains residual power from the system components, resetting their state.
To perform a hard reboot on a desktop PC, first, if the screen is black, try pressing the Windows key + Ctrl + Shift + B. This shortcut attempts to restart your graphics driver. If that doesn’t work, press and hold the power button on your computer case for about 10-15 seconds until the system completely shuts down.
Once it’s off, unplug the power cable from the wall outlet and from the back of the PC. For laptops, remove the battery if it’s easily detachable. Press and hold the power button again for 30 seconds to discharge any remaining power. Wait for a minute or two, then plug everything back in and try to power on your computer normally.
This simple act can often resolve issues where the operating system or a driver has become unresponsive, leading to the display turning off. It’s a clean slate for your system’s power state and can be surprisingly effective for a Windows 11 random black screen no error.
Accessing Safe Mode or Recovery Environment
If a hard reboot doesn’t resolve the issue, accessing Safe Mode or the Windows Recovery Environment (WinRE) becomes crucial. These modes allow you to troubleshoot software-related problems when the normal display is unavailable or unstable.
To access WinRE, you typically need to interrupt the normal boot process three times. Power on your PC, and as soon as you see the Windows logo or the manufacturer’s logo, press and hold the power button until the PC shuts down. Repeat this process two more times.
On the third boot attempt, Windows should automatically enter the Windows Recovery Environment. From there, navigate to Troubleshoot > Advanced options > Startup Settings, then click Restart. After the restart, you’ll see a list of options; press 4 or F4 for Safe Mode, or 5 or F5 for Safe Mode with Networking.
In Safe Mode, Windows loads with a minimal set of drivers and services, which can help determine if a third-party application or driver is causing the black screen. If your display works correctly in Safe Mode, it strongly suggests a software or driver conflict that needs further investigation.
Software-Related Causes and Solutions
Once you’ve ruled out basic physical connections and temporary glitches, the focus shifts to software. Many instances of a Windows 11 random black screen no error are rooted in driver conflicts, power settings, or system file corruption. These issues can often be resolved with careful adjustments and maintenance.
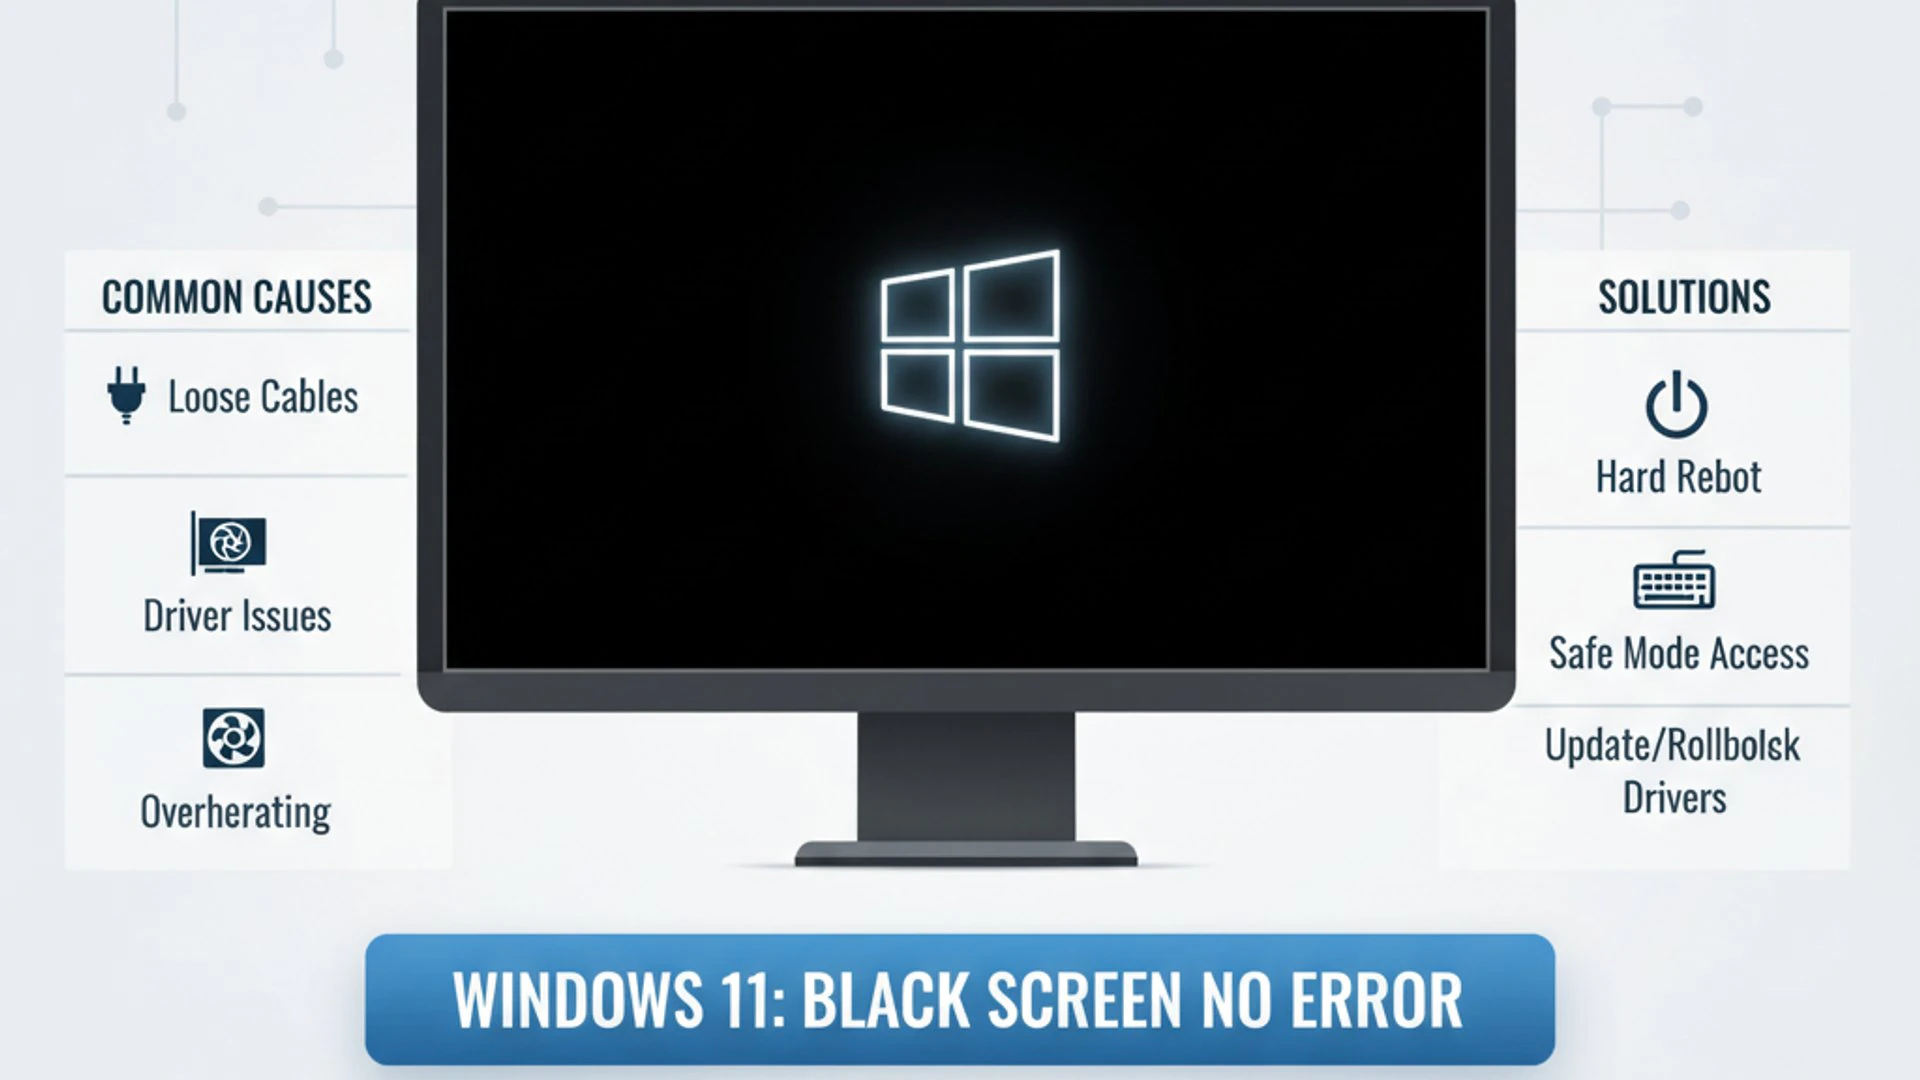
The operating system relies heavily on various software components to manage hardware, especially the display. When these components become outdated, corrupted, or misconfigured, the display output can become unstable or cease entirely. Identifying the specific software culprit is key to a lasting solution.
This section will guide you through managing graphics drivers, adjusting power settings, and repairing system files. These steps are critical for restoring stability and preventing future black screen incidents caused by software inconsistencies.
Update or Reinstall Graphics Drivers
Outdated, corrupted, or incompatible graphics drivers are a leading cause of display issues, including a Windows 11 random black screen no error. Your graphics driver acts as the translator between your operating system and your graphics card. If this translation breaks down, your screen goes blank.
Regularly updating your graphics drivers is crucial for performance and stability. Manufacturers frequently release new driver versions that include bug fixes, performance improvements, and compatibility updates for the latest Windows versions and applications. Neglecting these updates can lead to unexpected display problems.
Sometimes, simply updating isn’t enough; a clean reinstallation might be necessary to completely remove any corrupted driver files. This ensures a fresh start for your graphics subsystem, often resolving persistent black screen issues. It’s a proactive measure that can prevent many display-related headaches.
Using Device Manager to Manage Drivers
The Device Manager is your primary tool within Windows to manage hardware drivers. You can access it by right-clicking the Start button and selecting “Device Manager.”
- Expand the Display adapters section.
- Right-click on your graphics card (e.g., NVIDIA, AMD, Intel) and select Update driver.
- Choose Search automatically for drivers. If Windows finds a newer driver, it will install it.
- If that doesn’t work, right-click again and select Uninstall device. Check the box that says “Attempt to remove the driver for this device” if available, then click Uninstall.
- Restart your computer. Windows will usually reinstall a generic driver, or you can manually install a fresh one.
This method is straightforward but sometimes Windows’ automatic search doesn’t find the very latest driver. For the most up-to-date drivers, it’s often better to visit the manufacturer’s website directly.
Clean Installation of Graphics Drivers
A clean installation of graphics drivers is often more effective, especially if you suspect driver corruption. This involves completely removing all traces of old drivers before installing new ones.
First, download the latest graphics driver directly from your GPU manufacturer’s website (NVIDIA, AMD, or Intel). Do not rely solely on Windows Update for this. Then, use a specialized tool like Display Driver Uninstaller (DDU). DDU is a free utility that thoroughly removes all graphics driver components from your system.
To use DDU:
- Download DDU from a reputable source (e.g., Guru3D).
- Boot your Windows 11 PC into Safe Mode (as described in the “Accessing Safe Mode” section).
- Run DDU. Select your GPU vendor and choose Clean and restart.
- Once your PC restarts into normal mode, install the fresh driver package you downloaded earlier.
This process ensures that no remnants of old, potentially corrupted drivers interfere with the new installation, providing the best chance to resolve driver-related black screen issues.
Disable Fast Startup Feature
Windows 11’s Fast Startup feature is designed to make your computer boot up quicker after a shutdown. It does this by saving a hibernation file of your system state when you shut down, allowing for a faster resume. However, this feature can sometimes cause conflicts, particularly with hardware initialization, leading to a Windows 11 random black screen no error.
If your system is not shutting down completely, certain drivers or hardware components might not be properly reinitialized upon startup. This can manifest as a black screen, especially if the graphics driver is affected. Disabling Fast Startup ensures a full shutdown and fresh boot each time, which can resolve these types of issues.
To disable Fast Startup:
- Right-click the Start button and select Power Options.
- Click on Additional power settings on the right side of the window.
- In the Power Options window, click Choose what the power buttons do from the left pane.
- Click Change settings that are currently unavailable.
- Uncheck the box next to Turn on fast startup (recommended).
- Click Save changes.
After disabling Fast Startup, perform a full shutdown and then restart your computer to see if the black screen issue persists. This simple change can often eliminate a subtle but persistent problem.
Adjust Power Management Settings
Incorrect power management settings can also contribute to a Windows 11 random black screen no error. If your display is set to turn off too aggressively or if power-saving features are misconfigured, your screen might go blank unexpectedly, even if the system is still running.
These settings govern how your computer manages power to various components, including the display and graphics card. An overly aggressive power plan might cut power to the display adapter, causing the screen to go black, especially during periods of inactivity or when switching between power states.
To adjust power management settings:
- Right-click the Start button and select Power Options.
- Click on Additional power settings.
- Next to your currently selected power plan (e.g., Balanced, High Performance), click Change plan settings.
- Click Change advanced power settings.
- Expand Display, then Turn off display after. Ensure this is set to a reasonable time or Never for troubleshooting purposes.
- Expand PCI Express, then Link State Power Management. Set this to Off for both “On battery” and “Plugged in.” This prevents the graphics card from entering a low-power state that might cause issues.
- Click Apply and then OK.
Experimenting with these settings can help identify if power management is inadvertently causing your display to shut down. Setting PCI Express Link State Power Management to “Off” is particularly important for graphics-related stability.
Scan for Malware and System File Corruption
Malware infections and corrupted system files can severely impact Windows 11’s stability, leading to various issues, including a Windows 11 random black screen no error. Malicious software can interfere with drivers, system processes, or even critical Windows components, causing unexpected display behavior.
Similarly, essential Windows system files can become corrupted due to improper shutdowns, disk errors, or faulty updates. When these files, especially those related to the display subsystem or core operating system functions, are damaged, the system may fail to render graphics correctly or at all.
Regularly scanning for malware and verifying the integrity of system files are crucial maintenance steps. They help ensure your operating system is running in a healthy and secure state, minimizing the chances of encountering inexplicable issues like a black screen.
Running SFC and DISM Scans
Windows provides built-in tools to check and repair system file corruption:
- System File Checker (SFC): This tool scans for and restores corrupted Windows system files.
- Open Command Prompt as an administrator (search for “cmd,” right-click, and select “Run as administrator”).
- Type
sfc /scannowand press Enter. - Allow the scan to complete. It may take some time.
- Deployment Image Servicing and Management (DISM): If SFC fails, DISM can repair the Windows system image itself, which SFC relies on.
- Open Command Prompt as an administrator.
- Type
DISM /Online /Cleanup-Image /RestoreHealthand press Enter. - This process also takes time and requires an active internet connection to download necessary files.
After running both scans and allowing them to complete, restart your computer. These tools can often fix underlying system inconsistencies that might be contributing to your black screen problem. For comprehensive system health, consider also performing a system image backup on Windows 11 regularly.
Hardware-Related Causes and Advanced Diagnostics
When software troubleshooting doesn’t yield results, the Windows 11 random black screen no error often points towards a hardware malfunction. Diagnosing hardware issues can be more complex, as it might involve physical inspection, component testing, or even replacement. However, a methodical approach can help pinpoint the faulty part.
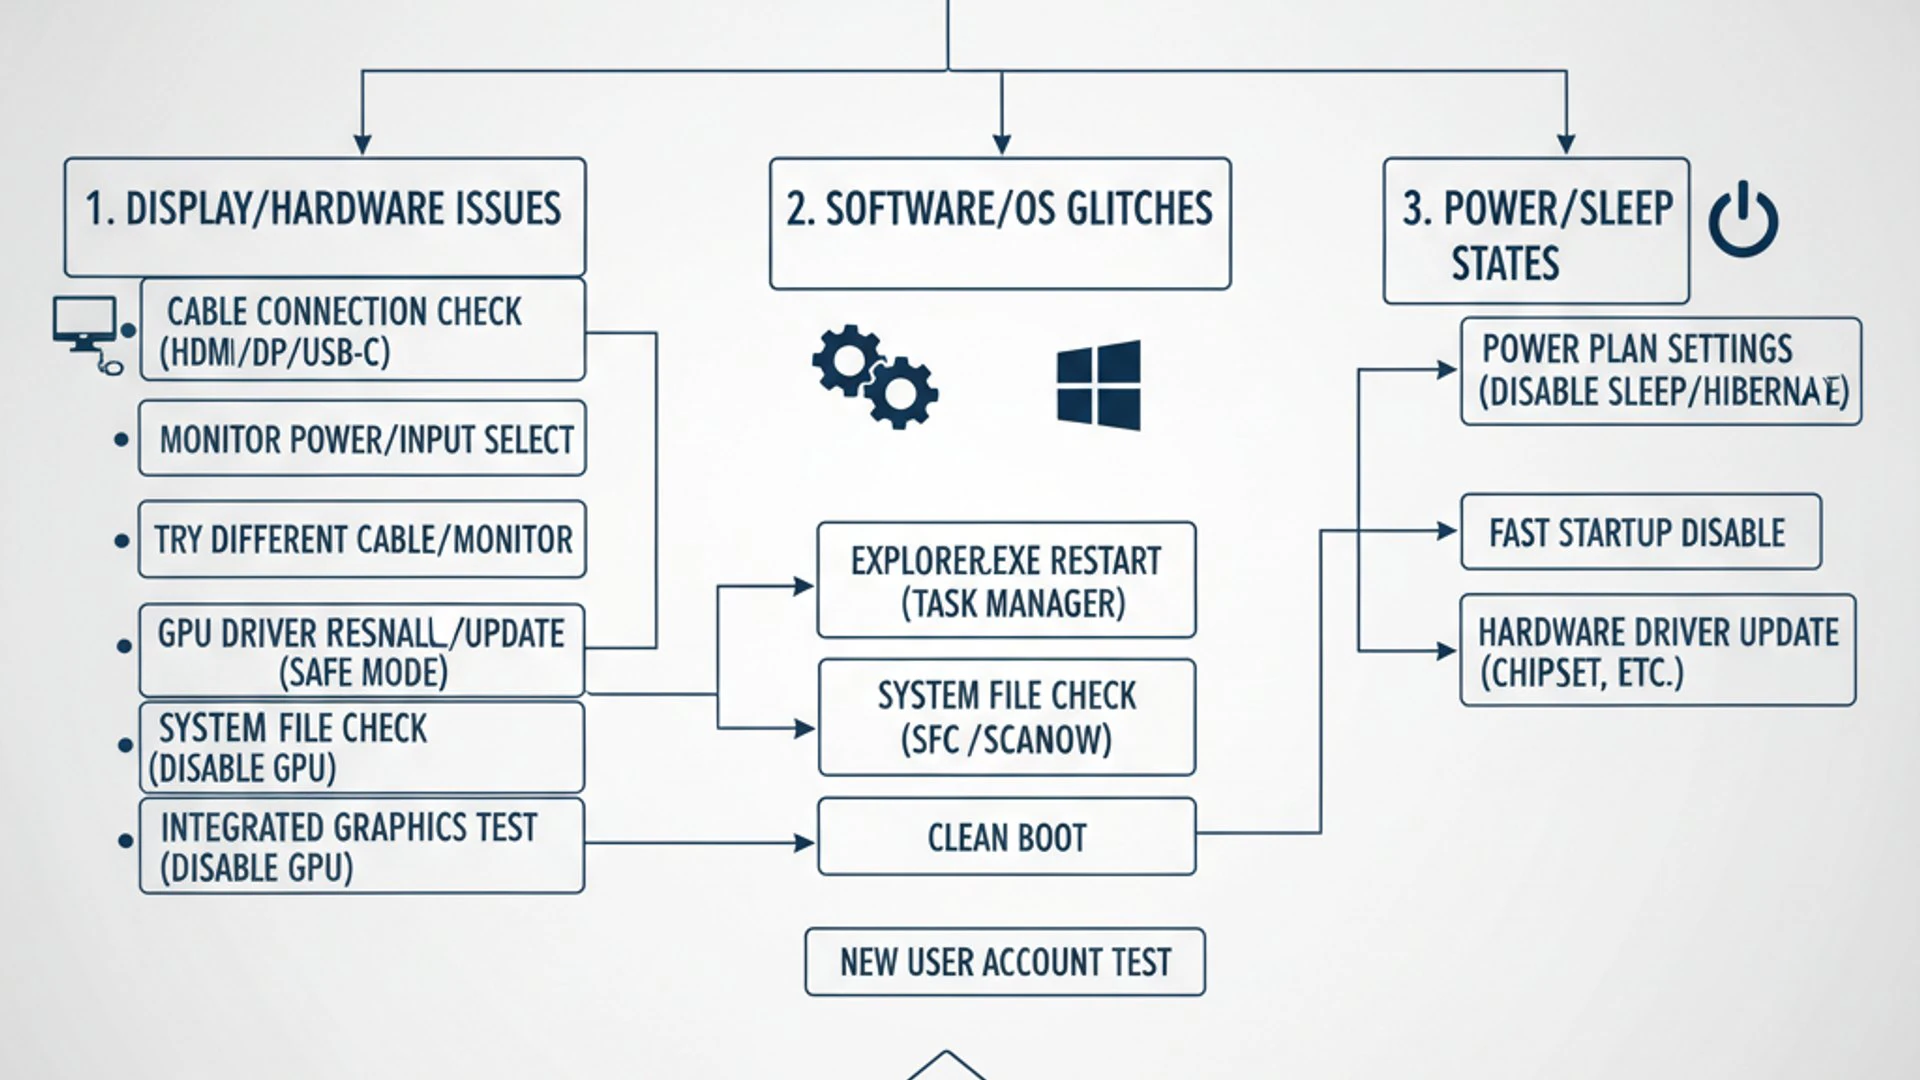
Hardware components like the monitor, video cable, graphics card, RAM, storage drive, and even the power supply unit (PSU) are all critical for a stable display. A failure in any one of these can lead to the dreaded black screen. Understanding how to test each component individually is key to effective diagnosis.
This section will guide you through advanced diagnostics, helping you assess the health of your physical components. These steps require a bit more hands-on effort but are essential for resolving hardware-induced black screen problems.
Test Your Monitor and Video Cable
Before suspecting internal PC components, it’s crucial to confirm that your monitor and the video cable are not the culprits. A faulty monitor or a damaged cable can easily cause a Windows 11 random black screen no error, mimicking a more serious internal PC problem.
To test the monitor, try connecting it to another working computer, laptop, or even a gaming console. If the monitor displays an image correctly with another device, then the monitor itself is likely fine. If it still shows a black screen, the monitor is probably defective and needs repair or replacement.
Similarly, test the video cable. Replace your current video cable (HDMI, DisplayPort, DVI) with a known good one. Cables can develop internal breaks or connection issues that are not always visible externally. A simple cable swap can often resolve perplexing display problems.
“Don’t underestimate the humble cable. A damaged video cable is a surprisingly common cause of intermittent or persistent black screens.”
If you have multiple video output ports on your graphics card or motherboard, try connecting your monitor to a different port. This helps rule out a specific port failure on your graphics hardware. These simple swaps can quickly isolate the issue to either the display peripherals or the PC itself.
Overheating Issues and Thermal Management
Excessive heat is a silent killer of computer components and a common cause of system instability, including a Windows 11 random black screen no error. When components like the CPU or GPU get too hot, they can throttle performance or even shut down to prevent permanent damage. This shutdown often manifests as a black screen.
Overheating can be caused by dust accumulation blocking airflow, failing cooling fans, or dried-out thermal paste on processors. The system’s protective mechanisms, sensing critical temperatures, might cut off the display output to reduce load or initiate an emergency shutdown, leaving you with a blank screen but a seemingly running PC.
Monitoring your system’s temperatures is a proactive measure. Use software like HWMonitor, Speccy, or MSI Afterburner to check CPU and GPU temperatures, especially during intensive tasks. If temperatures consistently exceed 85-90°C (185-194°F) under load, you have an overheating problem.
To address overheating:
- Clean Dust: Use compressed air to clear dust from fans, heatsinks, and vents.
- Check Fan Functionality: Ensure all case fans, CPU cooler fans, and GPU fans are spinning correctly.
- Improve Airflow: Ensure your PC case has adequate ventilation and is not placed in an enclosed space.
- Reapply Thermal Paste: For advanced users, reapplying thermal paste on the CPU and GPU can significantly improve heat transfer.
RAM and Storage Drive Health Check
While less directly linked to display output, faulty RAM (Random Access Memory) or a failing storage drive can cause system instability that results in a Windows 11 random black screen no error. Corrupted data due to bad RAM sectors or an unresponsive storage drive can prevent Windows from loading correctly or cause critical processes to crash.
When RAM modules are defective, the system might experience random crashes, freezes, or fail to boot entirely, sometimes presenting a black screen. Similarly, if the operating system files on your storage drive become unreadable due to bad sectors or drive failure, Windows cannot initialize, leading to no display.
Testing these components helps rule them out as the source of your black screen. It’s a crucial step in comprehensive hardware diagnostics, ensuring that the core components responsible for system operation are functioning correctly.
To check RAM and storage drive health:
- RAM Test:
- Use Windows Memory Diagnostic: Search for “Windows Memory Diagnostic” in the Start menu. Choose to “Restart now and check for problems.”
- Alternatively, use a bootable tool like MemTest86 for a more thorough test. Let it run for several passes.
- If you have multiple RAM sticks, try booting with one stick at a time to identify a faulty module.
- Storage Drive Test:
- Open Command Prompt as administrator. Type
chkdsk /f /rand press Enter. You’ll be prompted to schedule a scan on the next restart. - For SSDs, use the manufacturer’s diagnostic tool (e.g., Samsung Magician, WD Dashboard).
- For HDDs, use tools like CrystalDiskInfo or the manufacturer’s diagnostic utility to check S.M.A.R.T. status.
- Open Command Prompt as administrator. Type
Power Supply Unit (PSU) Concerns
The Power Supply Unit (PSU) is the heart of your computer, delivering electricity to all components. A failing or insufficient PSU can manifest in various ways, including a Windows 11 random black screen no error. If the PSU cannot provide stable or sufficient power, components like the graphics card might intermittently lose power, leading to a blank screen.
Symptoms of a failing PSU can include random shutdowns, system instability, or components not receiving enough power to function correctly. The black screen might occur under load (e.g., during gaming) when the power demand is highest, or even during idle periods if the PSU is severely degraded.
Diagnosing a PSU can be tricky without specialized equipment. However, there are some indicators and steps you can take:
- Listen for Unusual Noises: A failing PSU might make clicking, grinding, or buzzing sounds.
- Check for Burning Smell: A burnt smell emanating from the PSU area is a strong indicator of failure.
- Intermittent Issues: If the black screen issue is highly intermittent and seemingly random, a PSU could be the cause.
- Test with a Known Good PSU: The most definitive way to test is to swap your PSU with a known working one. This is often not practical for the average user.
- Power Calculator: Ensure your PSU wattage is sufficient for your system’s components, especially if you’ve recently upgraded your graphics card. Use online PSU calculators to verify.
If you suspect a PSU issue, especially with an older unit, it’s often best to consult a professional or consider replacing it with a new, reputable brand PSU. A stable power supply is paramount for system reliability.
Addressing Specific Scenarios
The context in which a Windows 11 random black screen no error occurs can provide valuable clues for troubleshooting. Whether it happens immediately after an update, during intensive tasks, or on a specific type of hardware (laptop vs. desktop), understanding the scenario helps narrow down the potential causes and apply more targeted solutions.
Different triggers suggest different underlying problems. An update-related black screen might point to driver incompatibility, while one during gaming could indicate overheating or a power issue. Tailoring your diagnostic approach to these specific situations can significantly expedite the resolution process.
This section will explore common scenarios and provide specific advice for each, allowing you to focus your efforts more effectively. By considering the circumstances, you can move closer to understanding and fixing the elusive black screen.
Black Screen After Windows Update
A black screen appearing immediately after a Windows update is a common and often frustrating scenario. Windows updates, while essential for security and features, can sometimes introduce driver incompatibilities or conflicts that lead to a Windows 11 random black screen no error.
This usually happens because the update either installs a generic or incompatible graphics driver, or it conflicts with an existing third-party driver. The system attempts to boot with the new configuration, but the display subsystem fails to initialize correctly.
Here’s how to address it:
- Roll Back Drivers: If you can get into Safe Mode, go to Device Manager, right-click your graphics card, select Properties, then the Driver tab, and click Roll Back Driver.
- Uninstall Recent Updates: If a driver rollback isn’t an option or doesn’t work, you can uninstall the problematic Windows update.
- Access the Windows Recovery Environment (as described earlier).
- Go to Troubleshoot > Advanced options > Uninstall Updates.
- Choose to uninstall the latest quality update or feature update.
- Clean Install Drivers: After rolling back or uninstalling updates, perform a clean installation of your graphics drivers as detailed in the “Clean Installation of Graphics Drivers” section.
- Prevent Automatic Driver Updates: Temporarily prevent Windows from automatically updating drivers to avoid re-installing the problematic one. You can typically find this option in System Properties under Hardware > Device Installation Settings.
Black Screen During Gaming or Intensive Tasks
If your Windows 11 random black screen no error primarily occurs during gaming, video editing, or other graphically intensive tasks, it strongly suggests a hardware-related issue, often related to the graphics card or power supply.
These activities push your components, especially the GPU, to their limits, demanding more power and generating more heat. If the graphics card is unstable, overheating, or not receiving enough power, it can crash, leading to a black screen while the rest of the system might still be running.
Consider these targeted solutions:
- Monitor Temperatures: Use software to monitor GPU temperatures during gaming. If they spike above 85°C (185°F), overheating is likely. Improve cooling by cleaning fans and heatsinks, or consider better case airflow.
- Check PSU Wattage: Ensure your Power Supply Unit has enough wattage to handle your graphics card under full load. Upgrading your GPU without upgrading your PSU can cause instability.
- Underclock/Undervolt GPU: As a temporary measure or if your GPU is aging, slightly underclocking or undervolting your graphics card using tools like MSI Afterburner can reduce heat and power consumption, improving stability.
- Update/Reinstall Graphics Drivers: Even if updated recently, a clean installation is crucial for gaming stability.
- Test Graphics Card: If possible, test your graphics card in another PC or try a different graphics card in your system to rule out a faulty GPU.
Black Screen on Laptop vs. Desktop
While many troubleshooting steps apply universally, there are specific considerations for laptops versus desktops when dealing with a Windows 11 random black screen no error.
For Laptops:
- External Monitor Test: Connect your laptop to an external monitor. If the external monitor works, the issue is with your laptop’s internal display or its connection (e.g., display cable, backlight).
- Battery Issues: A failing laptop battery can sometimes cause power delivery problems. Try running the laptop solely on AC power with the battery removed (if detachable).
- Overheating: Laptops are more prone to overheating due to their compact design. Ensure vents are clear and consider a cooling pad.
- Integrated vs. Dedicated Graphics: Laptops often switch between integrated and dedicated graphics. Ensure drivers for both are updated and that the system is correctly managing the switch.
- Hard Reset: For many laptops, a hard reset involves disconnecting the charger, removing the battery (if possible), holding the power button for 30-60 seconds, then reassembling.
For Desktops:
- Dedicated Graphics Card: Desktops almost always use a dedicated graphics card. Ensure it’s properly seated in its PCIe slot and that its power connectors are firmly attached.
- Motherboard Video Output: If you have a dedicated GPU, ensure your monitor is plugged into the graphics card, not the motherboard’s integrated video output.
- Component Swapping: Desktops offer easier access for swapping components like the graphics card, RAM, or PSU for testing purposes.
- BIOS/UEFI Settings: Check BIOS/UEFI settings to ensure the primary display output is correctly configured (e.g., PCIe slot instead of integrated graphics).
Preventing Future Black Screen Incidents
Resolving a Windows 11 random black screen no error is a relief, but preventing its recurrence is equally important. Proactive maintenance and system awareness can significantly reduce the chances of encountering such disruptive issues again. A stable computing environment is built on consistent care and informed practices.
Many of the causes we’ve discussed, from outdated drivers to overheating, can be mitigated with regular attention. Establishing good habits for system upkeep ensures that your hardware and software remain in optimal condition, reducing the likelihood of unexpected failures.
This section focuses on empowering you with strategies for long-term system health. By integrating these practices into your routine, you can maintain a reliable Windows 11 experience and avoid the frustration of future black screen events.
Maintain Updated System and Drivers
Keeping your Windows 11 operating system and all drivers, especially graphics drivers, up to date is paramount for stability and security. Microsoft regularly releases updates that include bug fixes, performance enhancements, and compatibility improvements for new hardware and software. Neglecting these can lead to vulnerabilities and system inconsistencies, potentially causing a Windows 11 random black screen no error.
Graphics card manufacturers (NVIDIA, AMD, Intel) also frequently release new driver versions. These updates often contain critical bug fixes, performance optimizations for new games and applications, and improved stability for the latest Windows builds. Running on old or generic drivers is a recipe for display problems.
Establish a routine for checking and installing updates:
- Windows Updates: Regularly check for Windows updates via Settings > Windows Update. Install all recommended updates.
- Graphics Drivers: Periodically visit your graphics card manufacturer’s website (NVIDIA, AMD, Intel) to download and install the latest drivers. Consider using their respective utility software (e.g., GeForce Experience, AMD Adrenalin) for automatic notifications.
- Other Drivers: Don’t forget motherboard chipset drivers, audio drivers, and network drivers. These can be found on your motherboard manufacturer’s website or your laptop manufacturer’s support page.
Always back up your system before major driver updates, especially graphics drivers. A system image backup on Windows 11 can be a lifesaver if an update goes wrong.
Monitor System Health Regularly
Proactive monitoring of your system’s health can help you detect potential problems before they escalate into a Windows 11 random black screen no error. Paying attention to key indicators like temperatures, disk usage, and resource consumption can provide early warnings of impending issues.
Overheating components are a common cause of instability. Regular checks of CPU and GPU temperatures, especially during demanding tasks, can alert you to cooling issues. Similarly, monitoring disk health can help you anticipate storage drive failures before they lead to data loss or boot problems.
Here are some practices for regular system health monitoring:
- Temperature Monitoring: Use free utilities like HWMonitor, Core Temp, or MSI Afterburner to keep an eye on CPU and GPU temperatures. Set up alerts if available.
- Disk Health: Periodically check your storage drive’s S.M.A.R.T. status using tools like CrystalDiskInfo. Run
chkdskscans occasionally. - Task Manager: Use Windows Task Manager (Ctrl+Shift+Esc) to monitor CPU, RAM, Disk, and GPU usage. High, sustained usage without clear reason can indicate background processes or malware.
- Event Viewer: Regularly check the Windows Event Viewer (search for “Event Viewer” in Start). Look for critical errors or warnings, especially under “Windows Logs” > “System” or “Application,” which might precede a black screen event.
Keeping your system clean, both physically (dust) and digitally (unnecessary files, malware), also contributes significantly to overall health and stability. Regular maintenance ensures components are working efficiently and prevents unexpected failures.
When to Seek Professional Help
While this guide provides extensive troubleshooting steps for a Windows 11 random black screen no error, there comes a point where professional intervention becomes necessary. Recognizing when an issue is beyond your capabilities or resources can save you time, prevent further damage, and ensure a proper resolution.
Attempting complex hardware diagnostics or repairs without the right tools or expertise can sometimes worsen the problem. Knowing when to hand over the reins to a qualified technician is a mark of a responsible computer user. They have specialized equipment and experience to diagnose and fix issues that are difficult for an average user to tackle.
Consider seeking professional help in the following scenarios:
- Suspected Hardware Failure: If you’ve systematically ruled out software issues and basic hardware problems, and suspect a component like the graphics card, motherboard, or PSU is failing, a professional can perform more definitive tests or replacements.
- Lack of Tools or Expertise: If you don’t have access to spare parts (e.g., a test PSU, another graphics card) or lack the confidence to open your PC and perform internal diagnostics.
- Persistent and Unresolved Issues: If you’ve tried all the troubleshooting steps in this guide and the black screen issue continues to occur frequently, it’s time for expert eyes.
- Physical Damage: If you notice any physical damage to components, burn marks, or unusual smells, immediately power down your PC and consult a technician.
- Warranty: If your computer is still under warranty, attempting self-repair might void it. Contact the manufacturer’s support first.
“Don’t hesitate to seek professional help when the problem exceeds your comfort level or diagnostic capabilities. A qualified technician can often pinpoint complex hardware failures quickly and safely.”
Conclusion: Restoring Stability to Your Windows 11 System
The Windows 11 random black screen no error is undoubtedly one of the most frustrating computer problems, precisely because of its elusive nature. The absence of clear error messages leaves users guessing, often leading to a trial-and-error approach that can be time-consuming and ineffective. However, by adopting a systematic and patient troubleshooting methodology, as outlined in this comprehensive guide, you can effectively diagnose and resolve the underlying causes.
We’ve covered everything from basic physical checks and hard reboots to in-depth software diagnostics like driver management and system file repairs, and advanced hardware troubleshooting involving monitors, RAM, and power supplies. Understanding the specific context of the black screen, whether after an update or during intensive tasks, further refines the diagnostic process.
Ultimately, preventing future incidents hinges on proactive measures: maintaining an updated operating system and drivers, particularly for your graphics card, and regularly monitoring your system’s health. These habits ensure a stable and reliable computing experience, minimizing unexpected disruptions.
Remember, your Windows 11 system is a complex interplay of hardware and software. When issues arise, a calm, methodical approach is your best tool. By following these steps, you empower yourself to tackle this challenging problem, restoring stability and confidence to your digital workspace. And when in doubt, never hesitate to consult a professional to safeguard your valuable technology investment.
For more interesting articles, stay tuned to Winsides.com!









Community
Comments (0)